Configure Azure CDN as Reverse Proxy
Availability varies by Auth0 plan
Your Auth0 plan or custom agreement affects whether this feature is available. To learn more, read Pricing.
To set up Azure CDN as a reverse proxy, an Azure CDN Premium plan is required.
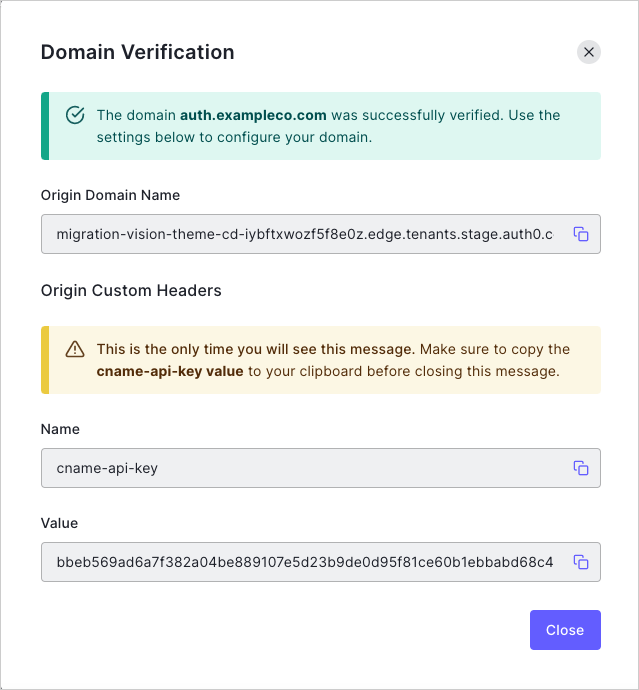
Configure Custom Domains with Self-Managed Certificates if you haven't already. Make note of the Origin Domain Name and cname-api-key values since you'll need these later.
Login to the Azure Portal.
Create a new Azure CDN endpoint using the CDN Profile you just created. For the CDN endpoint settings, provide the Origin Domain Name from Auth0 Dashboard.
Configure HTTPS for your Azure CDN custom domain. This process requires you to verify ownership of the domain. Once done, it may take up to 6 hours to deploy the certificate to all of the CDN pop locations.
Set up the configuration for the custom domain communication with Auth0 using the Azure CDN Rules engine. (To learn more, see Override HTTP behavior using the Azure CDN from Verizon Premium rules engine in Microsoft documentation.) Create a new Azure CDN Rule with the following settings:
Setting Value Name/Description Auth0 Custom Domain Type of requests Select the Edge CName option, then select your custom domain name from the list. Add the following Features to your Azure CDN Rule: We recommend creating another Azure CDN Rule to deny the usage of the azureedge.net CNAME.
Setting Value Bypass Cache Enabled Modify Client Request Header Select Override, enter cname-api-key for the name, and enter the CNAME API Key provided by Auth0 as the value. Once the Azure CDN Rule is approved, the status will change from Pending XML to Active XML. At this point, Azure CDN will be publishing the rules and certificates. When Azure finishes processing all changes, you can use your custom domain.
