Before migration
Before you start the migration, visit Migrate from Rules to Actions. This migration guide is an excellent resource that explains the differences between Rules and Actions and is a helpful tool in the migration journey.Rule migration order
Rules execute before Actions, which implies that Rules should be migrated in reverse runtime order. Migrate the last Rule to execute in your existing flow and work your way to the first Rule in reverse, chronological order. Failing to migrate in this order can result in errors due to unanticipated side effects caused by dependencies in the ordering of Rules and Actions.Safely rolling back
The migration tooling allows you to safely and easily roll back if something goes wrong. Re-enable your Rule and skip the corresponding Action logic.Migrating a Rule
To begin migrating your Rule, select Auth Pipeline > Rules. Once selected, your Rules appear with an option to migrate each of them individually.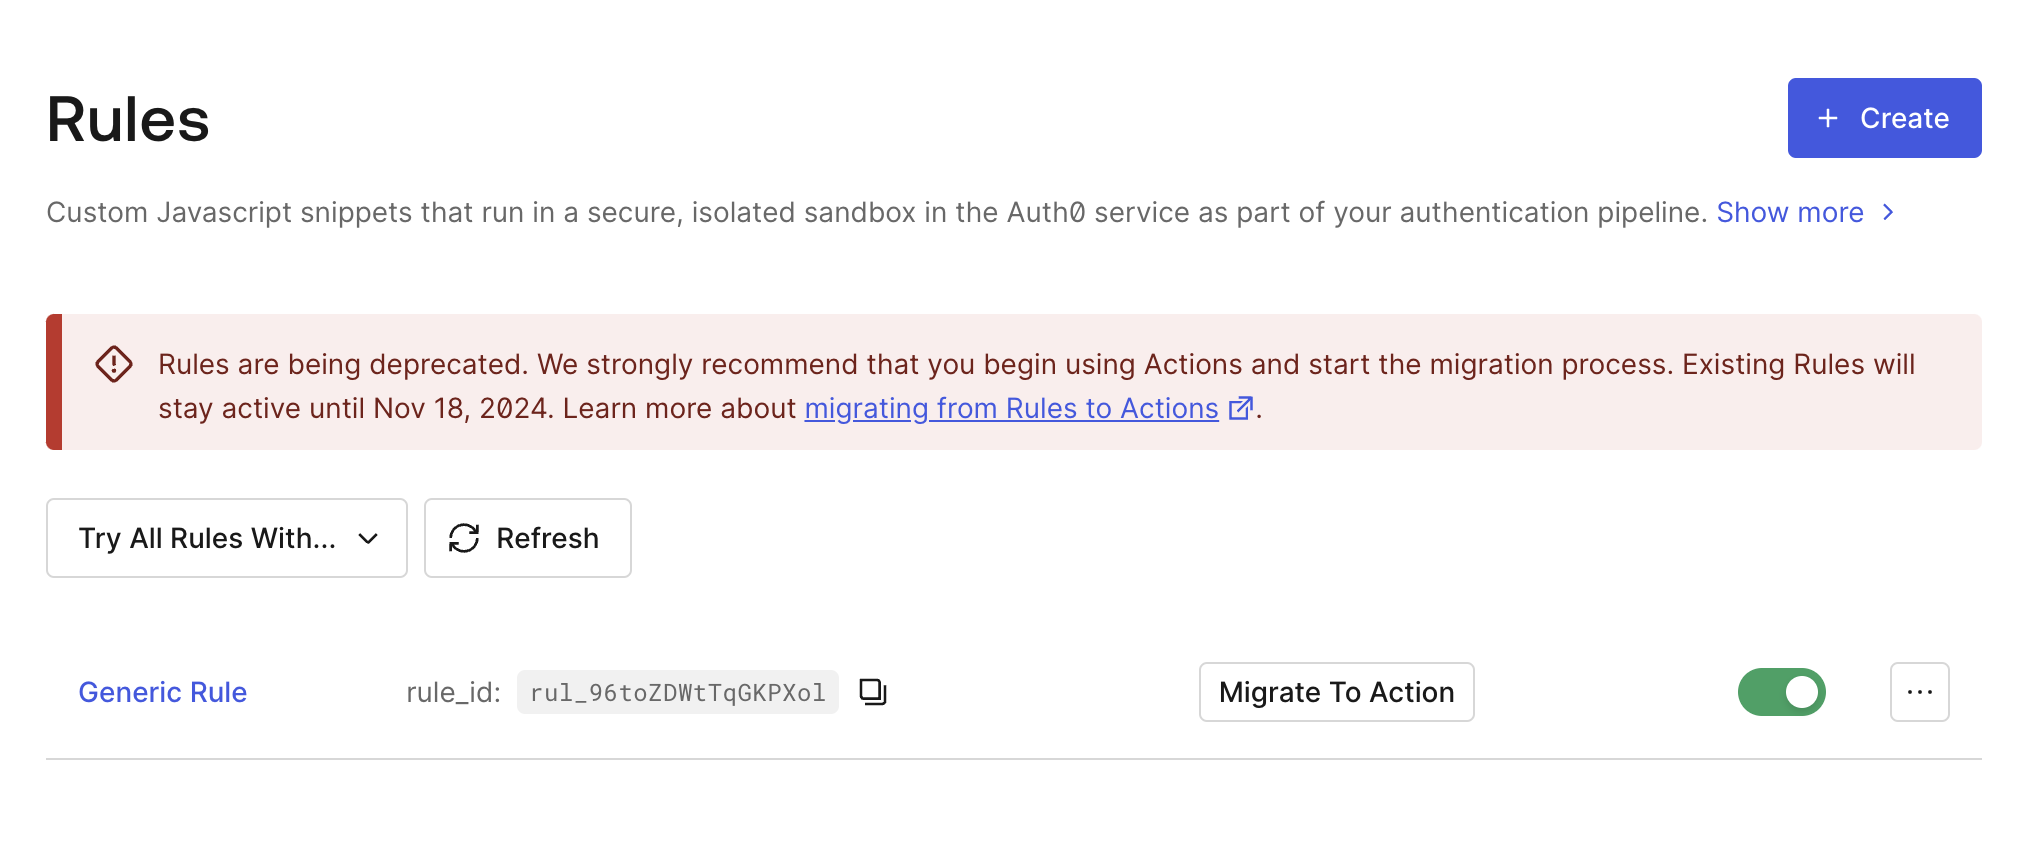
Only migration begins when you chose Migrate to Action. As a developer, you can choose when to activate the new Action.
Migrate to Action
After selecting Migrate to Action, the tooling prompts you to create a new Action.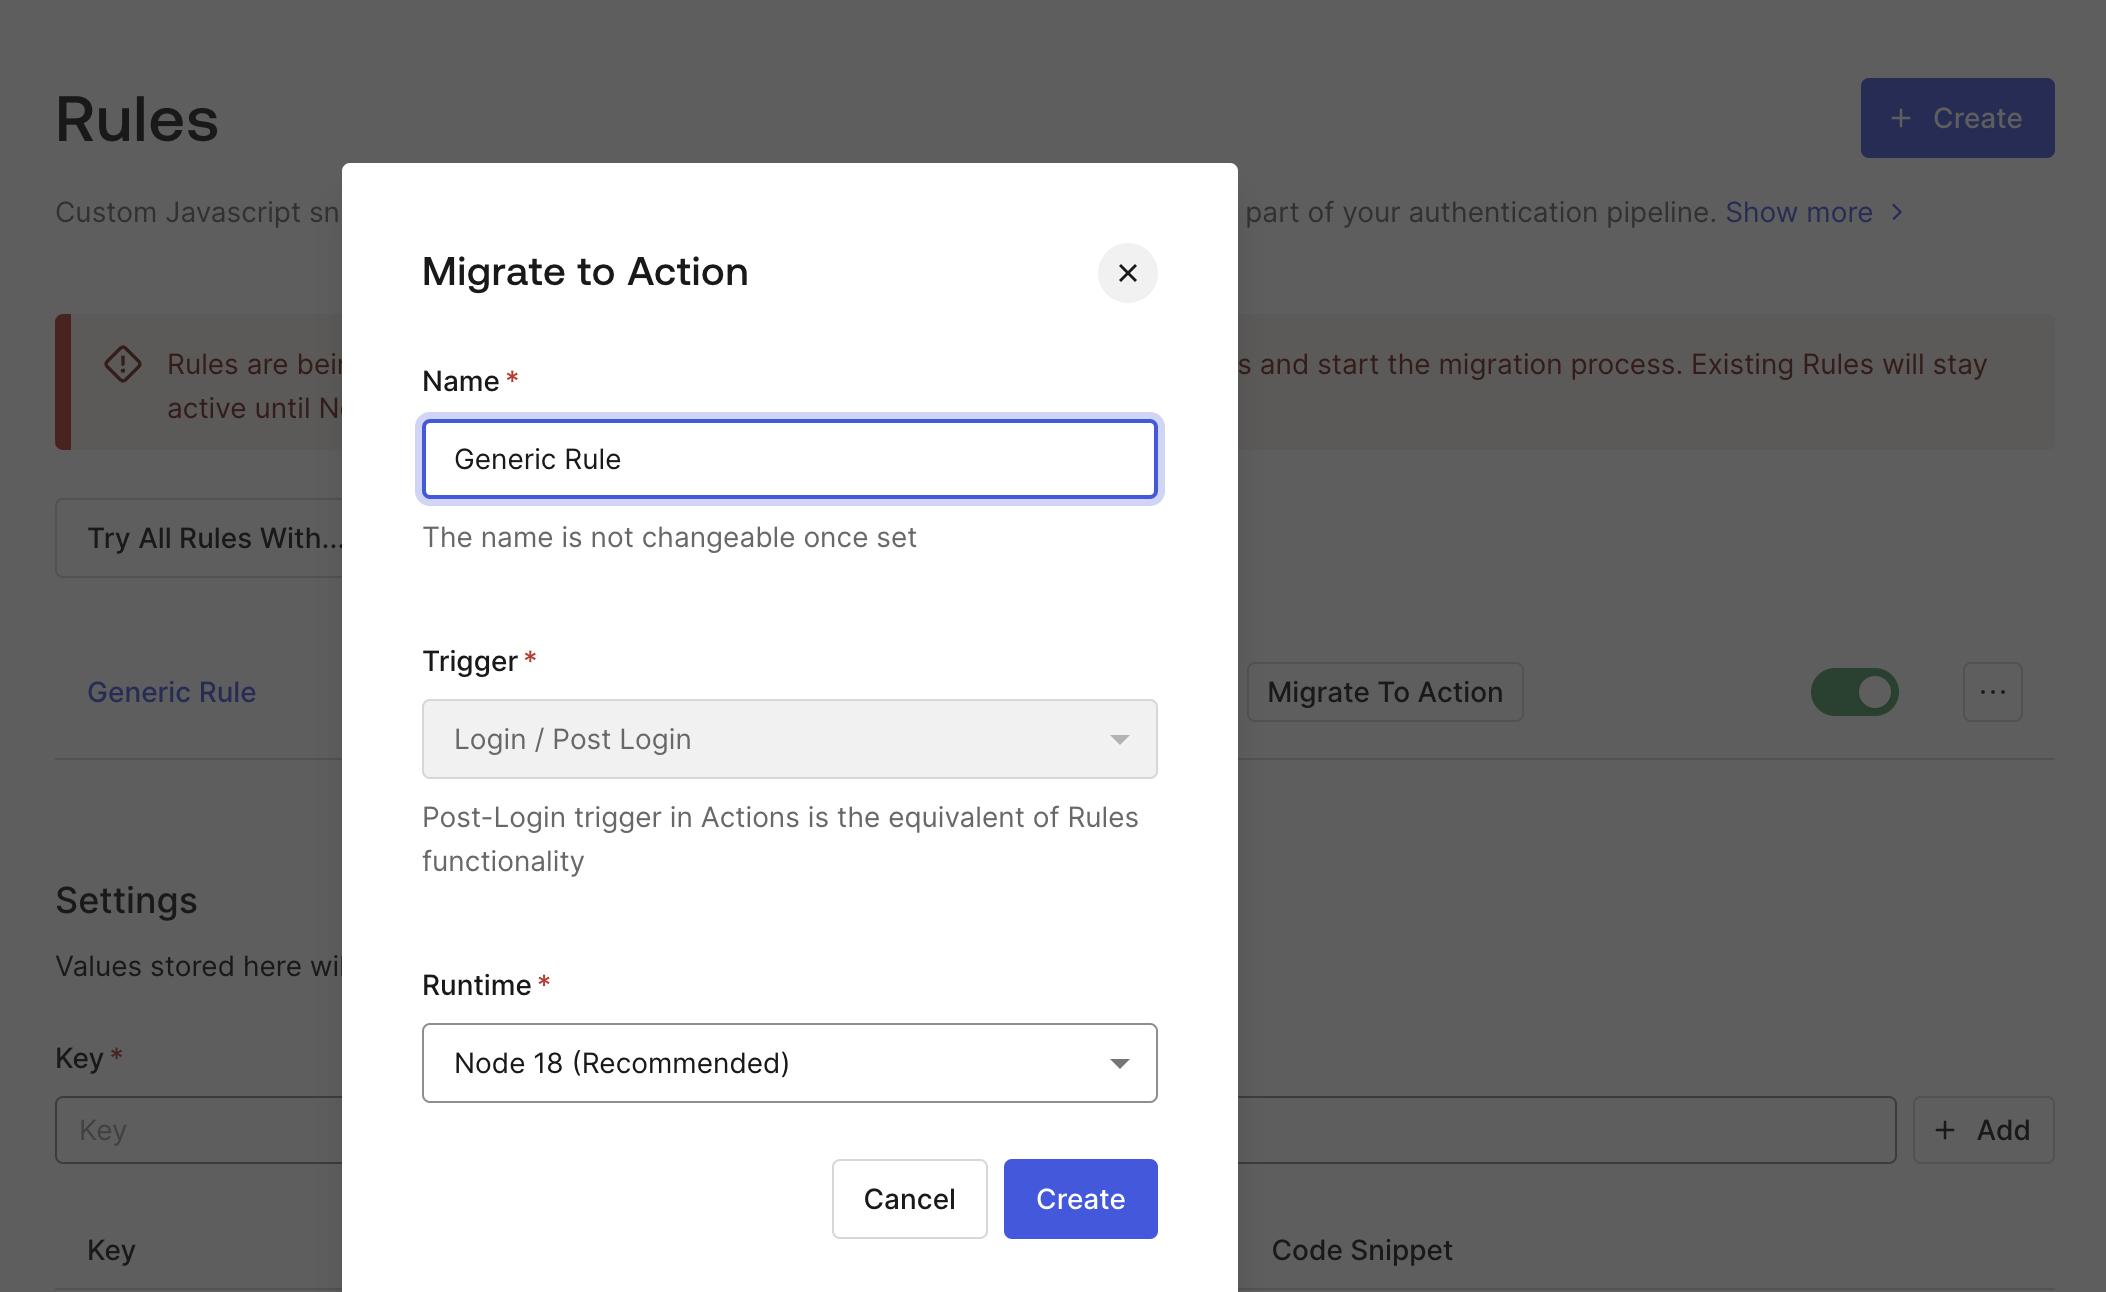
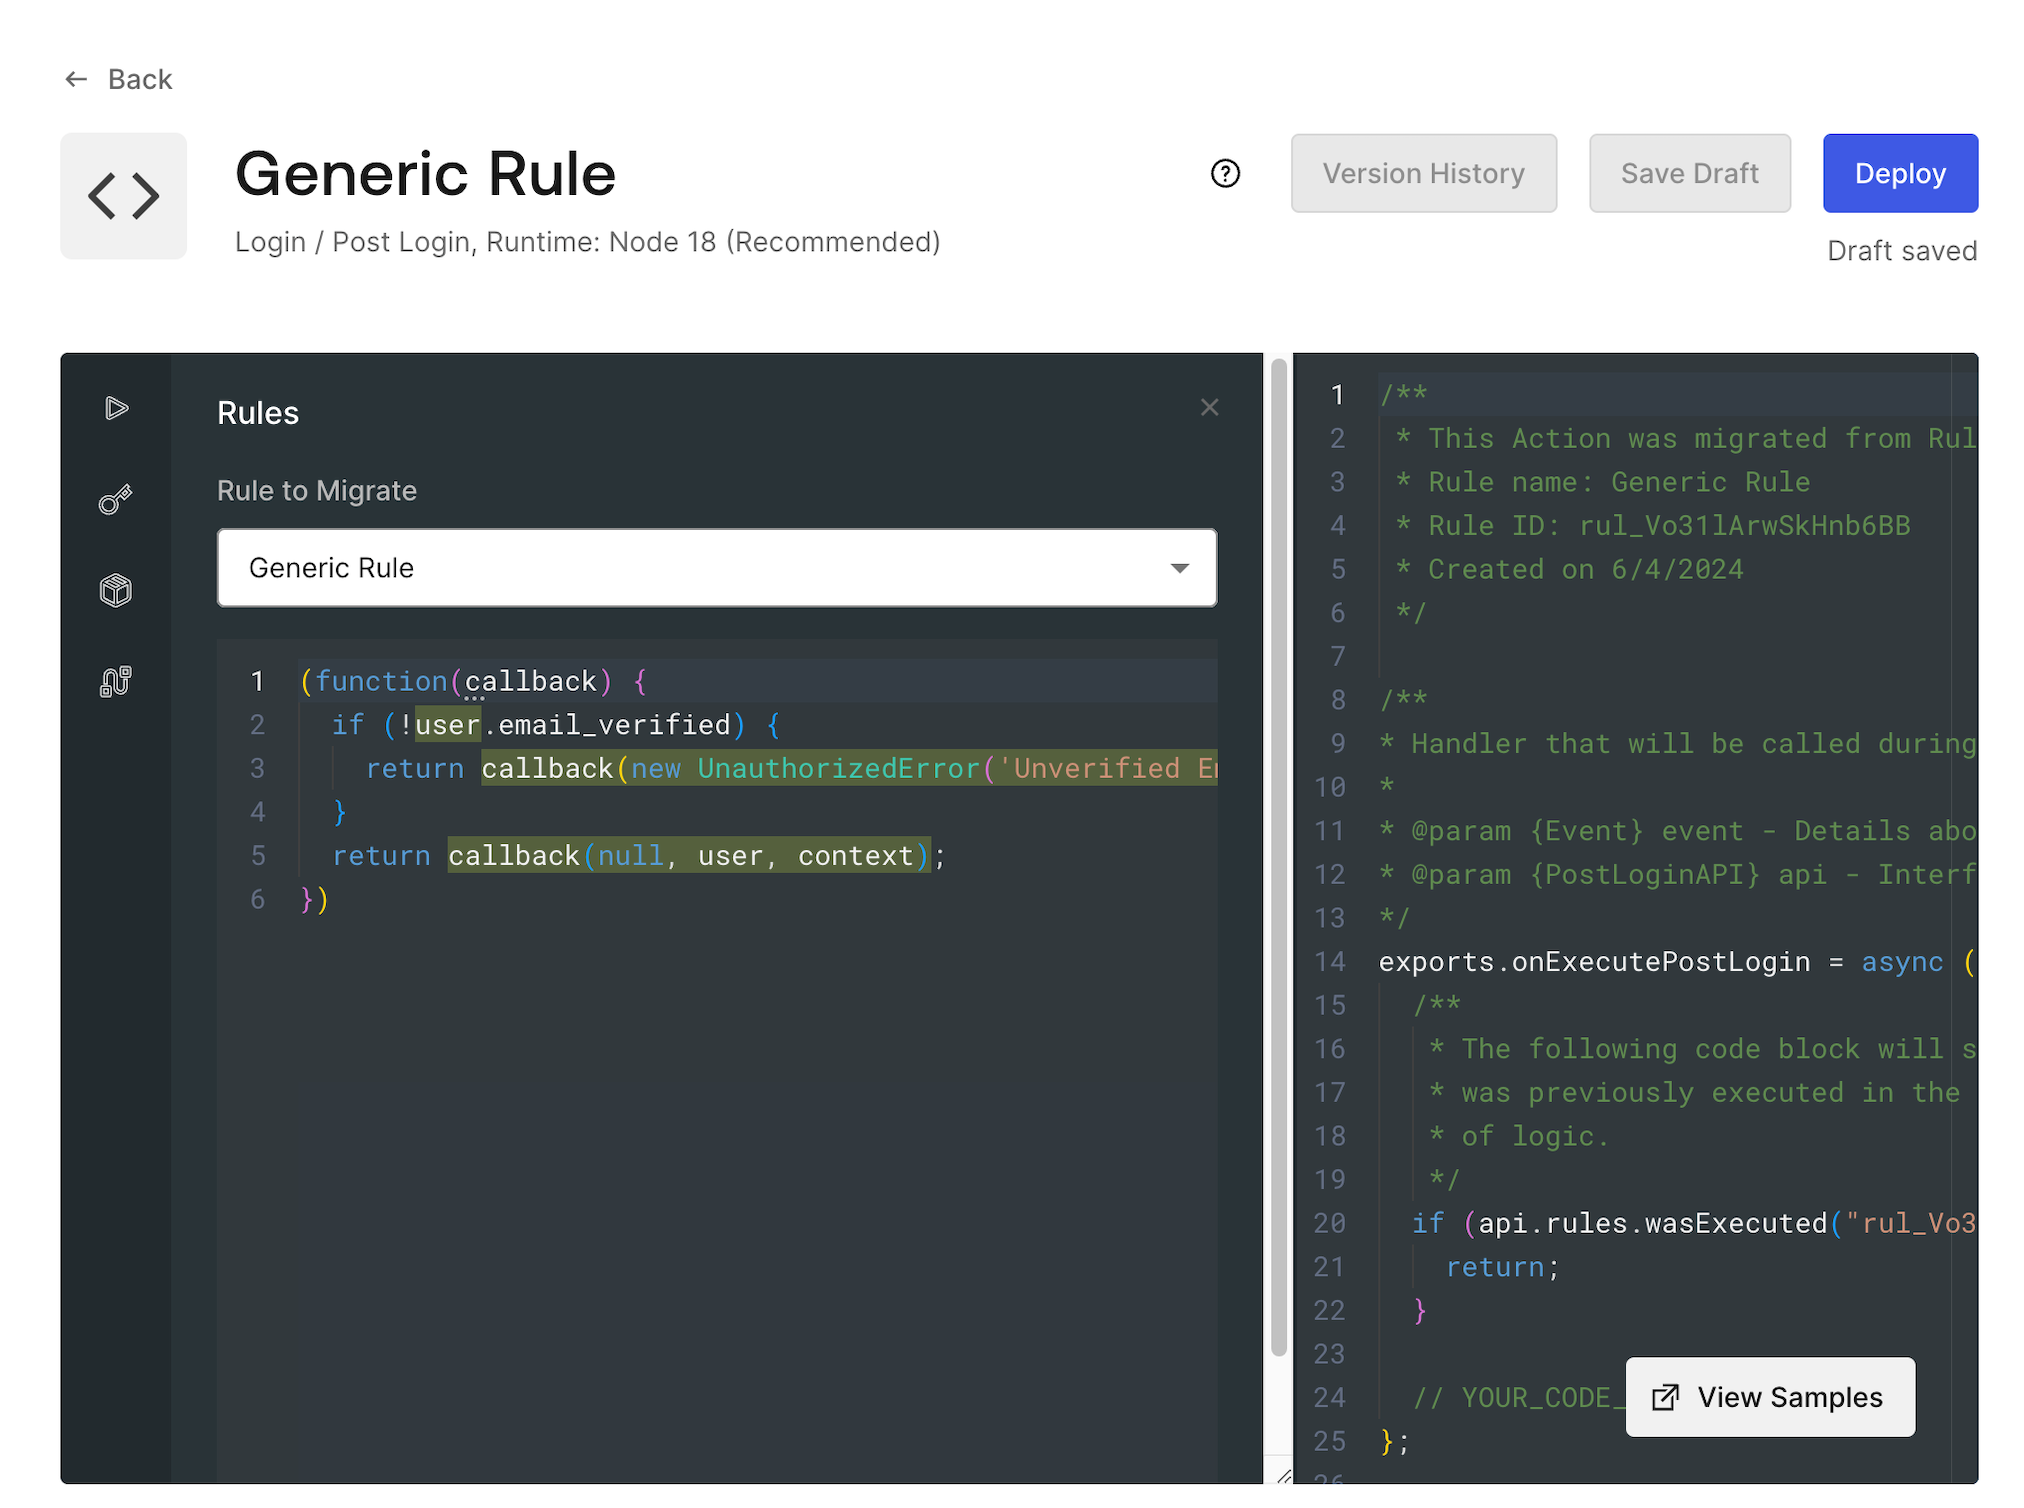
api.rules.wasExecuted(). If the wasExecuted function consumes a string containing the Rule ID, it returns true if the Rule has already run (and otherwise, returns false).
This is a helpful tool to prevent your logic from running twice. As soon as you disable the referenced Rule, the function returns false and the business logic now executes in the Action.
The Rule ID value populates automatically for any rule that is migrated using the Migrate to Action feature.
api.rules.wasExecuted() function, refer to Actions Triggers: post-login - API Object.
Rewrite Rule code
Select the Rules button in the Actions Editor to load the Rules Migration tool. There, you can quickly reference the code of the migrated Rule. You should review the code of the selected Rule in the sidebar. Copy the contents of the Rule function and paste it under the// YOUR CODE HERE comment in the Action. It’s likely that this code is not adapted for the Actions programming model.
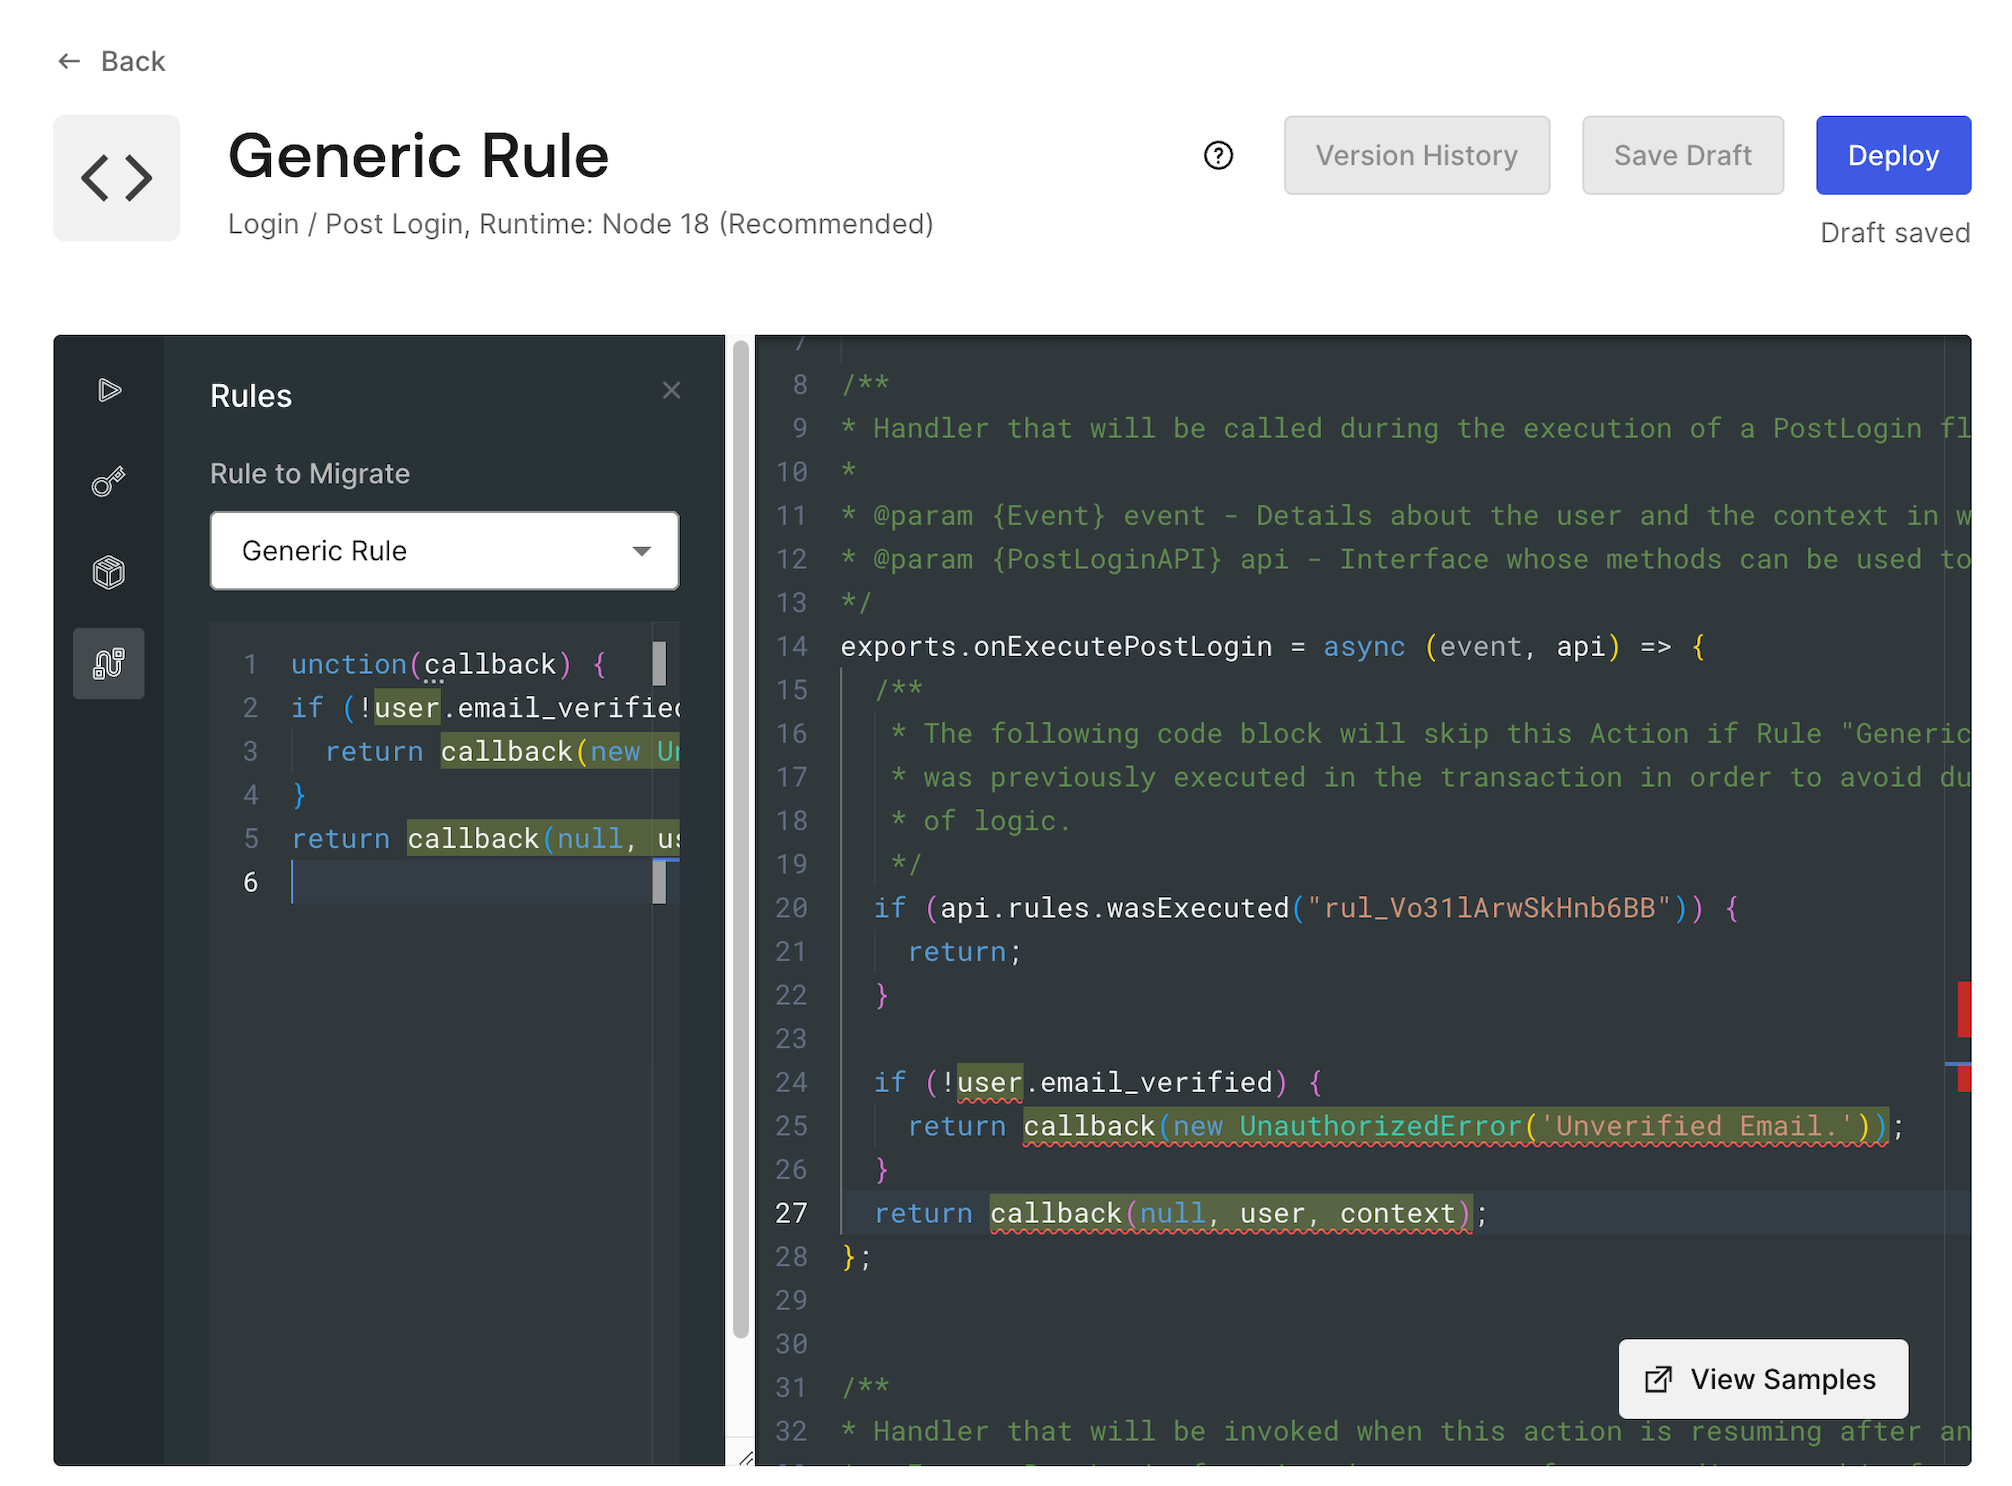
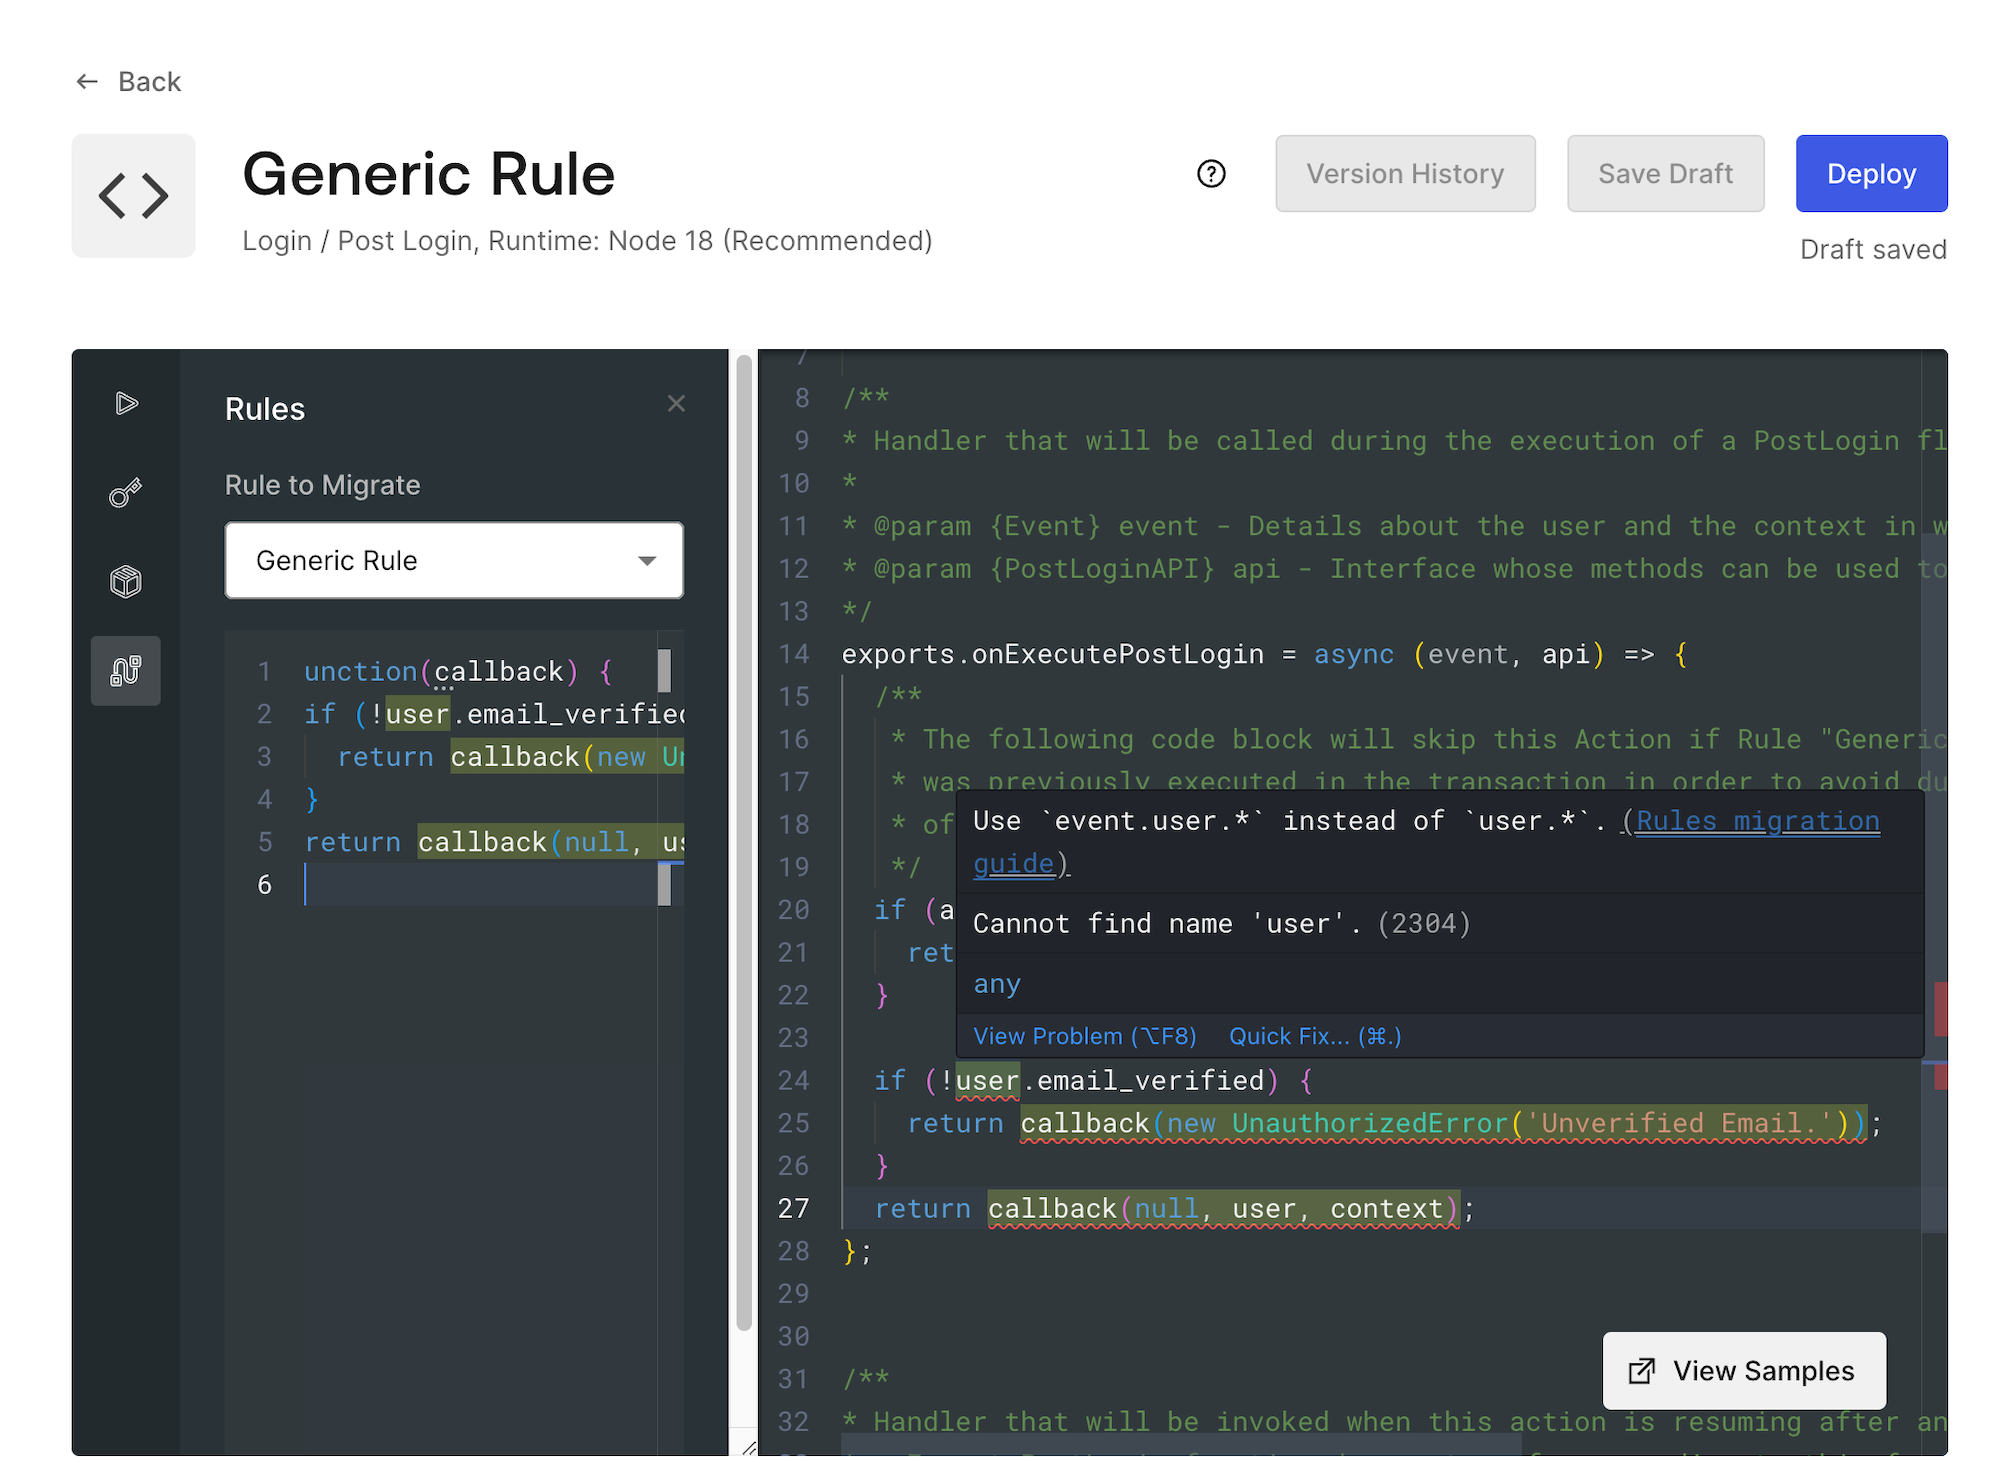
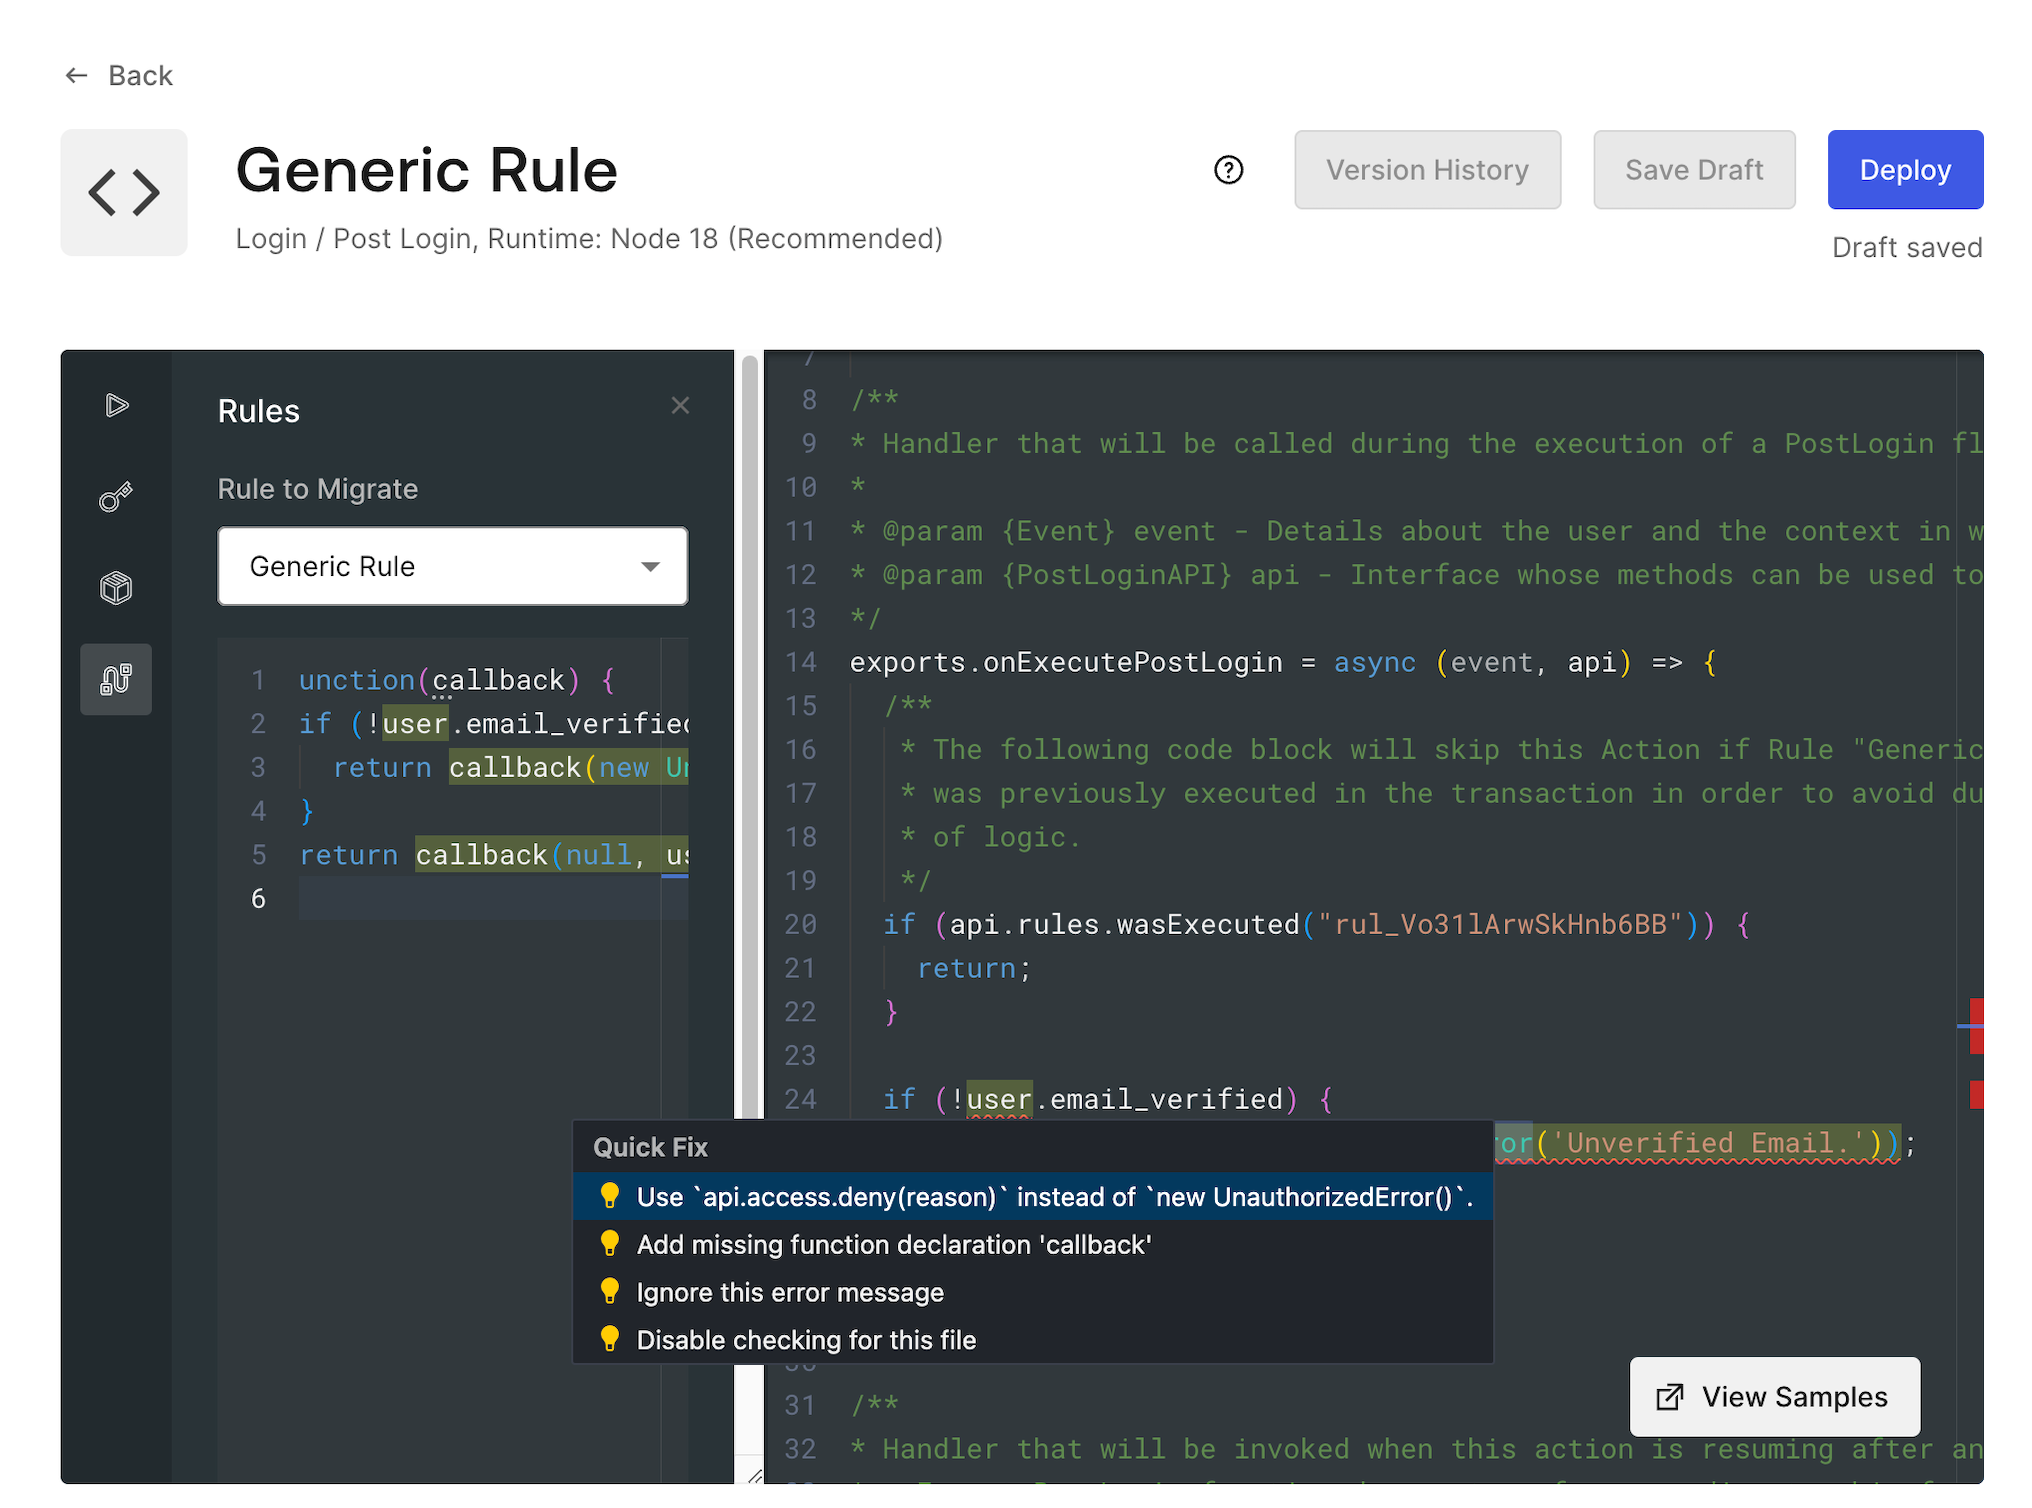
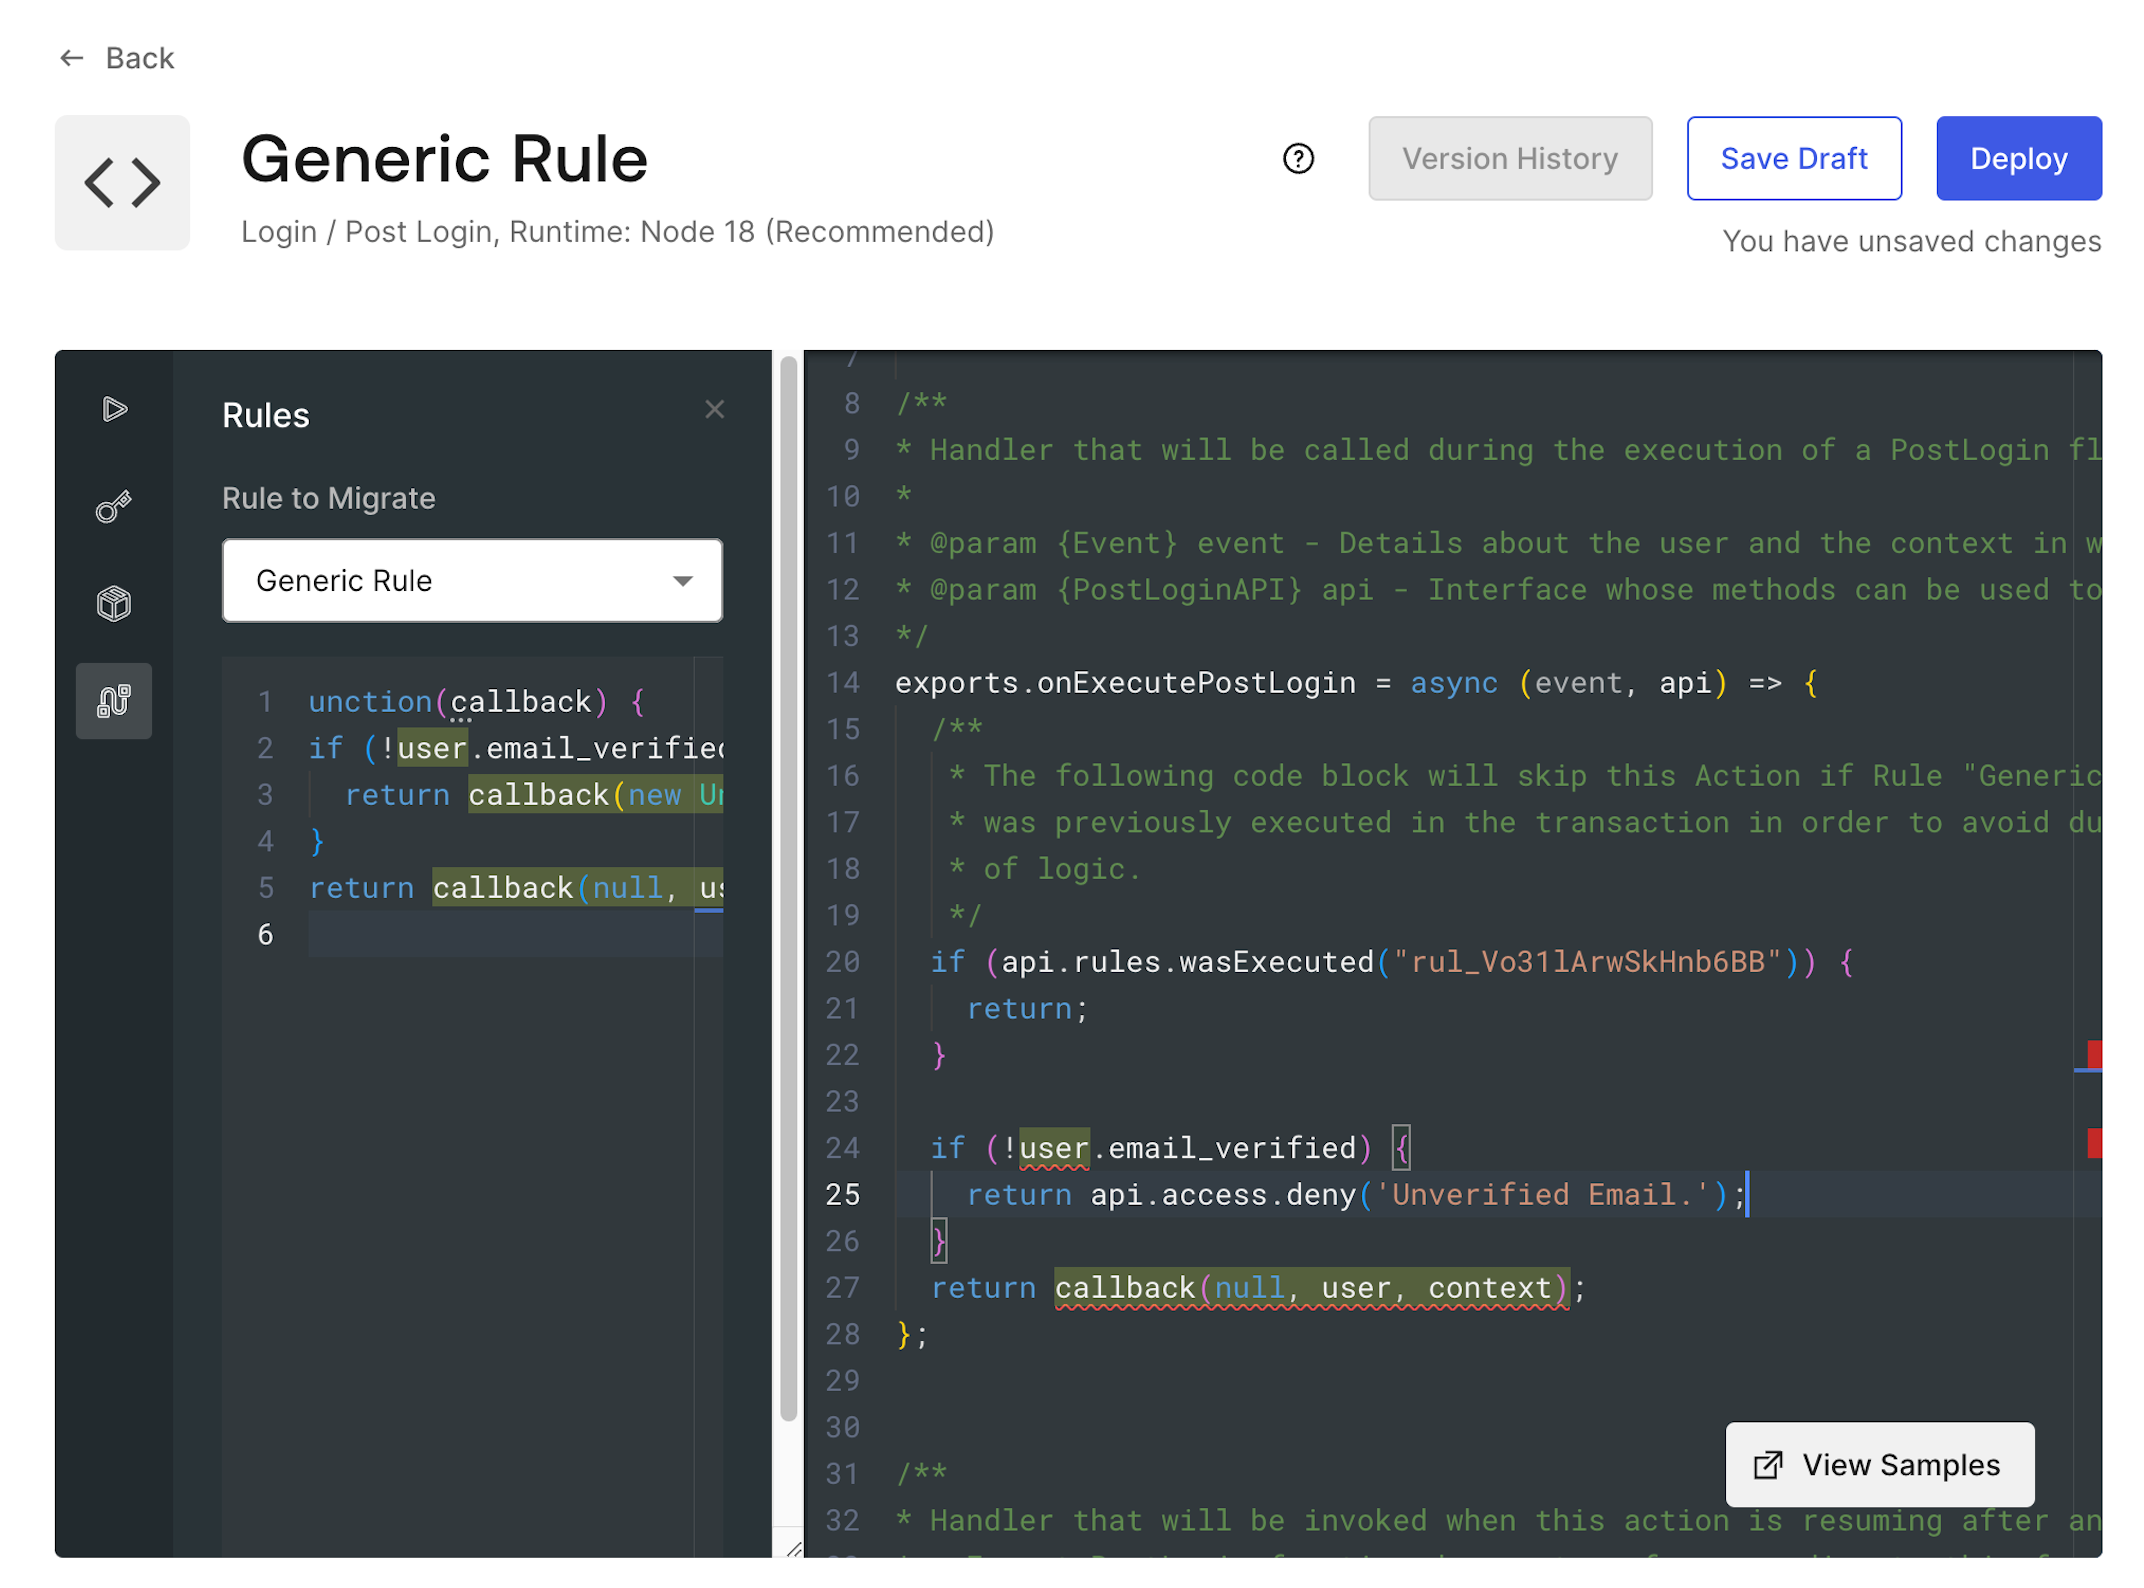
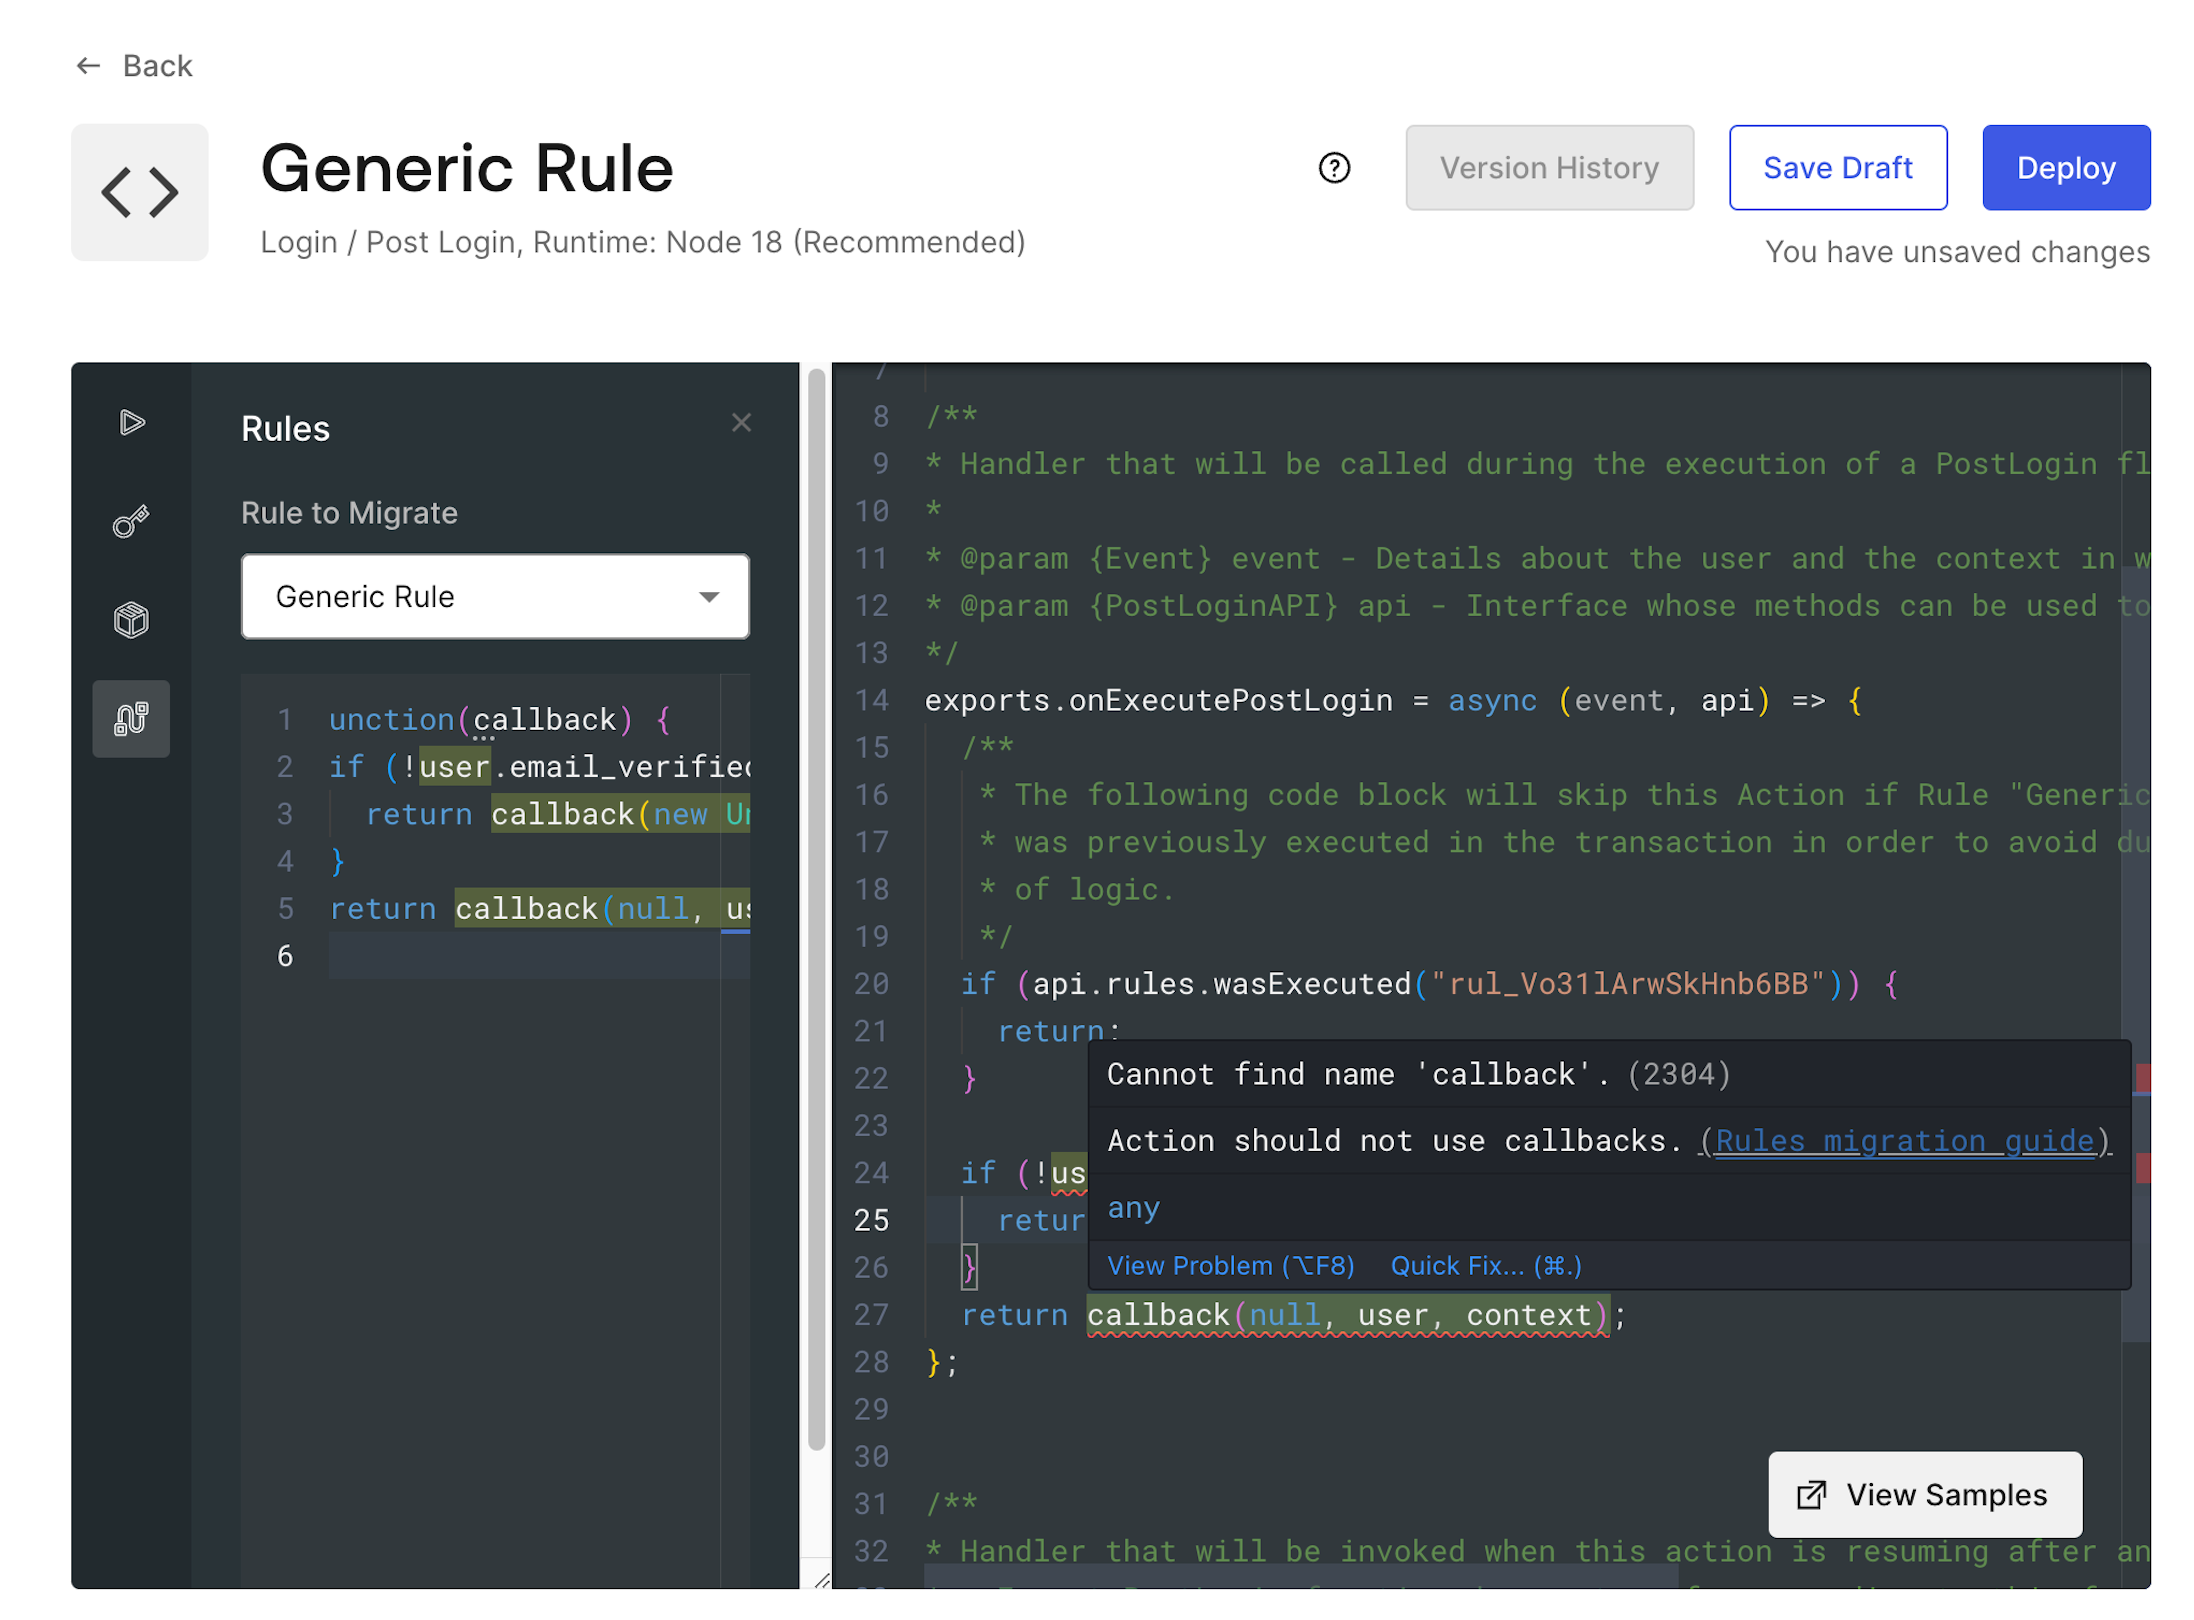
callback function, it is recommended to use api.access.deny for errors, or just return in successful cases.
Test the new Action
Actions can be tested directly in the editor, as this is an essential part of the migration journey. For more information, review Test Actions.Automatically enabling the Action
When the Action code is updated and you are ready to make the switch:- Select Deploy.
- On the alert that confirms your deployment, select Add to flow.
- Add your newly created Action to the flow, then select Apply.
- Select Continue, and disable any Rules selected to simultaneously enable the new Action and disable the original Rule. If you are not ready, select Cancel, and you can disable the Rule later to activate the migrated Action logic.
If you re-enable a Rule, the corresponding Action logic is skipped.