

--- So today we're introducing a new screencast series for Lock, which will include ways to get started with Lock, customizing it, and taking a look at the API. Today we'll start with the basic implementation of Lock in a web app:
The demo is an Express application with a login and logout route, and some Javascript on the front-end. We can login using either Twitter or username/password, and logout.
Let's start with our assumptions for this exercise: you have a server with the following routes:
/users/authenticate, which Lock can call that will register a user as logged in/users/logout, which Lock can call that will end a user's session and log them out
If you need help with these, we have quickstart guides in our docs, including the Express quickstart that I used to set this tutorial up.
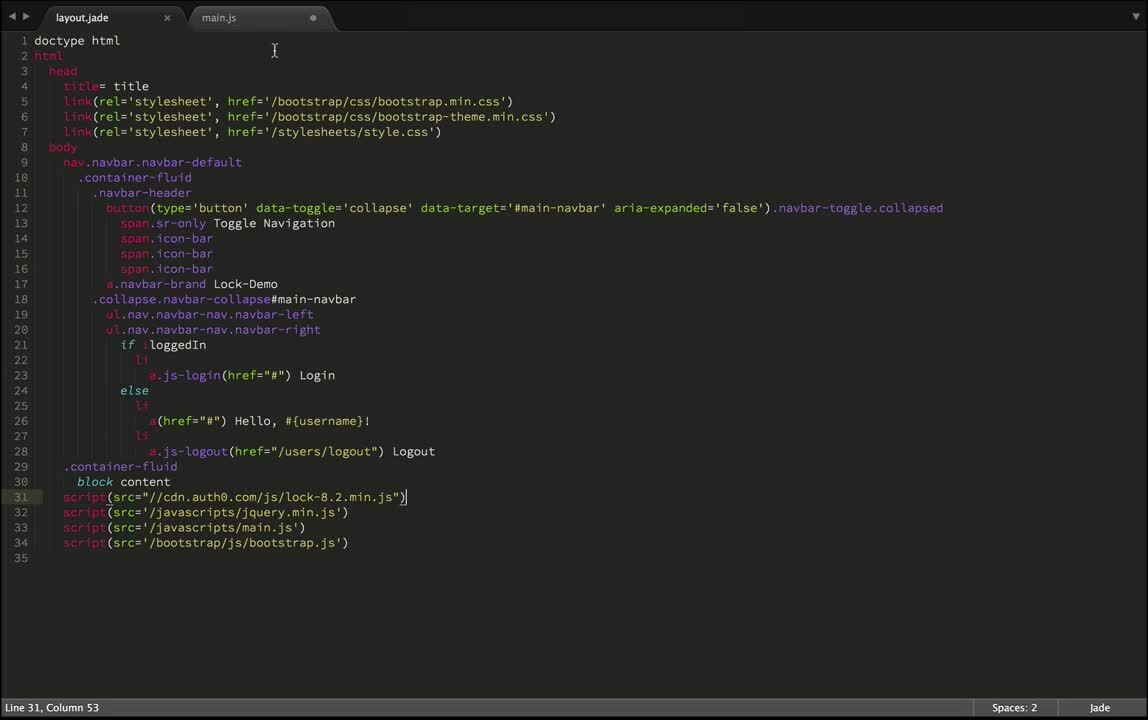
We also have some elements in our Jade page layout:
.js-login, which corresponds to our 'Login' button.js-logout, which corresponds to our 'Logout' button
Finally, we have imported the following libraries into our client-side environment:
- JQuery
- Lock
That all being said, let's write our code to construct an instance of Lock that we can use. You'll need your ClientID and Auth0 domain, which you can find in the dashboard under 'Apps/APIs', and clicking your App's name.
var lock = new Auth0Lock('YOUR_CLIENT_ID', 'YOUR_DOMAIN.auth0.com');
Now, let's set up showing the lock dialog when we click .js-login:
$('.js-login').on('click', function(event){
  event.preventDefault();
    lock.show({
      callbackURL: 'http://localhost:3000/users/authenticate',
      rememberLastLogin: false
    });
});
The first argument is the options object. We'll go into detail on more options in the next episode, but we should talk about the two ways Lock can operate:
- Redirect mode: this mode is the recommended usage, and used for regular web apps that use typical navigation
- Popup mode: this mode is specifically designed for single-page applications, and uses tokens instead of redirects
To set redirect mode, we set callbackURL to our server's users/authenticate route.
We also send rememberLastLogin as false -- this prevents Lock from prompting us with the last user to log in.
Next, let's take a look at logging out when the user clicks '.js-logout':
  $('.js-logout').on('click', function(event){
    event.preventDefault();
    lock.logout({
      returnTo: 'http://localhost:3000/users/logout'
    });
});
The returnTo option tells Auth0 where to redirect the user once it has logged out our user, allowing the server to clean up.
That's it! With just a few lines of code you have implemented Lock in your web app! In the next episode we'll talk about the options you can use to construct your Lock instance-- things like what login types to show, remembering which user was logged in last, etc.
“With just a few lines of code, you can implement Lock in your web app”
Tweet This
Thanks for reading!