
Shiny Server is a great tool to create visualizations and interactive documents for your R applications. It is also very popular. Unfortunately, the free version of Shiny Server does not support any form of authentication whatsoever. This precludes many common use cases such as taking your apps online, or limiting access to certain users inside your network. In this article we will show you how to add authentication to the free version of Shiny Server using Auth0. Read on!
“We show you how to add authentication to the free version of Shiny Server!”
Tweet This
Introduction
So you know Shiny Server. If not, bring it up to data scientists and watch them drool. Data scientists love to turn their powerful R analyses into visual, interactive applications. And Shiny is just the right tool for that. Take a look at some of the demos in the product page.

Nifty, huh? Well, there's a catch. Shiny Server is currently available in two versions: an open-source, limited edition; and a full-blown "pro" edition.
Fortunately, for many use cases, the open-source edition is more than enough. But Shiny is a web application and two very important things for any web app are missing from the open-source edition: SSL/TLS support and authentication. In other words, using the open-source edition for public facing apps or internal apps that require at least some access control is a no-go.
A while ago we explored the alternative of using an Apache server as a reverse-proxy for Shiny with an authentication module (auth_openidc). While this worked most of the time, there were two problems with this approach: WebSockets support was not available (it is used internally by Shiny for better user experience) and connections timed-out after a certain amount of time.
However, not everything is bad about this approach. We just need to power it up a bit. So our own data scientist, Pablo Seibelt, took it upon himself to come up with a working solution: shiny-auth0. Shiny-auth0 is a simple reverse proxy with authentication, tuned-up for Shiny Server. It runs on node.js and makes use of Auth0 (through passport.js) for authentication, and http-proxy for full-blown proxy support. It is designed to run behind a fast nginx reverse-proxy, which can be found in most production environments. In other words, shiny-auth0 makes it a breeze to get authentication working with Shiny server without getting your hands too dirty. So, let's get to work!
Step 1: Get Shiny Server up and running
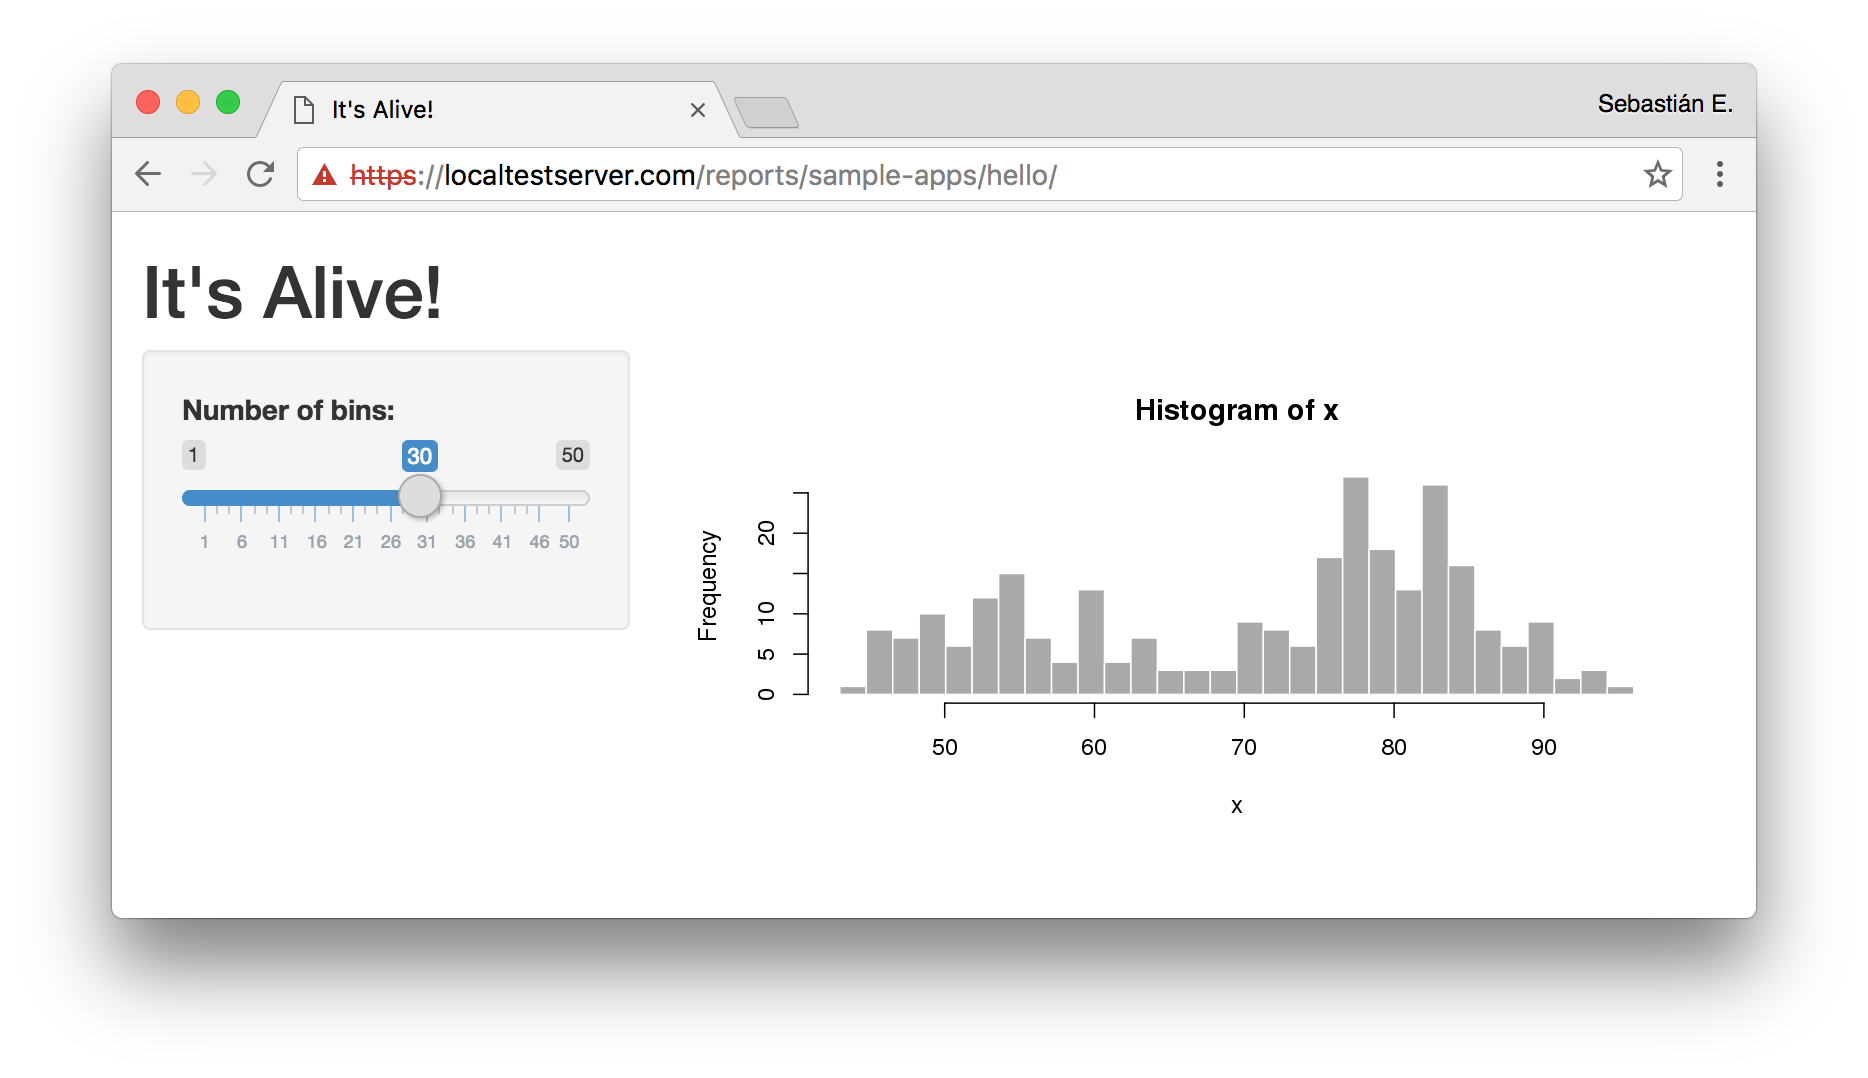
If you already have a working Shiny server setup with your apps, you can probably skip this step. For the purposes of giving a full working solution, in this step we will show you how to get a sample R app running on Shiny server, and how to find out the details we need to know about it for the next steps (hint: its IP address and port).
Shiny runs on Linux servers. We will assume a fairly common CentOS 7 / Red Hat Enterprise Linux 7 setup. If you are using other distros, read the official Shiny docs to perform the installation. Login to the console as root and type the following commands.
A word of caution: if you are not comfortable using Linux, ask a sysadmin to install Shiny server for you. He or she can use these steps, or follow the installation guide from the official Shiny docs.
# Enable the EPEL repository (extra packages for enterprise Linux)
sudo yum install epel-release
# Install R
sudo yum install R
# Run R as root
sudo R
The following commands must be input inside the R shell.
install.packages("digest")
# Install the R Shiny package
install.packages("shiny", repos='https://cran.rstudio.com/')
# Quit the shell, answer 'n' when asked to save
quit()
Now back in the command shell, follow the instructions in https://www.rstudio.com/products/shiny/download-server/ for your distribution, that look like:
# Download Shiny server
curl -O https://download3.rstudio.org/centos5.9/x86_64/shiny-server-1.x.y.z-rh5-x86_64.rpm
# Install it
sudo yum install --nogpgcheck shiny-server-1.x.y.z-rh5-x86_64.rpm
And start the service:
# Start it using systemd (it is already setup to run automatically during boot)
sudo systemctl start shiny-server
Shiny Server should now be active and running! By default, Shiny runs on port 3838. To check it, open a browser window and point it to: http://localhost:3838 on the same computer where you installed it. If you don't have access to a browser in that computer, find its IP address:
ip addr
Then use a browser in a different computer and point it to http://YOUR-IP-ADDRESS:3838.
If the computer running Shiny has a firewall setup, you will need to consult with your system administrator for the proper steps to access Shiny server.
Step 2: Get Nginx Up and Running
Nginx is a powerful and popular HTTP server. It supports a ton of features and is very fast. We will use Nginx to perform SSL/TLS termination. In other words, Nginx will act as the public facing server, with full TLS support (a must for secure connections). It will then forward all requests to our internal shiny-auth0 proxy server, which will run without TLS in our internal network (considered safe).
Our sample Nginx configuration file looks as follows:
events {
}

http {
    map $http_upgrade $connection_upgrade {
        default upgrade;
        ''      close;
    }

    # Listen on port 80 and redirect all requests to the
    # TLS enabled server (https, port 443)
    server {
        listen       *:80;

        # Your hostname should go here
        server_name  shiny.yourhost.com;

        access_log   off;
        location / {
            rewrite ^ https://$host$request_uri? permanent;
        }
    }

    # TLS enabled server
    server {
        listen       443 ssl;

        # Your hostname should go here
        server_name shiny.yourhost.com;

        # TLS/SSL certificates for your secure server should go here.
        # If you don't have a TLS certificate, you can get a free one by
        # following the free PDF available in this link:
        # https://auth0.com/blog/using-https/
        ssl_certificate      localtestserver-dot-com.pem;
        ssl_certificate_key  localtestserver-dot-com-key.pem;

        # To enhance security, as long as you don't need to support older browsers
        # (and you probably don't), you should only enable the most secure
        # ciphers and algorithms. This is a rational selection.
        ssl_ciphers 'ECDHE-RSA-AES128-GCM-SHA256:ECDHE-ECDSA-AES128-GCM-SHA256:ECDHE-RSA-AES256-GCM-SHA384:ECDHE-ECDSA-AES256-GCM-SHA384:DHE-RSA-AES128-GCM-SHA256:DHE-DSS-AES128-GCM-SHA256:kEDH+AESGCM:ECDHE-RSA-AES128-SHA256:ECDHE-ECDSA-AES128-SHA256:ECDHE-RSA-AES128-SHA:ECDHE-ECDSA-AES128-SHA:ECDHE-RSA-AES256-SHA384:ECDHE-ECDSA-AES256-SHA384:ECDHE-RSA-AES256-SHA:ECDHE-ECDSA-AES256-SHA:DHE-RSA-AES128-SHA256:DHE-RSA-AES128-SHA:DHE-DSS-AES128-SHA256:DHE-RSA-AES256-SHA256:DHE-DSS-AES256-SHA:DHE-RSA-AES256-SHA:AES128-GCM-SHA256:AES256-GCM-SHA384:AES128:AES256:AES:DES-CBC3-SHA:HIGH:!aNULL:!eNULL:!EXPORT:!DES:!RC4:!MD5:!PSK';
        ssl_protocols TLSv1 TLSv1.1 TLSv1.2;
        ssl_prefer_server_ciphers on;
        ssl_session_cache  builtin:1000  shared:SSL:10m;
        ssl_stapling on; # Requires nginx >= 1.3.7
        ssl_stapling_verify on; # Requires nginx => 1.3.7

        # This proxies requests to our shiny-auth0 authentication proxy.
        # Requests are passed in plain HTTP, so TLS termination
        # is applied at this point.
        location / {
            proxy_set_header    Host $host;

            # This points to our shiny-auth0 authentication proxy,
            # change localhost:3000 to suit the configuration of
            # your shiny-auth0 config
            proxy_pass          http://localhost:3000;
            proxy_redirect      http://localhost:3000/ $scheme://$host/;

            proxy_http_version  1.1;

            # The following lines enable WebSockets proxying, do not remove them
            # as they are used by Shiny Server to improve user experience
            proxy_set_header    Upgrade $http_upgrade;
            proxy_set_header    Connection $connection_upgrade;

            proxy_connect_timeout 3h;
            proxy_send_timeout 3h;
            proxy_read_timeout 3h;
        }
    }
}
The important part is near the bottom. Take a look at the last location / block. This block tells Nginx to handle all requests. Inside this block you will find two directives: proxy_pass and proxy_redirect. These directives tell Nginx to proxy requests to the host passed as parameter to them. This is were you should edit the configuration file to point it to your shiny-auth0 authentication server, which we will setup later on in this guide.
Other important directives in this configuration file are ssl_certificate and ssl_certificate_key. These directives point Nginx to your TLS/SSL certificates. These certificates are used to secure the connection to the server. You must set a valid certificate and a private key here, as TLS must be enabled to properly secure your Shiny Server installation. If you want to learn more about TLS/SSL, or find out how to get your own free TLS certificate, head over to our Using HTTPS article. You can also ask your system administrator to perform these steps for you. It is also possible to use a self-signed certificate, if only certain clients need access to the server (and can install your certificate in their browsers).
Last but not least, you should change both server_name directives to use the right name for your host. This is of particular importance if several hosts are being served by the same Nginx configuration. If in doubt about what this means, consult with your system administrator.
In most installations, the system-wide Nginx configuration file is located at /etc/nginx/nginx.conf.
Step 3: Setting up an Auth0 Account for shiny-auth0
Since authentication will be handled by Auth0, a free Auth0 account is required to work with shiny-auth0. Don't panic, it's as simple as signing-up and setting a few knobs here and there. Let's take a look.
First, head over to https://auth0.com and signup. Follow the steps to fill in your details. For simple use cases, a free account is more than enough. With a free account you get up to 7000 users. If you need more than that, check our pricing page.
After you have completed the signup process, access the Auth0 Dashboard and create a new application for our shiny-auth0 app. This application will let you setup how your users will log-in through shiny-auth0. You have several options you must consider: will you use a standard username/password database? Or will you allow social logins (through Facebook or Google, for example)? It is up to you to decide what fits best your use case. For simplicity, we will go with a simple social login through Google. We will only allow certain users access to our Shiny Server.
To create an application go to Applications on the sidebar and then Create Application on the top right of the screen. Pick a name and then select the type of client. Select Regular Web Applications. Ignore the quickstart that is presented after that and go straight to Settings.
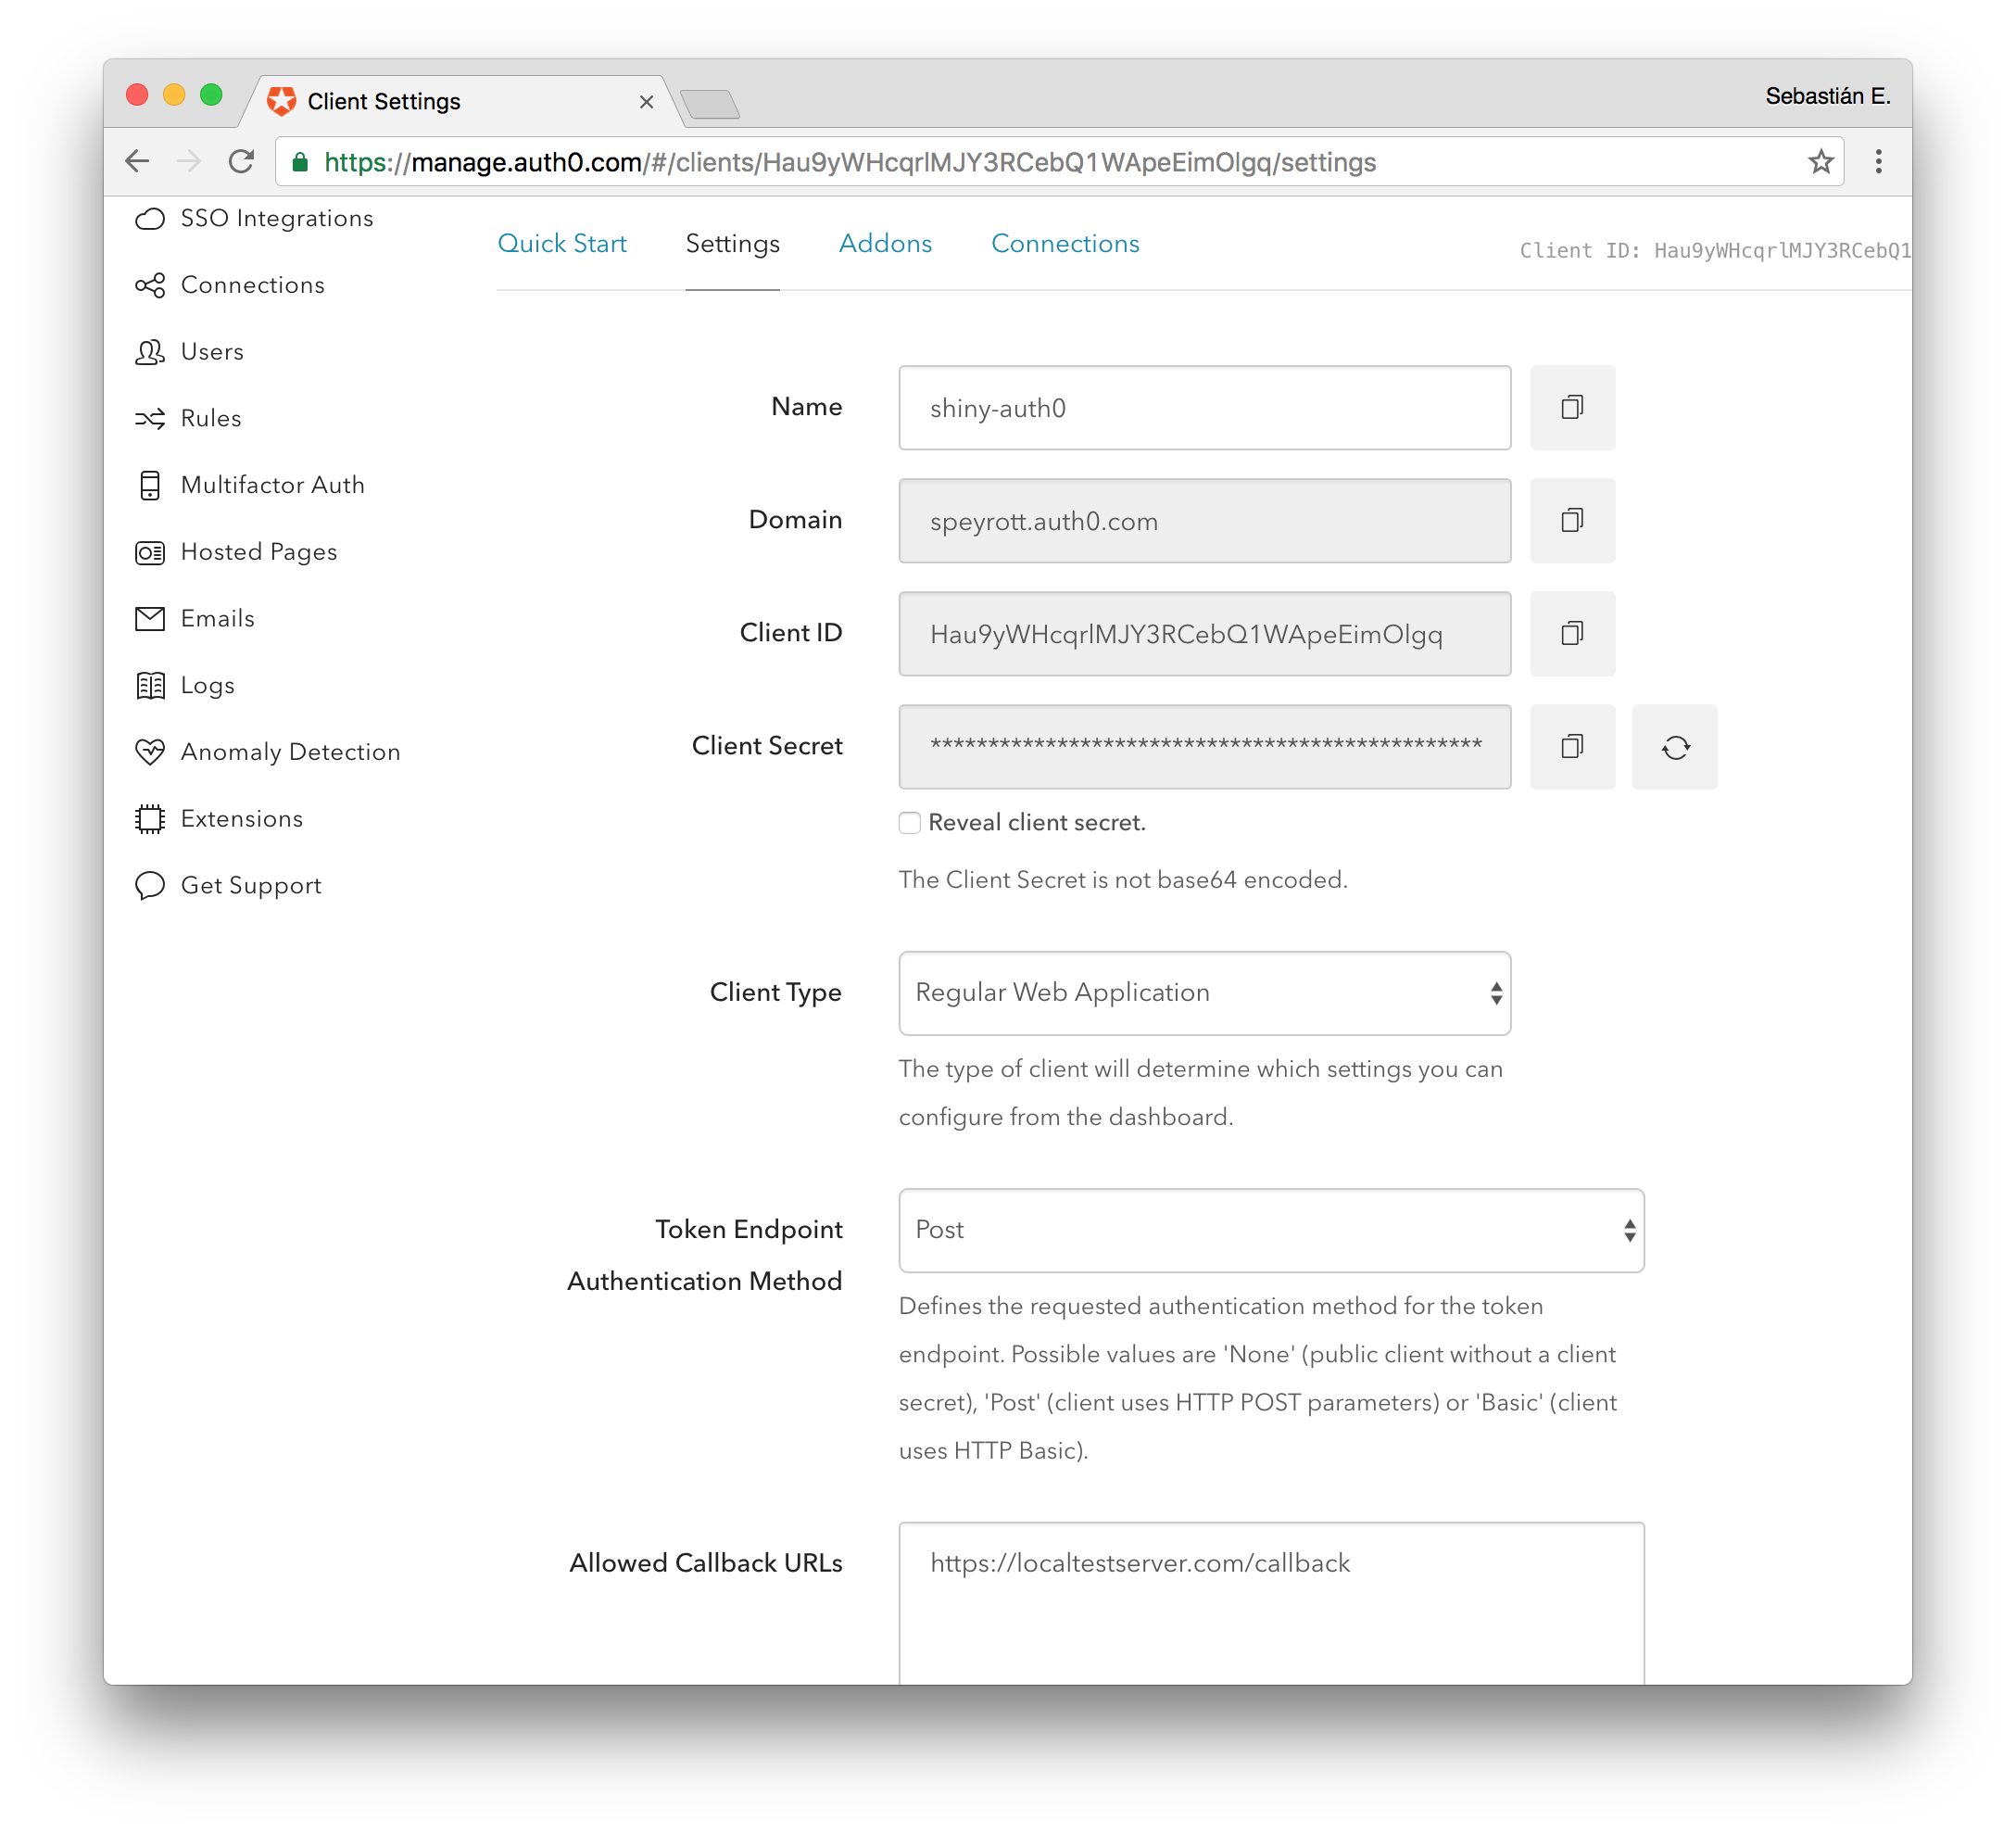
Take note of the Client ID, Domain and the Client Secret. You will need these later to setup shiny-auth0. Another important setting is the Allowed Callback URLs setting visible below. This is the URL the user will be redirected to after a successful authentication attempt. It is formed by the domain of your public server plus the callback path. For instance: https://shiny.yourhost.com/callback.
Limit Logins to Only Certain Users
Having a login screen anyone can access use to login after creating a user is usually not of much use. For instance, you may want to allow users whose email domain is the domain of your organization. To customize which users can login we can use rules. For our example, we will set a simple domain whitelist.
Go to the Auth0 dashboard and pick Rules from the sidebar. Then pick Create Rule on the top right corner of the screen. Choose Email domain whitelist from the Access Control section. This rule is simple enough you will have no trouble understanding it.
function (user, context, callback) {

  // Access should only be granted to verified users.
  if (!user.email || !user.email_verified) {
    return callback(new UnauthorizedError('Access denied.'));
  }

  const whitelist = ['example.com', 'example.org']; //authorized domains
  const userHasAccess = whitelist.some(
      function (domain) {
        const emailSplit = user.email.split('@');
        return emailSplit[emailSplit.length - 1].toLowerCase() === domain;
      });

  if (!userHasAccess) {
    return callback(new UnauthorizedError('Access denied.'));
  }

  return callback(null, user, context);
}
Users whose email addresses have one of the domains in the whitelist array are allowed to login. Simple as that! Do note that rules apply to all Auth0 Clients (that is, multiple applications) from your account. You can filter which applications, or even connections, a certain rule applies to. Read more on rules in the docs.
Step 4: Setting up shiny-auth0 for Shiny Server Authentication
Finally we'll get to see everything working together. Once this step is done you'll have a fully secured Shiny Server.
First, clone the latest version of shiny-auth0 to the system that will run the authentication proxy.
git clone git@github.com:auth0/shiny-auth0.git
Make sure you have an up-to-date Node.js installation. If in doubt, consult with your system administrator. Now install all required dependencies for shiny-auth0:
cd shiny-auth0
npm install
If everything went well, all dependencies for running shiny-auth0 are now locally installed. Now, we will setup shiny-auth0. Create a new file named .env inside the shiny-auth0 directory with the following content:
AUTH0_CLIENT_SECRET=myCoolSecret
AUTH0_CLIENT_ID=myCoolClientId
AUTH0_DOMAIN=myCoolDomain
AUTH0_CALLBACK_URL=https://shiny.yourhost.com/callback
COOKIE_SECRET=somethingRandomHerePlease
SHINY_HOST=localhost
SHINY_PORT=3838
PORT=3000
You will see several common names here. As you can imagine, AUTH0_CLIENT_SECRET, AUTH0_CLIENT_ID and AUTH0_DOMAIN are the client settings we took note in step 3. Proceed to fill these in here.
AUTH0_CALLBACK_URL depends on the actual URL you will use to access your Shiny Server from outside. In other words, it is the URL the user will be redirected to after authentication. This should be one of the Allowed Callback URLs from step 3. It is very important to leave the trailing /callback part of the URL in place, whatever the name of your host is.
COOKIE_SECRET should be a fairly long random string that should be kept secret. This secret is used to validate the cookie stored client side. Put a long, random string here.
SHINY_HOST and SHINY_PORT are the actual host and port for your running Shiny Server installation from step 1. If everything is running on the same server, the defaults should be OK (localhost and port 3838).
Lastly, PORT is the port where the shiny-auth0 authentication proxy will run. This port is the port that should be set in the proxy_pass and proxy_redirect directives from step 2. If shiny-auth0 will run on a different host from Nginx, don't forget to update the localhost part of these directives in nginx.conf as well. If in doubt, consult with your system administrator.
We're almost there! If you have reached this point, make sure everything is up and running:
# Run the following command in the host for Shiny Server
sudo systemctl start shiny-server
# Run the following command in the host for Nginx
sudo systemctl start nginx
# Run the following command in the host for shiny-auth0,
# inside the shiny-auth0 folder
node bin/www
Everything is up! Now test that everything is running as it should from a different computer. Attempt to access your Shiny host from a browser as setup in the Nginx configuration (the server_name directive).
Optional: Setting up Autostart
If you are not getting much help from your system administrators, the missing piece of the puzzle is to get shiny-auth0 to start automatically on each boot. Some distributions have their own startup systems, so covering every variation in this post is out of scope. However, many Linux distributions are converging on systemd for daemon management. So we'll setup a simple systemd service file for our shiny-auth0 server.
First, make sure Shiny Server and Nginx are setup to start automatically as well:
sudo systemctl enable shiny-server
sudo systemctl enable nginx
Now, let's take a look at a sample systemd service file for shiny-auth0:
[Service]
ExecStart=/usr/bin/node /home/shiny-auth0/shiny-auth0/bin/www
Restart=always
StandardOutput=syslog
StandardError=syslog
SyslogIdentifier=shiny-auth0
User=shiny-auth0
Group=shiny-auth0
Environment=NODE_ENV=production

[Install]
WantedBy=multi-user.target
Save this file as /etc/systemd/system/shiny-auth0.service. You may have notices we created a specific user to run this application. This is a common practice for services that do not require root permissions: by running the service as a user, even if the service is compromised, the attacker has limited access to the server (unless he or she can deploy an unpatched privilege escalation exploit). If you do want to run the service as root, remove the User and Group directives from the file. Remeber to set the right path to your local copy of shiny-auth0 in the ExecStart directive.
You can now make shiny-auth0 start automatically during boot:
# Enable shiny-auth0 autostart during boot
sudo systemctl enable shiny-auth0
# To start it now, without rebooting
sudo systemctl start shiny-auth0
If you need help with any of this, ask your local sysadmin. If you have succeeded in running Shiny Server with Auth0 by following the guide above, your local system administrator will not have any problems making the necessary changes to have this run in the appropriate servers, with automatic start on boot.
Conclusion
Shiny server is a great tool to visualize data using R. In spite of its limitations, the open-source version is really powerful. TLS/SSL support and authentication are essential for user facing apps, sometimes even inside private networks. Using Auth0, shiny-auth0 and nginx makes adding authentication and TLS support to Shiny Server Open Source Edition a breeze, even for people not versed in the arcana of Unix commands or programming. Leave us your thoughts in the comments section below, cheers!
About the author

Sebastian Peyrott
Senior Engineer