TL;DR: In this series, you will learn how to make React and Redux control a bunch of SVG elements to create a game. The knowledge acquired throughout this series will also allow you to create other types of animations that are orchestrated by React and Redux, not only games. You can find the final code developed in this article in the following GitHub repository: Aliens Go Home - Part 3
Implementing the Leaderboard Feature in Your React Game
The first thing you will do to make your game look like a real game is to implement the leaderboard feature. This feature will enable players to sign in, so your game can track their max score and show their rank.
Integrating React and Auth0
To make Auth0 manage the identity of your players, you have to have an Auth0 account. If you don't have one yet, you can sign up for a free Auth0 account here .
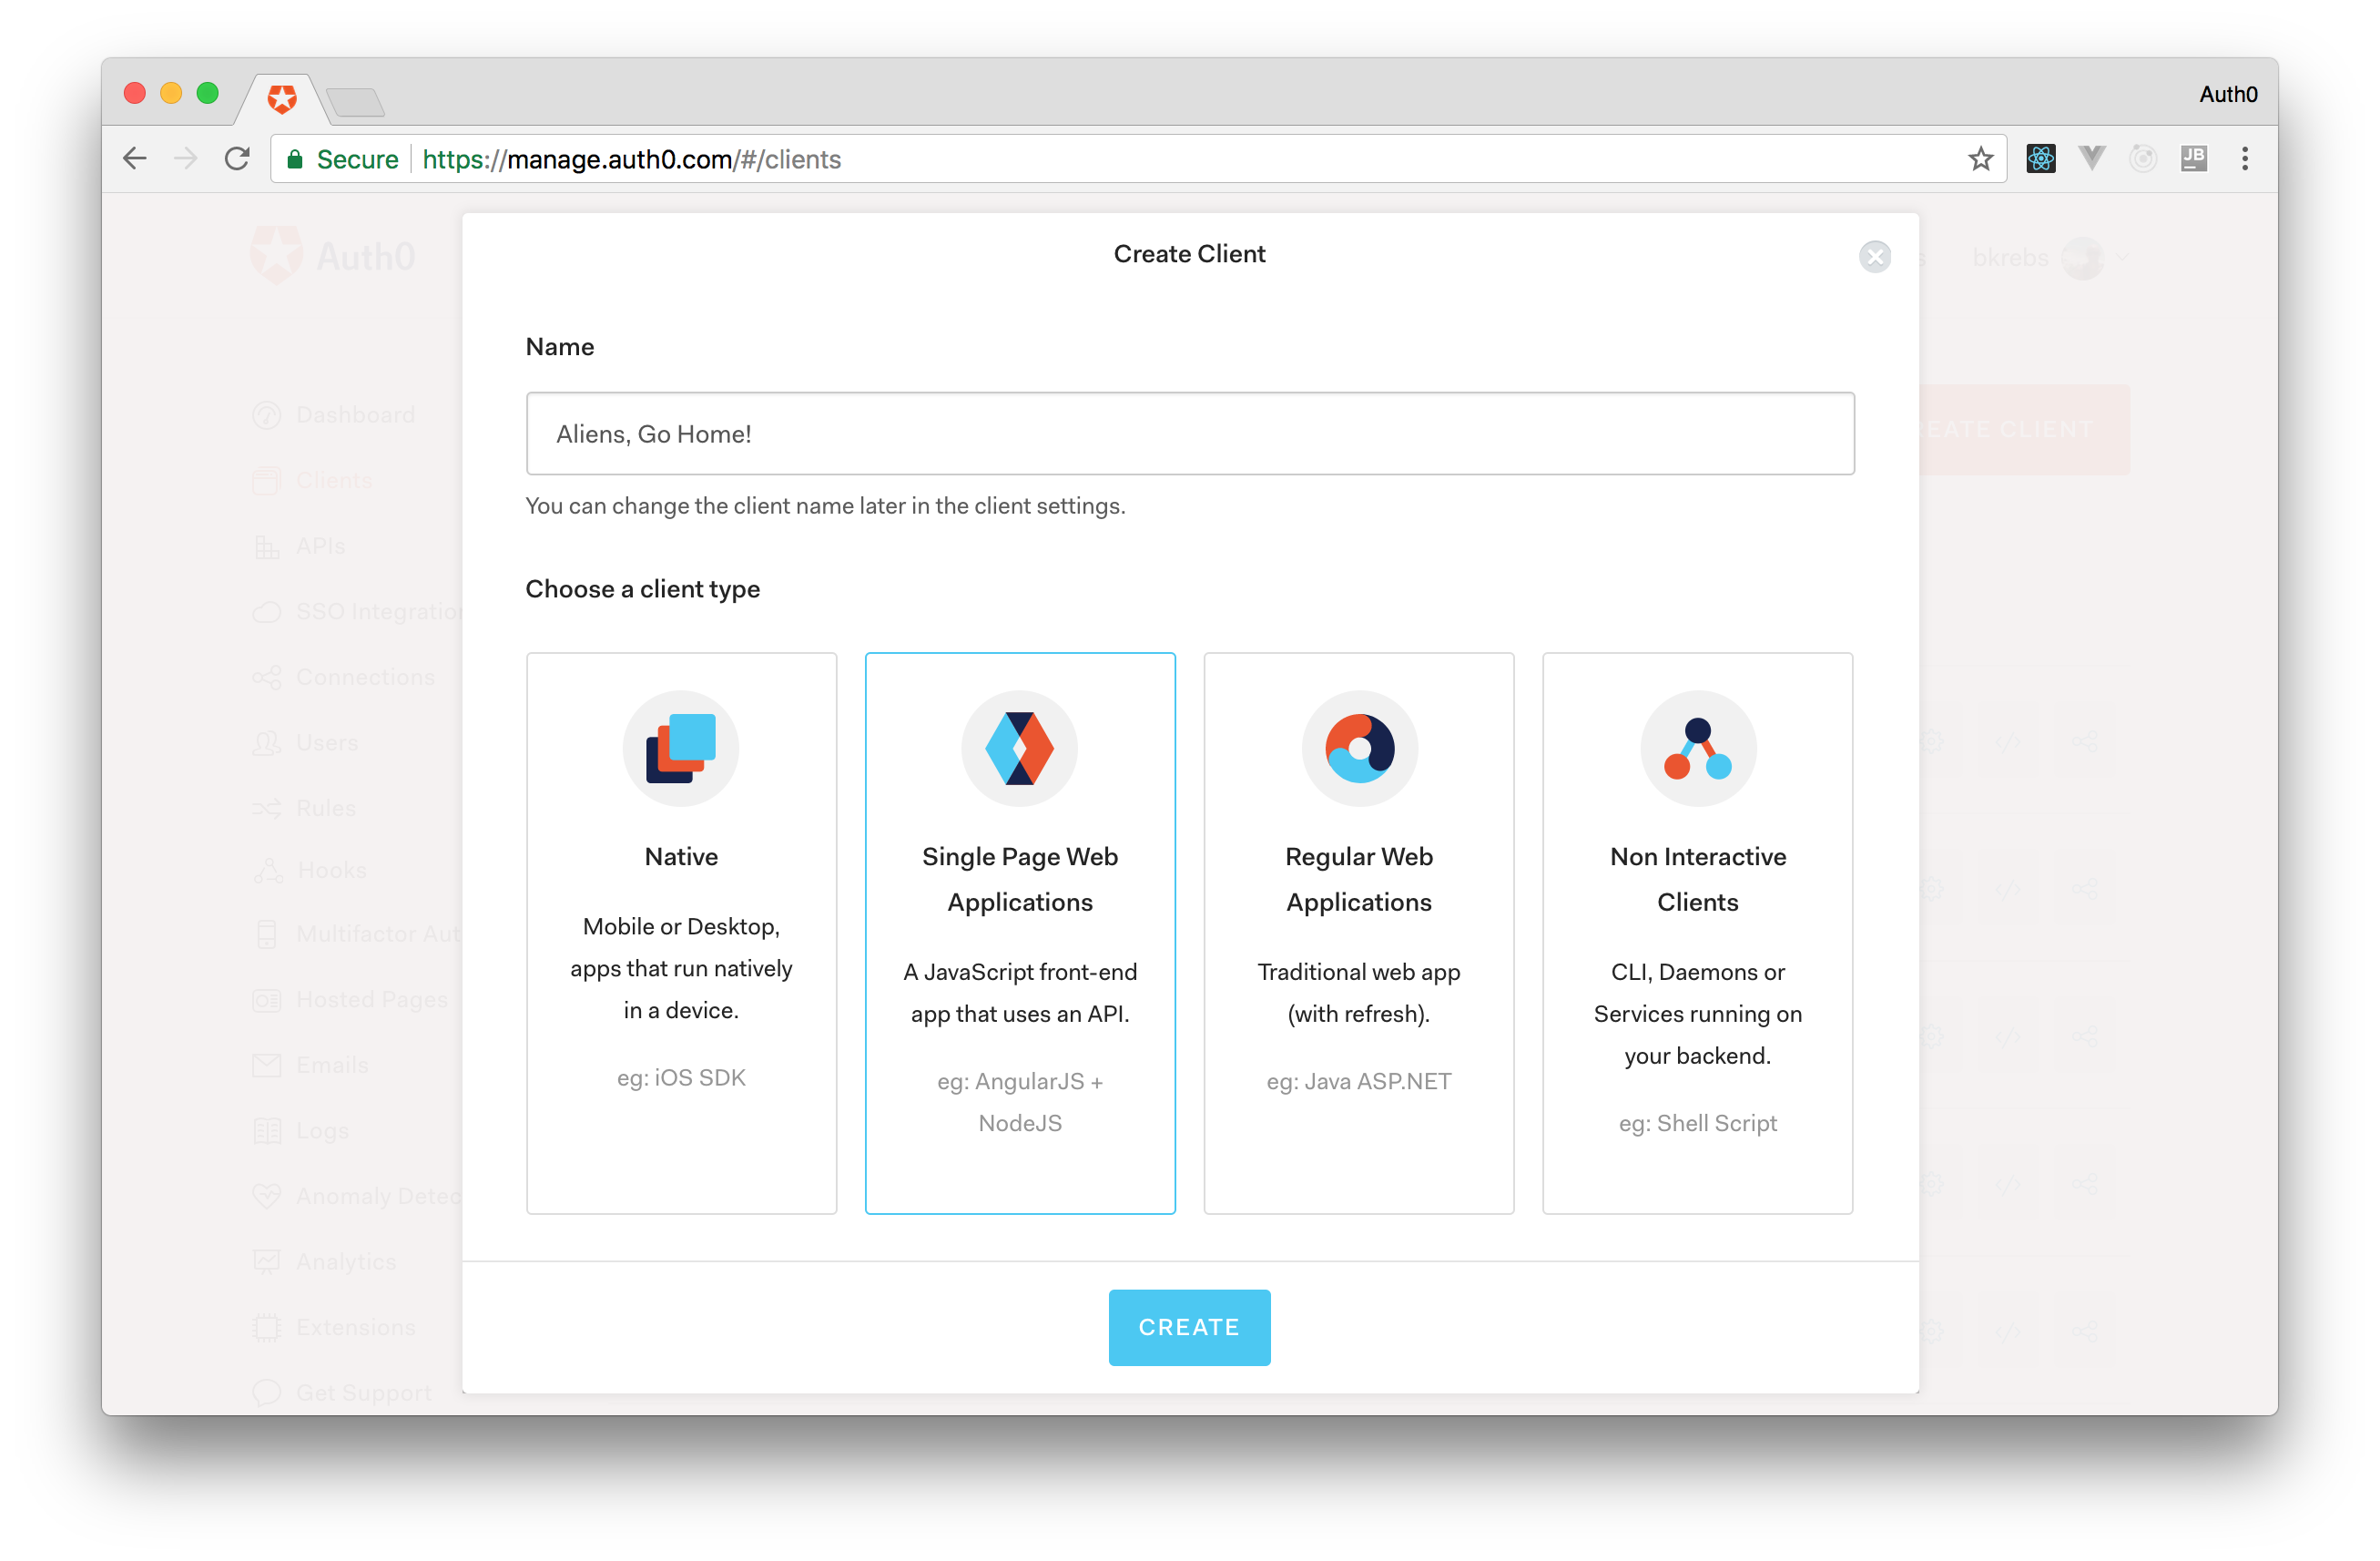
After creating your account, you just have to create an Auth0 Application to represent your game. To do this, head to the Applications page on the Auth0 dashboard and click on the Create Application button. The dashboard will show you a form where you will have to inform the name of your application and its type. You can type Aliens, Go Home! as the name and choose the Single Page Web Application type (your game is an SPA based on React after all). Then, you can click on Create.
When you click this button, the dashboard will redirect you to the Quick Start tab of your new application. As you will learn how to integrate React and Auth0 in this article, you won't need to use this tab. Instead, you will need to use the Settings tab, so head to it.
There are three things that you will need to do in this tab. The first one is to add the http://localhost:3000 value to the field called Allowed Callback URLs. As the dashboard explains, after the player authenticates, Auth0 will only call back one of the URLs in this field. So, if you are going to publish your game on the web, be sure to add its public URL there as well (e.g. http://aliens-go-home.digituz.com.br).
After inputting all your URLs on this field, hit the Save button or press ctrl + s (if you are using a MacBook, you will need to press command + s instead).
The last two things you will need to do is to copy the values from the Domain and Client ID fields. However, before using these values, you will need to code a little.
For starters, you will need to issue the following command in the root directory of your game to install the auth0-web package:
npm i auth0-web@1.7.0
As you will see, this package facilitates the integration between Auth0 and SPAs.
The next step is to add a login button in your game, so your players can authenticate via Auth0. To do this, create a new file called Login.jsx inside the ./src/components directory with the following code:
import React from 'react';
import PropTypes from 'prop-types';

const Login = (props) => {
  const button = {
    x: -300, // half width
    y: -600, // minus means up (above 0)
    width: 600,
    height: 300,
    style: {
      fill: 'transparent',
      cursor: 'pointer',
    },
    onClick: props.authenticate,
  };

  const text = {
    textAnchor: 'middle', // center
    x: 0, // center relative to X axis
    y: -440, // 440 up
    style: {
      fontFamily: '"Joti One", cursive',
      fontSize: 45,
      fill: '#e3e3e3',
      cursor: 'pointer',
    },
    onClick: props.authenticate,
  };

  return (
    <g filter="url(#shadow)">
      <rect {...button} />
      <text {...text}>
        Login to participate!
      </text>
    </g>
  );
};

Login.propTypes = {
  authenticate: PropTypes.func.isRequired,
};

export default Login;
The component that you have just created is agnostic in terms of what it will do when clicked. You will define this action when adding it to the Canvas component. So, open the Canvas.jsx file and update it as follows:
// ... other import statements
import Login from './Login';
import { signIn } from 'auth0-web';

const Canvas = (props) => {
  // ... const definitions
  return (
    <svg ...>
      // ... other elements

      { ! props.gameState.started &&
      <g>
        // ... StartGame and Title components
        <Login authenticate={signIn} />
      </g>
      }

      // ... flyingObjects.map
    </svg>
  );
};
// ... propTypes definition and export statement
As you can see, in this new version, you have imported the Login component and the signIn function of the auth0-web package. Then, you have added your new component to the block of code that is shown only if players have not started the game. Also, you have indicated that, when clicked, the login button must trigger the signIn function.
With these changes in place, the last thing you will have to do is to configure the auth0-web with your Auth0 Application properties. To do this, open the App.js file and update it as follows:
// ... other import statements
import * as Auth0 from 'auth0-web';

Auth0.configure({
  domain: 'YOUR_AUTH0_DOMAIN',
  clientID: 'YOUR_AUTH0_CLIENT_ID',
  redirectUri: 'http://localhost:3000/',
  responseType: 'token id_token',
  scope: 'openid profile manage:points',
});

class App extends Component {
  // ... constructor definition

  componentDidMount() {
    const self = this;

    Auth0.handleAuthCallback();

    Auth0.subscribe((auth) => {
      console.log(auth);
    });

    // ... setInterval and onresize
  }

  // ... trackMouse and render functions
}

// ... propTypes definition and export statement
Note: You have to replace
YOUR_AUTH0_DOMAINandYOUR_AUTH0_CLIENT_IDwith the values copied from the Domain and Client ID fields of your Auth0 application. Besides that, when publishing your game to the web, you will have to replace theredirectUrivalue as well.
The enhancements in this file are quite simple. This list summarizes them:
configure: You used this function to configure theauth0-webpackage with your Auth0 application properties.handleAuthCallback: You triggered this function in thecomponentDidMountlifecycle hook to evaluate if the player is returning from Auth0 after authenticating. This function simply tries to fetch tokens from the URL and, if it succeeds, fetches the player profile and persists everything in thelocalstorage.subscribe: You used this function to log if the player is authenticated or not (truefor authenticated andfalseotherwise).
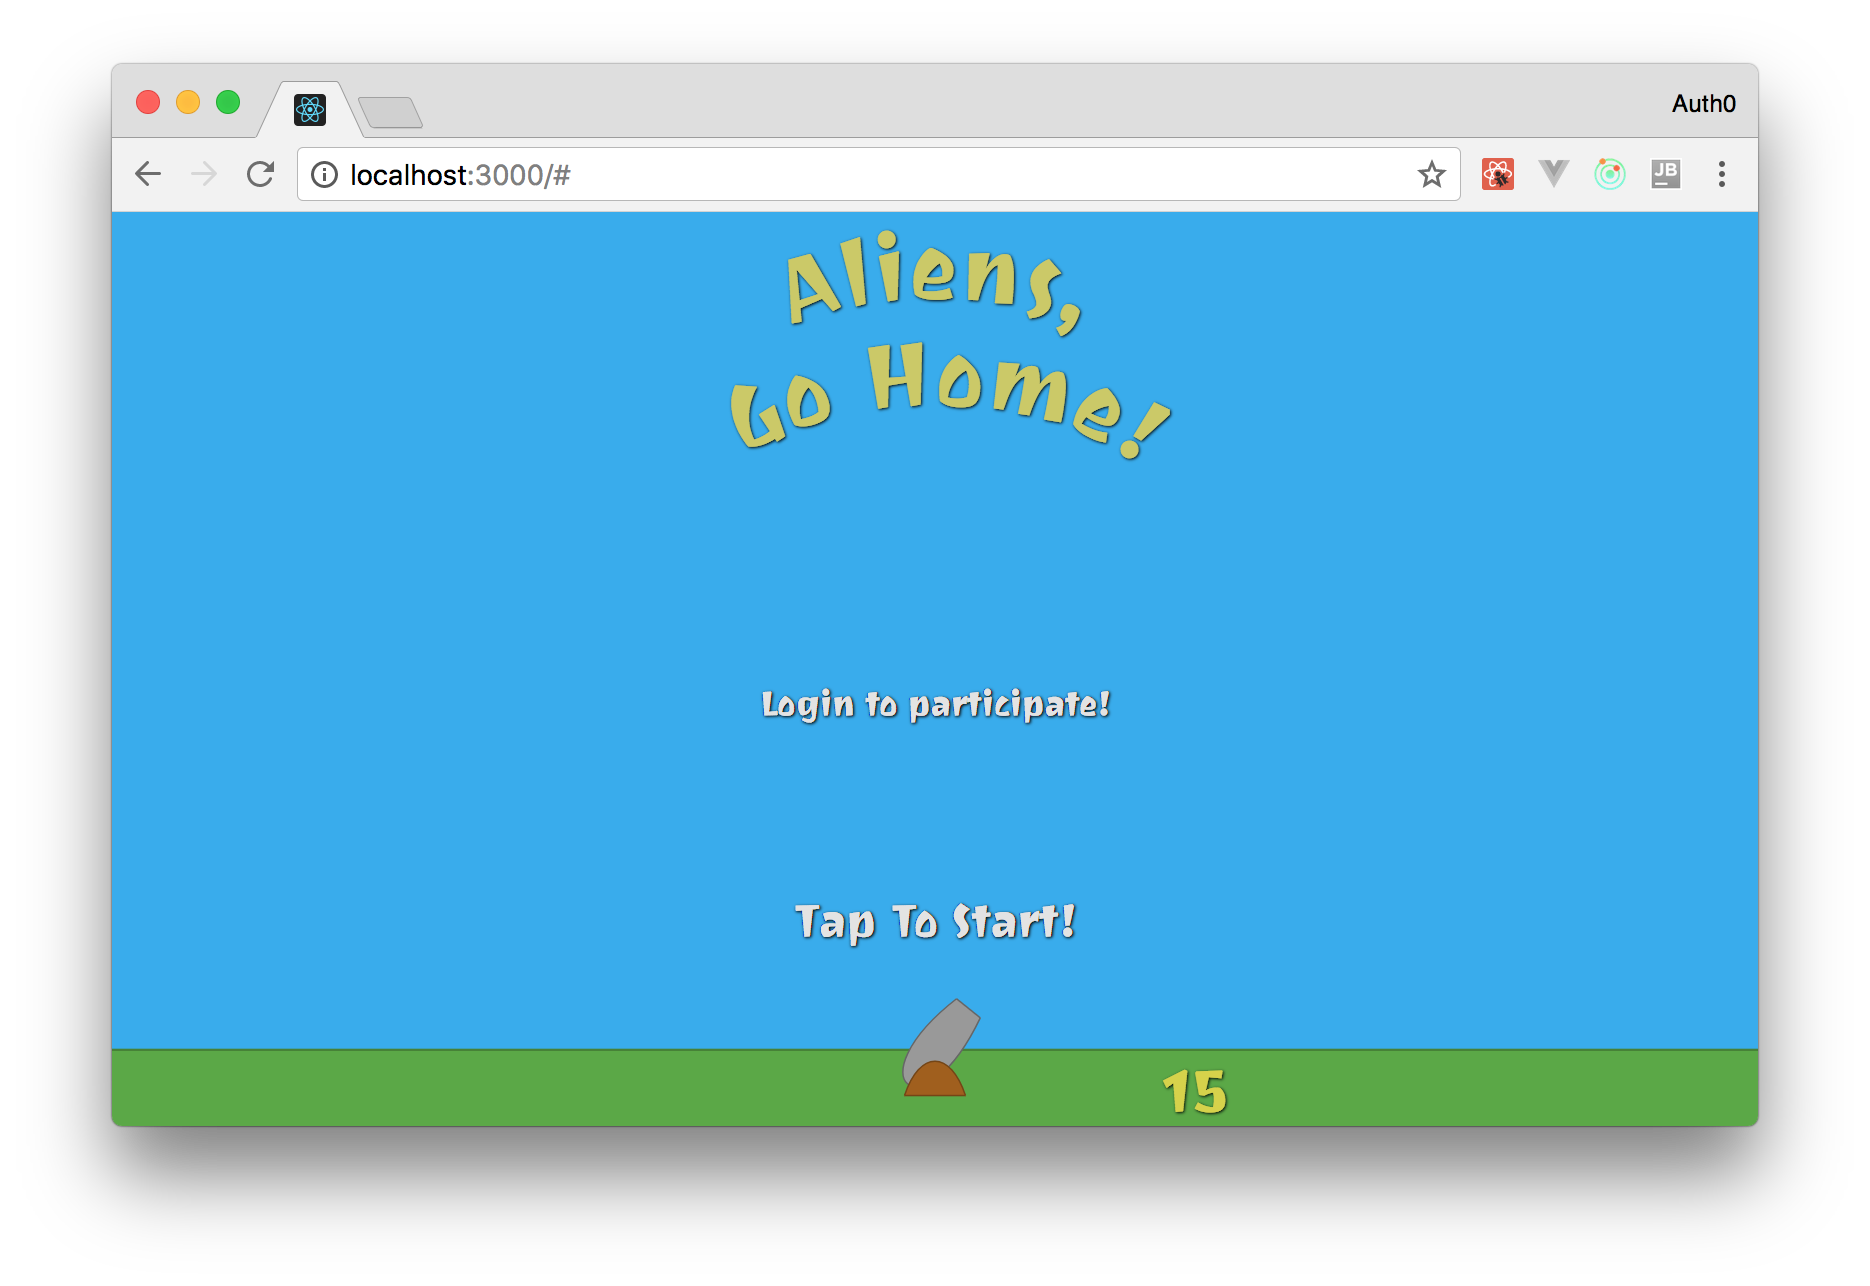
That's it, your game is already using Auth0 as its identity management service. If you run your app now (npm start) and head to it in your browser (http://localhost:3000), you will see the login button. Clicking on it will redirect you to the Auth0 login page where you will be able to sign in.
After you finish the sign in process, Auth0 will redirect you to your game again where the handleAuthCallback function will fetch your tokens. Then, as you have told your app to console.log any changes on the authentication state, you will be able to see it logging true in your browser console.
“Securing games with Auth0 is simple and painless.”
Tweet This
Creating the Leaderboard React Component
Now that you have configured Auth0 as your identity management system, you will need to create the components that will show the leaderboard and the max score for the current player. For that, you will create two components: Leaderboard and Rank. You will need to split this feature into two components because, as you will see, it's not that simple to show player's data (like max score, name, position, and picture) in a nice way. It's not hard either, but you will have to type some good amount of code. So, adding everything into one component would make it look clumsy.
As your game does not have any players yet, the first thing you will need to do is to define some mock data to populate the leaderboard. The best place to do this is in the Canvas component. Also, since you are going to update your canvas, you can go ahead and replace the Login component with the Leaderboard (you will add Login inside the Leaderboard in a moment):
// ... other import statements
// replace Login with the following line
import Leaderboard from './Leaderboard';

const Canvas = (props) => {
  // ... const definitions
  const leaderboard = [
    { id: 'd4', maxScore: 82, name: 'Ado Kukic', picture: 'https://twitter.com/KukicAdo/profile_image', },
    { id: 'a1', maxScore: 235, name: 'Bruno Krebs', picture: 'https://twitter.com/brunoskrebs/profile_image', },
    { id: 'c3', maxScore: 99, name: 'Diego Poza', picture: 'https://twitter.com/diegopoza/profile_image', },
    { id: 'b2', maxScore: 129, name: 'Jeana Tahnk', picture: 'https://twitter.com/jeanatahnk/profile_image', },
    { id: 'e5', maxScore: 34, name: 'Jenny Obrien', picture: 'https://twitter.com/jenny_obrien/profile_image', },
    { id: 'f6', maxScore: 153, name: 'Kim Maida', picture: 'https://twitter.com/KimMaida/profile_image', },
    { id: 'g7', maxScore: 55, name: 'Luke Oliff', picture: 'https://twitter.com/mroliff/profile_image', },
    { id: 'h8', maxScore: 146, name: 'Sebastian Peyrott', picture: 'https://twitter.com/speyrott/profile_image', },
  ];
  return (
    <svg ...>
      // ... other elements

      { ! props.gameState.started &&
      <g>
        // ... StartGame and Title
        <Leaderboard currentPlayer={leaderboard[6]} authenticate={signIn} leaderboard={leaderboard} />
      </g>
      }

      // ... flyingObjects.map
    </svg>
  );
};

// ... propTypes definition and export statement
In the new version of this file, you defined a constant called leaderboard that holds an array of fake players. These players have the following properties: id, maxScore, name, and picture. Then, inside the svg element, you added the Leaderboard component with the following parameters:
currentPlayer: This defines who the current player is. For now, you are using one of the fake players defined before so you can see how everything works. The purpose of passing this parameter is to make your leaderboard highlight the current player.authenticate: This is the same parameter that you were adding to theLogincomponent in the previous version.leaderboard: This is the array of fake players. Your leaderboard will use it to show the current ranking.
Now, you have to define the Leaderboard component. To do this, create a new file called Leaderboard.jsx in the ./src/components directory and add the following code to it:
import React from 'react';
import PropTypes from 'prop-types';
import Login from './Login';
import Rank from "./Rank";

const Leaderboard = (props) => {
  const style = {
    fill: 'transparent',
    stroke: 'black',
    strokeDasharray: '15',
  };

  const leaderboardTitle = {
    fontFamily: '"Joti One", cursive',
    fontSize: 50,
    fill: '#88da85',
    cursor: 'default',
  };

  let leaderboard = props.leaderboard || [];
  leaderboard = leaderboard.sort((prev, next) => {
    if (prev.maxScore === next.maxScore) {
      return prev.name <= next.name ? 1 : -1;
    }
    return prev.maxScore < next.maxScore ? 1 : -1;
  }).map((member, index) => ({
    ...member,
    rank: index + 1,
    currentPlayer: member.id === props.currentPlayer.id,
  })).filter((member, index) => {
    if (index < 3 || member.id === props.currentPlayer.id) return member;
    return null;
  });

  return (
    <g>
      <text filter="url(#shadow)" style={leaderboardTitle} x="-150" y="-630">Leaderboard</text>
      <rect style={style} x="-350" y="-600" width="700" height="330" />
      {
        props.currentPlayer && leaderboard.map((player, idx) => {
          const position = {
            x: -100,
            y: -530 + (70 * idx)
          };
          return <Rank key={player.id} player={player} position={position}/>
        })
      }
      {
        ! props.currentPlayer && <Login authenticate={props.authenticate} />
      }
    </g>
  );
};

Leaderboard.propTypes = {
  currentPlayer: PropTypes.shape({
    id: PropTypes.string.isRequired,
    maxScore: PropTypes.number.isRequired,
    name: PropTypes.string.isRequired,
    picture: PropTypes.string.isRequired,
  }),
  authenticate: PropTypes.func.isRequired,
  leaderboard: PropTypes.arrayOf(PropTypes.shape({
    id: PropTypes.string.isRequired,
    maxScore: PropTypes.number.isRequired,
    name: PropTypes.string.isRequired,
    picture: PropTypes.string.isRequired,
    ranking: PropTypes.number,
  })),
};

Leaderboard.defaultProps = {
  currentPlayer: null,
  leaderboard: null,
};

export default Leaderboard;
Don't be scared! The code of this component is quite simple:
- You are defining the
leaderboardTitleconstant to set how the leaderboard title will look like. - You are defining the
dashedRectangleconstant to style arectelement that will work as the container of the leaderboard. - You are calling the
sortfunction of theprops.leaderboardvariable to order the ranking. After that, your leaderboard will have the highest max score on the top and the lowest max score on the bottom. Also, if there is a tie between two players, you are ordering them based on their names. - You are calling the
mapfunction on the result of the previous step (thesortfunction) to complement players with theirrankand with a flag calledcurrentPlayer. You will use this flag to highlight the row where the current player appears. - You are using the
filterfunction on the result of the previous step (themapfunction) to remove everyone who is not among the top three players. Actually, you are letting the current player stay on the final array if they don't belong to this select group. - Lastly, you are simply iterating over the filtered array to show
Rankelements if there is a player logged in (props.currentPlayer && leaderboard.map) or showing theLoginbutton otherwise.
Then, the last thing you will need to do is to create the Rank React component. To do this, create a new file called Rank.jsx beside the Leaderboard.jsx file with the following code:
import React from 'react';
import PropTypes from 'prop-types';

const Rank = (props) => {
  const { x, y } = props.position;

  const rectId = 'rect' + props.player.rank;
  const clipId = 'clip' + props.player.rank;

  const pictureStyle = {
    height: 60,
    width: 60,
  };

  const textStyle = {
    fontFamily: '"Joti One", cursive',
    fontSize: 35,
    fill: '#e3e3e3',
    cursor: 'default',
  };

  if (props.player.currentPlayer) textStyle.fill = '#e9ea64';

  const pictureProperties = {
    style: pictureStyle,
    x: x - 140,
    y: y - 40,
    href: props.player.picture,
    clipPath: `url(#${clipId})`,
  };

  const frameProperties = {
    width: 55,
    height: 55,
    rx: 30,
    x: pictureProperties.x,
    y: pictureProperties.y,
  };

  return (
    <g>
      <defs>
        <rect id={rectId} {...frameProperties} />
        <clipPath id={clipId}>
          <use xlinkHref={'#' + rectId} />
        </clipPath>
      </defs>
      <use xlinkHref={'#' + rectId} strokeWidth="2" stroke="black" />
      <text filter="url(#shadow)" style={textStyle} x={x - 200} y={y}>{props.player.rank}º</text>
      <image {...pictureProperties} />
      <text filter="url(#shadow)" style={textStyle} x={x - 60} y={y}>{props.player.name}</text>
      <text filter="url(#shadow)" style={textStyle} x={x + 350} y={y}>{props.player.maxScore}</text>
    </g>
  );
};

Rank.propTypes = {
  player: PropTypes.shape({
    id: PropTypes.string.isRequired,
    maxScore: PropTypes.number.isRequired,
    name: PropTypes.string.isRequired,
    picture: PropTypes.string.isRequired,
    rank: PropTypes.number.isRequired,
    currentPlayer: PropTypes.bool.isRequired,
  }).isRequired,
  position: PropTypes.shape({
    x: PropTypes.number.isRequired,
    y: PropTypes.number.isRequired
  }).isRequired,
};

export default Rank;
Nothing to be scared of about this code either. The only unordinary thing that you are adding to this component is the clipPath element and a rect inside the defs element to create a rounded portrait.
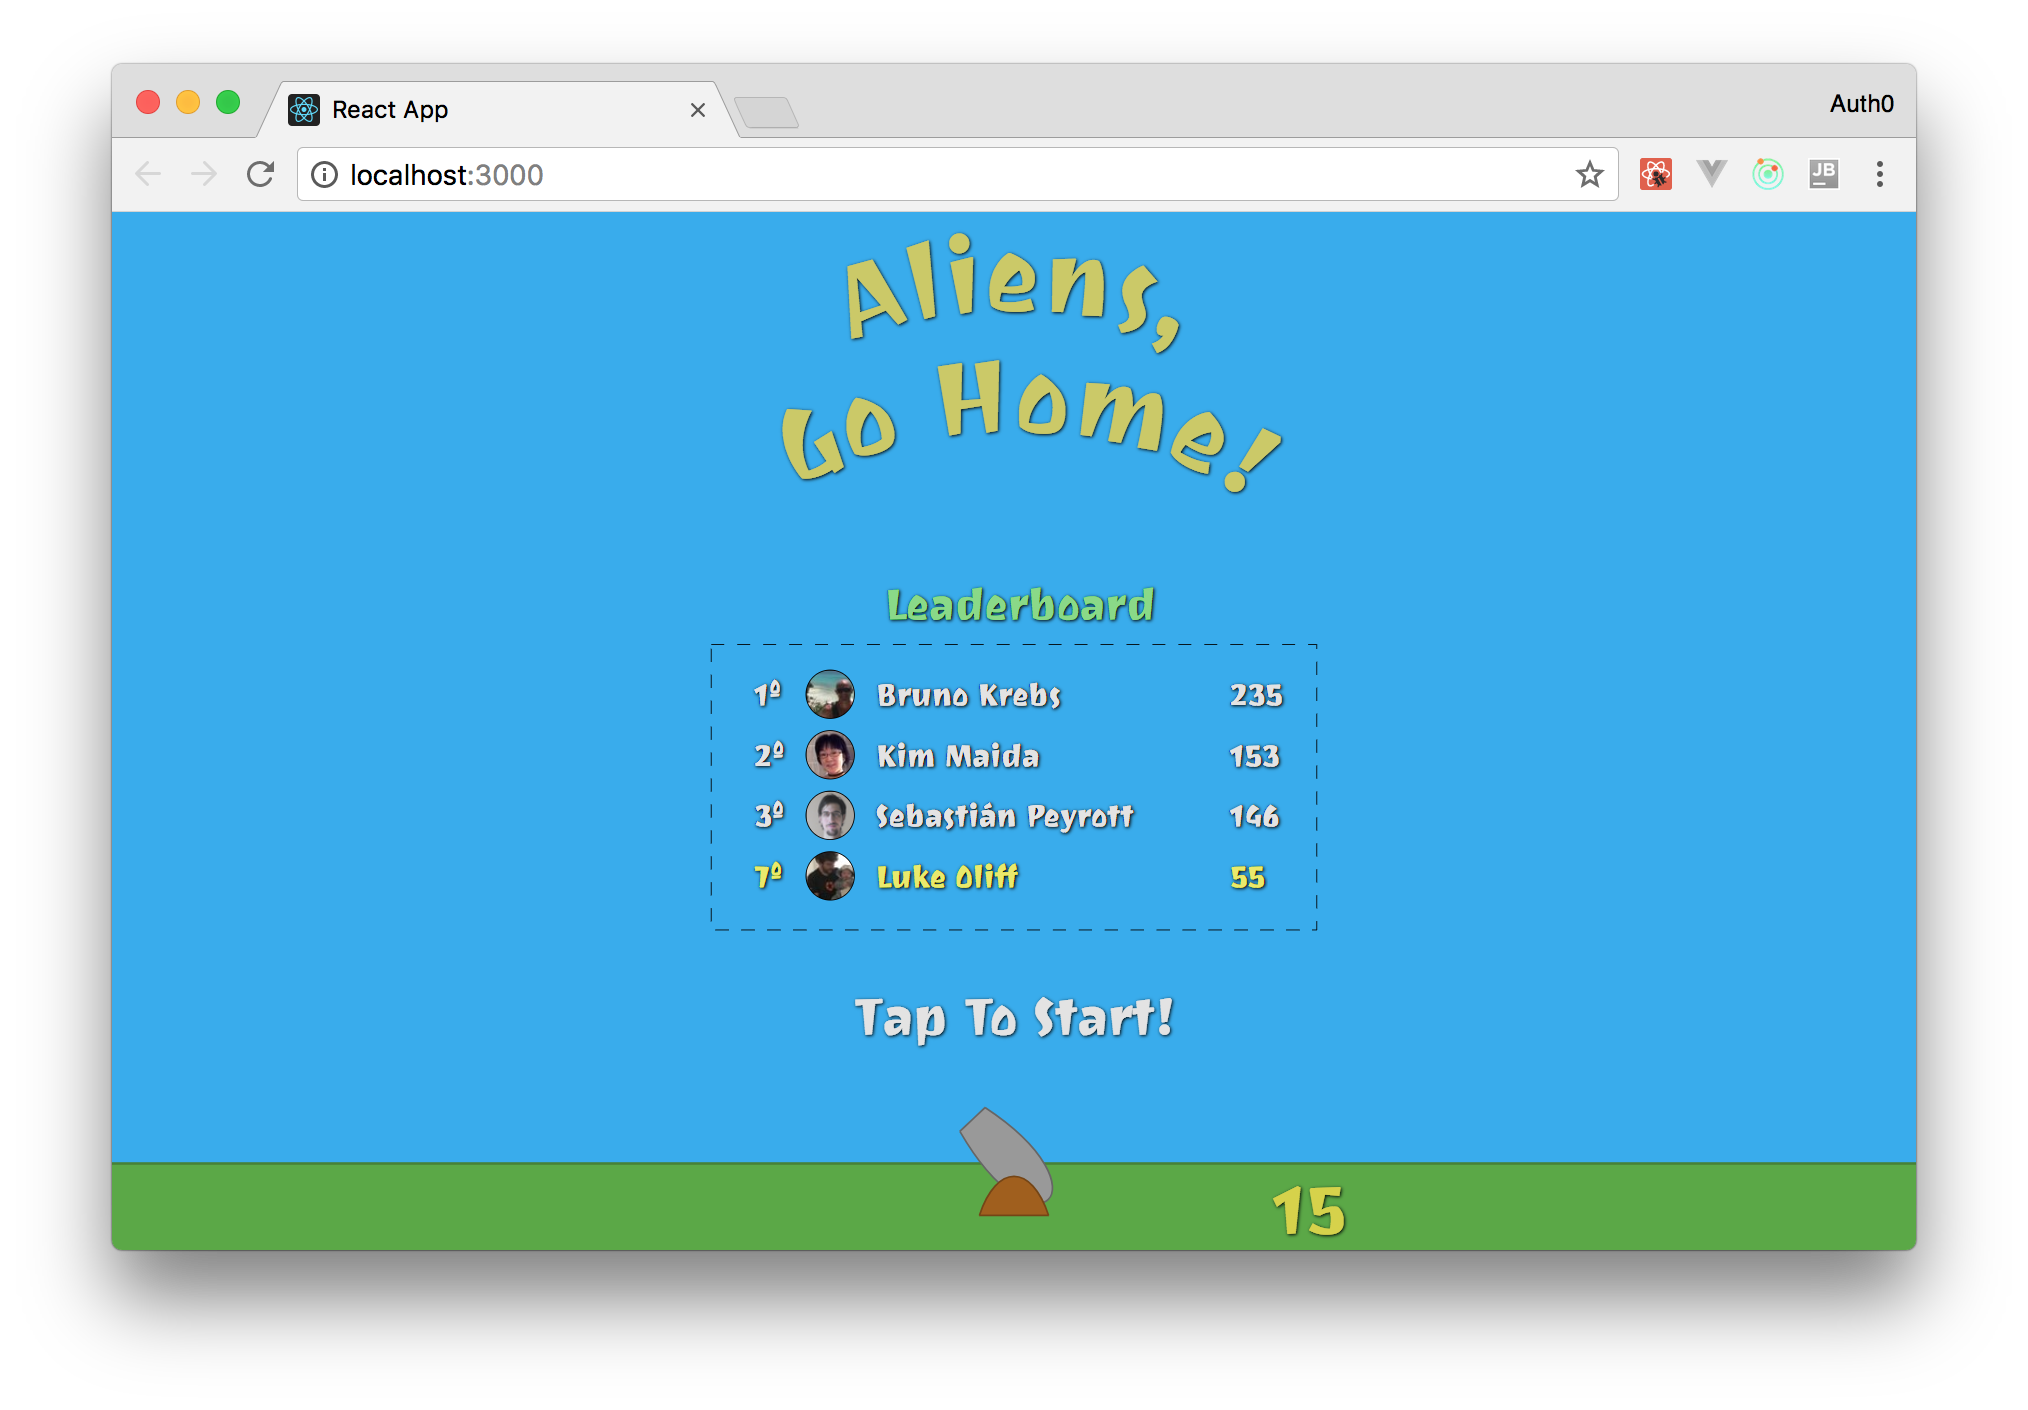
With these new files in place, you can head to your app (http://localhost:3000/) to see your new leaderboard feature.
About the author

Bruno Krebs
R&D Content Architect (Auth0 Alumni)


