
The Vue CLI has evolved into a full system for rapid VueJS development. Vue CLI 3.0 comes packed with extraordinary tooling that increases developer experience by providing fast and intuitive project scaffolding, webpack sensible defaults, zero configuration, extensibility, and much more.
But probably, the most user-friendly of its offerings is the ability to create and manage Vue projects through a beautiful browser-based graphic user interface called Vue Project Manager. In this blog post, you are going to learn how to use the Vue CLI 3.0 graphic user interface to create, import, manage, and customize Vue projects easily.
"Although Vue CLI 3 is released as stable, the UI is still in beta. Expect a few quirks here and there." (Evan You)
Installing Vue CLI 3.0
There are two ways that you can run and use Vue CLI 3.0: through a global installation or through npx. You will learn about both here.
Installing Vue CLI 3.0 Globally
If you have previously installed vue-cli, v1.x or v2.x, you need to uninstall it first by running the following command:
npm uninstall vue-cli -g
The Vue CLI package has been renamed for v3.x to @vue/cli. This version requires Node.js v8.9+ to be installed. To install the package globally, after uninstalling any previous version, run the following command:
npm install -g @vue/cli
Once the installation is finished, you will have access to the vue binary to interact with this global package anywhere within your command line. Verify that the installation has been successful by checking the version of the CLI:
vue --version
Using Vue CLI 3.0 through npx
If you have NPM v5.2+ installed, you have access to npx. npx makes it easy for developers to use CLI tools and other executables hosted on the NPM registry. For example, you can execute an NPM CLI package without installing it globally. To use Vue CLI 3.0 with npx, you replace the vue binary with npx @vue/cli. For example, to check the version of the Vue CLI that npx will use, you can issue the following command:
npx @vue/cli --version
Installation Recap
It may be a good idea to install the Vue CLI locally so that you can lock the version that you are going to be using. The Vue CLI is under active development and using it through npx is good for an one-off trial, but if you are a Vue developer dedicated to managing and creating many Vue projects with lots of dependencies, a global installation for local usage is a better approach to avoid bug or conflicts that may be introduced in future releases.
“You can run Vue CLI 3.0 through a global installation or through npx. It's easy to get started!”
Tweet This
Starting the Vue Project Manager
To start the Vue CLI 3.0 GUI, known as the Vue Project Manager, run one of the following commands depending on your previously used installation path:
Global install:
vue ui
npx
npx @vue/cli ui
Once this command is fully executed you are going to see the following message in the command line:
🚀  Starting GUI...
🌠  Ready on http://localhost:8000
Go ahead and open http://localhost:8000 to bask in the glory of the Vue Project Manager. Beautiful, isn't it?
To customize the port where you can to run vue-ui you can pass the command the -p argument followed by the port number that you want to use. For example:
Global install:
vue ui -p 8080
npx
npx @vue/cli ui -p 8080
Feel free to use whatever port number you prefer.
For those who prefer to work using dark themes, the Vue Project Manager offers that option. On the bottom menu bar, look for a black and white drop icon. Click on it to toggle dark mode:
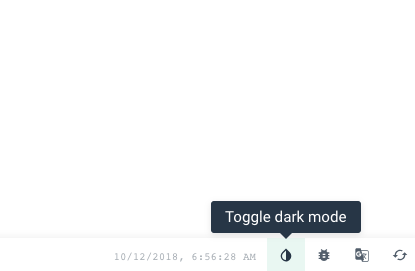
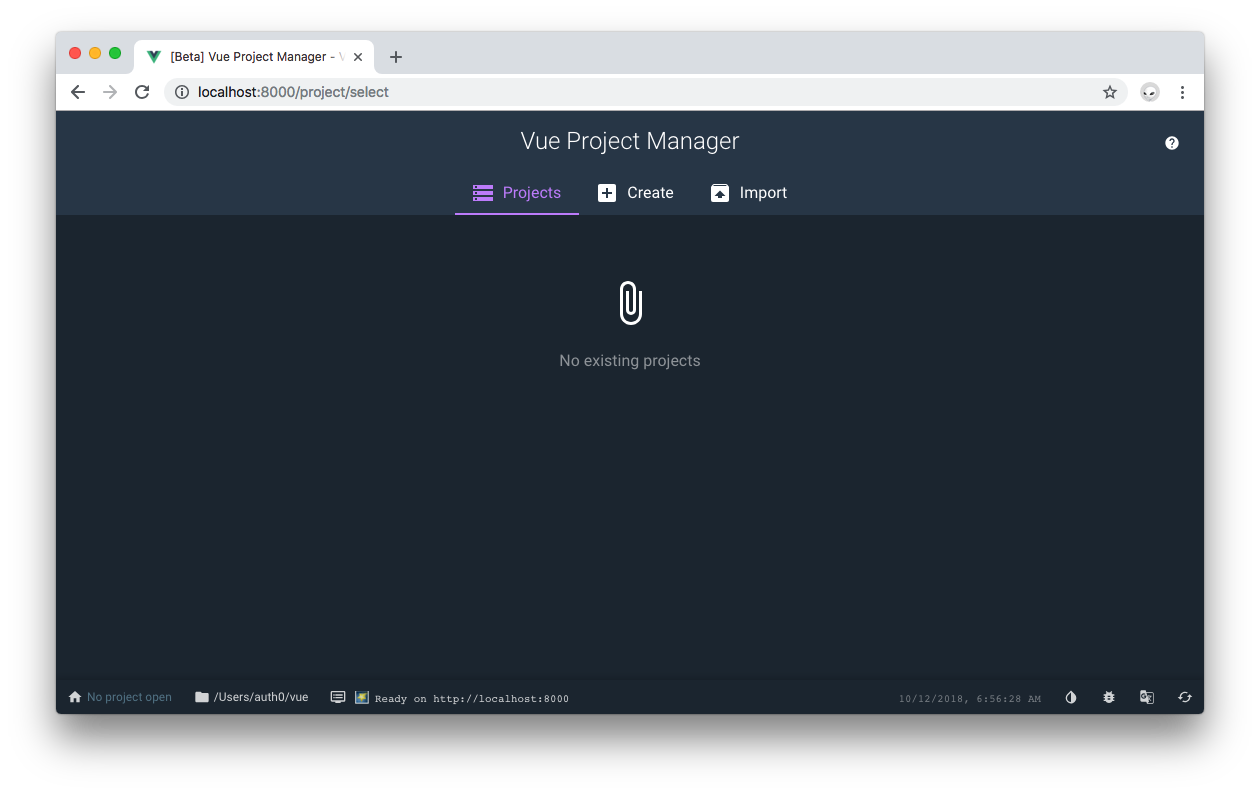
I prefer to use dark mode across my applications. Feel free to use the color scheme of your choice.
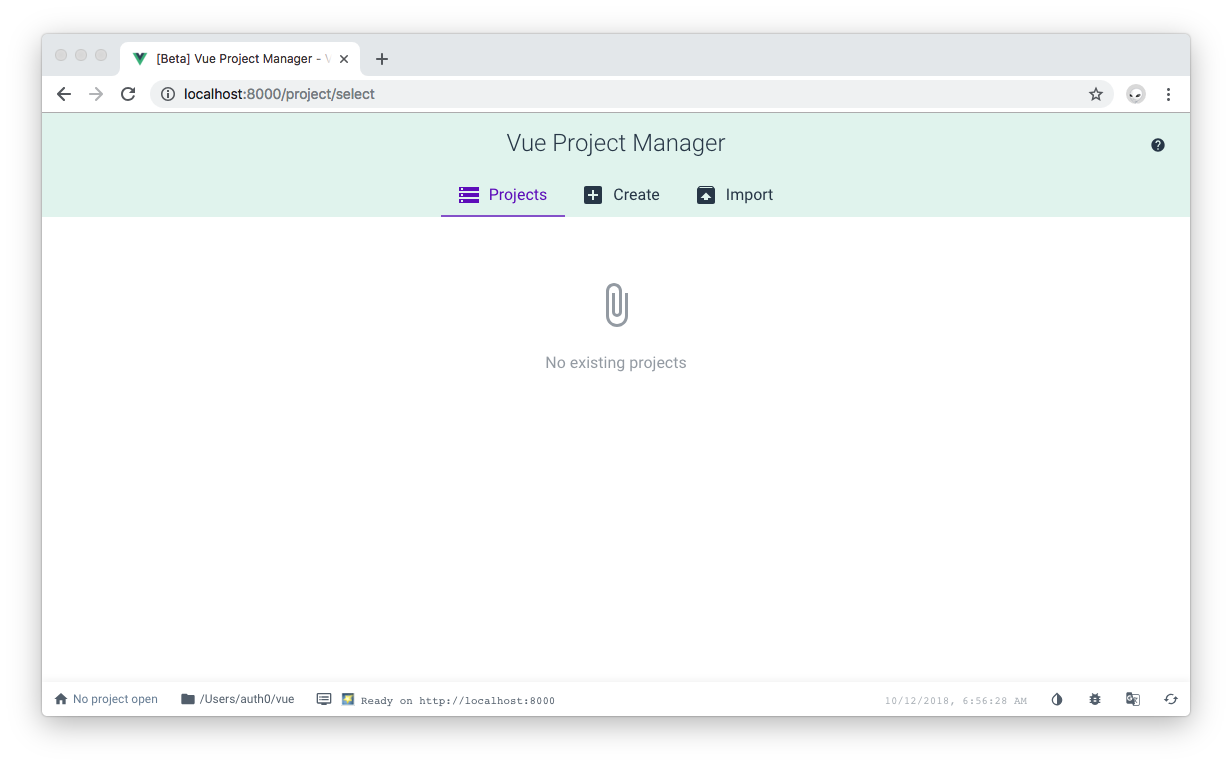
The landing view for the Vue Project Manager is http://localhost:8000/project/select. This view allows you to view any project that has been created or imported to Vue Project Manager, create new projects, and import projects. Right now, the tool shows a message of "No existing project" because it has no project registered with it yet. What you'll do next is to learn how to both create and import Vue projects into this tool.
Before you do that, notice how on the bottom menu bar, you can see the file path to the directory from where you ran the vue-ui command. I'd recommend that you create a directory in your system to store all your Vue projects and always run vue-ui from there. In my case, I chose to use /Users/auth0/vue on my Mac.
Creating New Projects Using the Vue Project Manager
With the main Vue Project Manager view open, http://localhost:8000/project/select, click on the Create tab:
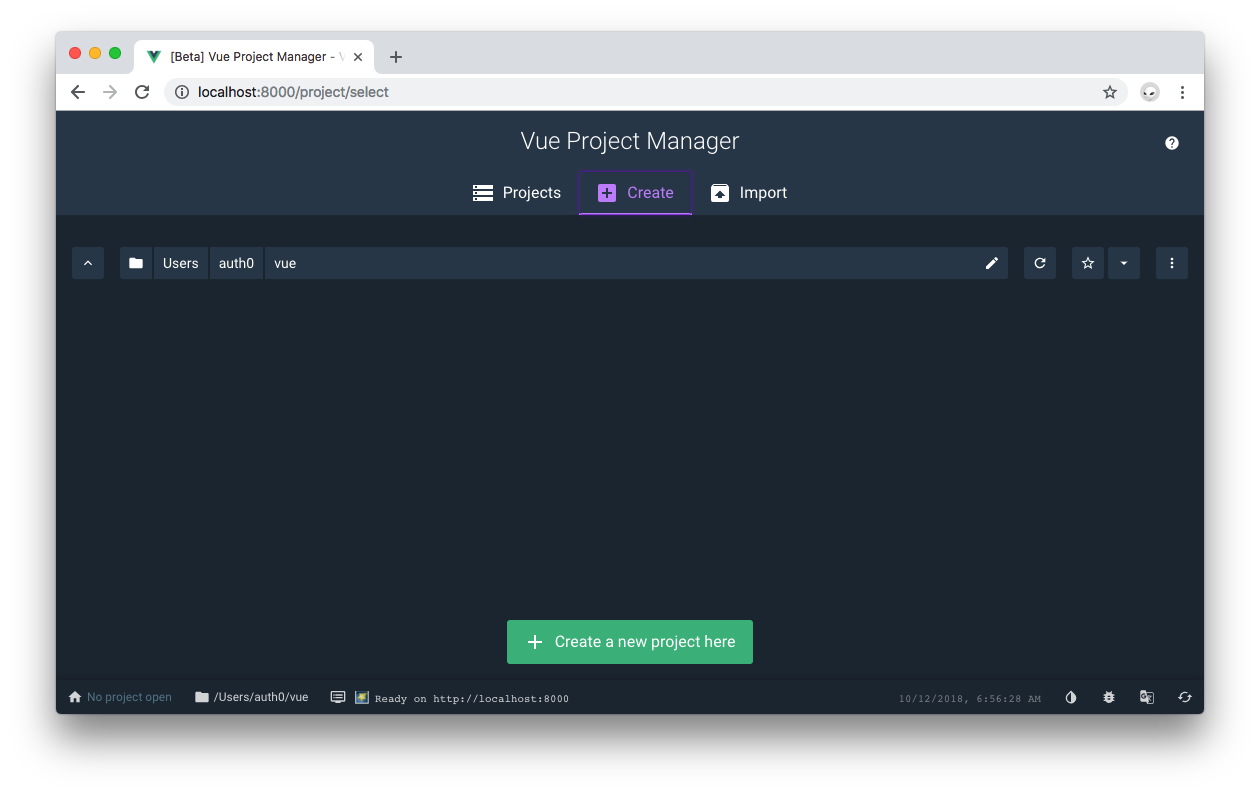
From now on, I am going to refer to the Vue Project Manager as the VPM. Within the "Create" feature, the VPM offers you an intuitive and interactive tool to specify the folder where you want to create the project. By default, the VPM uses the directory from where you run vue-ui.
Using the File Navigation Feature
The leftmost button of the folder navigation feature lets you open the parent folder of the current directory:
The pencil icon lets you manually edit the file path. When you are done editing, press the esc or enter keys to close it:
You can also navigate the file system using the directory tabs:

You can "Favorite" a folder and then navigate directly to it using the favorites drop-down:
Finally, you also have the option to create a new folder and to show hidden folders from the file system:
Creating a New Project
Now that you understand how to use the VPM file navigation feature, it's time for you to create a new project. Click on the "+ Create a new project here" button. This will start the process of scaffolding a Vue project within the selected directory. You may be used to scaffolding projects using CLI tools, but this time, it's all done through a UI. You are in for a treat!
The first step in the scaffolding process is to specify the "Details" of the project:
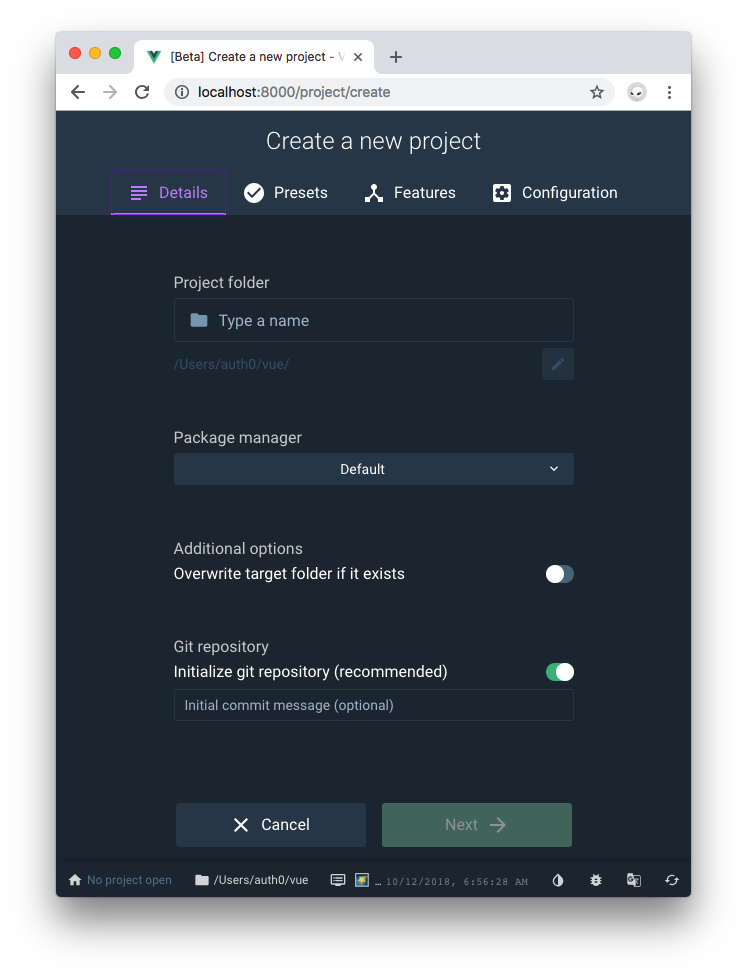
Here, you can:
- Specify the name of the project through its project folder name. Name it
hello-vue. - Specify the package manager: Default,
npm, oryarn. Choosenpm. - Overwrite the target folder if it exists already.
Initialize a git repository and specify the initial commit message.
- Enable this option and type "Welcome to Vue." as the commit message.
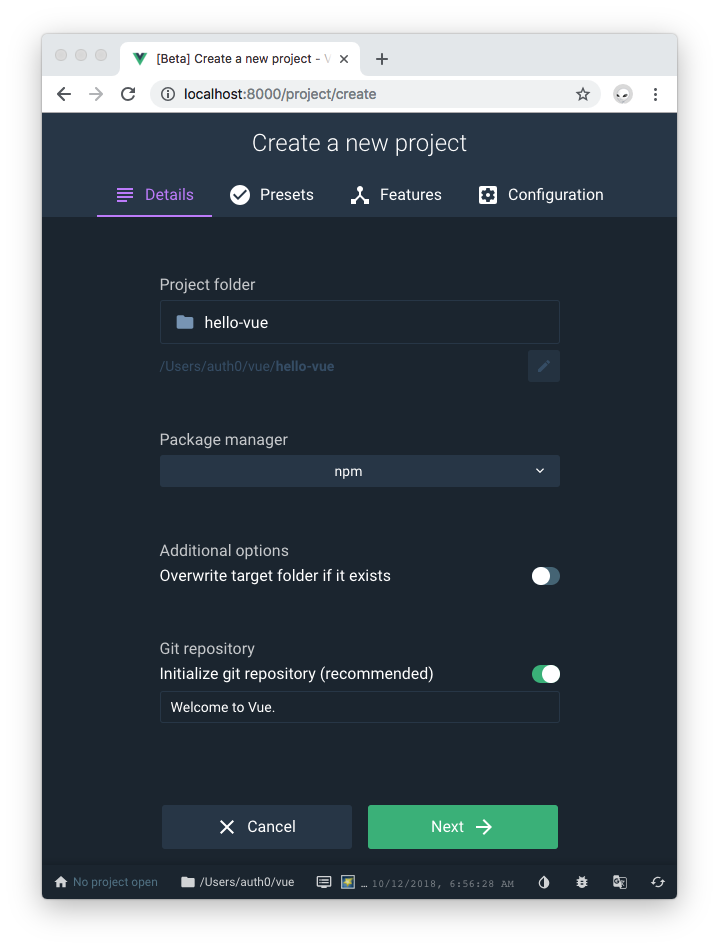
Once you are done setting the project details, click on the "Next" button.
The next step is to set the presets of the project:
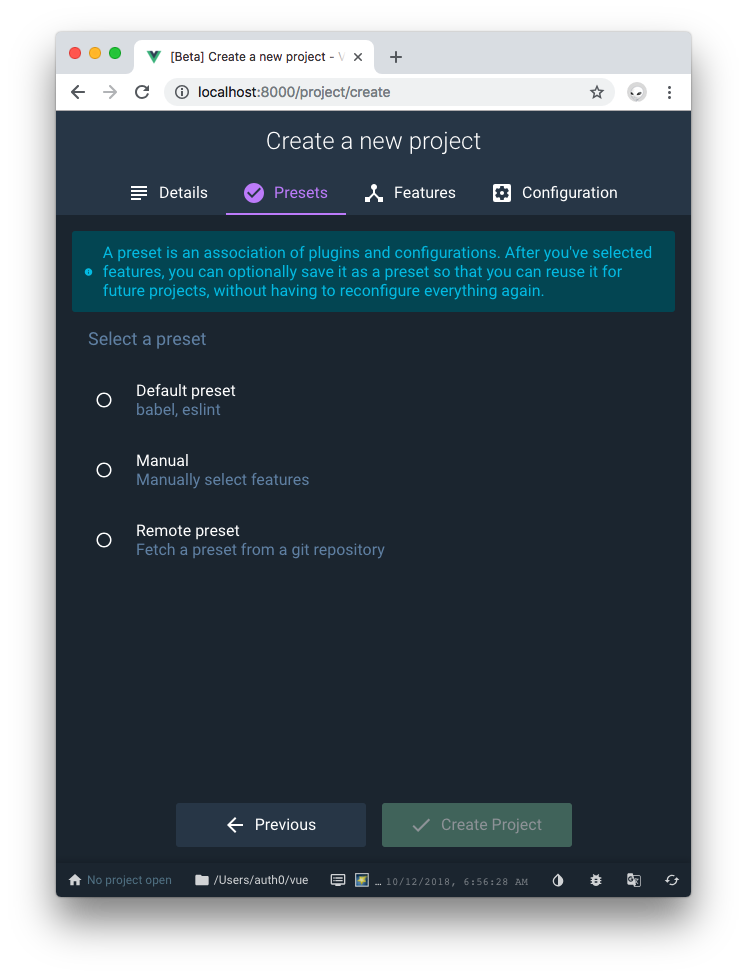
According to the VPM, a preset is an association of plugins and configurations. After you've selected features, you can optionally save it as a preset so that you can reuse it for future projects, without having to reconfigure everything again.
You have three options to create presets:
- Default preset:
babel,eslint. - Manual: Manually select features.
- Remote preset: Fetch a preset from a git repository.
Choose "Manual" and click on "Next". Now, you are taken to the "Features" tab where you can specify what features you want to turn on for the project:
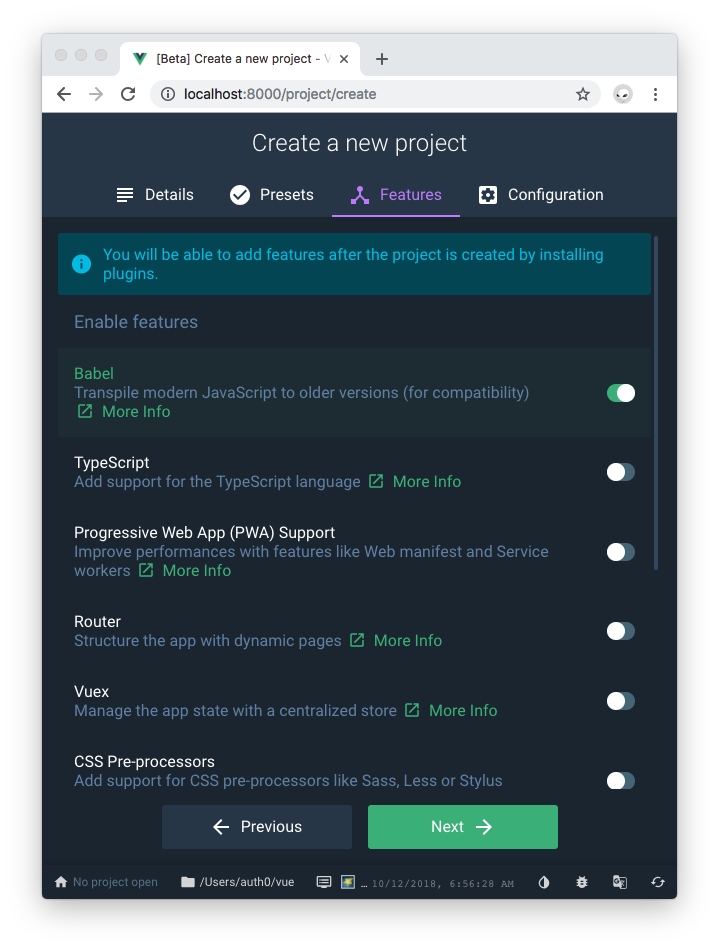
You can turn on or off as many features as you'd like. The VPM really shines here for project scaffolding because if you don't know what a feature does, you can click the "More info" link and you'll be taken to a feature information page.
For now, turn on the following:
- Progressive Web App (PWA) Support.
- Router
- CSS Pre-processors.
Leave Vuex off as you are going to turn it on differently later. Click "Next".
Finally, you are presented with the "Configuration" tab where you can specify details on the features that you decided to turn on that require additional configuration:
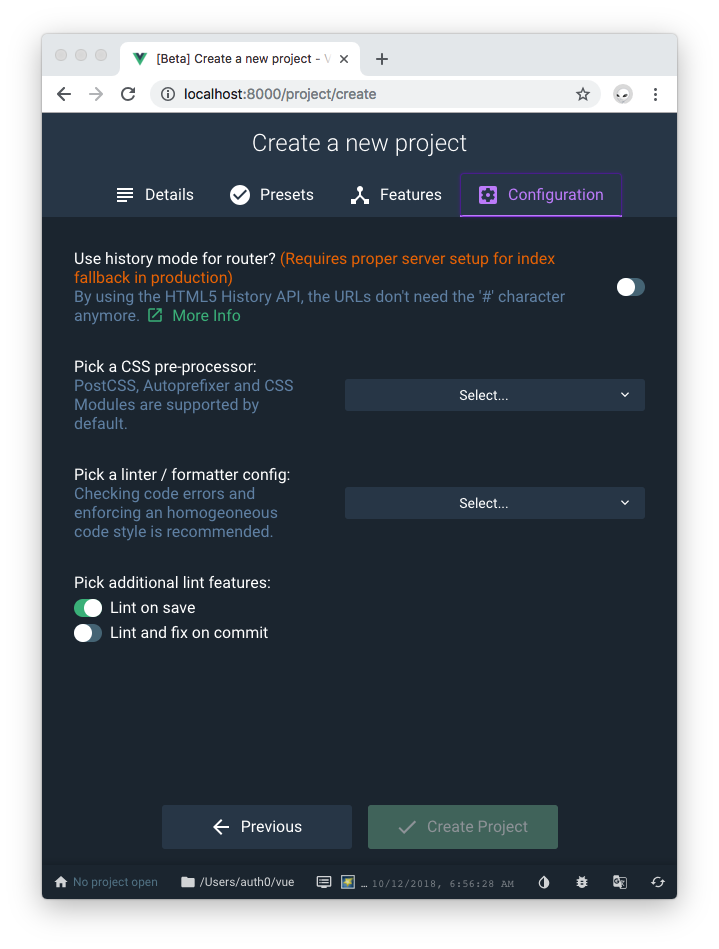
Here, by default, all projects are given the option to use history mode for the router. Be mindful that history mode requires proper server setup for index fallback in production.
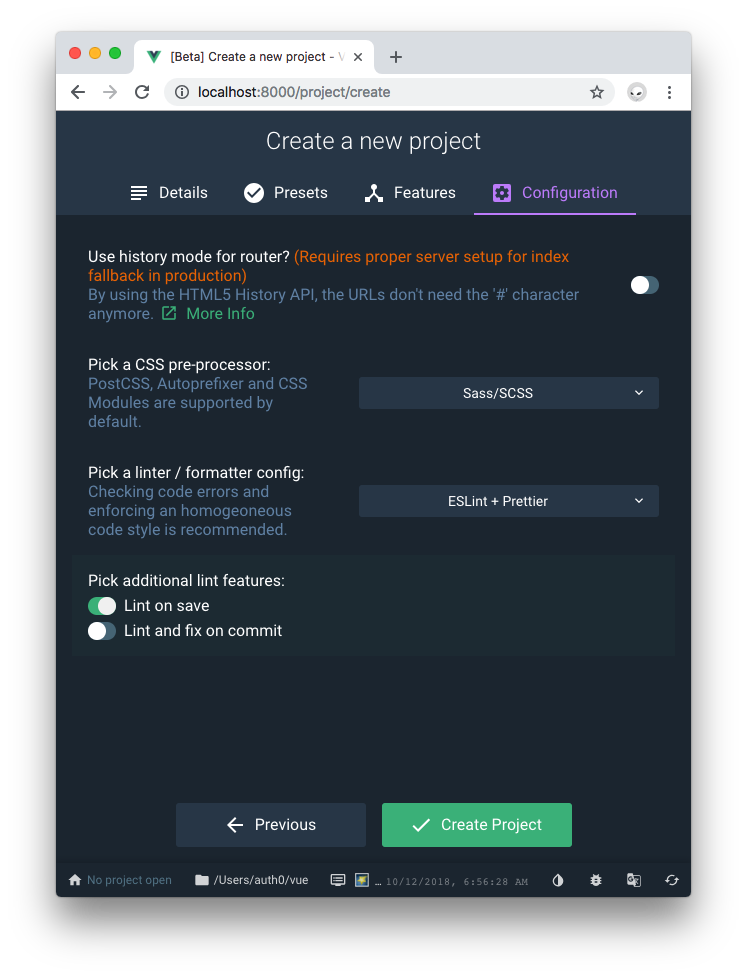
Since you turned on CSS Pre-processors, you are given the option to choose a CSS pre-processor: Sass/SCSS, Less, and Stylus. Feel free to choose any of them.
Next, since this is a manual preset configuration, you need to specify which linter you want to use for the project. The drop-down reveals different options. My preferred one is "ESLint + Prettier". Choose the one you'd like the most.
Finally, you can choose whether you want the linting process to kick in on save or on commit. I like to lint my projects on save so that my files look clean and organized while I am coding — it helps with readability too!
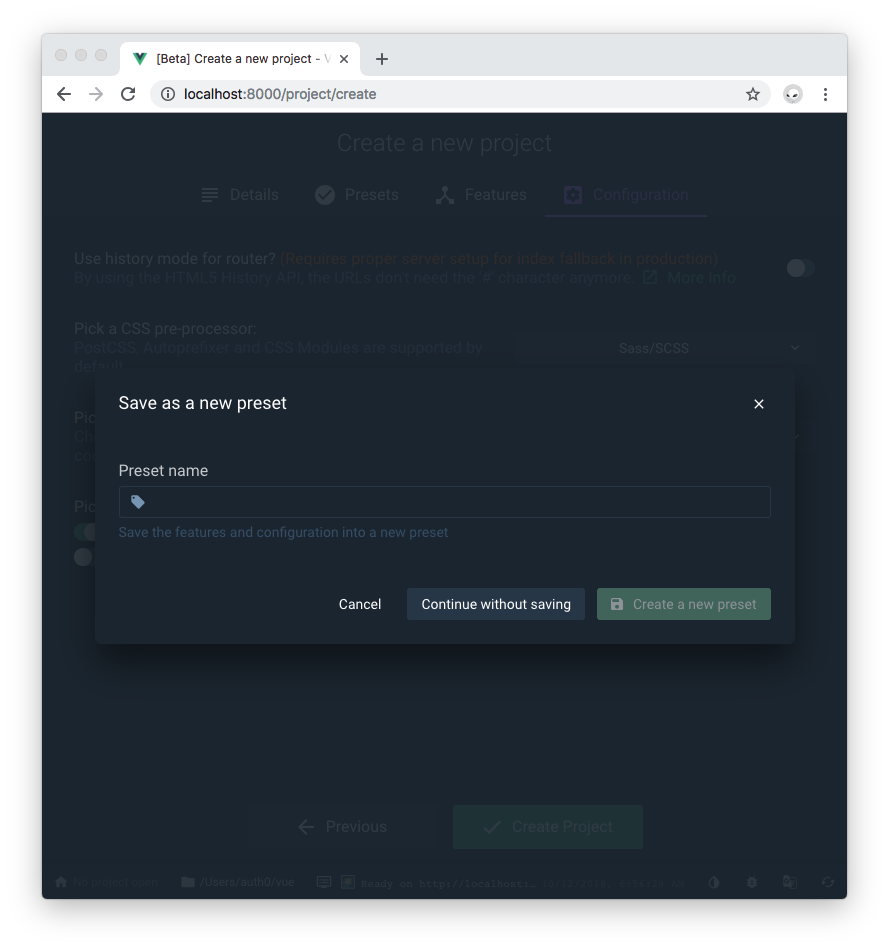
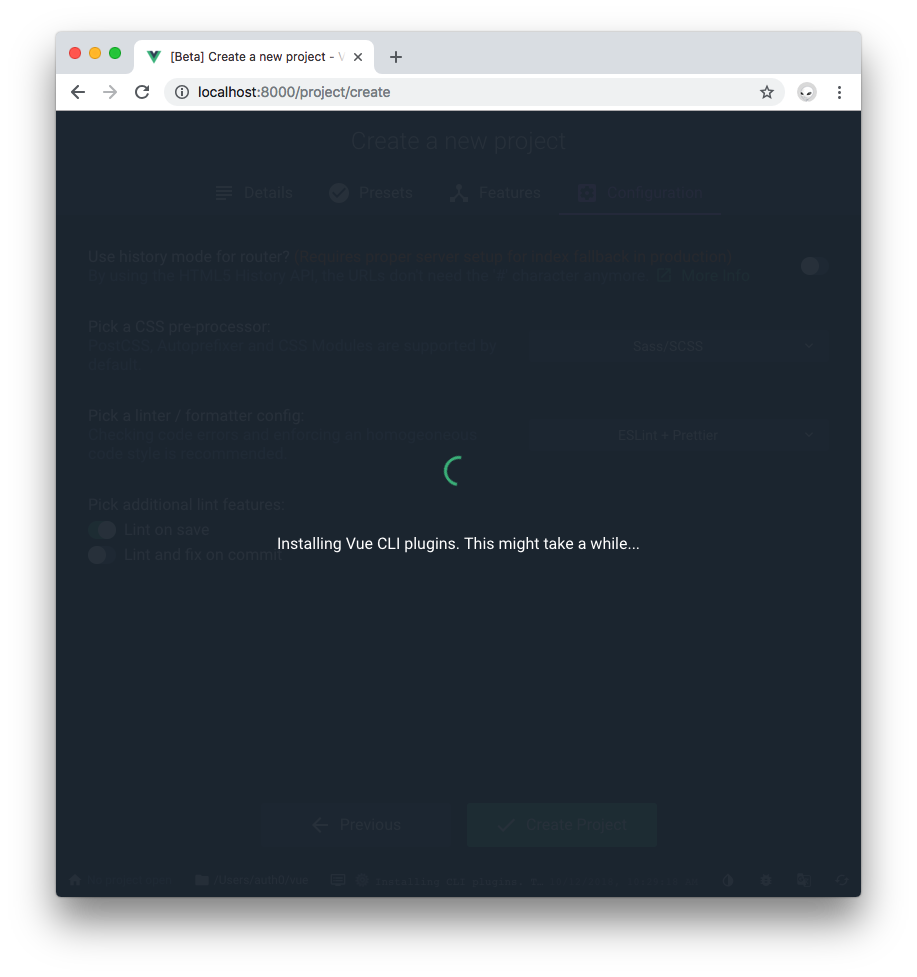
You are all set. Go ahead and smash that "Create Project" button to kick in the project scaffolding process. Not so fast though... The VPM wants to know if you'd like to save your current custom presents to reuse them on a future project creation. Feel free to do so or click on "Continue without saving":
The build process can take from seconds to a few minutes depending on your system. While the VPM is working on that you'll see the build screens:
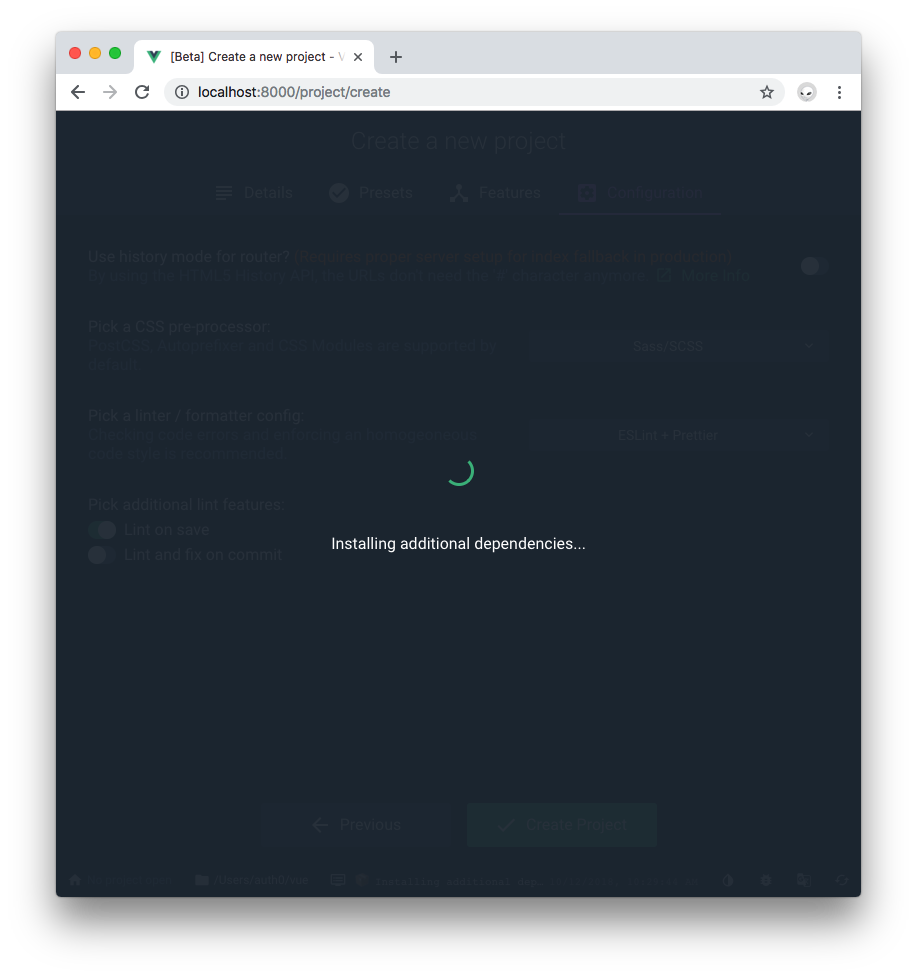
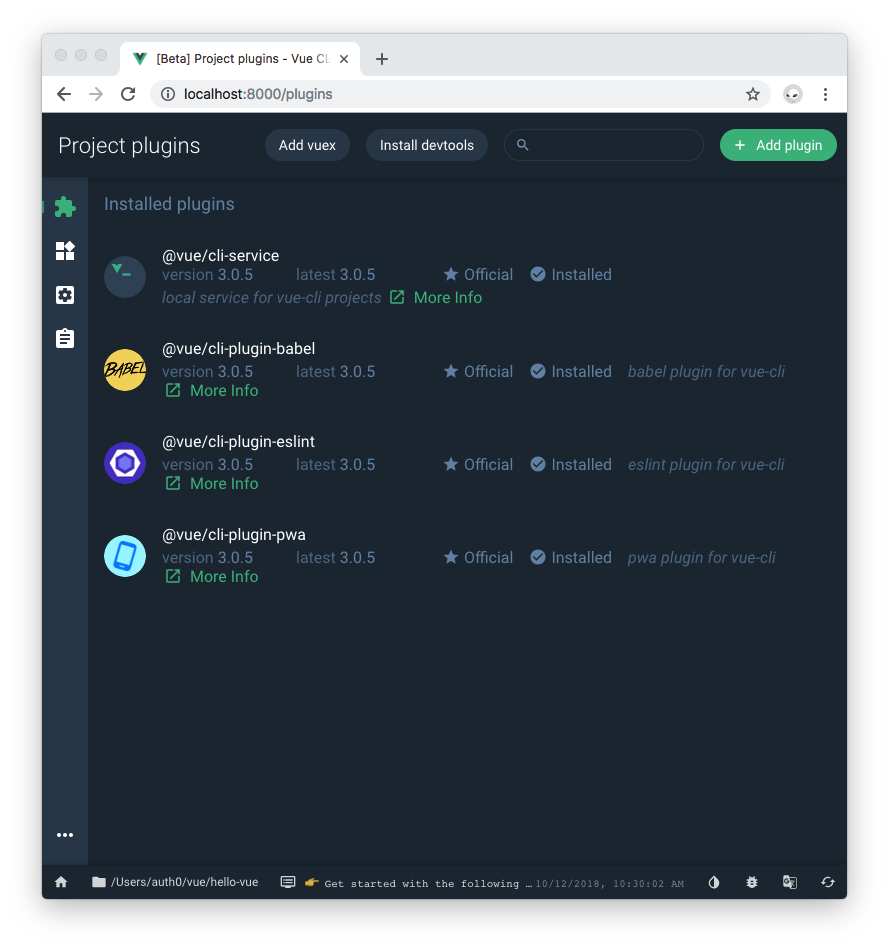
Once it is finished, you'll be taken to the "Projects plugins" view of the VPM:
If your browser supports desktop notifications and they have been enabled, you will get a notification when the build process is complete.
Managing Projects with the Vue Project Manager
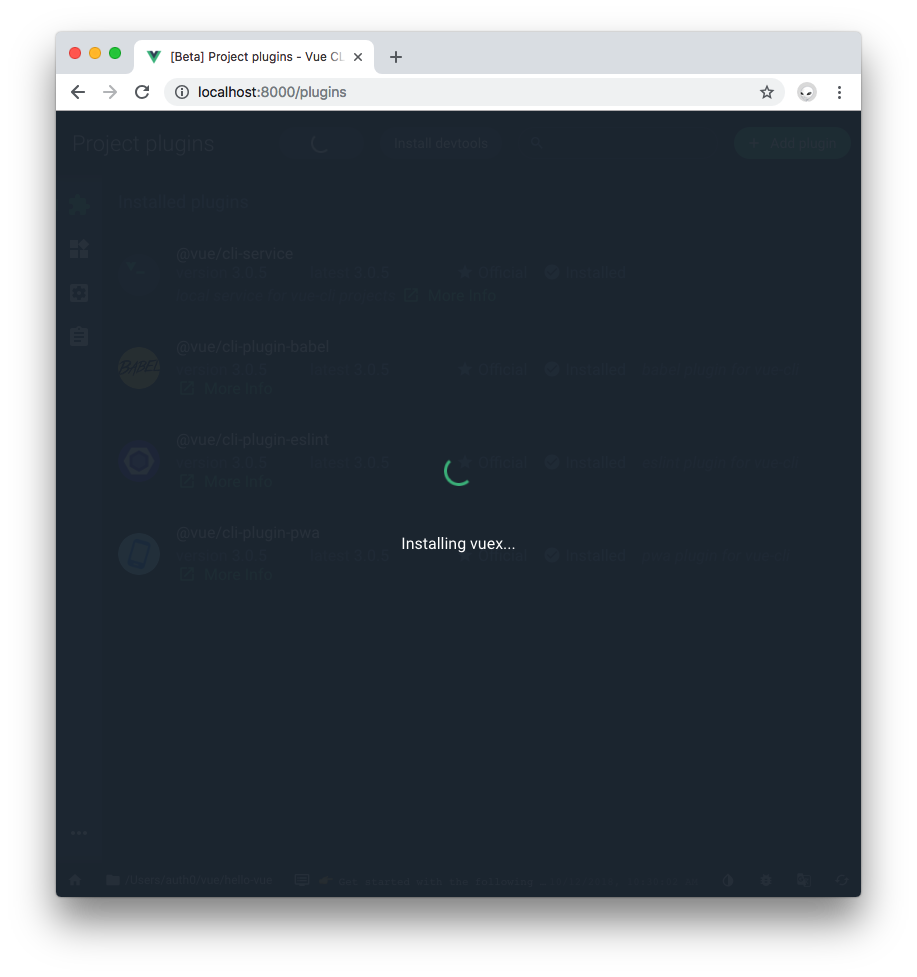
The "Projects plugins" screen lists all the plugins that have been installed in the application. It also lets you add more plugins. The most popular plugins are suggested for installation at the top of the screen. Notice how you have buttons to "Add vuex" and "Install devtools". This is why I asked you not to turn on Vuex during the project creation process. You can do that now using this handy feature: click on "Add vuex"
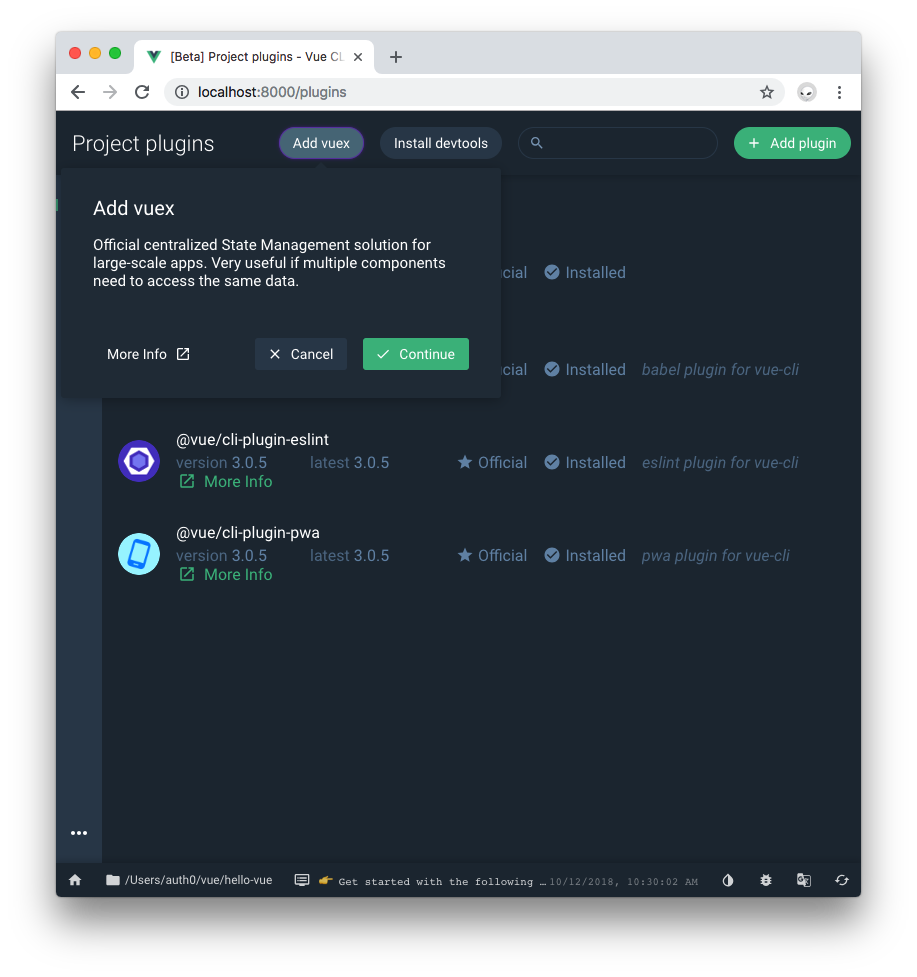
A dialog box comes up with a description of what Vuex is and does, a link to get more information on Vuex, and the option to cancel or continue installation. Go head and click on "Continue". The VPM will start installing Vuex:
Once the installation of Vuex finishes, you are taken back to the "Project plugins" screen again. Notice, however, that the Vuex plugin is not listed. But, if you click on the "Dependencies" button from the left sidebar, you'll see Vuex listed under the "Main dependencies":

On the "Project dependencies", you can also see listed the "Development dependencies". The "Install dependency" button in the top right allows you to install any new dependency without having to use a package manager on the CLI. For practice, click on it and install lodash:
As you can see from the image, the VPM offers visual installation of dependencies. lodash was already in the suggested list of dependencies to install. Alternatively, you can also search for the package that you want to install and then select it from the listed results. For example, to install axios, you type "axios" on the "Search a plugin" input box and click on the first result:

You can choose whether you install it as a main or development dependency by clicking on the header tabs "Main dependencies" and "Development dependencies".
Configuring Projects with Vue Project Manager
The next option from the left sidebar of the VPM to explore is the "Project configuration" tab whose icon looks like a gear. This screen offers you the ability to configure options for the Vue CLI, ESLint configuration, and Progressive Web App (PWA) configuration.
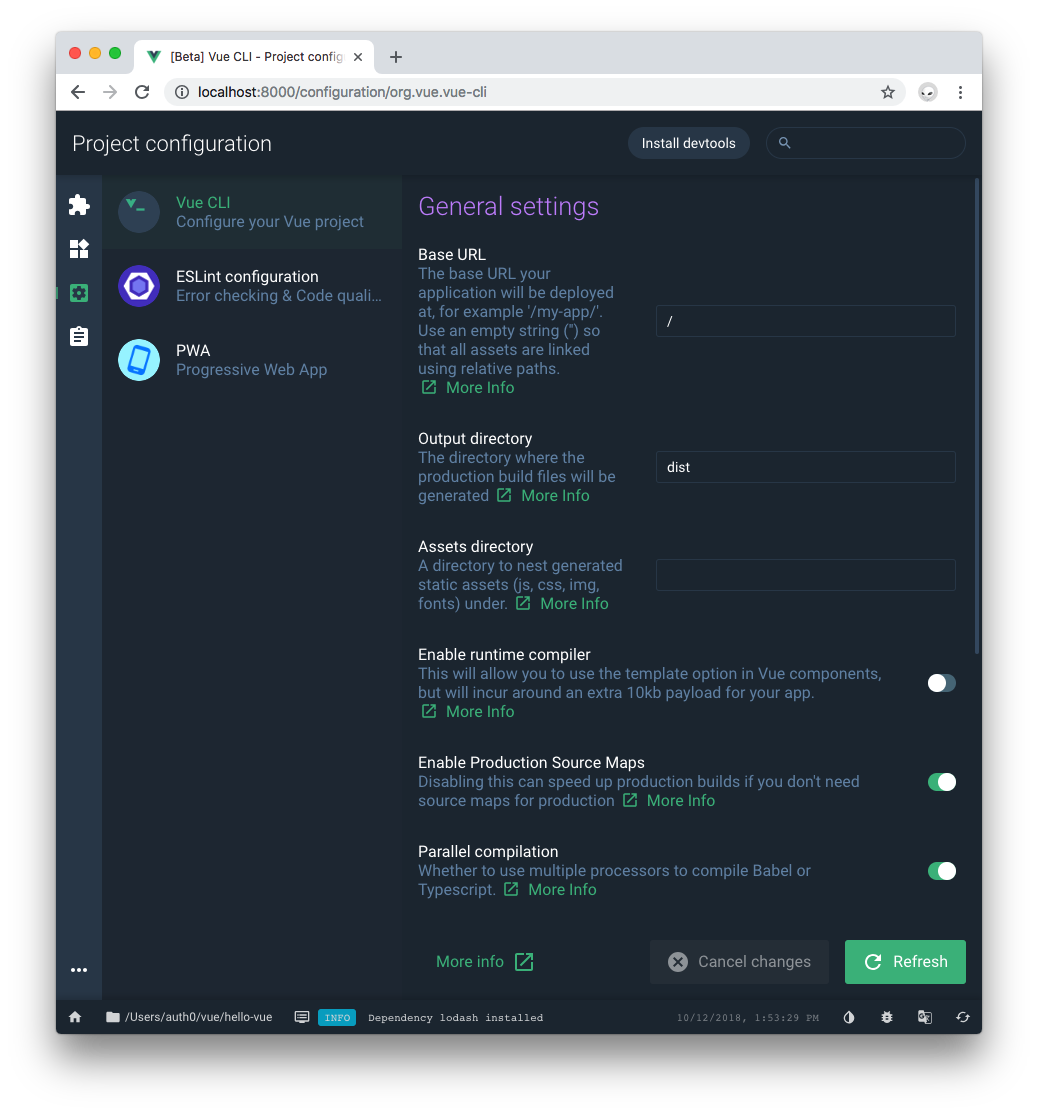
Vue CLI: Here you can configure settings used by the Vue CLI such as base URL, output directory, assets directory, and parallel compilation. You can also enable runtime compiler and production source maps. Learn more about each option by clicking on the "More Info" link. On this area, you can also configure CSS settings such as enabling CSS modules and CSS source maps as well as extracting CSS.
ESLint: Here you can modify the settings for ESLint for error checking and code quality. You can turn off "Lint on save" as well as choose its configuration. The best part of this area is being able to visually configure ESLint Rules.
PWA: Here, you can tweak settings for how the Vue CLI builds a PWA for you. You can choose the webpack plugin to use, the app name, theme color, splash background, Windows app title color, and Apple mobile status bar style. A handy feature here is also being able to open the PWA manifest as shown in the top bar.
Any changes made in the Project configuration screen require you to "Save Changes" for them to take effect. If changes have been made outside of the VPM, you need to click the "Refresh" button to update the VPM with those changes.
“You can configure ESLint rules graphically using the Vue Project Manager available through the Vue CLI. No more hunting rules down on a file!”
Tweet This
Running Tasks with Vue Project Manager
The last option on the left sidebar is the Tasks tab. On this tab, you can visually execute commands to serve, build, lint, and inspect your project application. Instead of having to run such commands on the command line, you can click on the desired command here and run it.
The advantage that you get from running the commands in the Tasks tab instead of the command line is that you get additional visual feedback on the application. For example, click on the serve option.
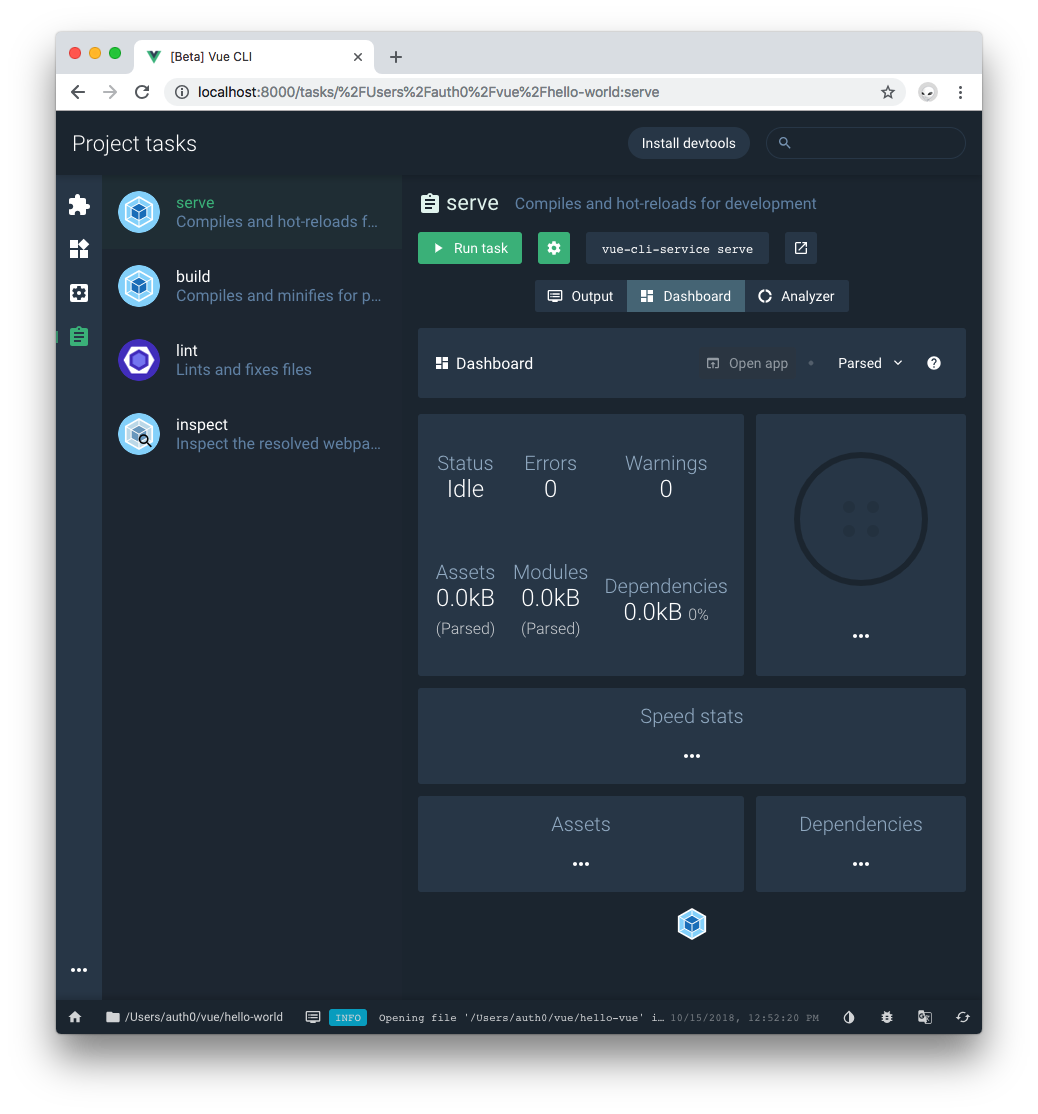
You will then see the serve screen and its many options. To run this task, click on the button "Run task" button. The VPM will show you information on the status of the task, the file size of assets, module, and dependencies. You will also get a count of any errors or warnings.
Another neat feature of this task is that it gives insight on speed stats such as how fast your application loads on different types of internet connections.
Clicking on the "Open app" button takes you to the browser where you will see your app live and running. The VPM excels here on providing a modern approach to running applications without leaving the browser.
Displaying Projects with Vue Project Manager
You have learned how to create a project using the VPM. Any project that you create through the VPM gets automatically added to your Projects in the VPM home screen. To go to the home screen, click on the "home/house" icon in the bottom left. Click on the "Projects" tab and you'll see the hello-vue project listed:
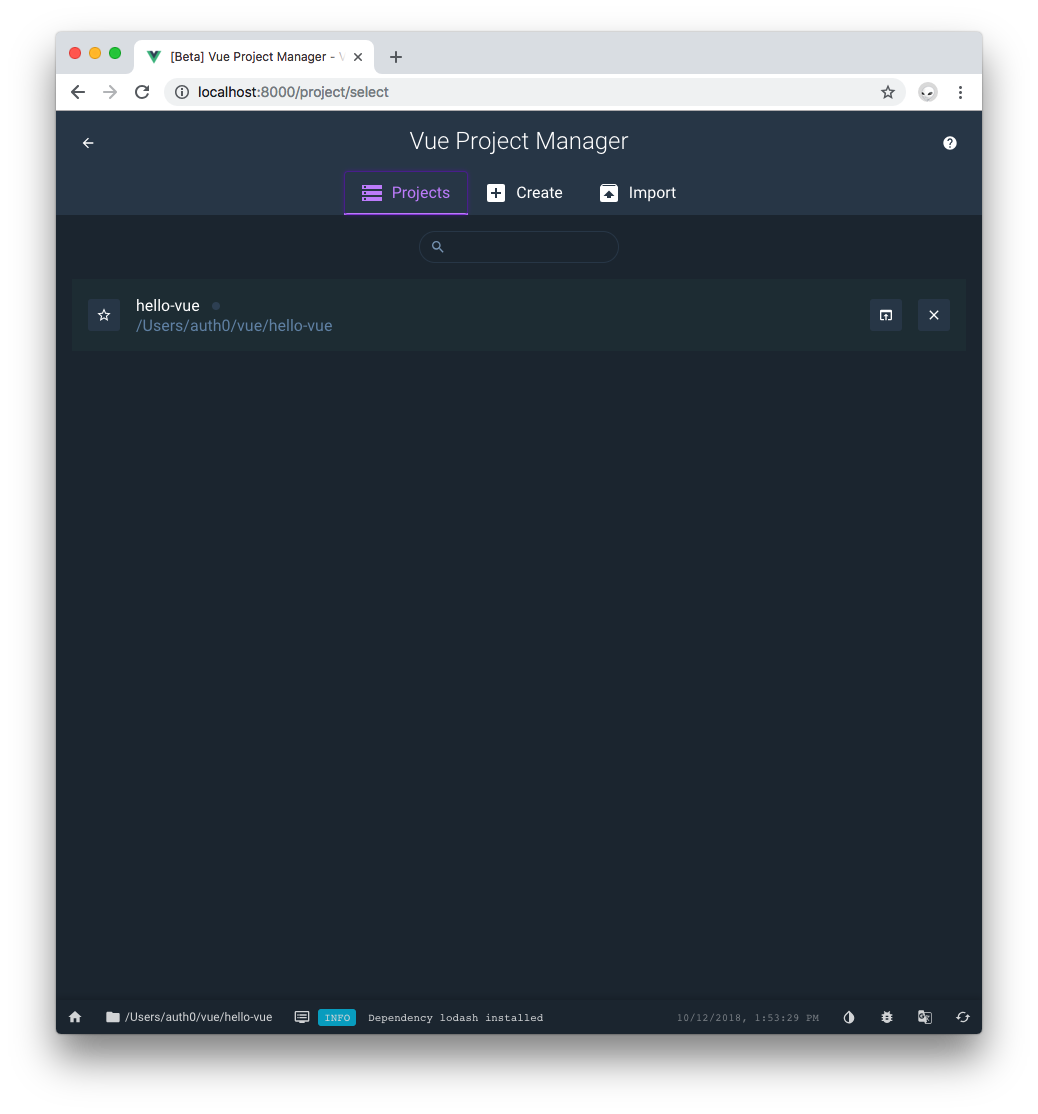
Each project listed offers you the ability to star it as favorite or remove it from the VPM projects. However, the most useful feature is to be able to open it on your editor by clicking the button to the left of the "Remove" button.
Importing Projects to Vue Project Manager
Aside from creating project through the VPM, you can also import an existing one. Head to the terminal, ensure that the Vue directory you created earlier is the current working directory. Next, create a new project using the Vue CLI:
Global install:
vue create hello-world
npx:
npx @vue/cli create hello-world
Choose any of the project configurations you'd like to use. The goal is just to create an additional project. Once the CLI is done creating the project, you will see that the new hello-world project folder is listed under your current working directory or file system but not in the "Projects" tab of the VPM home screen. The VPM doesn't automatically display or manage projects created outside of it; such projects will have to be imported.
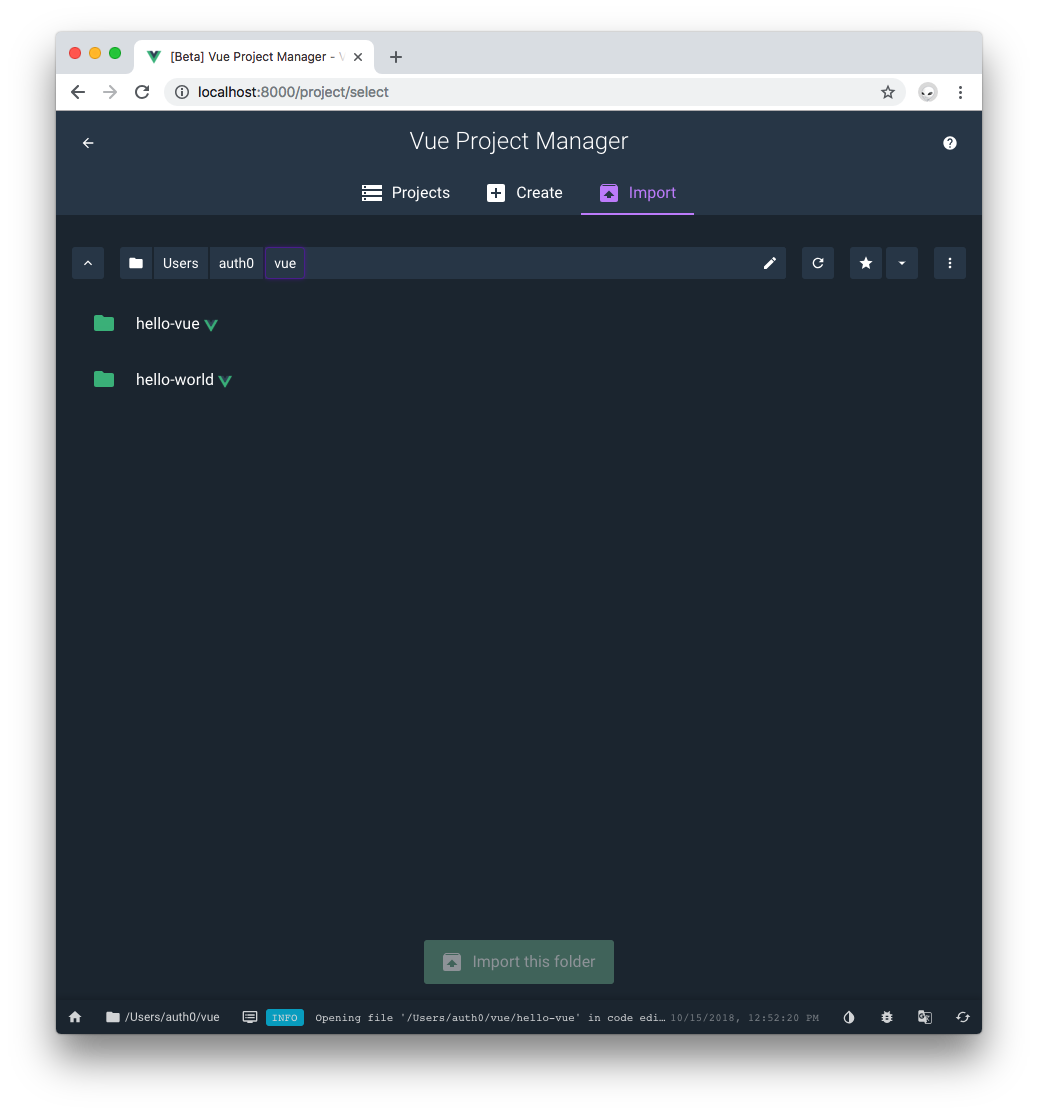
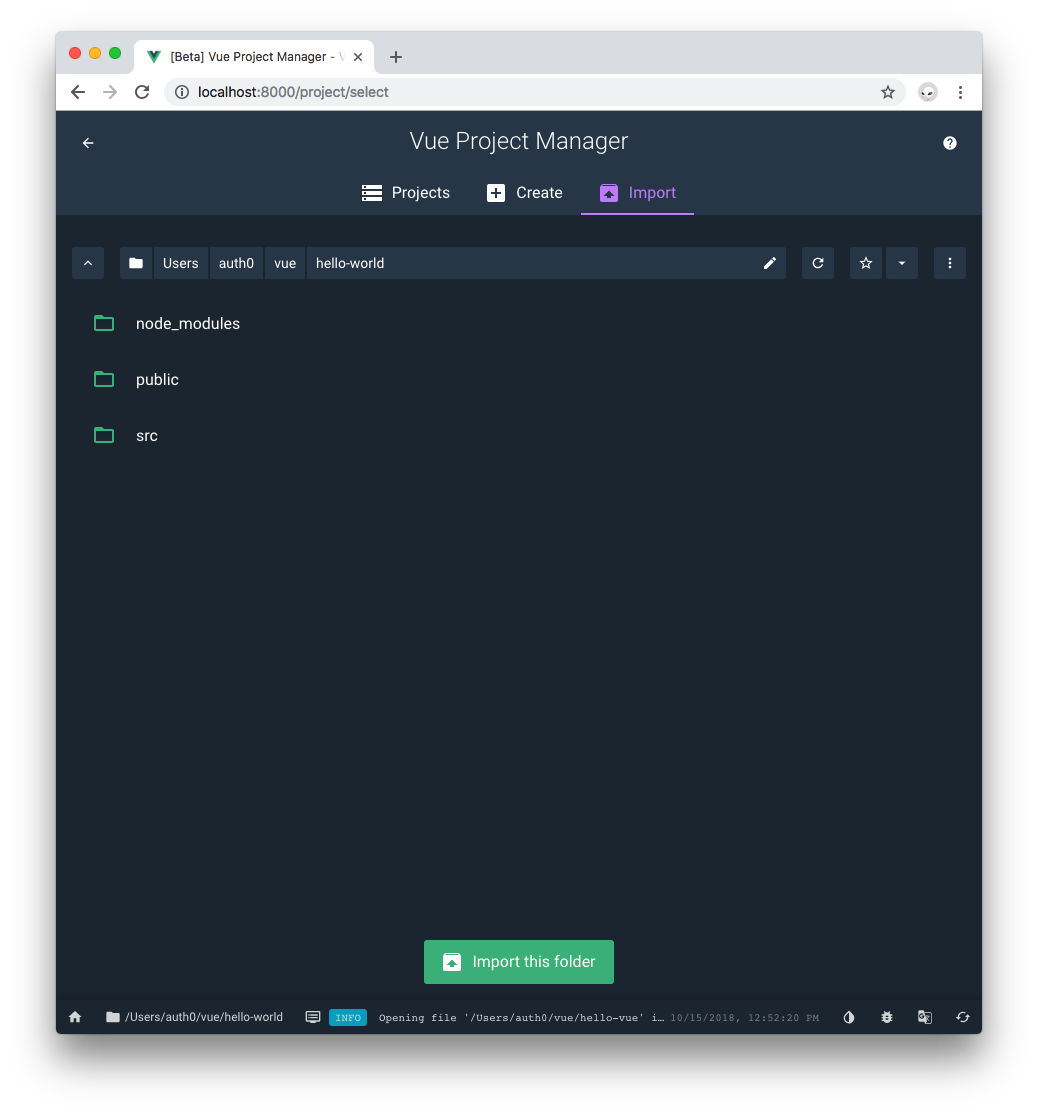
Thus, click on the "Import" tab in the home screen. Once there, use the navigation tool to make your Vue directory the current working directory by clicking on the folder navigation buttons. There, you will see hello-world listed along with hello-vue. Click on the hello-world directory and then click on "Import this folder":
Once the project is imported, you will be taken to the "Project plugins" view. All of the other project management options will be there available for you.
Special Considerations When Importing Projects
Projects that were not created with Vue CLI 3.0 may be missing plugins that are needed for the VPM to offer a comprehensive array of project configuration settings. Open package.json of either hello-vue or hello-world and notice the @vue/cli- listed under devDependencies:
{
  // ...
  "devDependencies": {
    "@vue/cli-plugin-babel": "^3.0.5",
    "@vue/cli-plugin-eslint": "^3.0.5",
    "@vue/cli-plugin-pwa": "^3.0.5",
    "@vue/cli-service": "^3.0.5",
    "@vue/eslint-config-prettier": "^3.0.5",
    "node-sass": "^4.9.0",
    "sass-loader": "^7.0.1",
    "vue-template-compiler": "^2.5.17"
  }
  // ...
}
These are plugins for the Vue CLI that enable extra configurations to be present within the VPM. A handy way to find out which CLI plugins are available is to visit the NPM registry site and search for @vue/cli-plugin. Add any of the relevant plugins to your project by installing them as regular packages.
Recap
You have learned how easy and streamlined it is to create and manage projects with the Vue CLI UI tool. Once it is fired up from the command line, you can perform all the tasks related to configuring or running a Vue project within the browser. The visual presentation of dependencies, plugins, commands, and projects make this tool very intuitive and fast to use. The aesthetics of the VPM are the cherry on top that makes it pleasant to work with.
While a lot of us have become used to creating and running projects from the CLI, using this graphic user interface is worth a try! I hope that you love it as much as I do.
Auth0: Never Compromise on Identity
So you want to build an application? You're going to need to set up user authentication. Implementing it from scratch can be complicated and time-consuming, but with Auth0 it can be done in minutes. For more information, visit https://auth0.com, follow @auth0 on Twitter, or watch the video below:
About the author

Dan Arias
Software Engineer (Auth0 Alumni)