
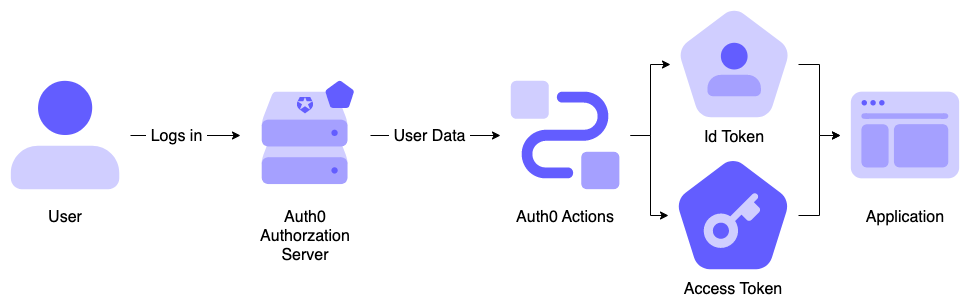
When building an application requiring access control, you might have the need to use roles and permissions. In this blog post, you'll learn roles and permissions, the difference between the two, and how to assign a default role for your users using Auth0 Actions.
Roles and Permissions
The first step to add authorization to your application is to add authentication. Once you guarantee that only authenticated users can access it, you should have more control over who can access what.
In an organization, a role defines what a user can or can't do. Roles are often used to reflect the organizational structure, departments, etc. In relatively small authorization systems, using roles is a fast way to manage access control of resources.
A permission is a declaration of an action that can be executed on a resource.
In Auth0, a role is a collection of permissions that you can apply to users, which can facilitate how you add, remove, and manage permissions because you handle them as a group rather than assigning them to users individually. For example, you could have a role author, and as permissions, you could have create:article, edit:article, and so on.
Creating and Assigning Roles with Auth0
For this blog post you'll need an Auth0 account and a registered API with Auth0, if you don't have one, you can sign up for free.
Get an Auth0 Account for free.
Get started →Create a Role on Auth0
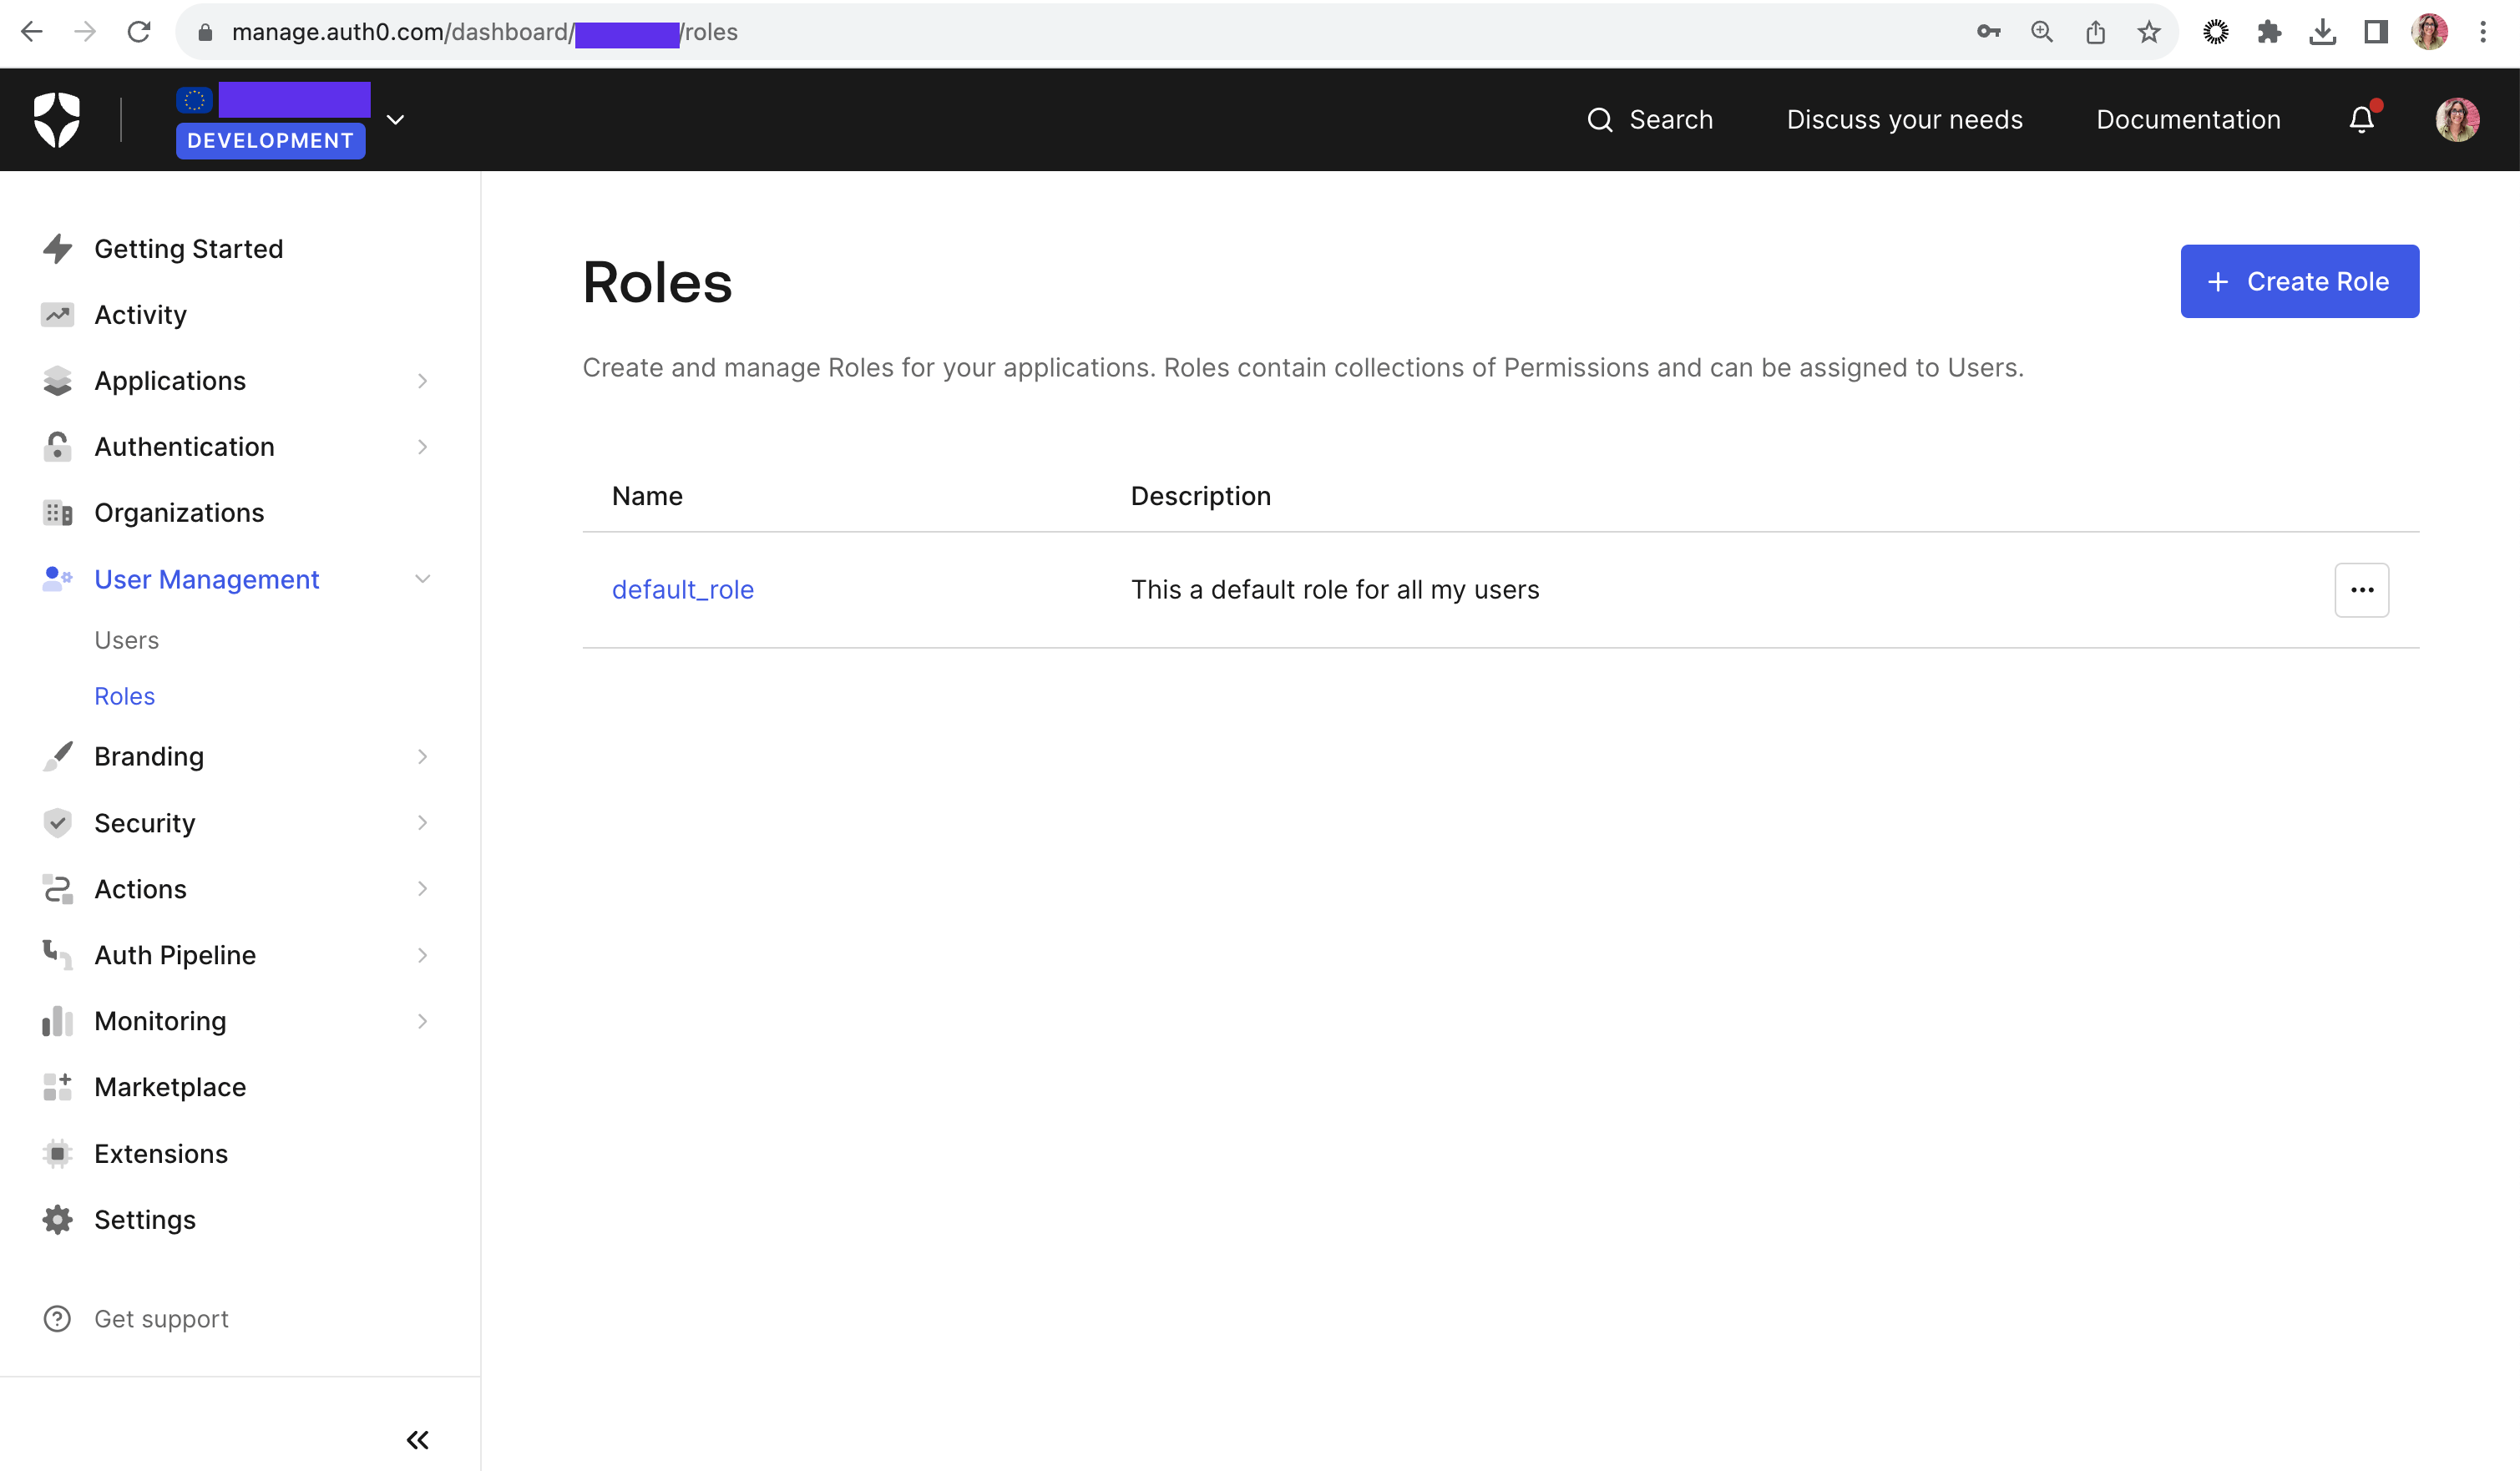
From the Auth0 Dashboard, click on User Management on the sidebar, then Roles. Click the + Create Role button to create a new role. Let's say we want a default role for users, so you can name it default_role and add a meaningful description, then click on Create.
Assigning Roles with Auth0 Actions
Now that you have the role, you need to be able to send it to your application. A simple way to do this with Auth0 is by adding the user's role using the Management API
Adding roles to sign-up is not a built-in feature, so adding an Auth0 Action to the Login Flow is a way to do it. An Action is a JavaScript function that allows you to customize the standard behavior of different Auth0 flows.
Note: you'll use the Login Flow and not Post User Registration flow.
The Post User Registration flow is triggered after a user is added to a Database or Passwordless Connection. The actions that you use in this flow are non-blocking; they run asynchronously, which means the Auth0 pipeline will continue to run without waiting for the Action to finish its execution.

What about the other connections? Well, if your user's sign up using a Social Connection, the Post User Registration flow will not be triggered, but the Login Flow will, because in Auth0, whenever a user signs up, they are immediately logged in afterward.
In the Login Flow, the post-login trigger will be executed after a user logs in and when a Refresh Token is requested, which is exactly what you need because you want your action to execute regardless of the database connection used.
You can check out the official docs to learn more about Actions Flows and Triggers.
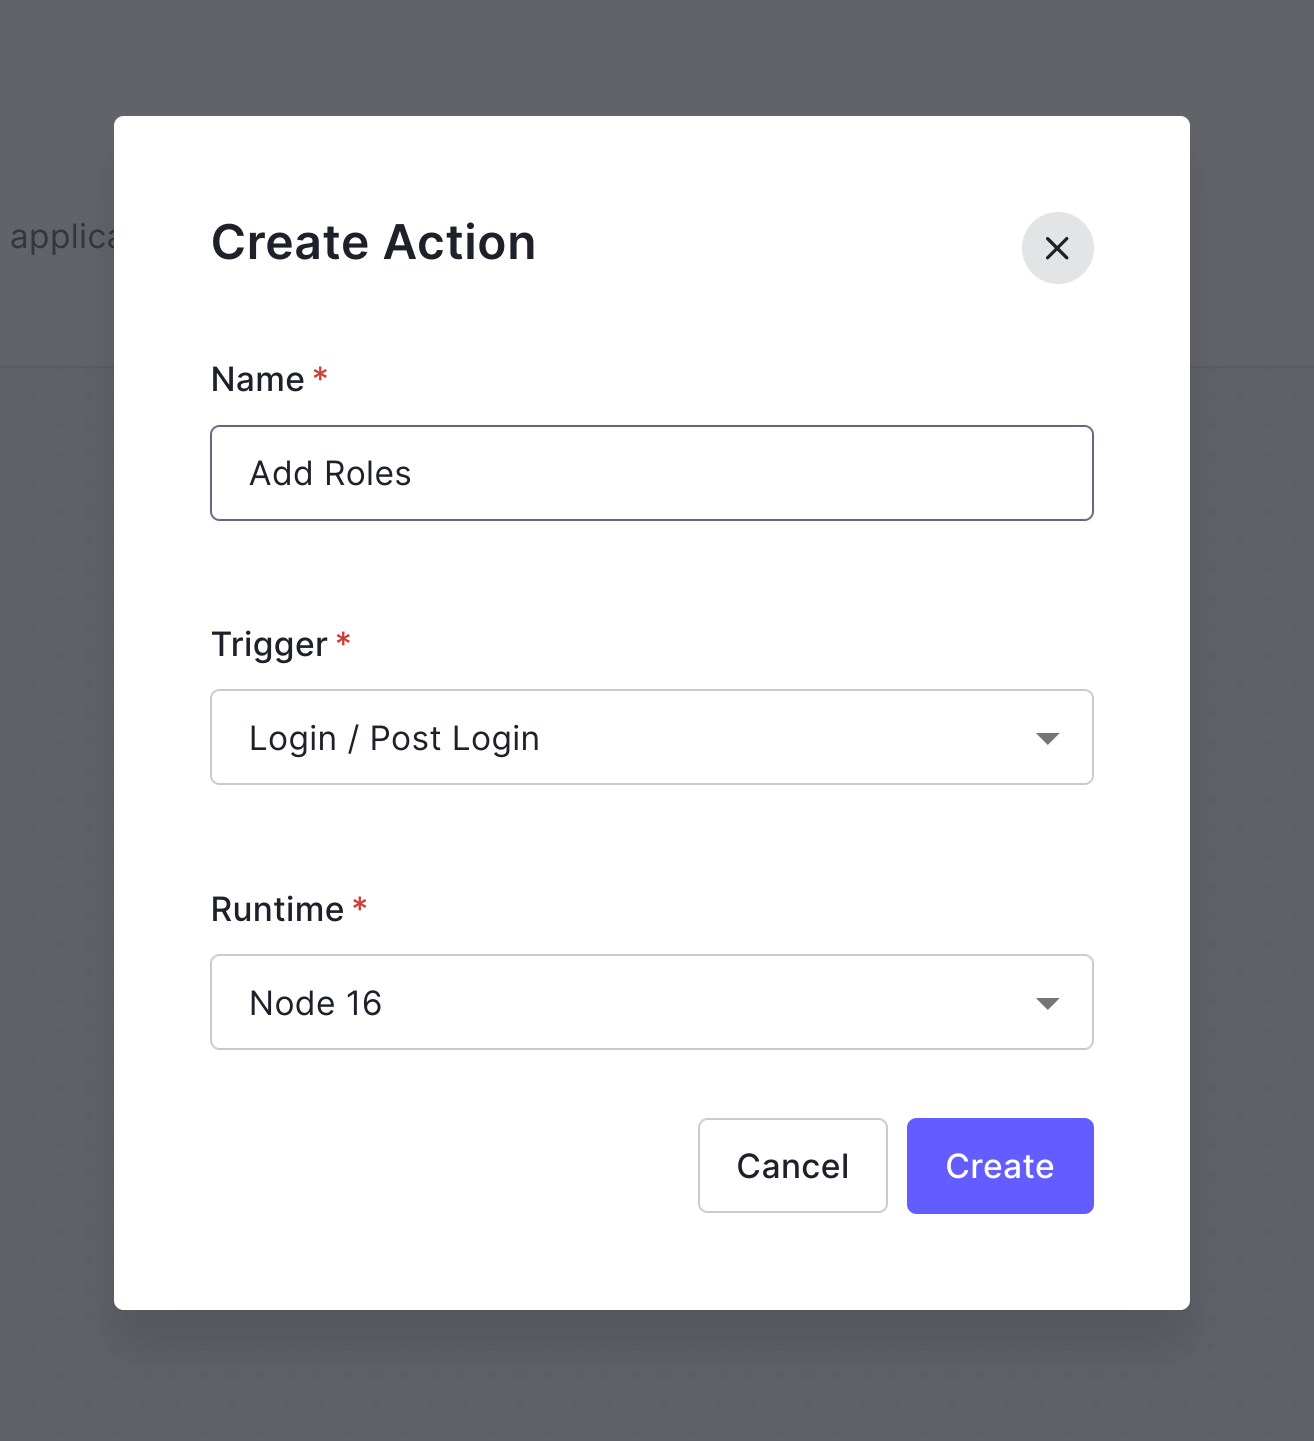
From the Auth0 Dashboard, click on Actions and then Library. Next, click on the Build Custom button. In the modal that opens up, add a name for the action, select the Login/Post Login trigger, and then click on Create.
The Actions editor will open, and inside the onExecutePostLogin function, add the following code:
/**
* Handler that will be called during the execution of a PostLogin Flow.
*
* @param {Event} event - Details about the user and the context in which they are logging in.
* @param {PostLoginAPI} api - Interface whose methods can be used to change the behavior of the login.
*/
exports.onExecutePostLogin = async (event, api) => {

  // Check if the user has a role assigned
  if (event.authorization && event.authorization.roles && event.authorization.roles.length > 0) {
    return;
  }

  // Create management API client instance
  const ManagementClient = require("auth0").ManagementClient;

  const management = new ManagementClient({
    domain: event.secrets.DOMAIN,
    clientId: event.secrets.CLIENT_ID,
    clientSecret: event.secrets.CLIENT_SECRET,
  });

  const params =  { id : event.user.user_id };
  const data = { "roles" : ["YOUR_ROLE_ID"] };

  try {
    await management.users.assignRoles(params, data);
  } catch (e) {
    console.log(e);
  }
};
Let's take a look at what this code does, starting with the first if statement:
if (event.authorization && event.authorization.roles && event.authorization.roles.length > 0) {
  return;
}
You are checking that the user has a role assigned, which, in the particular use case of this blog post, means the user has logged in previously. Remember you care about the user's first login, and in Auth0, that happens right after they sign up.
You're using the event object from the Login Flow. The event.authorization object contains information describing the authorization granted to the user who is logging in, and one of its properties is roles, an Array of strings that contains the names of the user's assigned roles.
Then, by using the auth0 NPM package, you create a new Management API client instance and initialize it with the values for domain, clientId, and clientSecret:
const ManagementClient = require("auth0").ManagementClient;

const management = new ManagementClient({
  domain: event.secrets.domain,
  clientId: event.secrets.cliendId,
  clientSecret: event.secrets.clientSecret,
});
For this code to work, you must install the auth0 NPM package. You can do so using the dependency manager on the sidebar in your Actions Code Editor.
You also need to add the values for domain, clientId, and clientSecret to the Actions' Secret Manager. You can find the values for these variables in your Auth0 Application Settings page.
Next, you're initializing the payload to send it to the management API. To add a role to a user, you'll use the method assignRoles, which associates a role with a user. The first parameter is an object with the user's ID, and the second is an object with an array of roles.
const params =  { id : event.user.user_id };
const data = { "roles" : ["YOUR_ROLE_ID"] };
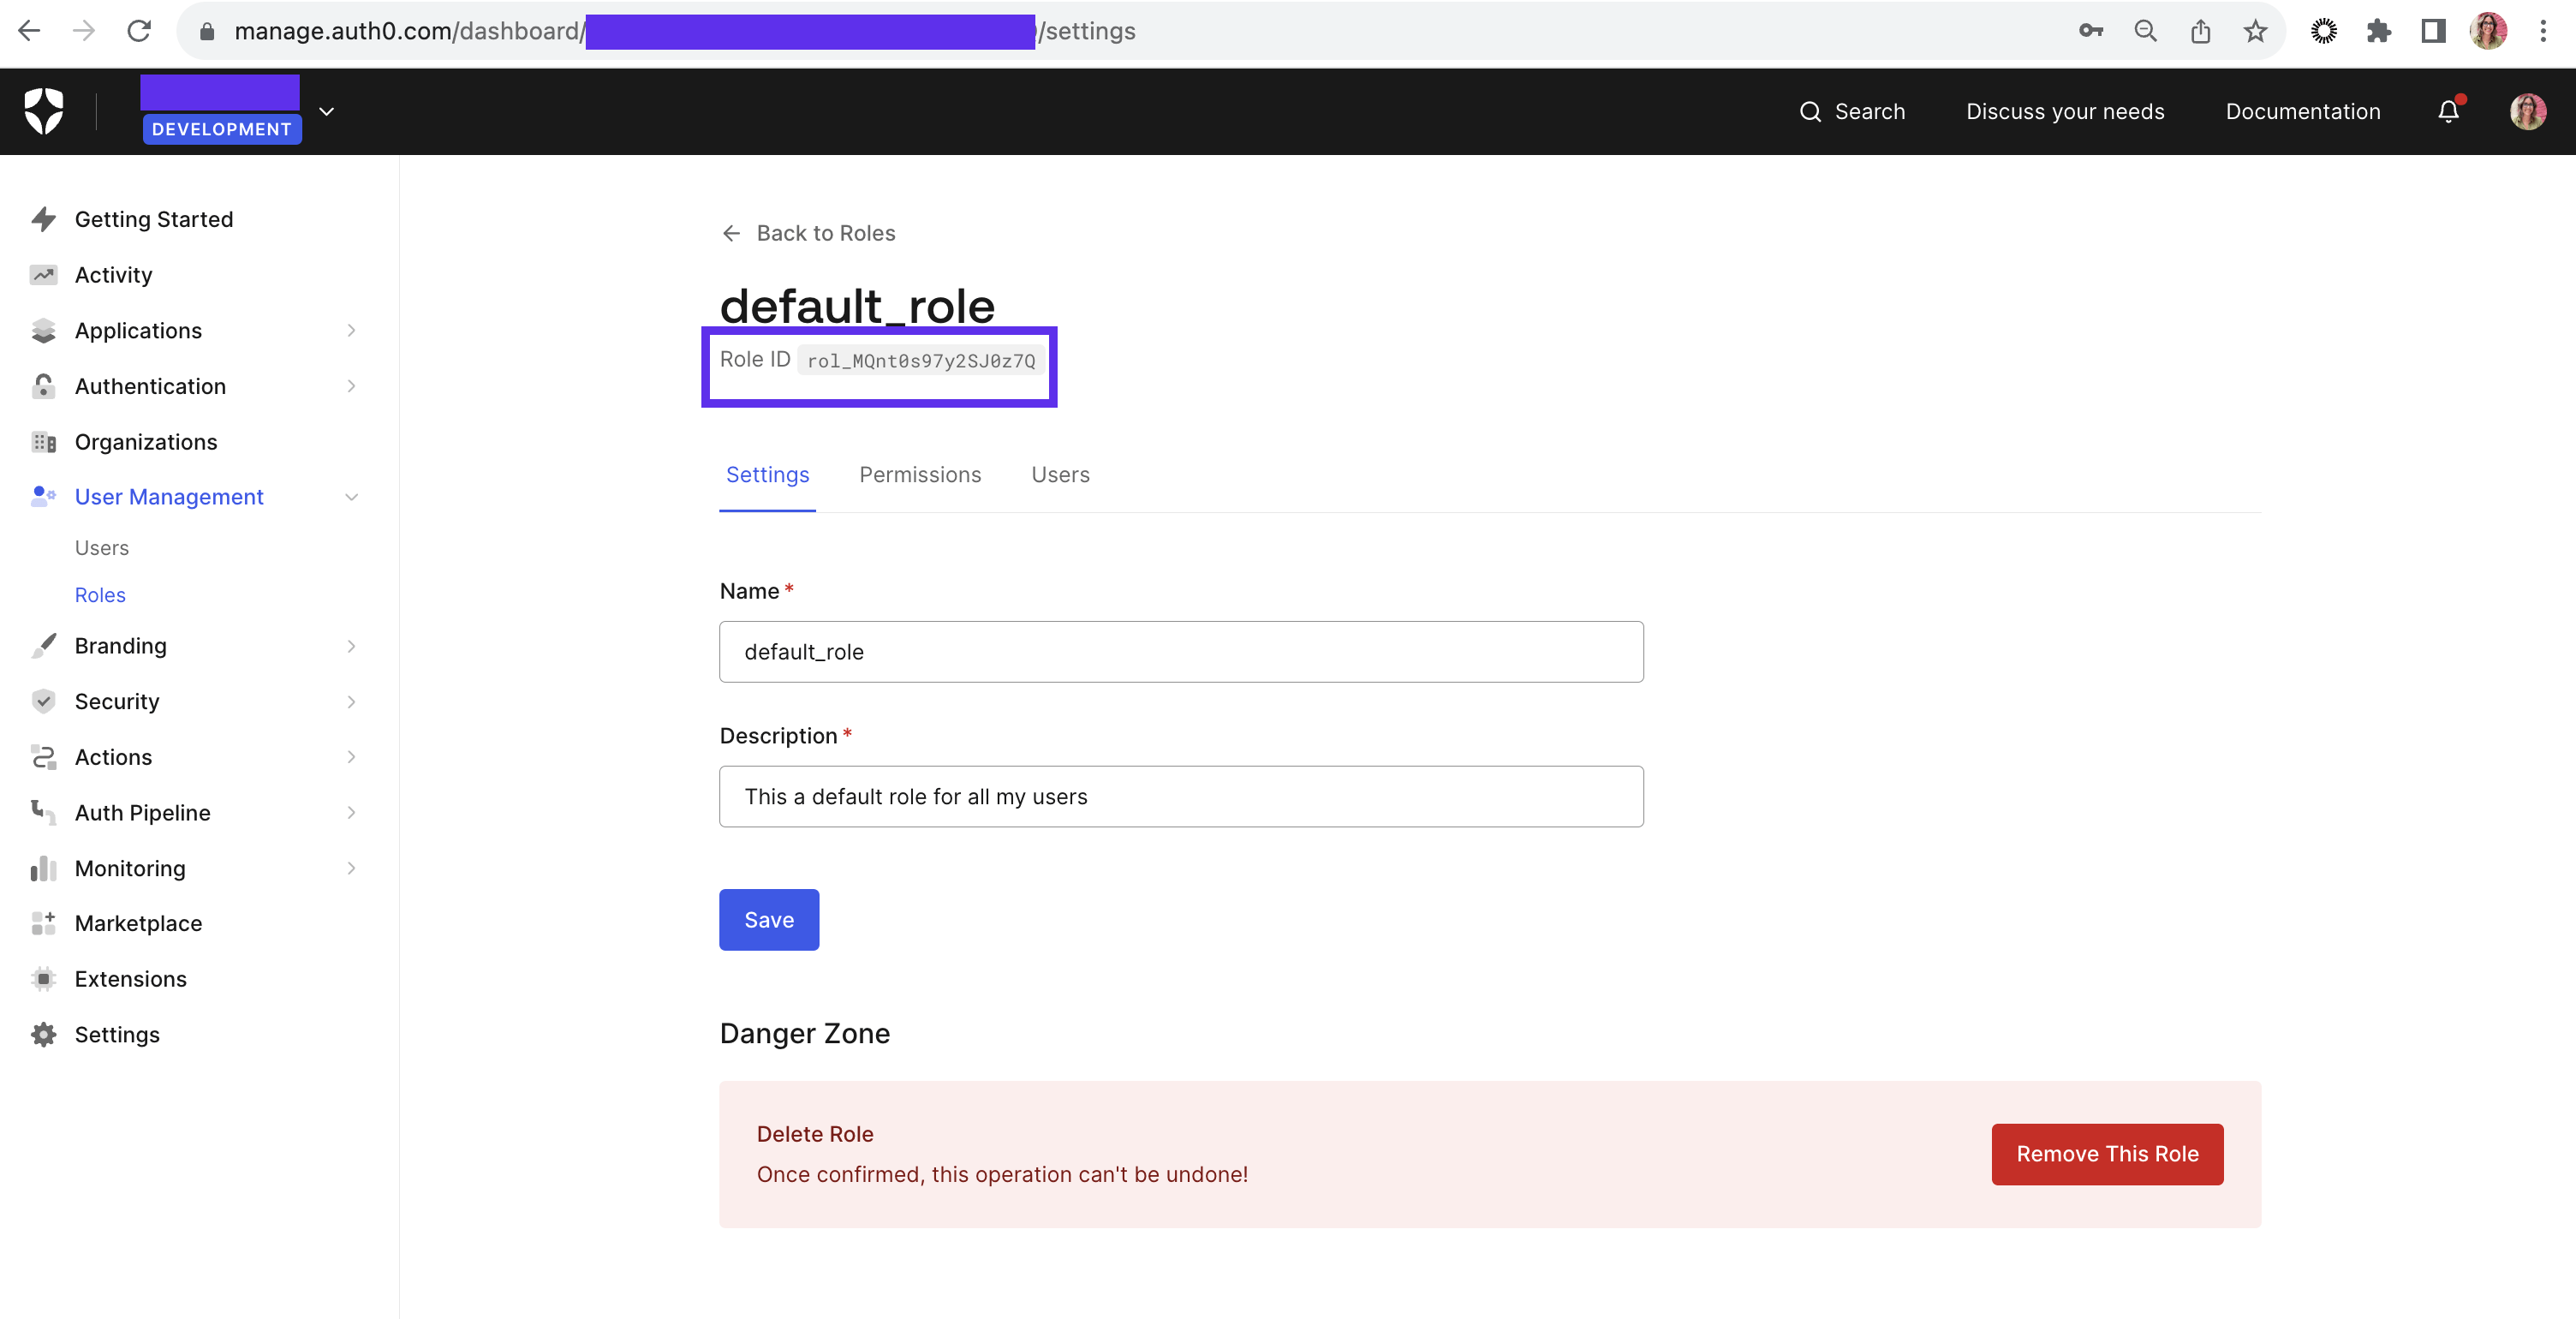
Note here you're passing YOUR_ROLE_ID; here, you'd need to pass the role ID, which you can find on the Auth0 Dashboard by navigating on the sidebar to User Management> Roles. Select the role you want to see details of, and you'll see the Role ID.
Finally, you're making the call to the Management API's method assignRoles and passing the parameters you initialized in the previous step:
try {
  await management.users.assignRoles(params, data);
} catch (e) {
  console.log(e);
}
You can test the action within the editor using the user ID of a test user you have already created but has no role assigned yet. After logging in, the user should have the role assigned!
Once you're happy with your action, you can go ahead and click on the Deploy button in the top-right corner.
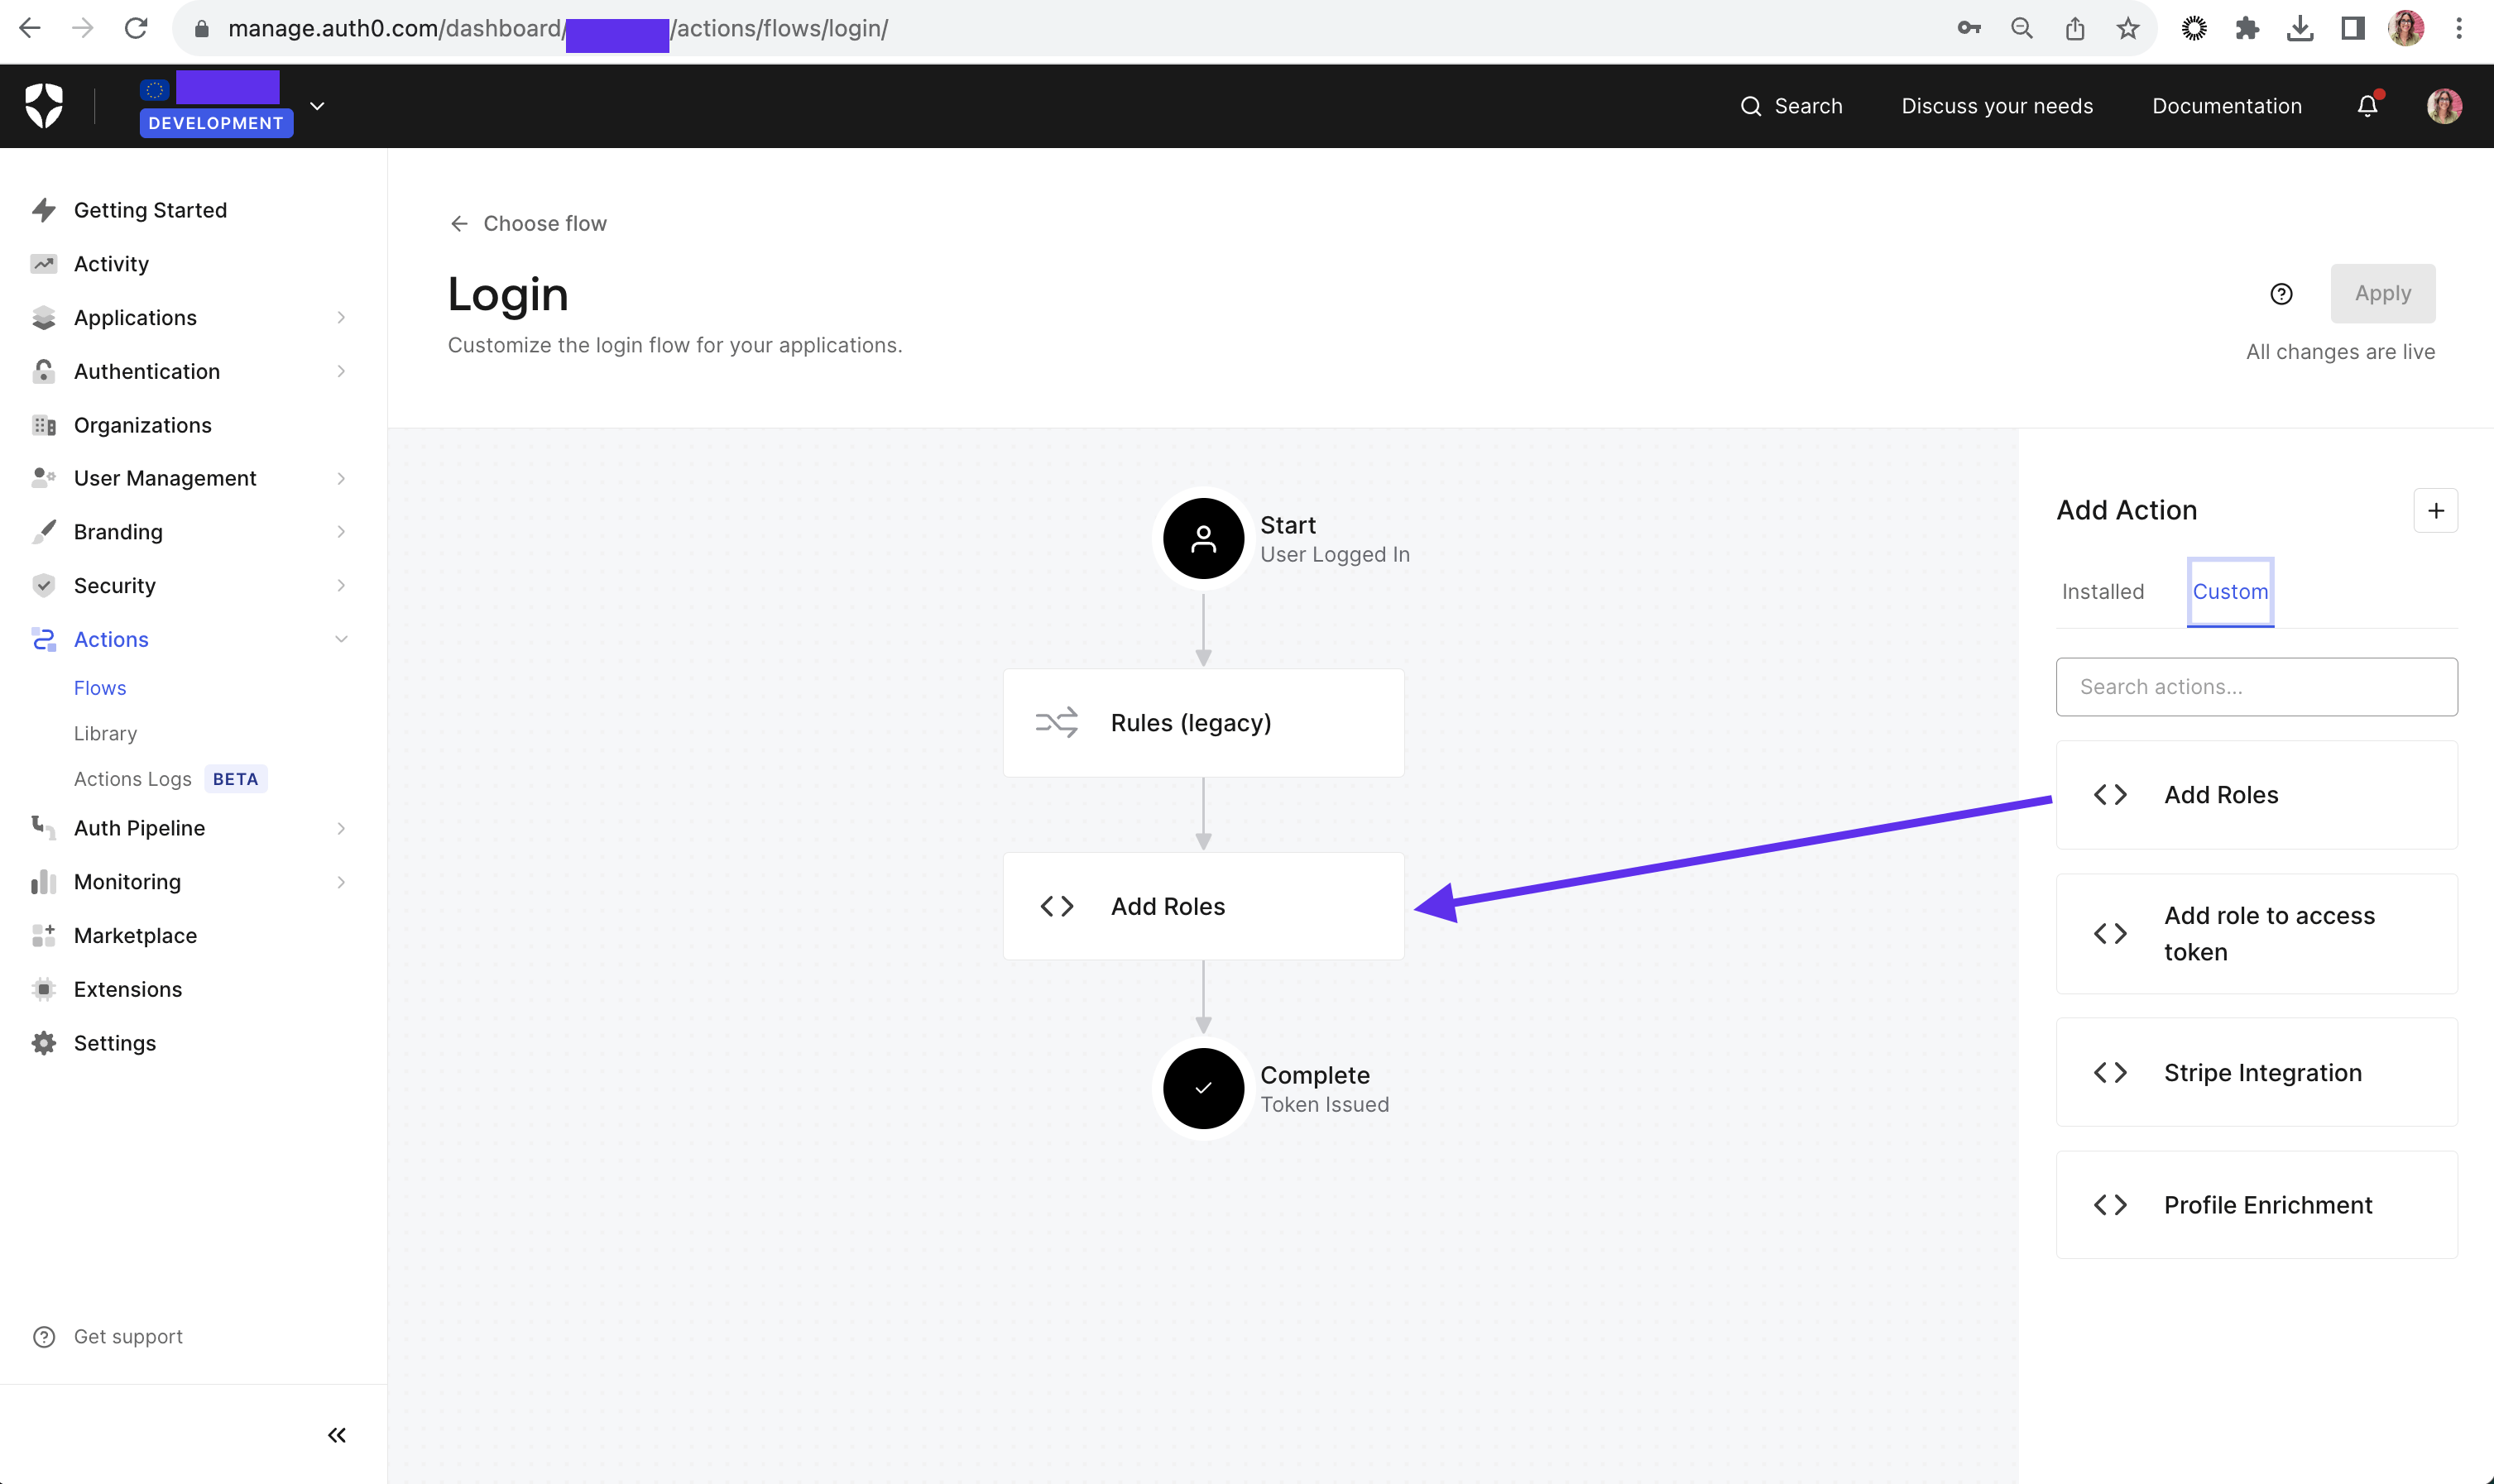
The last step is to add your action to the Login Flow. From the Auth0 Dashboard sidebar, go to Actions > Flows > Login.
Once in the Login Flow view, click on Custom on the right side to add the action you just created. Then, drag your action into the Login Flow and place it between the Start and Complete steps.
Summary
In this blog post, you learned about roles and permissions and that in Auth0, a role is a collection of permissions.
Then, you implemented an Auth0 Action to assign users a default role after signing up. For that, you added the auth0 NPM package, created secrets using the Actions Code Editor, and tested and deployed your action.
About the author

Carla Urrea Stabile
Staff Developer Advocate
I've been working as a software engineer since 2014, particularly as a backend engineer and doing system design. I consider myself a language-agnostic developer but if I had to choose, I like to work with Ruby and Python.
After realizing how fun it was to create content and share experiences with the developer community I made the switch to Developer Advocacy. I like to learn and work with new technologies.
When I'm not coding or creating content you could probably find me going on a bike ride, hiking, or just hanging out with my dog, Dasha.