


TL;DR: Throughout this article, we will use Flask and Python to develop a RESTful API. We will create an endpoint that returns static data (dictionaries). Afterward, we will create a class with two specializations and a few endpoints to insert and retrieve instances of these classes. Finally, we will look at how to run the API on a Docker container. The final code developed throughout this article is available in this GitHub repository. I hope you enjoy it!
“Flask allows Python developers to create lightweight RESTful APIs.”
Tweet This
Why Python?
According to GitHub Octoverse 2024 Python is the most popular programming language in 2024. The popularity of Python is due to its simplicity and flexibility; it allows a developer to create a wide range of applications such as web applications (Django, Flask, FastAPI), Data Analysis services (Pandas), Machine Learning tools (Pytorch) and easy integration with LLMs (LlamaIndex, LangGraph). StackOverflow recently analyzed that Python is among the top five most popular programming languages in its developer survey.
Python’s popularity is not a fashion trend, but a long-term trend that shows how important the language is for the industry. The popularity also increases the community around the language, which improves library availability and support around the development cycle. Nowadays, the number of Python articles even improves LLM's code snippet quality using the language.
Why Flask?
Flask and FastAPI dispute the Python API development market. FastAPI is the most starred framework on GitHub, with a full feature suite and more modern, with tools like automatic Swagger UI and is an excellent choice for APIs. However, Flask offers simplicity as it is a microframework, designed for quick prototyping, building microservices and tiny applications.
Being lightweight, easy to adopt, well-documented, and popular, Flask is a good option for developing RESTful APIs
Bootstrapping a Flask Application
In the below lines, we are going to use the following tools
Installing Flask
For this example we'll use pip to install flask:
pip install Flask
Note: all tests were made under Flask version 3.1
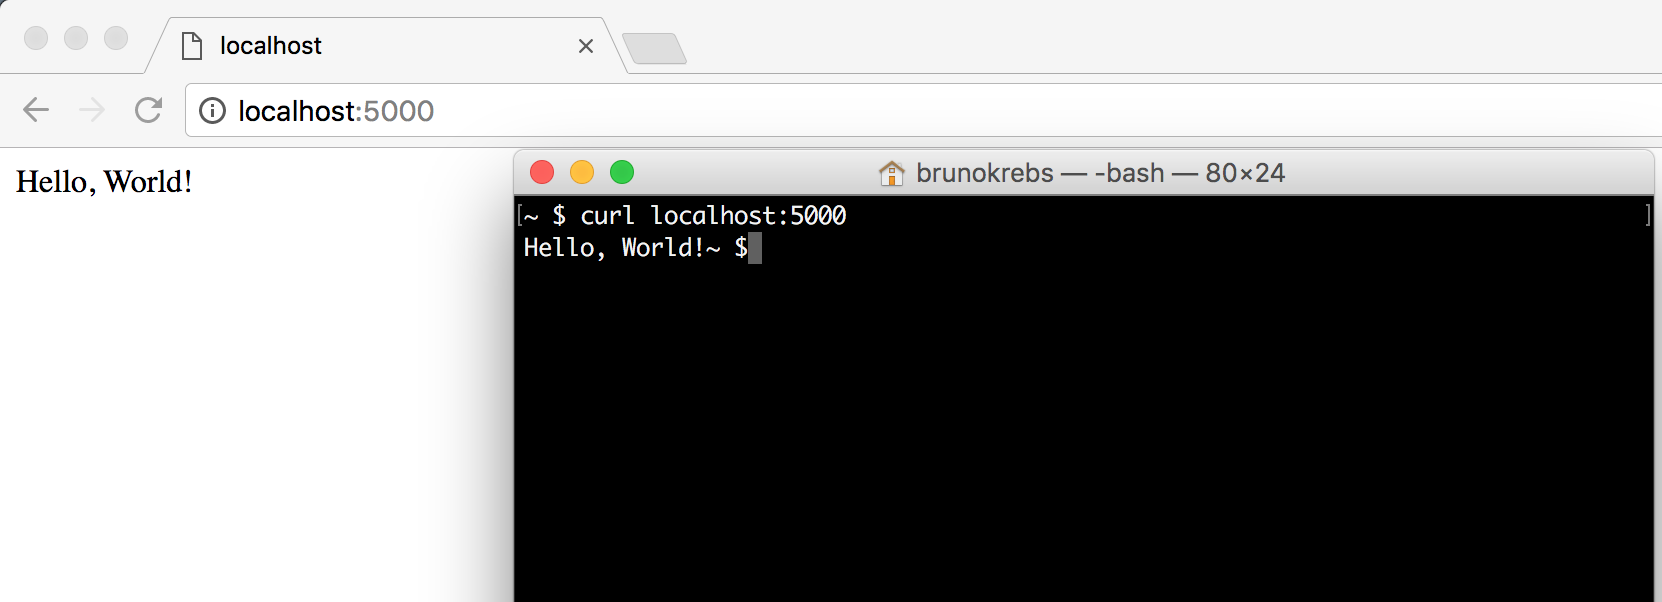
After installing the package, let's create a file called hello.py and add five lines of code to it. As we will use this file to check if Flask was correctly installed, we don't need to test it in a new directory.
# hello.py

from flask import Flask

app = Flask(__name__)

@app.route("/")
def hello_world():
   return "Hello, World!"
These five lines of code are everything we need to handle HTTP requests and return a "Hello, World!" message. To run it, we execute the following command:
flask --app hello run

* Serving Flask app 'hello'
* Debug mode: off
WARNING: This is a development server. Do not use it in a production
deployment. Use a production WSGI server instead.
* Running on http://127.0.0.1:5000
Press CTRL+C to quit
After executing these commands, we can reach our application by opening a browser and navigating to http://127.0.0.1:5000/ or by issuing curl http://127.0.0.1:5000/.
Using a virtual environment and dependency manager
Until now, we use pip to install Flask. However, the tool is not appropriate for serious projects. When working in a team or working in a project that needs multiple dependencies, it is important to use a virtual environment and a dependency manager. A virtual environment will allow us to isolate our project's dependencies and even the Python version from the rest of the system. This allows us to not mess a running application with the dependencies of other projects. A dependency manager will allow us to install and update dependencies in a consistent way, ensuring that the correct versions of the packages will be installed even on multiple development machines.
For this article, we will use UV. This tool replaces several tools that are commonly used to manage Python projects, such as pipenv and poetry. Implemented in Rust, it is extremely fast. To install it, run the following command (check UV website for other installation methods):
curl -LsSf https://astral.sh/uv/install.sh | sh
Now, to start creating a serious Flask application, let's create a new directory that will hold our source code. In this article, we will create Cashman, a small RESTful API that allows users to manage incomes and expenses. Therefore, we need to create a UV project with this name:
uv init cashman-flask-project
Cd cashman-flask-project
The created project will have these files:
pyproject.tomldescribes the project's dependencies and other properties..python-versiontells UV which Python version to use..gitignoretells Git which files to ignore when committing changes.README.mdis a Markdown file that will be used to document the project.main.pyis the application main entrypoint
Now, we can run the following command to start the application:
uv run python main.py
For the first time, UV will automatically create the virtual environment and install and execute the application.
Before creating our application, we need to install Flask:
uv add flask
Python packages
Like other mainstream programming languages, Python also has the concept of packages to enable developers to organize source code according to subjects/functionalities. Similar to Java packages and C# namespaces, packages in Python are files organized in directories that other Python scripts can import. To create a package in a Python application, we need to create a folder and add an empty file called __init__.py.
Let's create our first package in our application, the main package, with all our RESTful endpoints. Inside the application's directory, let's create another one with the same name, cashman. The root cashman-flask-project directory created before will hold metadata about our project, like what dependencies it has, while this new one will be our package with our Python scripts.
# create source code's root
mkdir cashman && cd cashman

# create an empty __init__.py file
touch __init__.py
Inside the main package, let's create a script called index.py. In this script, we will define the first endpoint of our application.
from flask import Flask
app = Flask(__name__)

@app.route("/")
def hello_world():
   return "Hello, World!"
As in the previous example, our application returns a "Hello, world!" message. We will start improving it in a second, but first, let's create an executable file called bootstrap.sh in the root directory of our application.
# move to the root directory
cd ..

# create the file
touch bootstrap.sh

# make it executable
chmod +x bootstrap.sh
The goal of this file is to facilitate the start-up of our application. Its source code will be the following:
#!/bin/sh
export FLASK_APP=./cashman/index.py
uv run flask --debug run -h 0.0.0.0
The first command defines the main script to be executed by Flask. The second command runs our Flask application in the context of the virtual environment listening to all interfaces on the computer (-h 0.0.0.0).
Note: we are setting flask to run in debug mode to enhance our development experience and activate the hot reload feature, so we don't have to restart the server each time we change the code. If you run Flask in production, we recommend updating these settings for production.
To check that this script is working correctly, we run ./bootstrap.sh to get similar results as when executing the "Hello, world!" application.
* Serving Flask app './cashman/index.py'
* Debug mode: on
WARNING: This is a development server. Do not use it in a production deployment.
Use a production WSGI server instead.
* Running on all addresses (0.0.0.0)
* Running on http://127.0.0.1:5000
* Running on http://192.168.1.242:5000
Press CTRL+C to quit
* Restarting with stat
* Debugger is active!
* Debugger PIN: ***
Creating a RESTful Endpoint with Flask
Now that our application is structured, we can start coding some relevant endpoints. As mentioned before, the goal of our application is to help users to manage incomes and expenses. We will begin by defining two endpoints to handle incomes. Let's replace the contents of the ./cashman/index.py file with the following:
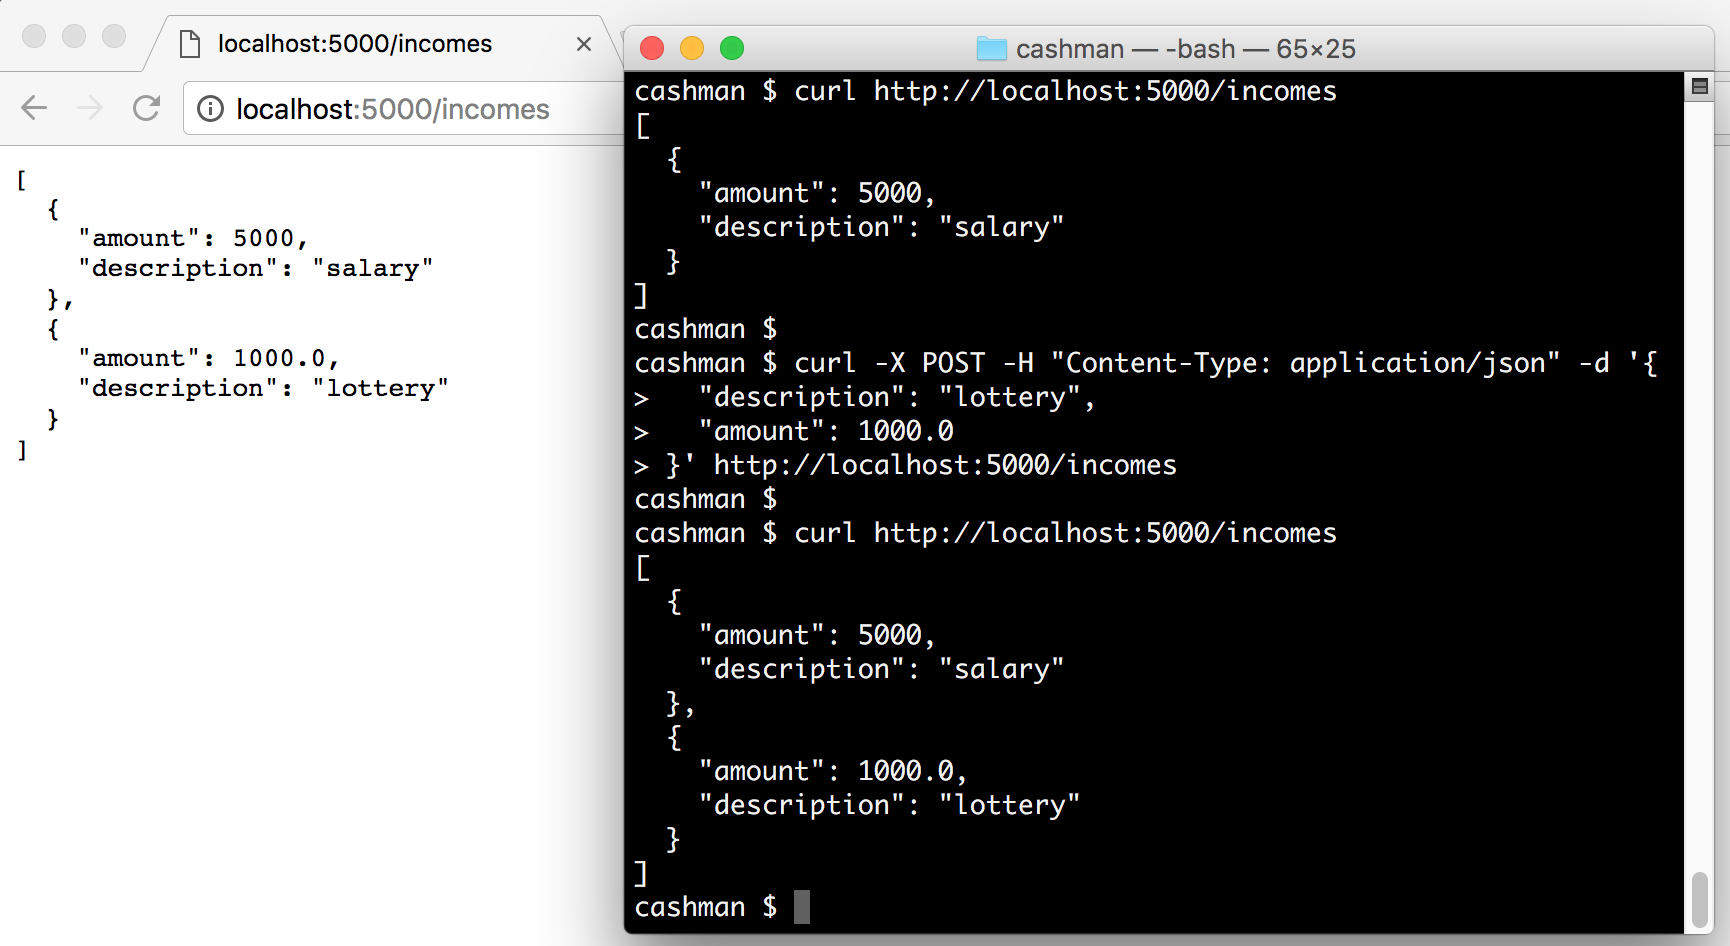
from flask import Flask, jsonify, request

app = Flask(__name__)

incomes = [
   { 'description': 'salary', 'amount': 5000 }
]

@app.route('/incomes')
def get_incomes():
   return jsonify(incomes)

@app.route('/incomes', methods=['POST'])
def add_income():
   incomes.append(request.get_json())
   return '', 204
Since improving our application, we have removed the endpoint that returned "Hello, world!" to users. In its place, we defined an endpoint to handle HTTP GET requests to return incomes and another endpoint to handle HTTP POST requests to add new ones. These endpoints are annotated with @app.route to define routes listening to requests on the /incomes endpoint. Flask provides great documentation on what exactly this does.
To facilitate the process, we currently manipulate incomes as dictionaries. However, we will soon create classes to represent incomes and expenses.
To interact with both endpoints that we have created, we can start our application and issue some HTTP requests:
# start the cashman application
./bootstrap.sh &

# get incomes
curl http://localhost:5000/incomes

# add new income
curl -X POST -H "Content-Type: application/json" -d '{
 "description": "lottery",
 "amount": 1000.0
}' http://localhost:5000/incomes

# check if lottery was added
curl localhost:5000/incomes
Mapping Models with Python Classes
Using dictionaries in a simple use case like the one above is enough. However, for more complex applications that deal with different entities and have multiple business rules and validations, we might need to encapsulate our data into Python classes.
We will refactor our application to learn the process of mapping entities (like incomes) as classes. The first thing that we will do is create a subpackage to hold all our entities. Let's create a model directory inside the cashman package and add an empty file called __init__.py on it.
# create model directory inside the cashman package
mkdir -p cashman/model

# initialize it as a package
touch cashman/model/__init__.py
Mapping a Python superclass
We will create three classes in this new directory: Transaction, Income, and Expense. The first class will be the base for the two others, and we will call it Transaction. Let's create a file called transaction.py in the model directory with the following code:
import datetime as dt

from marshmallow import Schema, fields

class Transaction(object):
   def __init__(self, description, amount, type):
       self.description = description
       self.amount = amount
       self.created_at = dt.datetime.now()
       self.type = type

   def __repr__(self):
       return '<Transaction(name={self.description!r})>'.format(self=self)

class TransactionSchema(Schema):
   description = fields.Str()
   amount = fields.Decimal(places=2, as_string=True)
   created_at = fields.DateTime()
   type = fields.Str()
Besides the Transaction class, we also defined a TransactionSchema. We will use the latter to deserialize and serialize instances of Transaction from and to JSON objects. This class inherits from another superclass called Schema that belongs on a package not yet installed.
# installing marshmallow as a project dependency
uv add marshmallow
Marshmallow is a popular Python package for converting complex datatypes, such as objects, to and from built-in Python datatypes. We can use this package to validate, serialize, and deserialize data. We won't dive into validation in this article, as it will be the subject of another one. Though, as mentioned, we will use marshmallow to serialize and deserialize entities through our endpoints.
Mapping Income and Expense as Python classes
To keep things more organized and meaningful, we won't expose the Transaction class on our endpoints. We will create two specializations to handle the requests: Income and Expense. Let's make a module called income.py inside the model package with the following code:
from marshmallow import post_load

from .transaction import Transaction, TransactionSchema
from .transaction_type import TransactionType

class Income(Transaction):
   def __init__(self, description, amount):
       super(Income, self).__init__(description, amount,
          TransactionType.INCOME)

   def __repr__(self):
       return '<Income(name={self.description!r})>'.format(self=self)

class IncomeSchema(TransactionSchema):
   @post_load
   def make_income(self, data, **kwargs):
       return Income(**data)
The only value that this class adds for our application is that it hardcodes the type of transaction. This type is a Python enumerator, which we still have to create, that will help us filter transactions in the future. Let's create another file, called transaction_type.py, inside model to represent this enumerator:
from enum import Enum

class TransactionType(Enum):
   INCOME = "INCOME"
   EXPENSE = "EXPENSE"
The code of the enumerator is quite simple. It just defines a class called TransactionType that inherits from Enum and that defines two types: INCOME and EXPENSE.
Lastly, let's create the class that represents expenses. To do that, let's add a new file called expense.py inside model with the following code:
from marshmallow import post_load

from .transaction import Transaction, TransactionSchema
from .transaction_type import TransactionType

class Expense(Transaction):
   def __init__(self, description, amount):
       super(Expense, self).__init__(description, -abs(amount),
             TransactionType.EXPENSE)

   def __repr__(self):
       return '<Expense(name={self.description!r})>'.format(self=self)

class ExpenseSchema(TransactionSchema):
   @post_load
   def make_expense(self, data, **kwargs):
       return Expense(**data)
Similar to Income, this class hardcodes the type of the transaction, but now it passes EXPENSE to the superclass. The difference is that it transforms the given amount to be negative. Therefore, no matter if the user sends a positive or a negative value, we will always store it as negative to facilitate calculations.
Serializing and Deserializing Objects with Marshmallow
With the Transaction superclass and its specializations adequately implemented, we can now enhance our endpoints to deal with these classes. Let's replace ./cashman/index.py contents to:
from flask import Flask, jsonify, request

from cashman.model.expense import Expense, ExpenseSchema
from cashman.model.income import Income, IncomeSchema
from cashman.model.transaction_type import TransactionType

app = Flask(__name__)

transactions = [
   Income('Salary', 5000),
   Income('Dividends', 200),
   Expense('pizza', 50),
   Expense('Rock Concert', 100)
]

@app.route('/incomes')
def get_incomes():
   schema = IncomeSchema(many=True)
   incomes = schema.dump(
       filter(lambda t: t.type == TransactionType.INCOME, transactions)
   )
   return jsonify(incomes)

@app.route('/incomes', methods=['POST'])
def add_income():
   income = IncomeSchema().load(request.get_json())
   transactions.append(income)
   return "", 204

@app.route('/expenses')
def get_expenses():
   schema = ExpenseSchema(many=True)
   expenses = schema.dump(
       filter(lambda t: t.type == TransactionType.EXPENSE, transactions)
   )
   return jsonify(expenses)

@app.route('/expenses', methods=['POST'])
def add_expense():
   expense = ExpenseSchema().load(request.get_json())
   transactions.append(expense)
   return "", 204
The new version that we just implemented starts by redefining the incomes variable into a list of Expenses and Incomes, now called transactions. Besides that, we have also changed the implementation of both methods that deal with incomes. For the endpoint used to retrieve incomes, we defined an instance of IncomeSchema to produce a JSON representation of incomes. We also used filter to extract incomes only from the transactions list. In the end we send the array of JSON incomes back to users.
The endpoint responsible for accepting new incomes was also refactored. The change on this endpoint was the addition of IncomeSchema to load an instance of Income based on the JSON data sent by the user. As the transactions list deals with instances of Transaction and its subclasses, we just added the new Income in that list.
The other two endpoints responsible for dealing with expenses, get_expenses and add_expense, are almost copies of their income counterparts. The differences are:
- instead of dealing with instances of
Income, we deal with instances ofExpenseto accept new expenses, - and instead of filtering by
TransactionType.INCOME, we filter byTransactionType.EXPENSEto send expenses back to the user.
This finishes the implementation of our API. If we run our Flask application now, we will be able to interact with the endpoints, as shown here:
# start the application
./bootstrap.sh

# get expenses
curl http://localhost:5000/expenses

# add a new expense
curl -X POST -H "Content-Type: application/json" -d '{
   "amount": 20,
   "description": "lottery ticket"
}' http://localhost:5000/expenses

# get incomes
curl http://localhost:5000/incomes

# add a new income
curl -X POST -H "Content-Type: application/json" -d '{
   "amount": 300.0,
   "description": "loan payment"
}' http://localhost:5000/incomes
Dockerizing Flask Applications
As we are planning to eventually release our API in the cloud, we are going to create a Dockerfile to describe what is needed to run the application on a Docker container. We need to install Docker on our development machine to test and run dockerized instances of our project. Defining a Docker recipe (Dockerfile) will help us run the API in different environments. That is, in the future, we will also install Docker and run our program on environments like production and staging.
Let's create the Dockerfile in the root directory of our project with the following code:
# Using lightweight alpine image
FROM ghcr.io/astral-sh/uv:python3.13-alpine

COPY . /app

WORKDIR /app
RUN uv sync --locked

# Start app
EXPOSE 5000
CMD ["/app/bootstrap.sh"]
The first item in the recipe defines that we will create our Docker container based on the UV Python image. This image already has UV and all features to work with UV in a containerized environment. After that, we copy all the files in the project to /app folder and set it as the working directory. The next step in the build process, we set UV to install all dependencies. Lastly, we define that our image will communicate through port 5000 and that this image, when executed, needs to run the bootstrap.sh script to start Flask.
Since UV creates a folder .venv in the root directory of the project, we need to add it to the .dockerignore file to avoid copying it to the Docker container. The .dockerignore file is a file that tells Docker which files to ignore when building the image. We can add the following line to the file:
.venv
To create and run a Docker container based on the Dockerfile that we created, we can execute the following commands:
# build the image
docker build -t cashman .

# run a new docker container named cashman
docker run --name cashman \
   -d -p 5000:5000 \
   cashman

# fetch incomes from the dockerized instance
curl http://localhost:5000/incomes/
The Dockerfile is simple but effective, and using it is similarly easy. With these commands and this Dockerfile, we can run as many instances of our API as we need with no trouble. It's just a matter of defining another port on the host or even another host.
Securing Python APIs with Auth0
Securing Python APIs with Auth0 is very easy and brings a lot of great features to the table. With Auth0, we only have to write a few lines of code to get:
- A solid identity management solution, including single sign-on
- User management
- Support for social identity providers (like Facebook, GitHub, Twitter, etc.)
- Enterprise identity providers (Active Directory, LDAP, SAML, etc.)
- Our own database of users
For example, to secure Python APIs written with Flask, we can simply create a requires_auth decorator:
# Format error response and append status code

def get_token_auth_header():
    """Obtains the access token from the Authorization Header
    """
    auth = request.headers.get("Authorization", None)
    if not auth:
        raise AuthError({"code": "authorization_header_missing",
                        "description":
                            "Authorization header is expected"}, 401)

    parts = auth.split()

    if parts[0].lower() != "bearer":
        raise AuthError({"code": "invalid_header",
                        "description":
                            "Authorization header must start with"
                            " Bearer"}, 401)
    elif len(parts) == 1:
        raise AuthError({"code": "invalid_header",
                        "description": "Token not found"}, 401)
    elif len(parts) > 2:
        raise AuthError({"code": "invalid_header",
                        "description":
                            "Authorization header must be"
                            " Bearer token"}, 401)

    token = parts[1]
    return token

def requires_auth(f):
    """Determines if the access token is valid
    """
    @wraps(f)
    def decorated(*args, **kwargs):
        token = get_token_auth_header()
        jsonurl = urlopen("https://"+AUTH0_DOMAIN+"/.well-known/jwks.json")
        jwks = json.loads(jsonurl.read())
        unverified_header = jwt.get_unverified_header(token)
        rsa_key = {}
        for key in jwks["keys"]:
            if key["kid"] == unverified_header["kid"]:
                rsa_key = {
                    "kty": key["kty"],
                    "kid": key["kid"],
                    "use": key["use"],
                    "n": key["n"],
                    "e": key["e"]
                }
        if rsa_key:
            try:
                payload = jwt.decode(
                    token,
                    rsa_key,
                    algorithms=ALGORITHMS,
                    audience=API_AUDIENCE,
                    issuer="https://"+AUTH0_DOMAIN+"/"
                )
            except jwt.ExpiredSignatureError:
                raise AuthError({"code": "token_expired",
                                "description": "token is expired"}, 401)
            except jwt.JWTClaimsError:
                raise AuthError({"code": "invalid_claims",
                                "description":
                                    "incorrect claims,"
                                    "please check the audience and issuer"}, 401)
            except Exception:
                raise AuthError({"code": "invalid_header",
                                "description":
                                    "Unable to parse authentication"
                                    " token."}, 400)

            _app_ctx_stack.top.current_user = payload
            return f(*args, **kwargs)
        raise AuthError({"code": "invalid_header",
                        "description": "Unable to find appropriate key"}, 400)
    return decorated
Then use it in our endpoints:
# Controllers API

# This doesn't need authentication
@app.route("/ping")
@cross_origin(headers=['Content-Type', 'Authorization'])
def ping():
    return "All good. You don't need to be authenticated to call this"

# This does need authentication
@app.route("/secured/ping")
@cross_origin(headers=['Content-Type', 'Authorization'])
@requires_auth
def secured_ping():
    return "All good. You only get this message if you're authenticated"
To learn more about securing Python APIs with Auth0, take a look at this tutorial. Alongside with tutorials for backend technologies (like Python, Java, and PHP), the Auth0 Docs webpage also provides tutorials for Mobile/Native apps and Single-Page applications.
Next Steps
In this article, we learned about the basic components needed to develop a well-structured Flask application. We looked at how to use uv to manage the dependencies of our API. After that, we installed and used Flask and Marshmallow to create endpoints capable of receiving and sending JSON responses. In the end, we also looked at how to dockerize the API, which will facilitate the release of the application to the cloud.
Although well-structured, our API is not that useful yet. Among the things that we can improve, we are going to cover the following topics in the following article:
- Database persistence with SQLAlchemy
- Add authorization to a Flask API application
- How to handle JWTs in Python
Stay tuned!