

TL;DR: This is a series on how to build a full-stack TypeScript web application using Angular and Nest.js. In the first part, you learned how to build a simple API with Nest.js. In part two, here, you are going to learn how to use Angular to develop the frontend of the application that communicates with Nest.js. You can find the final code developed throughout this article in this GitHub repository.
“Learn how to develop full-stack @typescriptlang applications with @nestframework and @angular.”
Tweet This
Summarizing Part 1
In part 1 of this series, you learned why you should use Angular together with Nest.js to create a full-stack web application using TypeScript.
Then, you created a Nest.js backend app that manages the menu of a restaurant. This API had three endpoints. One that accepts unauthenticated requests (GET /items), another one that accepts requests from authenticated users (POST /shop-cart), and the third one that accepts requests only from users authenticated as administrators (POST /items).
As you will need this backend application to support your Angular app, make sure you have it up and running:
# move into the backend directory
cd nest-restaurant-api

# run the server
npm start
Scaffolding an Angular Application
To facilitate the process of scaffolding an Angular app, you are going to use the Angular CLI tool. Installing this tool requires only Node and NPM, which you probably already have as you have followed the first article. Having those, you can open a new terminal and run the following command to install Angular CLI:
npm install -g @angular/cli
Then, to generate a new Angular application, move into the directory where you usually put your projects and run the following:
ng new angular-restaurant-app
After a while, Angular CLI will generate a project with the following structure:
├── README.md
├── angular.json
├── package-lock.json
├── package.json
├── src
│   ├── app
│   │   ├── app.component.css
│   │   ├── app.component.html
│   │   ├── app.component.spec.ts
│   │   ├── app.component.ts
│   │   └── app.module.ts
│   ├── assets
│   ├── browserslist
│   ├── environments
│   │   ├── environment.prod.ts
│   │   └── environment.ts
│   ├── favicon.ico
│   ├── index.html
│   ├── karma.conf.js
│   ├── main.ts
│   ├── polyfills.ts
│   ├── styles.css
│   ├── test.ts
│   ├── tsconfig.app.json
│   ├── tsconfig.spec.json
│   └── tslint.json
├── tsconfig.json
└── tslint.json
Throughout this article, you are mainly going to create code located under the src/app directory. In the structure created, you will see some files related to automated tests (like test.ts and these files that have spec in their names). Although implementing automated tests is extremely important, in this article, you are going to ignore them so you can achieve your goal faster.
After scaffolding your Angular app, you can make it run by issuing the following commands:
# moves into your new Angular app
cd angular-restaurant-app

# starts the Angular app and open it in the default browser
ng serve --open
After running these, Angular CLI will open your browser at localhost:4200 and you will see a page like this:
Developing Frontend Apps with Angular
To make the article easier to grasp, first, you are going to develop an Angular app that doesn't interact with your backend API. After that, you will integrate it with both your Nest.js API and with Auth0 (so your users can authenticate).
Angular and Bootstrap
As you don't want to develop an ugly app and you don't want to invest too much time working on CSS either, you are going to use Twitter's Bootstrap to give some basic style to your app. To import bootstrap, stop the Angular development server and run the following command:
npm install bootstrap
Then, open the src/styles.css file and add the following line to it:
@import "bootstrap/dist/css/bootstrap.css";
Showing the Menu with an Angular Component
The first feature you are going to implement in your app is the view where unauthorized users can check what is in the menu. So, to do that, you are going to create a new Angular component by running the following code in the project root:
ng generate component items
After that, you will get a new folder called items with three main files (plus one for tests that you won't use):
items.component.css: This is the file where you may add some local style for your new Angular component.items.component.html: This is the file where you are going to add the HTML code to structure your information.items.component.ts: This is the file where you are going to place the code that controls the behavior of this component.
The next step will be creating an interface (the same that you have created in your Nest.js backend API) to present items on the menu. As both your projects (the Angular one and the Nest.js one) will exchange data with this structure, you have to define the same structure on both sides. So, create a new file called item.interface.ts under the ./src/app/items directory and add the following code to it:
export class Item {
  readonly name: string;
  readonly price: number;
}
Then, open the items.components.ts file and replace its contents with this:
import { Component, OnInit } from '@angular/core';
import { Item } from './item.interface';

@Component({
  selector: 'app-items',
  templateUrl: './items.component.html',
  styleUrls: ['./items.component.css']
})
export class ItemsComponent implements OnInit {
  items: Item [] = [{
    name: 'Pizza',
    price: 3
  },
  {
    name: 'Salad',
    price: 2
  }];
  constructor() { }

  addToCart() {
    window.alert('Added');
  }

  ngOnInit() {
  }
}
Basically, this version of the component is hard coding some items so you can see the view working. Also, this version is adding a fake addToCart method that simply confirms the action by triggering a window.alert with the Added message.
Next, you are going to add the code needed in the HTML page. So, open the items.component.html file and replace its code with this:
<table class="table">
  <thead>
    <tr>
      <td>Name</td>
      <td>Price</td>
      <td>Action</td>
    </tr>
  </thead>
  <tbody>
    <tr *ngFor="let item of items"> <!--for every item in object items, create a table row-->
      <td>{{item.name }}</td> <!--Write it's name in a column-->
      <td>${{item.price}}</td> <!--Write it's price in a column-->
      <td>
        <button class="btn btn-secondary"
                (click)="addToCart()">
          Add to shopping cart
        </button>
      </td>
    </tr>
  </tbody>
</table>
As you can see, the code above contains an HTML table with a row (tr) that uses the *ngFor Angular directive. This directive makes Angular iterate over every item in the items array to build a table that exposes items' price, name, and a button to invoke the addToCart method.
Now, to show your new component, open the src/app/app.component.html file and replace everything with this:
<app-items></app-items>
Then, run your project again to check if it is working:
ng serve --open
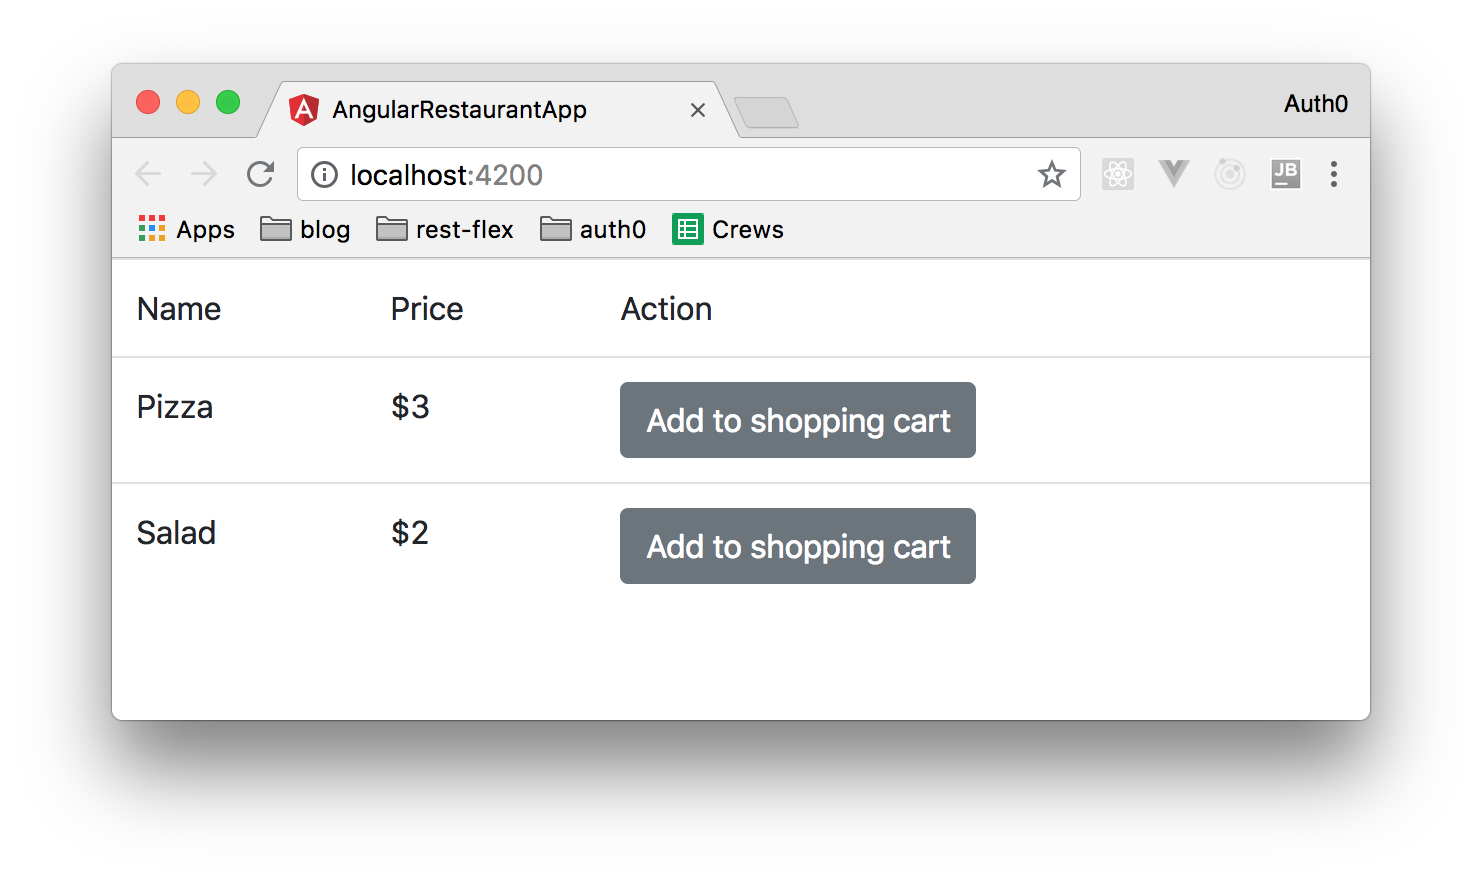
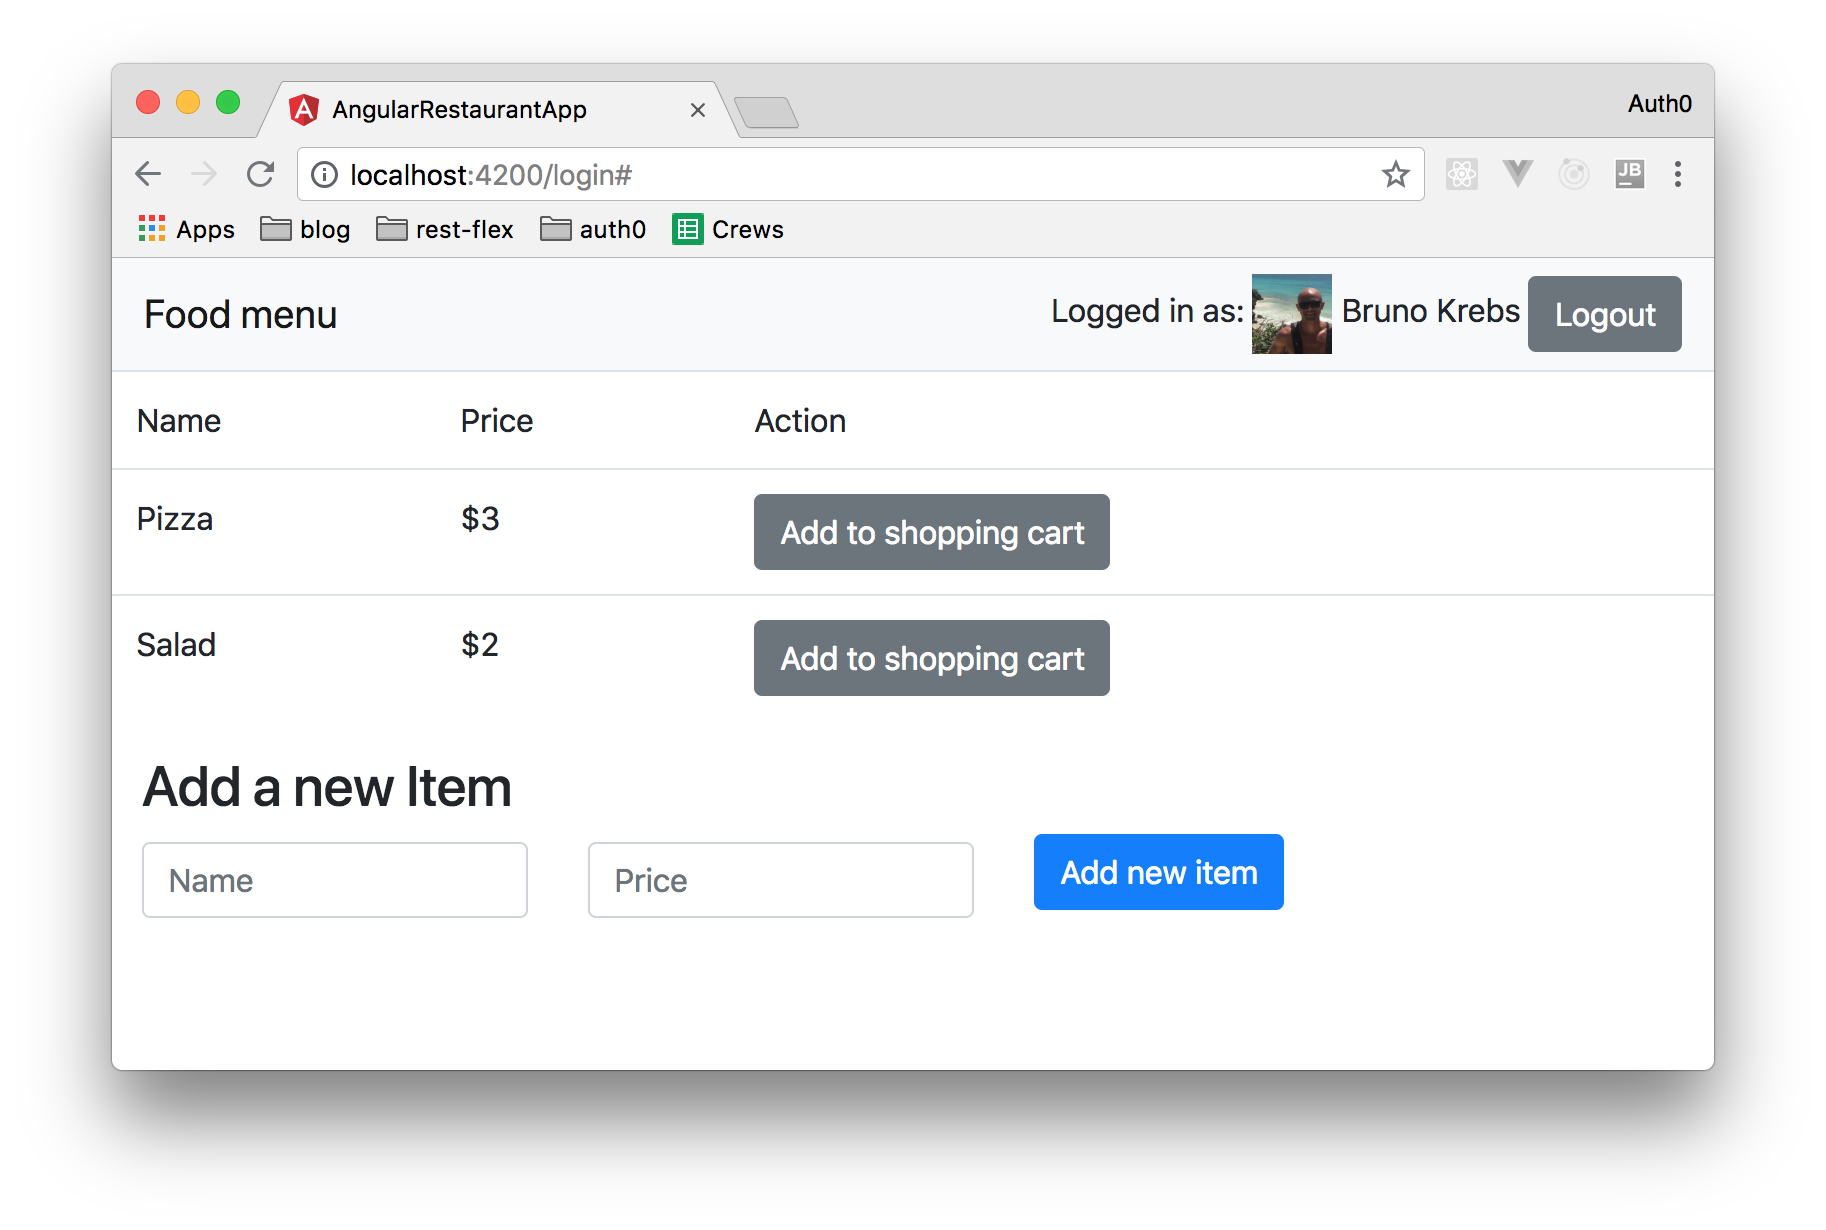
If everything is working as expected, you will see a web app like this one:
Adding New Items Through a Reactive Angular Form
Next, you are going to create a reactive Angular form to allow users to add new items to your items array. Using Angular's Reactive forms makes it easy to validate and test data that users input. To use this type of form, first, you will need to add Angular's form component to your app.module.ts file. that will look like that after the addition:
// ... other import statements ...

@NgModule({
  // ... declarations ...
  imports: [
    BrowserModule,
    FormsModule,
    ReactiveFormsModule,
  ],
  // ... providers and bootstrap ...
})
export class AppModule { }
Then, you will need to add some code to items.component.ts, where you are going to add a few properties to the ItemsComponent class:
itemForm(with theformGrouptype) which is the form itself;- and
itemSubmitteda boolean used for validation.
You will also create a method for adding new items to the array. After adding these, your code will look like this:
import { Component, OnInit } from '@angular/core';
import { Item } from './item.interface';
import { FormGroup, Validators, FormBuilder } from '@angular/forms';

@Component({
  selector: 'app-items',
  templateUrl: './items.component.html',
  styleUrls: ['./items.component.css']
})
export class ItemsComponent implements OnInit {
  items: Item [] = [{
    name: 'Pizza',
    price: 3
  },
  {
    name: 'Salad',
    price: 2
  }];
  itemSubmitted = false;
  itemForm: FormGroup;

  constructor(private formBuilder: FormBuilder) { }

  addToCart() {
    window.alert('Added');
  }

  ngOnInit() {
    // Initiating the form with the fields and the required validators
    this.itemForm = this.formBuilder.group({
      name: ['', Validators.required], // Name is required
      price: ['', [Validators.required, Validators.min(0)]] // Price is required and must be a positive number
    });
  }

  get getItemForm() {
    return this.itemForm.controls;
  }

  addNewItem() {
    this.itemSubmitted = true;
    if (this.itemForm.invalid) {
      console.log(this.itemForm);
    } else {
      this.items.push(this.itemForm.value);
    }
  }
}
Note: you could create a new component to handle the form (e.g.
ItemsForm) but, to keep things shorter, everything in this tutorial related to items will be created under the same component.
Now, you will need to update the items.component.html file. There, you will add the HTML code that represents the form defined by the itemForm field. The following code snippet shows the tags that you will have to include after the table element present in the current code:
<!--><table class="table">...</table><!-->
<div>
  <h3 class="col-md-12">Add a new Item</h3>
  <form class="form-inline" (submit)="addNewItem()" [formGroup]="itemForm">
    <div class="col-auto">
      <input type="text"
        class="form-control"
        placeholder="Name"
        formControlName="name"
        [ngClass]="{ 'is-invalid': itemSubmitted && getItemForm.name.errors }" >
        <div *ngIf="itemSubmitted && getItemForm.name.errors" class="invalid-feedback">
          <div *ngIf="getItemForm.name.errors.required">Name is required</div>
        </div>
    </div>
    <div class="col-auto">
      <input type="number"
        class="form-control"
        placeholder="Price"
        formControlName="price"
        [ngClass]="{ 'is-invalid': itemSubmitted && getItemForm.price.errors }" >
        <div *ngIf="itemSubmitted && getItemForm.price.errors" class="invalid-feedback">
          <div *ngIf="getItemForm.price.errors.required">Price is required and must be a number</div>
          <div *ngIf="getItemForm.price.errors.min">Must start from 0</div>
        </div>
    </div>
    <div class="col-auto">
      <button type="submit" class="btn btn-primary mb-2">Add new item</button>
    </div>
  </form>
</div>
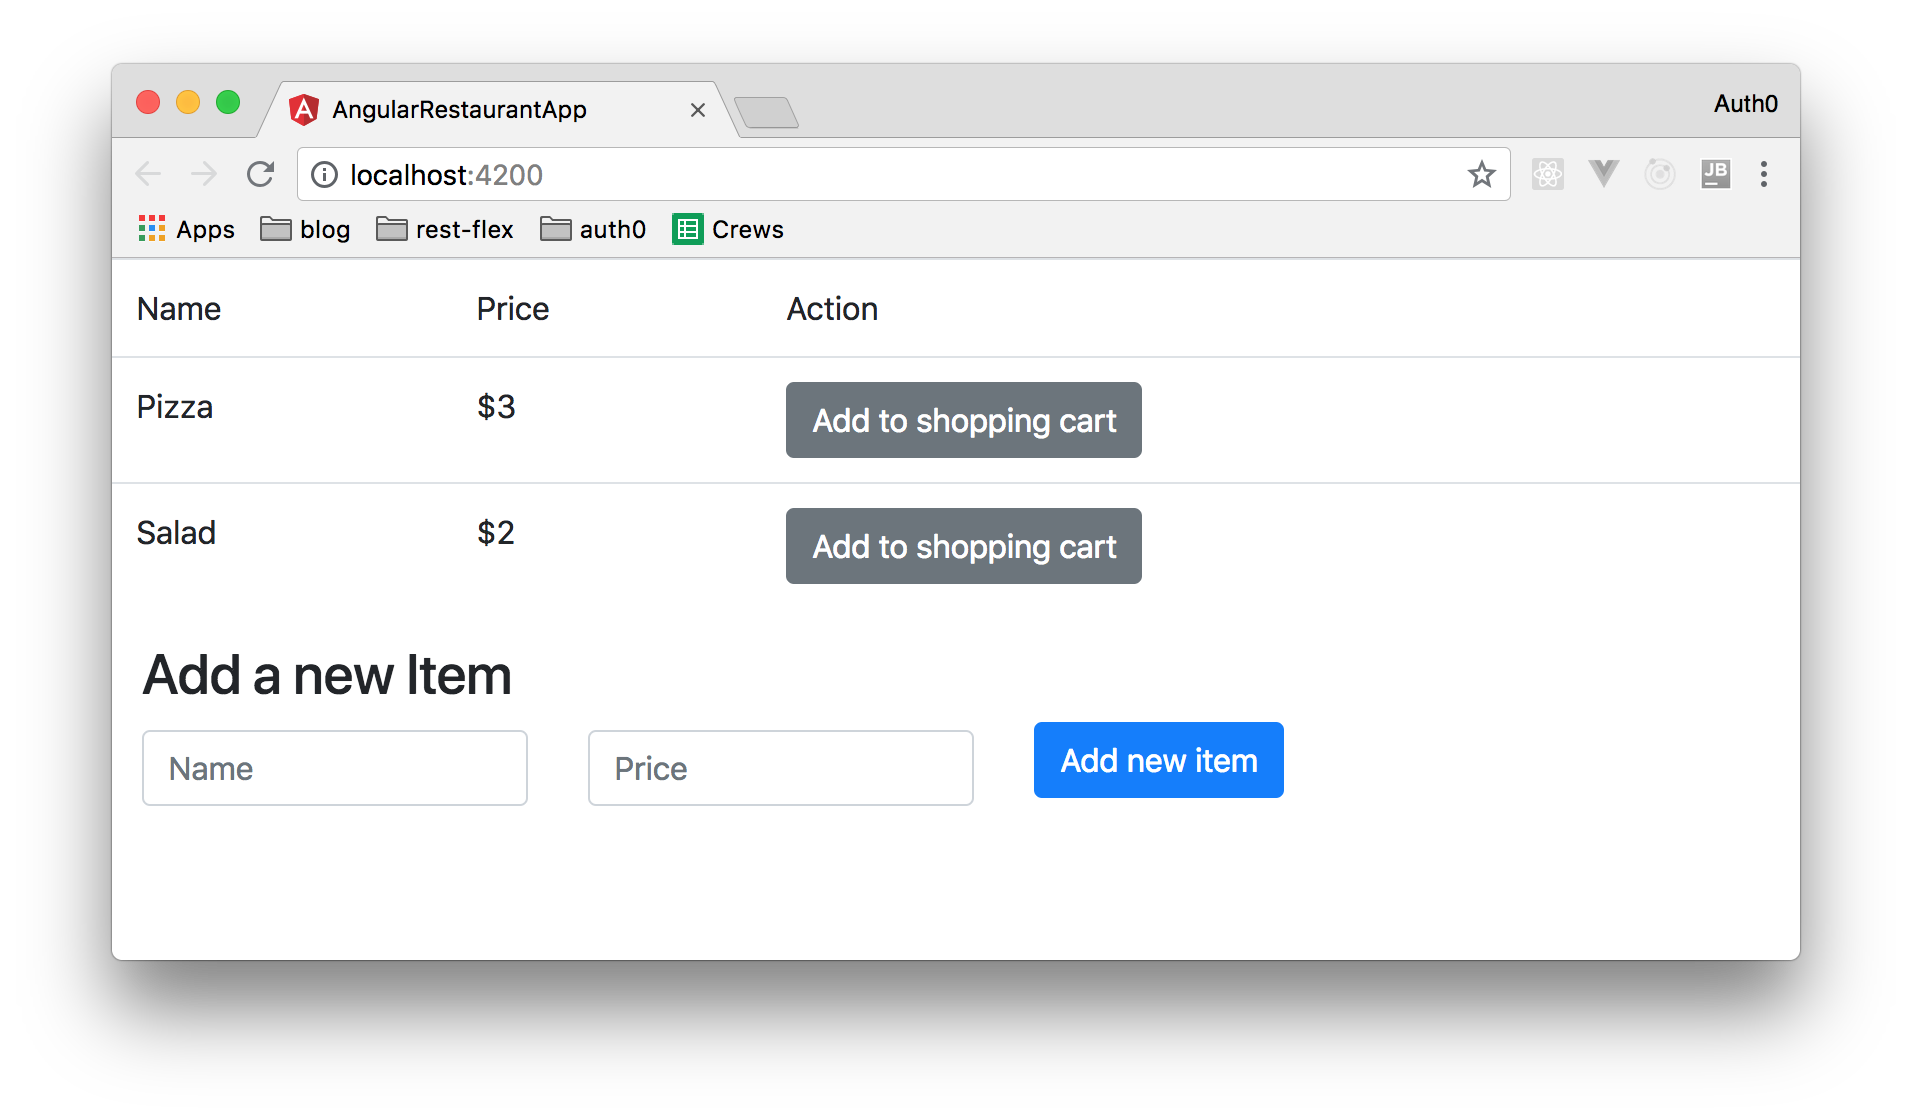
After adding these HTML elements, you can head back to your app (i.e. open localhost:4200 in your browser if you closed it before) and you will see that your app looks like this:
With these changes in place, you have finished developing the mock functionality that allows users to manage items on the menu. In the next sections, you will integrate your application with Auth0 and implement the missing parts that make your app communicate with the backend API.
Integrating Angular Apps with Auth0
In the first part of this series, you have secured your Nest.js backend API with Auth0 to guarantee that only certain users can manage the list of items. As such, you will also need to integrate your Angular application with Auth0 so your users can authenticate to perform these actions.
Installing the Dependencies
As you will see, securing Angular applications with Auth0 is really simple. First, you will only need to install two dependencies. So, stop your development server (which can be accomplished by hitting CMD/CTRL + C), then issue the following command on the project root:
npm install auth0-js @auth0/angular-jwt
Creating an Auth0 Angular Service
After installing these libraries, you will need to create an Angular service to interact with the Auth0 login page.
Note: If you have ever created a similar service using browser's
localStoragebefore, here you are going to use a better (more secure) strategy that requires new tokens to Auth0 every time the page reloads. This strategy avoids usinglocalStorageand keeps everything in memory, so you will make your application safer.
To create this service, run the following command:
ng generate service auth/auth
Then, open the auth.service.ts file that was just created and replace its contents with the following:
import { Injectable } from '@angular/core';
import { AuthOptions, WebAuth } from 'auth0-js';
import { JwtHelperService } from '@auth0/angular-jwt';

@Injectable({
  providedIn: 'root'
})
export class AuthService {

  protected _auth0Client: WebAuth;
  private _accessToken: string;
  private _idToken: string;
  private _properties: AuthOptions;

  constructor() {
    this._properties = {
      clientID: '[CLIENT_ID]',
      domain: '[DOMAIN]',
      responseType: 'token id_token',
      audience: 'http://localhost:3000',
      redirectUri: 'http://localhost:4200/login',
      scope: 'openid profile'
    };
    this._auth0Client = new WebAuth({...this._properties});
  }

  public login(): void {
    // triggers auth0 authentication page
    this._auth0Client.authorize();
  }

  public checkSession(): Promise<boolean> {
    return new Promise<boolean>((resolve, reject) => {
      // checks in Auth0's server if the browser has a session
      this._auth0Client.checkSession(this._properties, async (error, authResult) => {
        if (error && error.error !== 'login_required') {
          // some other error
          return reject(error);
        } else if (error) {
          // explicit authentication
          this.handleAuthentication();
          return resolve(false);
        }
        if (!this.isAuthenticated()) {
          this._setSession(authResult);
          return resolve(true);
        }
      });
    });
  }

  public isAuthenticated(): boolean {
    // Check whether the current time is past the
    // Access Token's expiry time
    return this._accessToken != null;
  }

  private handleAuthentication(): void {
    this._auth0Client.parseHash((err, authResult) => {
      if (authResult && authResult.accessToken && authResult.idToken) {
        window.location.hash = '';
        this._setSession(authResult);
      } else if (err) {
        console.log(err);
      }
    });
  }

  private _setSession(authResult): void {
    this._accessToken = authResult.accessToken;
    this._idToken = authResult.idToken;
  }

  // check if there is a property Admin in the access token
  public isAdmin(): boolean {
    if (this._accessToken) {
      const helper = new JwtHelperService();
      const decodedToken = helper.decodeToken(this._accessToken);
      if (decodedToken['http://localhost:3000/roles'].indexOf('admin') > -1) {
        return true;
      } else {
        return false;
      }
    } else {
      return false;
    }
  }

  public getProfile(): Object {
    if (this._idToken) {
      const helper = new JwtHelperService();
      return helper.decodeToken(this._idToken);
    }
  }

  public getAccessToken(): String {
    return this._accessToken;
  }

  public logout(): void {
    // Remove tokens
    delete this._accessToken;
    delete this._idToken;
  }
}
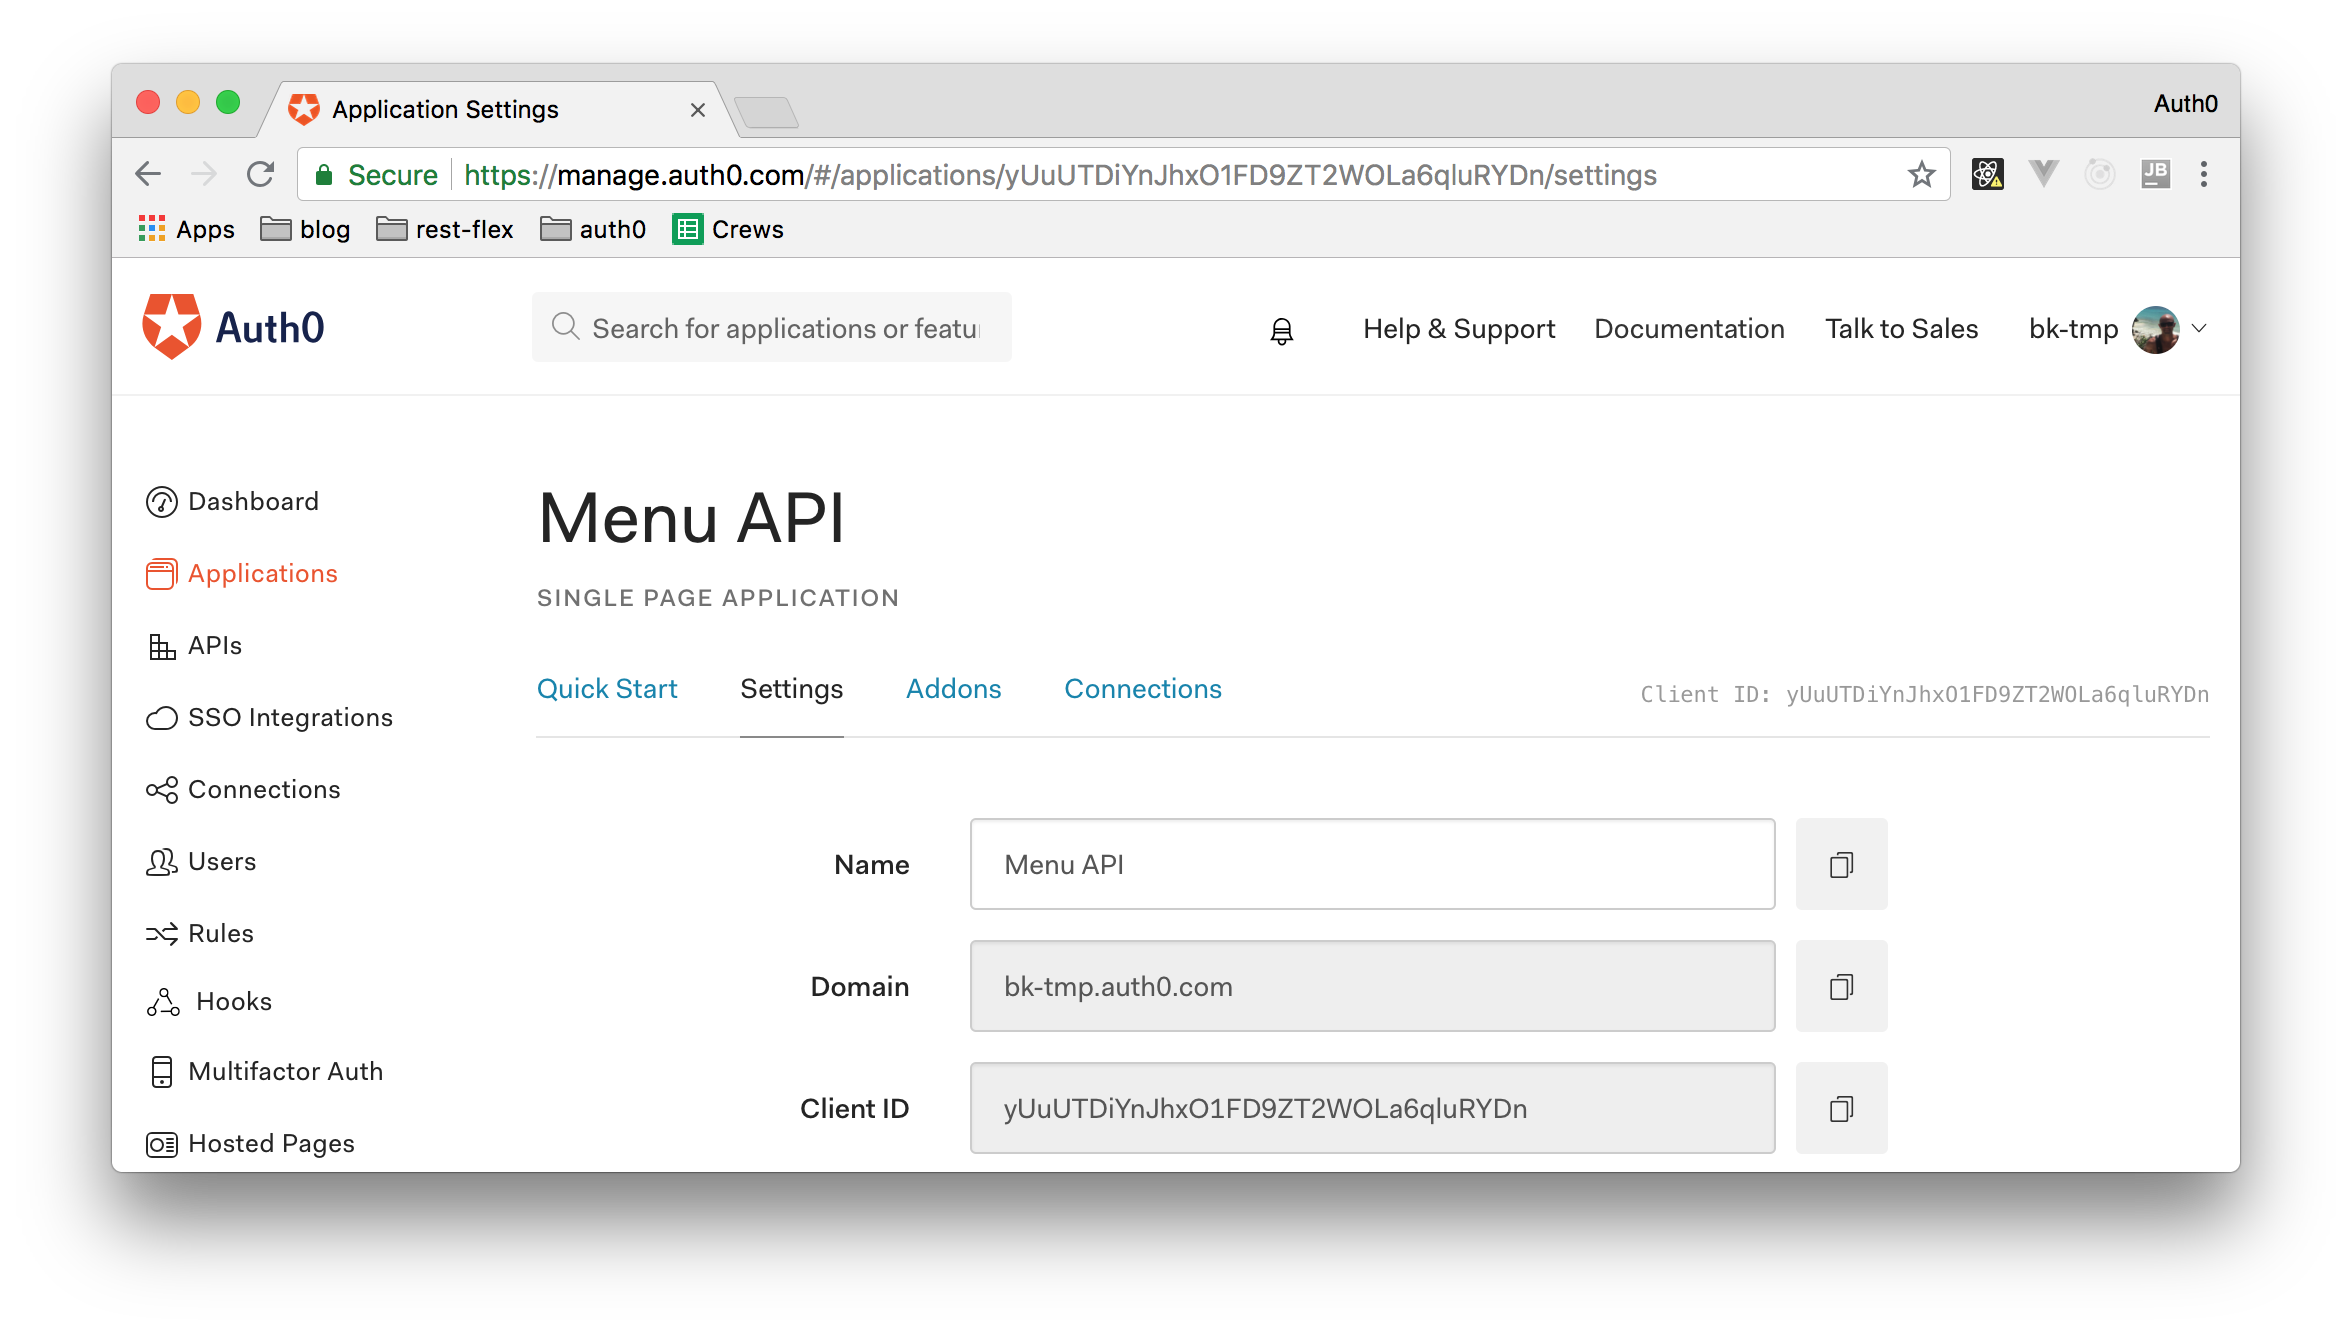
The code snippets above contains two placeholders that you will need to replace: [CLIENT_ID] and [DOMAIN]. These placeholders refer to the Auth0 Application that you have created in the previous article. So, open your Auth0 Dashboard, head to the Applications section, click on the Single Page Application you created, and copy the Client ID and Domain properties from it to replace these placeholders.
While on your Auth0 Application, find the Allowed Web Origins field and set http://localhost:4200 as its value. You will need this because your Angular application will issue cross-origin requests to check if users are authenticated or not.
Creating a Header Component with Angular
After creating this service, you are going to create a header component that will enable users to trigger the authentication process. To do that, create a new component called header by issuing ng generate component header. Then, open the header.component.ts file and replace its code with this:
import { Component, OnInit } from '@angular/core';
import { AuthService } from '../auth/auth.service';

@Component({
  selector: 'app-header',
  templateUrl: './header.component.html',
  styleUrls: ['./header.component.css']
})
export class HeaderComponent implements OnInit {

  title = 'Food menu';

  constructor(private authService: AuthService) {
  }

  ngOnInit() {
  }

  isAuthenticated() {
    return this.authService.isAuthenticated();
  }

  login() {
    return this.authService.login();
  }

  logout() {
    return this.authService.logout();
  }

  getProfile() {
    return this.authService.getProfile();
  }
}
The code above is basically getting an instance of AuthService injected into the authService private field of this component. Then, you make use of this instance to redefine only the methods that you want to share with your view (avoiding to share unnecessary stuff).
Now, open the header.component.html file and replace its contents with this:
<nav class="navbar navbar-expand-lg navbar-light bg-light justify-content-between">
  <a class="navbar-brand" href="#">{{title}}</a>
  <button class="btn btn-primary login" *ngIf="!isAuthenticated()" (click)="login()">
      Login
  </button>
  <span  *ngIf="isAuthenticated()">
    <span>
      Logged in as:
      <img [src]="getProfile().picture" width="40"/>
      {{getProfile().name }}
    </span>
    <button class="btn btn-secondary" (click)="logout()">Logout</button>
  </span>
</nav>
The elements above are basically verifying if the user is logged through the *ngIF directive. If the user is authenticated it will show the profile, otherwise, it will show a login button.
Now, to use this component you need to add this line to the top of app.component.html:
<app-header></app-header>
Then, last but not least, you are going to add code to app.component.ts to handle authentication when Auth0 redirects back to your app's main page. This will process the redirect URL and fetch the tokens from it):
import { Component } from '@angular/core';
import { AuthService } from './auth/auth.service';

@Component({
  selector: 'app-root',
  templateUrl: './app.component.html',
  styleUrls: ['./app.component.css']
})
export class AppComponent {
  constructor(private authService: AuthService) {
    this.authService.checkSession();
  }
}
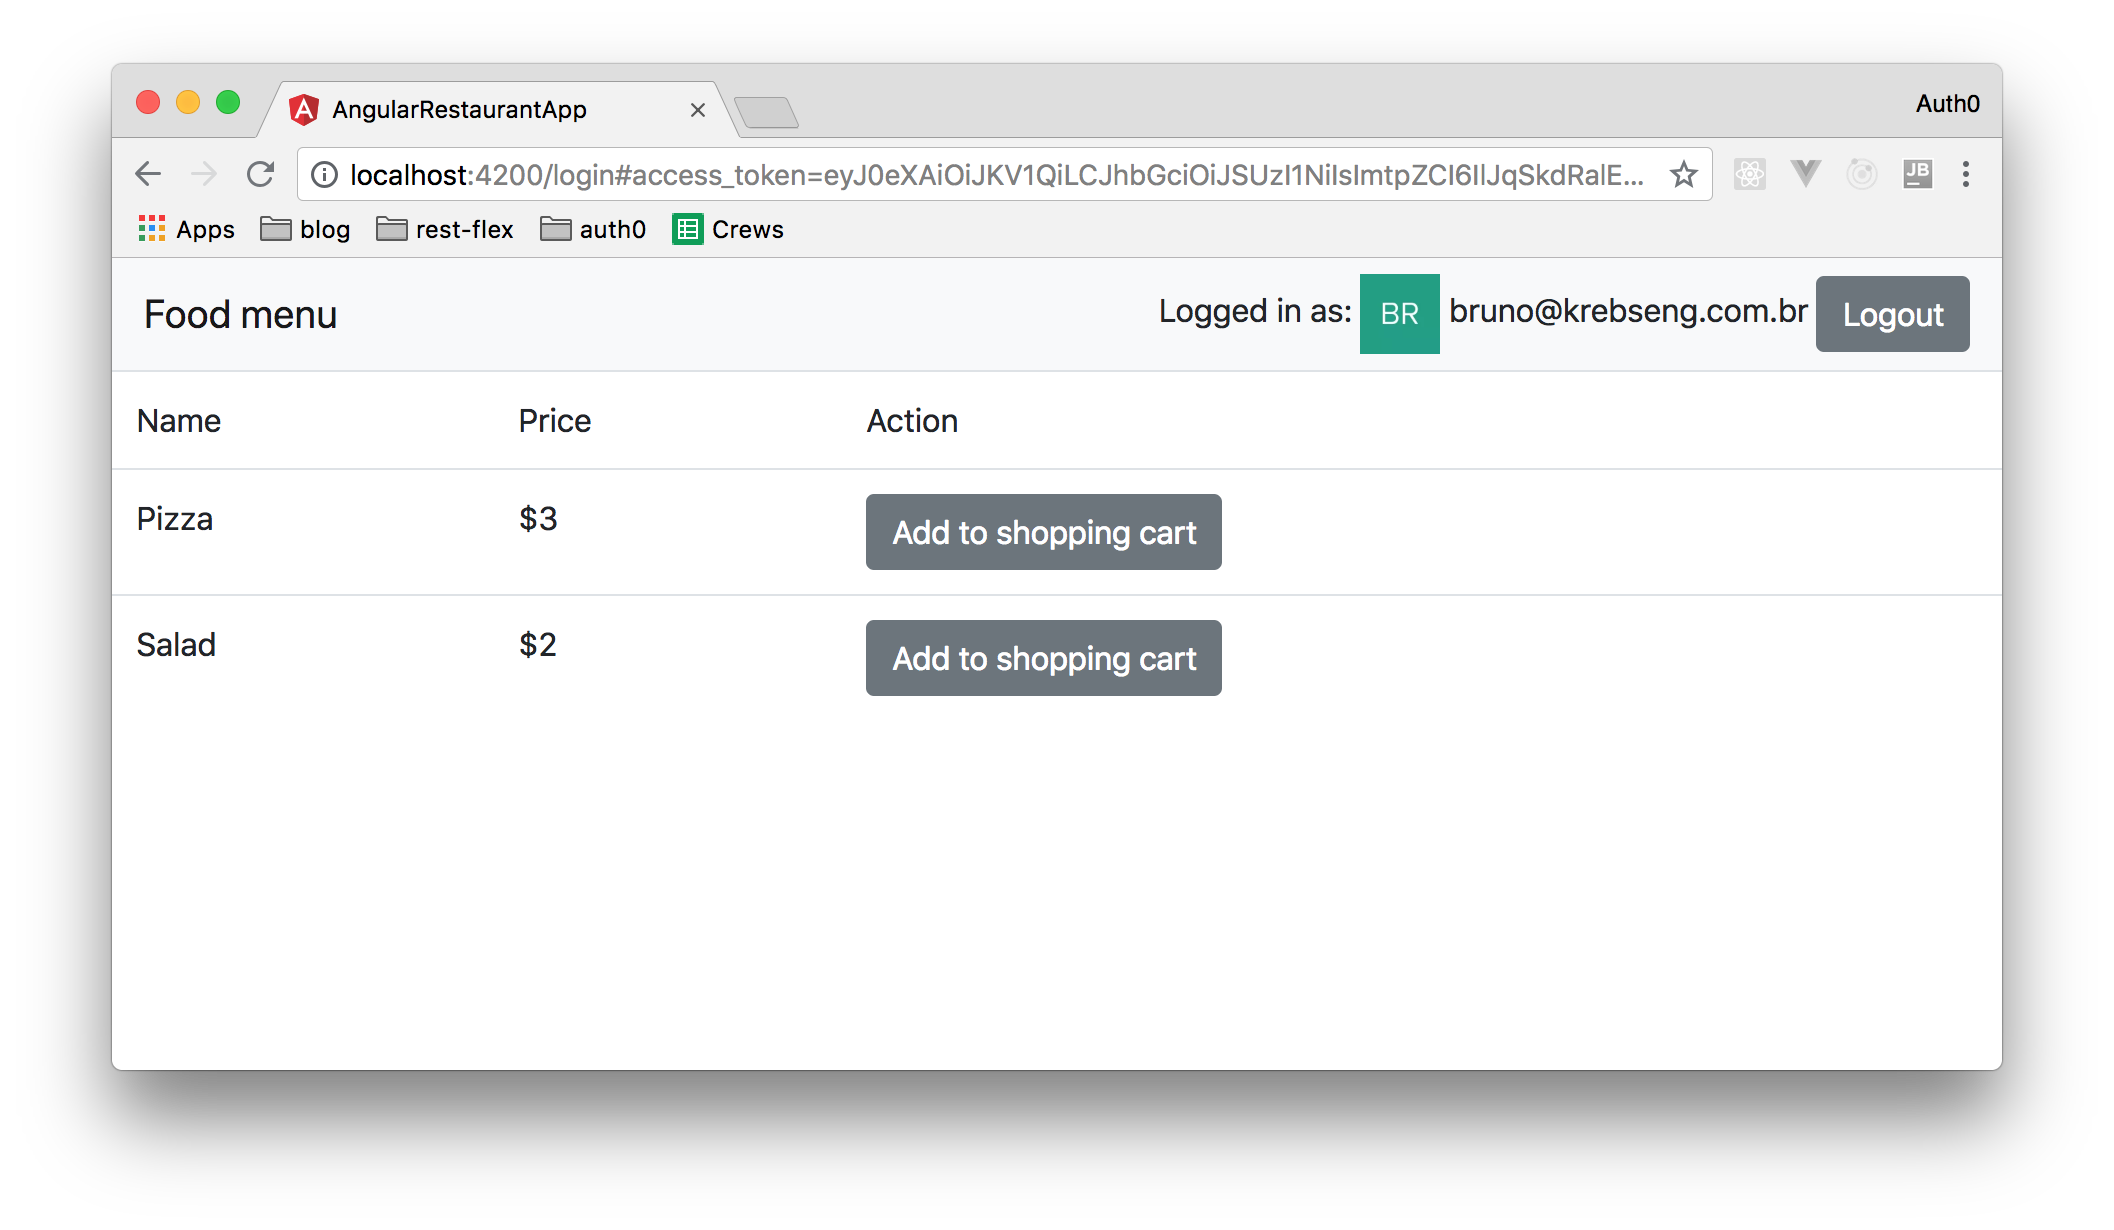
Now, you may run your project (ng serve --open) and play with the authentication methods that you have developed. If everything is okay, you will see a page like the following one when you authenticate:
Verify identity and authorization on items
Now, remember one of your business rules:
People who are not identified users should not be able to click the button to add an item to their shop cart and people who are not admin users should not be able to include new items.
To accomplish that, you will need to import AuthService into items.component.ts just as you did into header.component.ts. The following code snippet shows the code that you will need to add in this component:
// ... other import statements ...
import { AuthService } from '../auth/auth.service';

// ... @Component definition ...
export class ItemsComponent implements OnInit {
  // ... items, itemSubmitted, and itemForm definition ...

  constructor(private authService: AuthService, private formBuilder: FormBuilder) { }

  // ... ngOnInit, getItemForm, and addNewItem definition ...

  isAdmin() {
    return this.authService.isAdmin();
  }

  isAuthenticated() {
    return this.authService.isAuthenticated();
  }
}
Now, you will need to update the HTML template to execute some verification that checks if the current user has access to some of the services. To do that, open items.component.html and update the button that triggers addToCart as follows:
<!--The button will be disabled if is authenticated is false-->
<button class="btn btn-secondary"
  (click)="addToCart()"
  [disabled]="!isAuthenticated()">
  Add to shopping cart
</button>
Then, update the div that encapsulates the h3 and the form element as follows:
<!--It will show the form div if the user is admin-->
<div *ngIf="isAdmin()">
  <!-- ... h3 and div ... -->
</div>
Now, you can test your application with different accounts to see these changes in action.
Integrating Angular with Nest.js
So far, your Angular application didn't actually communicate with the Nest.js backend API you developed in the first article. So, in this section, you are going to integrate the frontend app with the Nest.js backend API you in the first article.
Creating a Proxy
In order to interact with the backend service, you will need to deal with CORS (Cross Request Origin Sharing). This is so because the calls made by Angular to your backend will be blocked by browsers because of the Same-origin policy. That is, as a security measure, browsers block requests made to different domains unless these domains explicitly say that they do allow these requests.
There are two ways you can solve this problem. One way is to update your backend API to enable CORS on it. If you were to follow this approach, you would need to configure your backend as follows:
app.enableCors();
Another way is to create a proxy for development (it should be used mainly when you are developing this application). To keep things short, in this article you are going to use this approach. So, create a file called proxy.config.js in the project root of Angular with the following code:
const proxy = [
  {
    context: '/api',
    target: 'http://localhost:3000',
    pathRewrite: {'^/api' : ''}
  }
];
module.exports = proxy;
Now, to start your development server and use this proxy, you will need to run the following command:
ng serve --proxy-config proxy.config.js --open
Create Requests with Angular Services
After creating the proxy, you are going to need to import into your project the Angular HTTP module. So, open the app.module.ts file and update it as follows:
// ... other import statements ...
import { HttpClientModule } from '@angular/common/http';

@NgModule({
  // ... declarations ...
  imports: [
    // ... other modules imported ...
    HttpClientModule,
  ],
  // ... providers and bootstrap ...
})
export class AppModule { }
Then, after importing HttpClientModule, you are going to create a service that handles all HTTP calls. To generate this service, run the following command:
ng generate service items/items
The command above will generate a file called items.service.ts. Open this file and replace its content with this:
import { Injectable } from '@angular/core';
import { Observable } from 'rxjs';
import { Item } from './item.interface';
import { HttpClient, HttpHeaders } from '@angular/common/http';
import { AuthService } from '../auth/auth.service';

@Injectable({
  providedIn: 'root'
})
export class ItemsService {

  constructor(private http: HttpClient, private auth: AuthService) { }

  // creates header
  private _authHeader(): Object {
    return {
      headers: new HttpHeaders({ 'authorization': `Bearer ${this.auth.getAccessToken()}`})
    };
  }

  public getItems(): Observable<Item[]> {
    return this.http.get<Item[]>('/api/items');
  }

  public postItems(item: Item): Observable<Item> {
    return this.http.post<Item>('/api/items', item, this._authHeader());
  }

  public postToShoppingCart(): Observable<String> {
    return this.http.post<String>('/api/shopping-cart', '', this._authHeader());
  }
}
As you can see, every method (other than _authHeader(), which adds the access token to requests) is just a wrapper to an HTTP request.
Now, to use your new service, open the items.component.ts file and update it as follows:
// ... other import statements ...
import { ItemsService } from './items.service';

// ... @Component ...
export class ItemsComponent implements OnInit {
  items: Item [];
  // ... itemSubmitted and itemForm definition ...

  constructor(public authService: AuthService, private itemService: ItemsService, private formBuilder: FormBuilder) {}

  ngOnInit() {
    this.itemService.getItems().subscribe(items => this.items = items);

    // ... this.itemForm ...
  }

  addToCart() {
    this.itemService.postToShoppingCart().subscribe(response => {
    }, error => {
        window.alert(error.error.message || error.error.text);
        console.log(error);
    });
  }

  addNewItem() {
    this.itemSubmitted = true;

    if (!this.itemForm.invalid) {
      this.itemService.postItems(this.itemForm.value).subscribe(response => {
        window.location.reload();
      }, error => {
        window.alert(error.error.message);
      });
    }
  }

  // ... getItemForm, isAdmin, isAuthenticated ...
}
Now, run your application again:
ng serve --proxy-config proxy.config.js --open
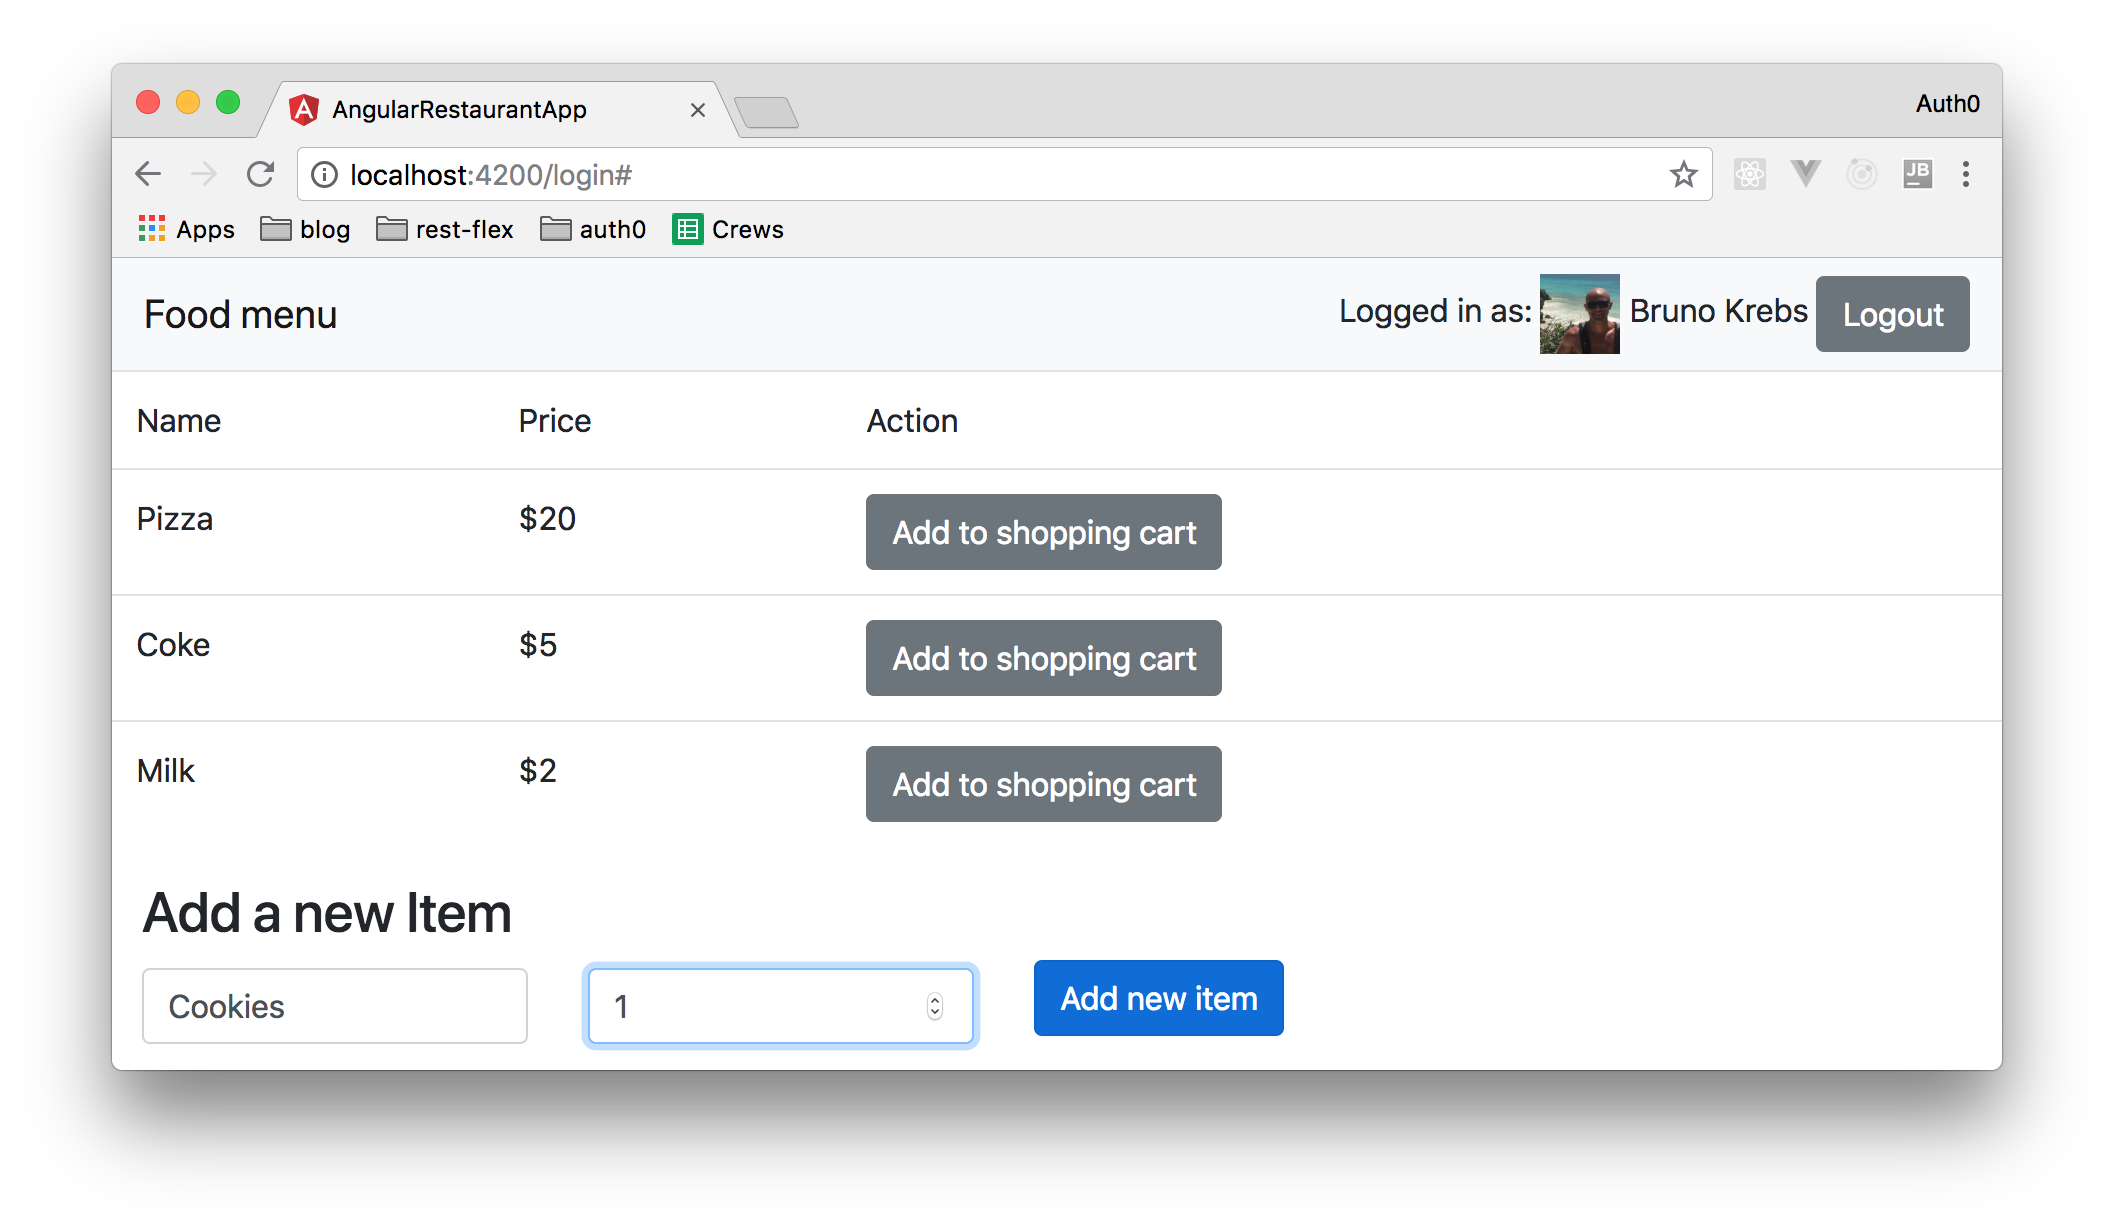
And head to your app (localhost:4200) to test it. From there, you can add new items that this time will be synced with your backend application. To check this, you can restart your Angular app and you will see that the new items you create will still be available (prior to these changes, your items were actually held in memory by Angular). Just don't forget that to update the list of items available in the menu, you have to authenticate yourself with the email address that you have used in the Auth0 rules in part 1 of this series.
“I just built a full-stack @typescriptlang application with @nestframework and @angular!”
Tweet This
Conclusion
In this series, you learned how to create a full-stack application that uses TypeScript on both sides (in the backend and in the frontend). In the first part of the series, you created a Nest.js backend API and secured it with Auth0 then, in this article, you created a nice Angular app that is also secured with Auth0.
Is this application production ready? I wouldn't say so. For starters, you will need to create some automated tests to guarantee that future changes don't break the current functionality. Also, you will need to integrate your backend API with some reliable database (such as MongoDB or PostgreSQL). However, with this series, you acquire sufficient knowledge to start creating modern applications with state-of-the-art technologies.