


In Part 1 of this tutorial, you created a SwiftUI-based iOS app that uses Auth0 for basic login and logout functionality. In this part, you’ll enhance your app by giving it the ability to read the user’s profile to display their photo, name, and email address when they’re logged in.

Looking for a step-by-step guide to leveraging OAuth 2.0 when accessing protected APIs via an iOS app built with Swift? If you're integrating with Auth0, then this is everything you need to know!
Once again, you can follow the text in this article, or if you prefer learning by video, you can follow the steps in this article’s companion video:
Look for the 🛠 emoji if you’d like to skim through the content while focusing on the build and execution steps.
The 📺 emoji highlights links to specific points in the video.
Examine the ID Token
📺 The Examine the ID Token section of the video
If you look at the .success case of the switch statement in ContentView’s login() method, you’ll see these print() functions:
print("Credentials: (credentials)")
print("ID token: (credentials.idToken)")
These functions’ output will appear in Xcode’s Debug area:
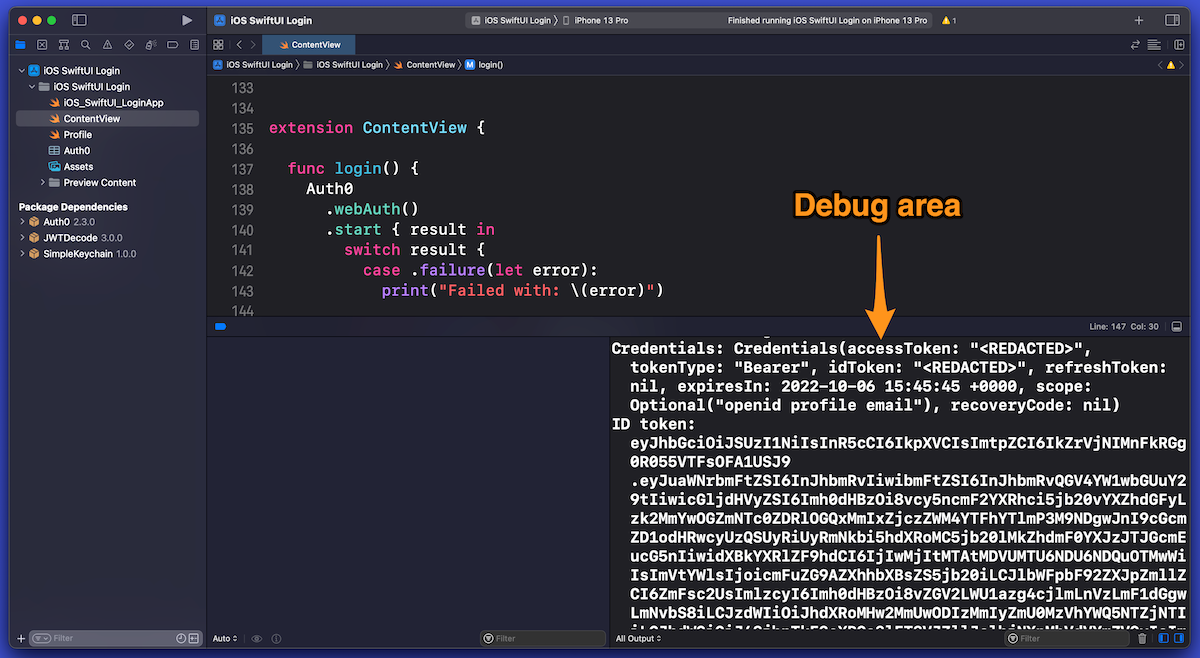
If the Debug area isn’t visible, open the View menu and select Debug Area → Show Debug Area or use the keyboard shortcut command-Shift-Y.
You’ll see the contents of the credentials object and its idToken property, which should look similar to this:
Credentials: Credentials(accessToken: "<REDACTED>", tokenType: "Bearer", idToken: "<REDACTED>", refreshToken: nil, expiresIn: 2022-03-20 04:38:25 +0000, scope: Optional("openid profile email"), recoveryCode: nil)
ID token: eyJhbGciOiJSUzI1NiIsInR5cC...
The credentials object is a package of information that Auth0 sends to your app after authenticating a user. This information includes:
- ID token: Data that proves that the user has been authenticated.
- Access token: Data that gives a client application permission to access a specific resource to perform specific actions on the user’s behalf.
- Refresh token: Applications use this to get additional access tokens when the original access token expires without requiring the user to re-authenticate.
- Scopes: A set of OpenID Connect (OIDC) scopes — authorizations for access to details about the user — that Auth0 has granted to the app. Unless you specify otherwise, Auth0.swift defaults to requesting the following scopes when logging in a user:
openid: Authorization to use OIDC to verify the user's identityprofile: Authorization to access the user’s name informationemail: Authorization to access the user’s email address
Want to know more about ID tokens and access tokens? We explain all in our article, ID Token and Access Token: What's the Difference?
Want to know more about refresh tokens? See our article, What Are Refresh Tokens and How to Use Them Securely.
The piece of information that we’re most interested in (for this exercise) is the ID token.
When the print() function is used to output the contents of credentials, the values of the idToken and accessToken properties are replaced with the string <REDACTED> as a security measure. Malicious parties can use tools to capture the output of print() functions from production apps; this is why Credentials instances redact the values of their idToken and accessToken properties when printed.
Note that when we use the print() function to output credentials.idToken — the ID token itself — the value is not redacted. That’s because this value is useful for debugging, which we’ll do in the next step.
It’s fine to print the value of the ID token to the debug console while you’re learning about the authentication process or building the app. Make sure you remove
print()statements — especially those that print sensitive information, such as the ID token — before putting them into production!
What’s in the ID token?
📺 The What’s in the ID token? section of the video
To see what’s in the ID token, copy its value from the Debug area, go to Auth0’s JWT.io site and paste that value into the Encoded text area on the left side of the page. JWT.io will decode the ID token from its JWT form and display its decoded contents in the Decoded area on the page’s right side:
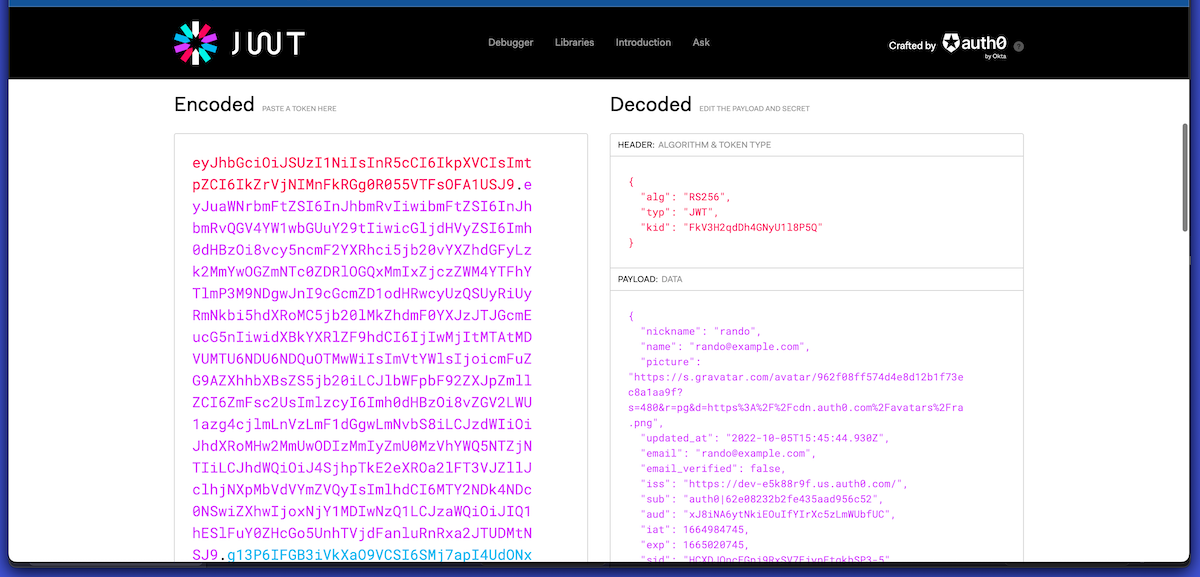
In the Decoded area’s Payload section, you’ll see the decoded user information from the ID token, including the data that we want the app to display: the user’s name, email address, and picture.
In the next step, we’ll give the app the same ID token-decoding capability as JWT.io’s.
Auth0 has plenty of information about JWTs. In addition to the main JWT.io page, you should visit JWT.io’s Introduction to JSON Web Tokens and download our free JWT Handbook.
Get the User’s Information
📺 The Get the User’s Information section of the video
The app only “knows” whether the user is logged in or logged out in its current state. It also has information about the user’s identity encoded in the ID token. Let’s extract this user information — the user profile — and use it to display the user’s name, email address, and picture when the user is logged in.
🛠 In Profile, add the following import statement before the struct Profile line:
// [ 📄 Profile.swift ]

import JWTDecode

// [ More code here ]
🛠 In the Profile extension, replace the // TODO: Implement the 'from()' method. comment with this from() method. It uses a couple of methods from the newly-imported JWTDecode library:
// [ 📄 Profile.swift ]

// [ More code here ]

  static func from(_ idToken: String) -> Self {
    guard
      let jwt = try? decode(jwt: idToken),
      let id = jwt.subject,
      let name = jwt.claim(name: "name").string,
      let email = jwt.claim(name: "email").string,
      let emailVerified = jwt.claim(name: "email_verified").boolean,
      let picture = jwt.claim(name: "picture").string,
      let updatedAt = jwt.claim(name: "updated_at").string
    else {
      return .empty
    }

    return Profile(
      id: id,
      name: name,
      email: email,
      emailVerified: String(describing: emailVerified),
      picture: picture,
      updatedAt: updatedAt
    )
  }

// [ More code here ]
Given an ID token string, the from() function creates a Profile instance. If from() can extract claims — values about the user’s identity, which include their name, email address, and the URL for their picture — from the ID token, it returns a Profile instance with that information in its properties. Otherwise, it returns a Profile instance with empty properties.
Display the User’s Information
📺 The Display the User’s Information section of the video
Now that there’s a way to extract information from an ID token, let’s put it to use.
Since userProfile is marked with the @State attribute, it defines the user interface’s state. Whenever userProfile or one of its properties changes, the app redraws the user interface to reflect the change.
We want to display the user’s information when they log in, so we’ll use Profile’s newly-created from() method in the login() method.
🛠 Open ContentView and update login() as shown below:
// [ 📄 ContentView.swift ]

// [ More code here ]

  func login() {
    Auth0 // 1
      .webAuth() // 2
      .start { result in // 3
        switch result {
          // 4
          case .failure(let error):
            print("Failed with: (error)")
          // 5
          case .success(let credentials):
            self.isAuthenticated = true
            // 👇🏽👇🏽👇🏽 New line of code here!
            self.userProfile = Profile.from(credentials.idToken)
            // 👆🏽👆🏽👆🏽
            print("Credentials: (credentials)")
            print("ID token: (credentials.idToken)")
        }
      }
  }

// [ More code here ]
The newly-added line of code runs after the user logs in, and the app receives the ID token. It creates a new Profile instance from the data in the ID token and sets ContentView’s userProfile property to that instance.
When the user logs out, we should clean up the user profile just to be safe.
🛠 Update logout() as shown below:
// [ 📄 ContentView.swift ]

// [ More code here ]

  func logout() {
    Auth0
      .webAuth()
      .clearSession { result in
        switch result {
          case .success:
            self.isAuthenticated = false
            // 👇🏽👇🏽👇🏽 New line of code here!
            self.userProfile = Profile.empty
            // 👆🏽👆🏽👆🏽

          case .failure(let error):
            print("Failed with: (error)")
        }
      }
  }

// [ More code here ]
Run the App Again
📺 The Run the App Again section of the video
Run the app and confirm that the changes work. When you log in, you should see the user’s name, email address, and picture:
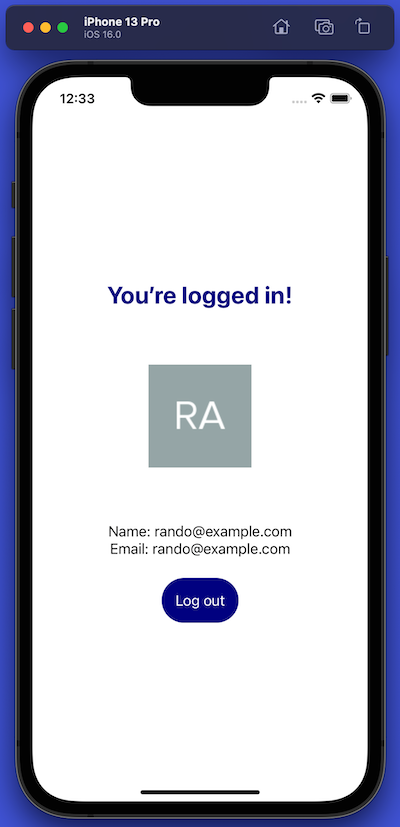
Congratulations, and high-fives and handshakes all around! You’ve taken a SwiftUI app and given it the ability to authenticate users with Auth0.
Next Steps
SwiftUI is an expansive topic; we only scratched its surface in this tutorial. For your next steps in exploring it, you might want to look at these valuable resources:
- SwiftUI by Example
- Your First SwiftUI App
- Stanford University’s “Developing Applications for iOS” course for Spring 2021
📺 Last but not least, the video ends with closing remarks and a quick accordion number!