In the realm of B2B SaaS, the ability to offer isolated and tailored experiences to distinct customer organizations is paramount. Auth0 Organizations provides a robust framework for managing these multi-tenant environments, offering features like dedicated user bases, custom branding, and organization-specific configurations. Building upon this foundation, implementing Role-Based Access Control (RBAC) within Auth0 Organizations unlocks a new level of granularity in managing user permissions.
In this article, we will explore how roles fit in the Auth0 Organizations framework and how to manage them programmatically using the SaaS Blazor application we are building throughout a series of articles.
Understanding Role Management in Auth0 Organizations
Auth0 allows you to define roles and permissions to apply the Role-Based Access Control authorization model. Usually, roles assigned to users apply across your entire Auth0 tenant. For example, a user who is assigned the editor role will keep this role in all applications registered in your Auth0 tenant unless you apply a different authorization policy via Actions.
Auth0 Organizations allow you to represent your customers' users as distinct entities within your Auth0 tenant. This isolation is crucial for managing users, connections, and policies on a per-organization basis. In the Auth0 Organization context, roles are defined and scoped within a specific Organization. This crucial distinction allows for fine-grained control over what members can do within their designated Organization.
Consider a scenario where you have two customers using your SaaS application: Acme Inc. and Foo Corp. You used Auth0 Organizations to separate Acme Inc. users from Foo Corp. users. However, based on the login flow you configured for your application and the connection model you are applying, you can have specific situations.
For example, suppose you have enabled users to log in as both an individual and an organization user. In that case, the question arises as to which role to consider. In fact, the user can be the application administrator when logging in as an individual, but a mere member when logging in as an Acme Inc. user.
Similarly, if you allow users to be shared between organizations, i.e., a user can be both an Acme Inc. and a Foo Corp. user, then there may be a need for the user to have different roles based on the Organization they are logging in to. For example, the user can be an administrator when logging in to Acme Inc. and just a member when logging in to Foo Corp.
Hence, the need for having roles linked to the Organization.
In this article, we discuss traditional Role-Based Access Control, but in more complex B2B SaaS scenarios, you may need more granularity for your authorization check. In this case, you can leverage Fine-Grained Authorization.
Creating Roles for an Auth0 Organization
Creating roles to assign to users in an Auth0 Organization is straightforward. You can use your Auth0 dashboard or the Auth0 Management API. In both cases, there are two basic steps:
- Create the roles your application needs in your tenant.
- Assign one or more roles to the members of an Organization.
In this article, we will use the Auth0 Management API to create roles and assign them to the members of an Organization.
The Sample Application
The scenario you will be using is the B2B SaaS application we built in the previous articles using Blazor. The following articles recap how we built the application:
- Add Auth0 Organizations to Your B2B Blazor Web App
- Enable Self-Subscribing Model in Your Blazor B2B SaaS Application
- Enforce Customer Email Verification in Your B2B Blazor Web App
You can download the starting Blazor project by running the following command:
git clone --branch email-verification --single-branch https://github.com/andychiare/MyBlazorSaaS
Follow the instructions in the attached README file to register and configure the application with Auth0. If you don't have an Auth0 account, you can sign up for free.
The Blazor application allows a new customer to subscribe and create a new Organization, but currently it makes no distinction between users. We want to introduce two roles in the application:
- the admin role, which is automatically assigned to the user who subscribes to your application and allows them to access an admin dashboard.
- the member role, which can be assigned to users who can't access the admin dashboard.
In this example, you do not use permissions, which are typically assigned to roles. To keep things simple, you are focusing on role names to make access control.
A new Auth0-powered .NET app in less than a minute? Try out our templates
Install the Nugget package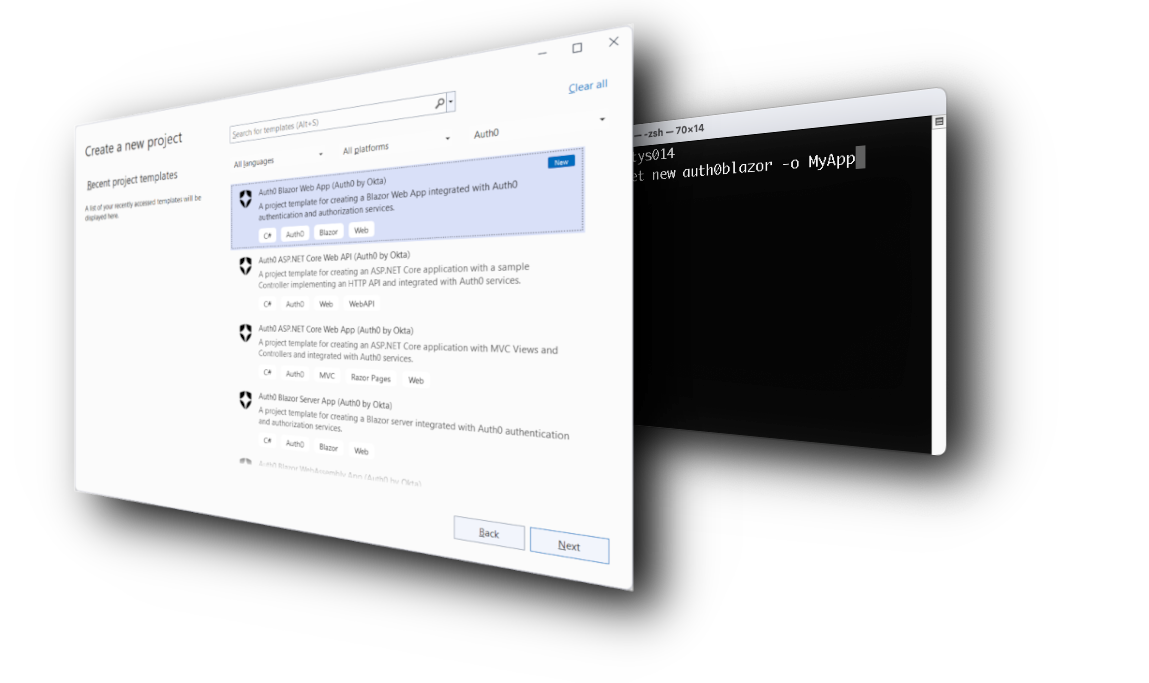
Creating the roles for the Auth0 Organization
Before modifying the application code, make sure you to update the permissions your application needs for managing roles. Assuming you have configured your application accordingly to the mentioned README file, go to your Auth0 dashboard and locate the ManagementClient application in the Applications > Applications section.
Select the APIs tab of the application's configuration page and expand the area below the Auth0 Management API item. Then, select the following permissions to add them to the existing ones:
read:roles, create:roles, update:organizations, create:organization_member_roles , and read:organization_member_roles.
Finally, click the Update button to apply your changes.
Now you can proceed to make the changes that allow the application to create the admin and member roles if they have not been created previously. The admin role will be assigned to the newly created user within the new Organization.
For this purpose, open the CreateOrganization.razor file in the MyBlazorSaaS/Components/Pages/Onboarding folder and apply the changes highlighted below:
<!-- MyBlazorSaaS/Components/Pages/Onboarding/CreateOrganization.razor -->

//...existing code..

  private async Task StartCreateOrganization()
  {
    if (!String.IsNullOrEmpty(OrganizationName))
    {
      Organization organization;

      try {
        //...existing code...

        // 👇 new code
        //Create admin role if it does not exist
        Role adminRole;
        var adminRoleList = await managementClient.Roles.GetAllAsync(
          new GetRolesRequest {NameFilter = "admin"}
          );

        if (adminRoleList.Count == 0)
        {
          adminRole = await managementClient.Roles.CreateAsync(
            new RoleCreateRequest
            {
              Name = "admin",
              Description = "Manage the organization's configuration."
            }
          );
        } else {
          adminRole = adminRoleList[0];
        }

        //Create member role if it does not exist
        Role memberRole;
        var memberRoleList = await managementClient.Roles.GetAllAsync(
          new GetRolesRequest {NameFilter = "member"}
          );

        if (memberRoleList.Count == 0)
        {
          memberRole = await managementClient.Roles.CreateAsync(
            new RoleCreateRequest
            {
              Name = "member",
              Description = "Member of an organization."
            }
          );
        } else {
          memberRole = memberRoleList[0];
        }
        // 👆 new code

        //Add member
        await managementClient.Organizations.AddMembersAsync(
          organization.Id,
          new OrganizationAddMembersRequest() {
            Members = [UserId]
          }
        );

        // 👇 new code
        //Assign admin role to the new member
        await managementClient.Organizations.AddMemberRolesAsync(
          organization.Id,
          UserId,
          new OrganizationAddMemberRolesRequest {
            Roles = [adminRole.Id]
          }
        );
        // 👆 new code

        //...existing code...
    } else {
      Message = "Organization name is required.";
    }
  }

//...existing code...
The first code block creates the two roles if they already don't exist. The second code block assigns the admin role to the user in the context of the current Organization. Let's take a closer look at the code:
        //Create admin role if it does not exist
        Role adminRole;
        var adminRoleList = await managementClient.Roles.GetAllAsync(
          new GetRolesRequest {NameFilter = "admin"}
          );

        if (adminRoleList.Count == 0)
        {
          adminRole = await managementClient.Roles.CreateAsync(
            new RoleCreateRequest
            {
              Name = "admin",
              Description = "Manage the organization's configuration."
            }
          );
        } else {
          adminRole = adminRoleList[0];
        }
This part creates the admin role. It defines the adminRole variable and uses the GetAllAsync() method of the Roles object to get the admin role from your Auth0 tenant. Notice the filter passed as a parameter to get just the role named admin.
Check out the Management API reference documentation for more details on role management.
If the admin role does not exist in your Auth0 tenant yet, you create it using the method CreateAsync() of the Roles object. In this case, you pass a RoleCreateRequest instance with the role's name and a description.
If the admin role already exists in your Auth0 tenant, you simply assign it to the adminRole variable.
Similarly, you create or get the member role with the rest of the code.
You may choose to create roles for your SaaS application using the Auth0 dashboard. In this case, you do not need the code shown above; you only need to retrieve the admin role and then assign it to the user you are about to create.
After creating the user for the new Organization, you assign them the admin role with the following code:
        // 👇 new code
        //Assign admin role to the new member
        await managementClient.Organizations.AddMemberRolesAsync(
          organization.Id,
          UserId,
          new OrganizationAddMemberRolesRequest {
            Roles = [adminRole.Id]
          }
        );
        // 👆 new code
You used the AddMemberRolesAsync() method of the Organizations object by passing the Organization ID, the user ID, and the role ID embedded in an OrganizationAddMemberRolesRequest instance. Read the documentation reference to learn more about the parameters of the method.
Your B2B SaaS application now has users and roles for its Organizations.
Applying Role-Based Access Control
Once you have role support in the context of the Organizations, it's time to leverage them to control access to your application.
Building and protecting the dashboard
As mentioned earlier, we will allow admin users to access a dashboard while Organization members will not.
Create a Dashboard folder in the MyBlazorSaaS/Components/Pages folder and add a Home.razor file with the following content:
<!-- MyBlazorSaaS/Components/Pages/Dashboard -->

@page "/dashboard"
@attribute [Authorize(Roles = "admin")]

@inject IAuth0Management auth0Management

<PageTitle>Dashboard</PageTitle>

<h1>Welcome to your dashboard!</h1>

<div>
  <div class="form-group row my-2">
    <label for="organizationName" class="col-sm-4 col-form-label">Organization</label>
    <div class="col-sm-6">
      <InputText
        type="text"
        @bind-Value="OrganizationName"
        id="organizationName"
        class="form-control"
        disabled/>
    </div>
  </div>
</div>

@code {
  [CascadingParameter]
  private Task<AuthenticationState>? authenticationState { get; set; }
  private string OrganizationName = "";

  protected override async Task OnInitializedAsync()
  {
    if (authenticationState is not null)
    {
      var state = await authenticationState;

      if (state.User?.Identity?.IsAuthenticated??false)
      {
        var organizationId = state.User?.FindFirst(c => c.Type == "org_id")?.Value??String.Empty;
        if (!string.IsNullOrEmpty(organizationId))
        {
          var managementClient = await auth0Management.getClient();
          var organization = await managementClient.Organizations.GetAsync(organizationId);
          OrganizationName = organization.DisplayName;
        }
      }
    }
  }
}
This code defines a page that simply shows the Organization name in a readonly textbox. Notice the Authorize attribute at the beginning of the Razor component. It specifies "admin" as the user role authorized to access this page.
Now, open the Home.razor file in the MyBlazorSaaS/Components/Pages folder and add the markup highlighted below:
<!-- MyBlazorSaaS/Components/Pages/Home.razor -->

<!--...existing markup..-->

@if (!string.IsNullOrWhiteSpace(OrganizationMessage)) {
  <div class="alert alert-success" role="alert">
    @OrganizationMessage
  </div>
}

<!--👇 new markup -->
<AuthorizeView Roles="admin">
    <Authorized>
      <div class="text-center">
        <p>Manage your Organization</p>
        <a href="Dashboard">Dashboard</a>
      </div>
    </Authorized>
</AuthorizeView>
<!--👆 new markup -->

<!--...existing markup..-->
The AuthorizeView component shows the dashboard link only to users with the admin role.
Making roles available to your Blazor app
One little step is missing to get role support working in your B2B SaaS Blazor application. You need to create an Auth0 Action that handles the Post Login trigger by adding the user's roles to the ID token.
Read this article to learn the details about making roles available to your Blazor application.
Basically, the Auth0 Action you need to create has the following code:
exports.onExecutePostLogin = async (event, api) => {
  const roleClaim = 'http://schemas.microsoft.com/ws/2008/06/identity/claims/role';

  if (event.authorization) {
    api.idToken.setCustomClaim(roleClaim, event.authorization.roles);
  }
}
Make sure to deploy and add your Action to the login flow. Read this article for an introduction to Auth0 Actions.
Testing Role-Based Access Control in Your Organization
Now it's time to test your Blazor application to ensure that users access it based on their assigned roles.
Testing as an Organization admin
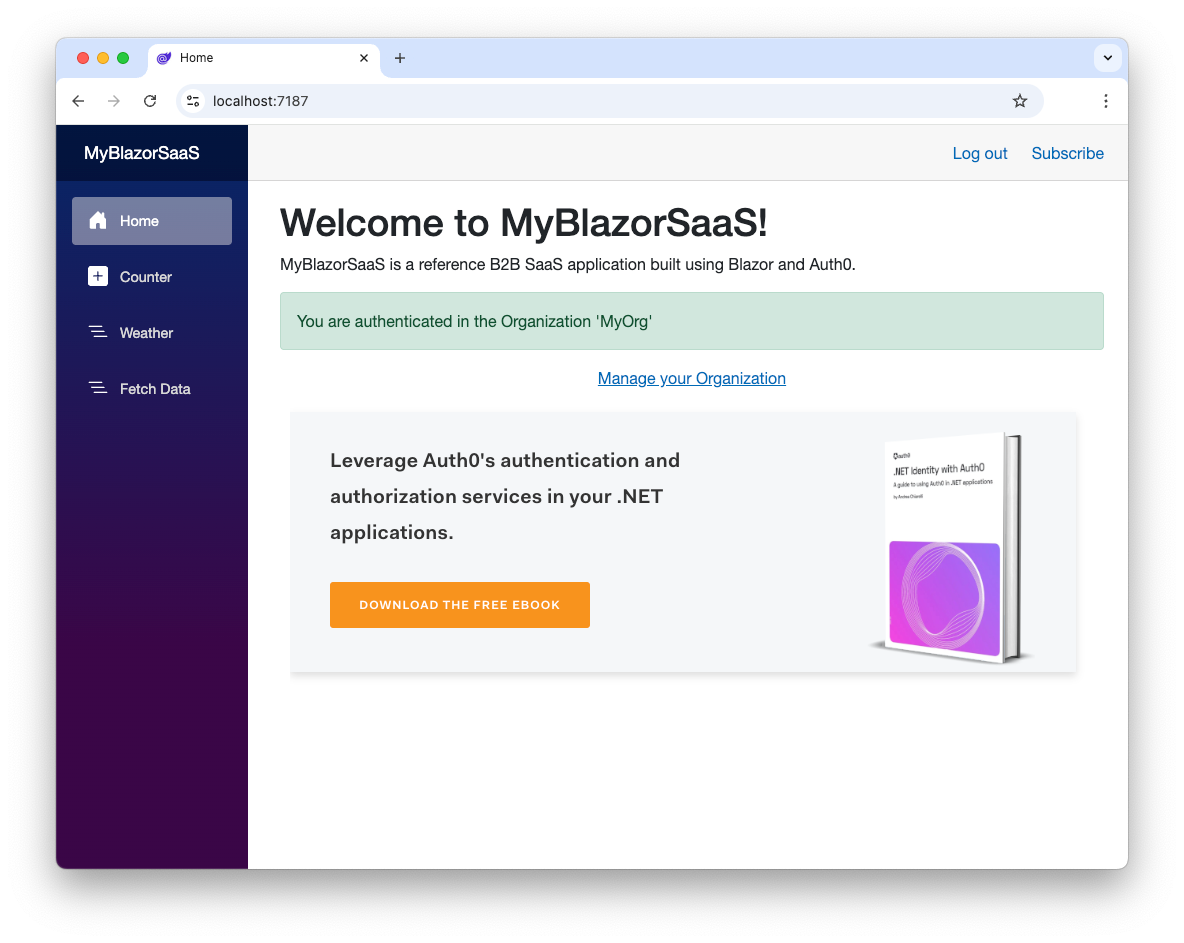
Run the application and create a new Organization by clicking the Subscribe link in the upper right corner of the home page. The newly created user will be assigned the admin role, so after the Auth0 Organization is created, your home page should look like the following picture:
Notice the link "Manage your Organization" in the center of the page. Navigating that link, you will see the following page:
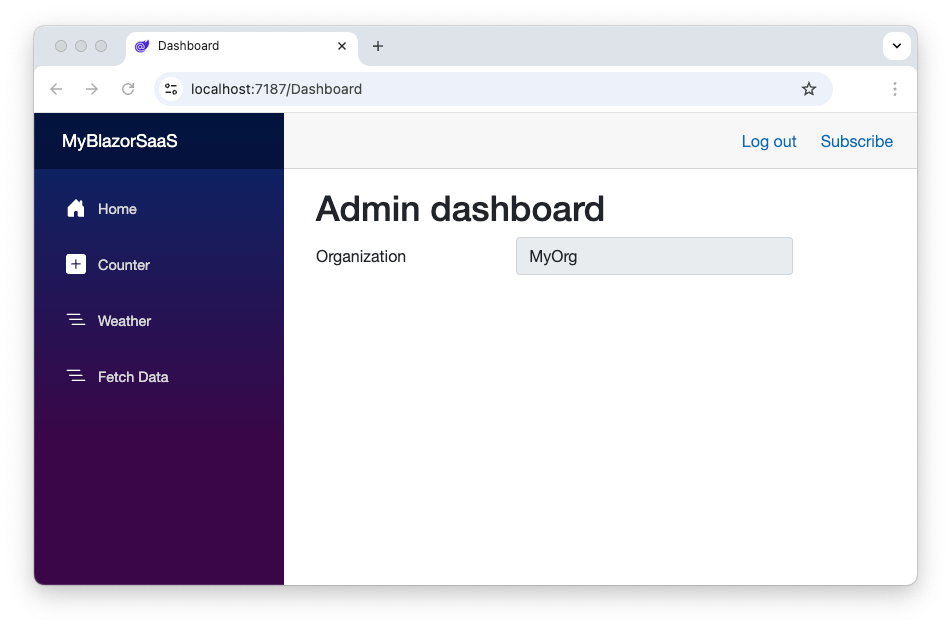
As an admin in the current Organization, you can access the application's dashboard.
Testing as an Organization member
Now, log out of the application and add a member to the Organization using the Auth0 dashboard and assign the member role. You will learn how to add a member to an Organization through your application's dashboard in a future article.
If you log in to your Blazor app as a member user, you'll get the following home page:
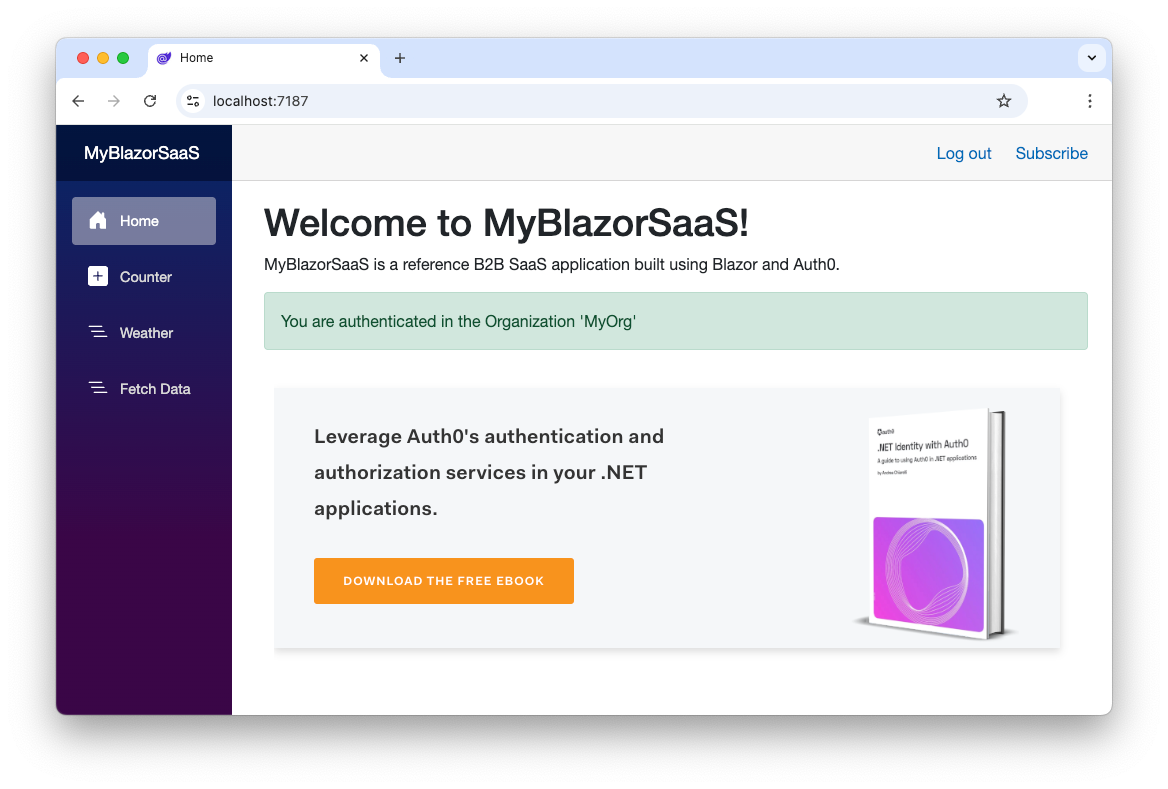
As an Organization member, you will not see the link to access the application dashboard.
Try out Auth0 authentication for free.
Get started →Recap
In this article, we walked through setting up Role-Based Access Control (RBAC) for a B2B SaaS Blazor application using Auth0 Organizations. Basically, you learned how to create roles like "admin" and "member" using the Auth0 Management API and then assign them to users belonging to an Organization.
You also set up an Auth0 Action to add user roles to the ID token for your Blazor app.
Finally, we showed how to protect routes and content using the Authorize attribute and the AuthorizeView component based on these roles. We tested with both admin and member roles to confirm that RBAC was working, making sure only the authorized users could get into the dashboard.
You can find the final code of the sample project implemented throughout the article here.
In a future article, we will add the ability to create new users to the dashboard. Stay tuned!
About the author

Andrea Chiarelli
Principal Developer Advocate
I have over 20 years of experience as a software engineer and technical author. Throughout my career, I've used several programming languages and technologies for the projects I was involved in, ranging from C# to JavaScript, ASP.NET to Node.js, Angular to React, SOAP to REST APIs, etc.
In the last few years, I've been focusing on simplifying the developer experience with Identity and related topics, especially in the .NET ecosystem.