
TL;DR: Redux is a state container for JavaScript applications by Dan Abramov that lets us have a predictable unidirectional data flow. It offers some benefits over other libraries like Flux, but works in similar ways. In this article we explore how to add JWT authentication to a Redux app. Check out the repo to go straight to the code.
There are many benefits to using unidirectional data flow in single page applications. Perhaps the biggest is that as applications become larger, it is easier to reason about how data affects the app's states and views. Although patterns and libraries like Flux have been popularized by React, we certainly aren't limited to using the two together. It's now common to see unidirectional data flow patterns in other frameworks, such as AngularJS.
While Flux is proven and works well for one-way data flow, a newer library called Redux is another great solution that offers the benefit of being easier to work with. While Flux and Redux are similar, there are some important differences.
In this tutorial, we'll explore some of the principles of Redux and look at how to build a simple React application with it. We'll focus on how to add authentication to our Redux app by allowing users to log in and access secure endpoints from a NodeJS API with JWT authentication.
What is Redux and What Does it Solve?
JavaScript applications are, in a lot of ways, large collections of data and state. Any good application will need a way for its state to be changed at some point, and this is where Redux comes in. Built by Dan Abramov, Redux is essentially a state container for JavaScript apps that describes the state of the application as a single object. Further, Redux provides an opinionated pattern and toolset for making changes to the state of the app.
Reducers
Redux makes it very clear that the application's data itself should never be mutated directly. Instead, a function should be put in place that returns the next state by looking at the previous state, along with an action that describes how things should change. These functions are called reducers and are at the heart of Redux. It's important to note that reducers should be kept pure, meaning that their output should rely solely on the arguments passed to them with no side effects such as making an API call or mutating the arguments passed in.
So why should reducers be pure and not have side effects? In short, it's to keep things simple and predictable. A function that relies only on the arguments passed to it to derive the next state will be easier to reason about and debug. If we wanted to we could return mutated objects and Redux wouldn't throw errors, but as mentioned, it is strongly discouraged.
Actions
While reducers describe how the app's state changes, actions describe what happened. They carry infomation about what has changed in the app's state and, as mentioned earlier, are used in reducers to derive the next state. Actions are given a type property which can be used in a switch statement within the reducer to handle the various types of actions that get defined.
Benefits of Redux
Since all data flow is strictly one-way, and because data is never mutated, Redux makes it possible to track every single state change in an application. This has some cool implications, including the ability to easily undo and redo data changes and to track actions so that errors can be logged.
Redux Authentication App - Getting Started
To get a sense for using JWT authentication with Redux, we'll build a simple app that retrieves Chuck Norris quotes. The app will let users log in and get a JWT that can be used to access protected endpoints with JWT middleware. We've already explored ReactJS Authentication while using Flux on the blog, so feel free to check that out as well.
We could spend a good amount of time just talking about and setting up the build tools for our app. Instead, let's use the Webpack setup that is provided in the Redux examples to get going quickly. We'll try to mimic the architecture of the example applications where we can to follow best practices.
Dependencies and Build Process
Here's our dependencies in package.json:
...

  "dependencies": {
    "react": "^0.14.3",
    "react-dom": "^0.14.3",
    "react-redux": "^4.0.4",
    "redux": "^3.0.5",
    "redux-thunk": "^0.1.0"
  },
  "devDependencies": {
    "babel-core": "^5.6.18",
    "babel-loader": "^5.1.4",
    "babel-plugin-react-transform": "^1.1.0",
    "express": "^4.13.3",
    "webpack": "^1.9.11",
    "webpack-dev-middleware": "^1.2.0",
    "webpack-hot-middleware": "^2.2.0"
  }

...
We need to set up an express server to serve our front end:
// server.js

var webpack = require('webpack')
var webpackDevMiddleware = require('webpack-dev-middleware')
var webpackHotMiddleware = require('webpack-hot-middleware')
var config = require('./webpack.config')

var app = new (require('express'))()
var port = 3000

var compiler = webpack(config)
app.use(webpackDevMiddleware(compiler, { noInfo: true, publicPath: config.output.publicPath }))
app.use(webpackHotMiddleware(compiler))

app.get("/", function(req, res) {
  res.sendFile(__dirname + '/index.html')
})

app.listen(port, function(error) {
  if (error) {
    console.error(error)
  } else {
    console.info("==> 🌎  Listening on port %s. Open up http://localhost:%s/ in your browser.", port, port)
  }
})
We need to set up Webpack to transpile our JavaScript with Babel and bundle it:
// webpack.config.js

var path = require('path')
var webpack = require('webpack')

module.exports = {
  devtool: 'cheap-module-eval-source-map',
  entry: [
    'webpack-hot-middleware/client',
    './index'
  ],
  output: {
    path: path.join(__dirname, 'dist'),
    filename: 'bundle.js',
    publicPath: '/static/'
  },
  plugins: [
    new webpack.optimize.OccurenceOrderPlugin(),
    new webpack.HotModuleReplacementPlugin(),
    new webpack.NoErrorsPlugin()
  ],
  module: {
    loaders: [{
      test: /.js$/,
      loaders: [ 'babel' ],
      exclude: /node_modules/,
      include: __dirname
    }, {
      test: /.css?$/,
      loaders: [ 'style', 'raw' ],
      include: __dirname
    }]
  }
}
Finally, we need the NodeJS Chuck Norris quote API so we can authenticate our users and get quotes. Clone the repo into a server subdirectory.
Creating the Redux Store
In Flux, many stores are used within the app, but with Redux, there is only one. A Redux store holds the application's state and lets us use the dispatch function to call our actions. In the case of our React app, we can provide the single store to the top-level component. We need to wrap the top-level component with a Provider from react-redux so that everything below gets access to the store.
// index.js

import React from 'react'
import { render } from 'react-dom'
import { createStore, applyMiddleware } from 'redux'
import { Provider } from 'react-redux'
import App from './containers/App'
import quotesApp from './reducers'
import thunkMiddleware from 'redux-thunk'
import api from './middleware/api'

let createStoreWithMiddleware = applyMiddleware(thunkMiddleware, api)(createStore)

let store = createStoreWithMiddleware(quotesApp)

let rootElement = document.getElementById('root')

render(
  <Provider store={store}>
    <App />
  </Provider>,
  rootElement
)
Note here that we are applying middleware as we create our store. This is looking ahead and we'll describe what the thunkMiddleware and api middleware do later on. We are importing the quotesApp reducer, which we've yet to create, and this is used to create the store. Before creating the reducer, let's create the App container component.
// containers/App.js

import React, { Component, PropTypes } from 'react'
import { connect } from 'react-redux'
import { loginUser, fetchQuote, fetchSecretQuote } from '../actions'
import Login from '../components/Login'
import Navbar from '../components/Navbar'
import Quotes from '../components/Quotes'

class App extends Component {
  render() {
    const { dispatch, quote, isAuthenticated, errorMessage, isSecretQuote } = this.props
    return (
      <div>
        <Navbar
          isAuthenticated={isAuthenticated}
          errorMessage={errorMessage}
          dispatch={dispatch}
        />
        <div className='container'>
          <Quotes
            onQuoteClick={() => dispatch(fetchQuote())}
            onSecretQuoteClick={() => dispatch(fetchSecretQuote())}
            isAuthenticated={isAuthenticated}
            quote={quote}
            isSecretQuote={isSecretQuote}
          />
        </div>
      </div>
    )
  }
}

App.propTypes = {
  dispatch: PropTypes.func.isRequired,
  quote: PropTypes.string,
  isAuthenticated: PropTypes.bool.isRequired,
  errorMessage: PropTypes.string,
  isSecretQuote: PropTypes.bool.isRequired
}

// These props come from the application's
// state when it is started
function mapStateToProps(state) {

  const { quotes, auth } = state
  const { quote, authenticated } = quotes
  const { isAuthenticated, errorMessage } = auth

  return {
    quote,
    isSecretQuote: authenticated,
    isAuthenticated,
    errorMessage
  }
}

export default connect(mapStateToProps)(App)
Here we create our root component, called App and call on some other components that we'll create afterward called Navbar and Quotes. We're passing some props to these components that come from our global state and are retrieved in the mapPropsToState function. With the connect function, we are wiring up the App component to be used with Redux and passing the props it needs from the global state to start.
Note: What's the
{ thing } = this.propssyntax all about? We're using a lot of object destructuring throughout our app. If you're not familiar with this ES2015 feature, you can read more here.
Before we go on to create the other React components, let's finish out with the Redux pieces first. This will allow us to get a sense for how the components behave once we put them in.
The Redux Authentication Actions
The actions that we need in our case are all going to be asynchronous because we are calling an API. To handle the async calls, we need a setup that has actions which cover the three possible states that exist:
- A request was sent
- A request successful
- A request failed
Let's create our actions to cater to those.
// actions.js

// There are three possible states for our login
// process and we need actions for each of them
export const LOGIN_REQUEST = 'LOGIN_REQUEST'
export const LOGIN_SUCCESS = 'LOGIN_SUCCESS'
export const LOGIN_FAILURE = 'LOGIN_FAILURE'

function requestLogin(creds) {
  return {
    type: LOGIN_REQUEST,
    isFetching: true,
    isAuthenticated: false,
    creds
  }
}

function receiveLogin(user) {
  return {
    type: LOGIN_SUCCESS,
    isFetching: false,
    isAuthenticated: true,
    id_token: user.id_token
  }
}

function loginError(message) {
  return {
    type: LOGIN_FAILURE,
    isFetching: false,
    isAuthenticated: false,
    message
  }
}
Our action functions return an object with an action type and any data that comes along with that action. Notice that we've got a boolean for whether or not there is fetching happening and also whether the user is authenticated. These items will be useful in our UI later on.
So those are the action functions, but when do they actually get called? We can import them to into our components and, because we have access to the store's dispatch method, we can call them from events like button clicks. However, we first need a function that actually calls the API.
// actions.js

...

// Calls the API to get a token and
// dispatches actions along the way
export function loginUser(creds) {

  let config = {
    method: 'POST',
    headers: { 'Content-Type':'application/x-www-form-urlencoded' },
    body: `username=${creds.username}&password=${creds.password}`
  }

  return dispatch => {
    // We dispatch requestLogin to kickoff the call to the API
    dispatch(requestLogin(creds))

    return fetch('http://localhost:3001/sessions/create', config)
      .then(response =>
        response.json().then(user => ({ user, response }))
            ).then(({ user, response }) =>  {
        if (!response.ok) {
          // If there was a problem, we want to
          // dispatch the error condition
          dispatch(loginError(user.message))
          return Promise.reject(user)
        } else {
          // If login was successful, set the token in local storage
          localStorage.setItem('id_token', user.id_token)
          localStorage.setItem('id_token', user.access_token)
          // Dispatch the success action
          dispatch(receiveLogin(user))
        }
      }).catch(err => console.log("Error: ", err))
  }
}

...
We're using the fetch API to make our calls to the server with our user's credentials. The important thing to notice here is that we're making use of our three login actions at various points of the API call. We start by dispatching the requestLogin function before the call is made to say that the request has been sent. If the status comes back as anything other than OK, we dispatch the loginError function, and if it was successful, we dispatch the receiveLogin function. In this way we can send the appropriate actions for whatever situation happens.
We're also taking care of saving the JSON Web Token that comes back from the API in local storage right here within the API call. We could do this elsewhere, but it's important to note that we can't do it in the reducer. As was mentioned earlier, reducers should have no side effects.
We can also put in the actions for logging the user out. The logout process is a bit different because it really just requires that we remove the user's token from local storage and set the isAuthenticated boolean to false, but we'll put in all the actions that we would normally have when talking to an API just in case they are needed.
// actions.js

...

// Three possible states for our logout process as well.
// Since we are using JWTs, we just need to remove the token
// from localStorage. These actions are more useful if we
// were calling the API to log the user out
export const LOGOUT_REQUEST = 'LOGOUT_REQUEST'
export const LOGOUT_SUCCESS = 'LOGOUT_SUCCESS'
export const LOGOUT_FAILURE = 'LOGOUT_FAILURE'

function requestLogout() {
  return {
    type: LOGOUT_REQUEST,
    isFetching: true,
    isAuthenticated: true
  }
}

function receiveLogout() {
  return {
    type: LOGOUT_SUCCESS,
    isFetching: false,
    isAuthenticated: false
  }
}

...

// Logs the user out
export function logoutUser() {
  return dispatch => {
    dispatch(requestLogout())
    localStorage.removeItem('id_token')
    localStorage.removeItem('access_token')
    dispatch(receiveLogout())
  }
}

...
It should be noted that we aren't taking care of letting users sign up for accounts here in this tutorial, even though we could do so with a POST request to localhost:3001/users. This is for the sake of brevity, but the implementation would look similar to our login flow.
The Redux Authentication Reducer
Now that we have the login actions in place, we need to create the reducer that will return new states in response to them.
// reducers.js

import { combineReducers } from 'redux'
import {
  LOGIN_REQUEST, LOGIN_SUCCESS, LOGIN_FAILURE, LOGOUT_SUCCESS
} from './actions'

// The auth reducer. The starting state sets authentication
// based on a token being in local storage. In a real app,
// we would also want a util to check if the token is expired.
function auth(state = {
    isFetching: false,
    isAuthenticated: localStorage.getItem('id_token') ? true : false
  }, action) {
  switch (action.type) {
    case LOGIN_REQUEST:
      return Object.assign({}, state, {
        isFetching: true,
        isAuthenticated: false,
        user: action.creds
      })
    case LOGIN_SUCCESS:
      return Object.assign({}, state, {
        isFetching: false,
        isAuthenticated: true,
        errorMessage: ''
      })
    case LOGIN_FAILURE:
      return Object.assign({}, state, {
        isFetching: false,
        isAuthenticated: false,
        errorMessage: action.message
      })
    case LOGOUT_SUCCESS:
      return Object.assign({}, state, {
        isFetching: true,
        isAuthenticated: false
      })
    default:
      return state
  }
}

// The quotes reducer
function quotes(state = {}, action) {
  switch (action.type) {

    default:
      return state
  }
}

// We combine the reducers here so that they
// can be left split apart above
const quotesApp = combineReducers({
  auth,
  quotes
})

export default quotesApp
Taking a look at the auth reducer, we can get a sense for how reducers get set up. The first parameter represents the starting state and in this case, we're assigning a default value that is an object. The default state just needs to say that we're not fetching any data to start out with, and whether the user has a JWT in local storage. We're using the presence of a JWT to determine if the user is authenticated, but in a full setup we could also use a utility to check if the JWT is expired or not. In either case, we can be sure that our API is secure because the user needs a valid JWT to get access to it.
The second parameter is the action which carries the type and any other data that describes the change to our data. The switch statement lets us respond to the various action types in whichever way we want. Remember that reducers need to return an unmutated object, so we use Object.assign with an empty object as the first argument so we can be sure the return value is a unique object. Notice that in the LOGIN_FAILURE case we are getting the error message that gets passed back from the loginError function.
The quotes reducer is just a skeleton right now, but we'll populate that once we get the actions for it set up.
Redux gives us a handy combineReducers function that lets us split our individual reducers apart and then tie them together afterward.
Note that we need to make use of the Redux thunk middleware to handle the async reducers. This makes it possible to have a reducer that returns something other than an object.
The Navbar and Login Components
We should see if everything is wiring up properly in the browser at this point. But before we do, we'll need the Navbar and Login components in place.
// components/Navbar.js

import React, { Component, PropTypes } from 'react'
import Login from './Login'
import Logout from './Logout'
import { loginUser, logoutUser } from '../actions'

export default class Navbar extends Component {

  render() {
    const { dispatch, isAuthenticated, errorMessage } = this.props

    return (
      <nav className='navbar navbar-default'>
        <div className='container-fluid'>
          <a className="navbar-brand" href="#">Quotes App</a>
          <div className='navbar-form'>

            {!isAuthenticated &&
              <Login
                errorMessage={errorMessage}
                onLoginClick={ creds => dispatch(loginUser(creds)) }
              />
            }

            {isAuthenticated &&
              <Logout onLogoutClick={() => dispatch(logoutUser())} />
            }

          </div>
        </div>
      </nav>
    )
  }

}

Navbar.propTypes = {
  dispatch: PropTypes.func.isRequired,
  isAuthenticated: PropTypes.bool.isRequired,
  errorMessage: PropTypes.string
}
This is a pretty standard React component. Notice that we're using dispatch to call our action functions and passing this behavior down as a prop on the Login and Logout components. We got the dispatch function as a prop in this component by passing it down from the root App component.
Here's our Login component:
// components/Login.js

import React, { Component, PropTypes } from 'react'

export default class Login extends Component {

  render() {
    const { errorMessage } = this.props

    return (
      <div>
        <input type='text' ref='username' className="form-control" style={{ marginRight: '5px' }} placeholder='Username'/>
        <input type='password' ref='password' className="form-control" style={{ marginRight: '5px' }} placeholder='Password'/>
        <button onClick={(event) => this.handleClick(event)} className="btn btn-primary">
          Login
        </button>

        {errorMessage &&
          <p style={{color:'red'}}>{errorMessage}</p>
        }
      </div>
    )
  }

  handleClick(event) {
    const username = this.refs.username
    const password = this.refs.password
    const creds = { username: username.value.trim(), password: password.value.trim() }
    this.props.onLoginClick(creds)
  }
}

Login.propTypes = {
  onLoginClick: PropTypes.func.isRequired,
  errorMessage: PropTypes.string
}
Here's our Logout component:
// components/Logout.js

import React, { Component, PropTypes } from 'react'

export default class Logout extends Component {

  render() {
    const { onLogoutClick } = this.props

    return (
      <button onClick={() => onLogoutClick()} className="btn btn-primary">
        Logout
      </button>
    )
  }

}

Logout.propTypes = {
  onLogoutClick: PropTypes.func.isRequired
}
If we comment out the Quotes component pieces of containers/App.js and remove the api middleware call in our index.js file, we should be able to log in. There is a default user on the server with gonto as the username and password. With a successful login, we get the token saved in local storage.

If we provide invalid credentials, the LOGIN_FAILURE action is hit and our error shows up.

Fetching Quotes with API Middleware
Redux lets us tie in middleware to our apps, which opens up a lot of possibilities. With it, we can easily do things like logging. Another common use of middleware is for setting up API communication. Let's create a middleware that calls our API for quotes. Our setup is well-informed by the API middleware from Redux's real world example.
// middleware/api.js

const BASE_URL = 'http://localhost:3001/api/'

function callApi(endpoint, authenticated) {

  let token = localStorage.getItem('access_token') || null
  let config = {}

  if(authenticated) {
    if(token) {
      config = {
        headers: { 'Authorization': `Bearer ${token}` }
      }
    }
    else {
      throw "No token saved!"
    }
  }

  return fetch(BASE_URL + endpoint, config)
    .then(response =>
      response.text().then(text => ({ text, response }))
    ).then(({ text, response }) => {
      if (!response.ok) {
        return Promise.reject(text)
      }

      return text
    }).catch(err => console.log(err))
}

export const CALL_API = Symbol('Call API')

export default store => next => action => {

  const callAPI = action[CALL_API]

  // So the middleware doesn't get applied to every single action
  if (typeof callAPI === 'undefined') {
    return next(action)
  }

  let { endpoint, types, authenticated } = callAPI

  const [ requestType, successType, errorType ] = types

  // Passing the authenticated boolean back in our data will let us distinguish between normal and secret quotes
  return callApi(endpoint, authenticated).then(
    response =>
      next({
        response,
        authenticated,
        type: successType
      }),
    error => next({
      error: error.message || 'There was an error.',
      type: errorType
    })
  )
}
The middleware itself is contained in the exported arrow function cascade which relies on the callApi function. The cool thing about setting up a middleware like this is that from our actions that make use of the middleware, we can set a property that specifies whether the request should be authenticated. Notice here that if the request should be authenticated, we attach the access token from local storage as an Authorization header.
Next, we need to include some more actions to call the API for the quotes.
// actions.js

// The middleware to call the API for quotes
import { CALL_API } from './middleware/api'

...

export const QUOTE_REQUEST = 'QUOTE_REQUEST'
export const QUOTE_SUCCESS = 'QUOTE_SUCCESS'
export const QUOTE_FAILURE = 'QUOTE_FAILURE'

// Uses the API middlware to get a quote
export function fetchQuote() {
  return {
    [CALL_API]: {
      endpoint: 'random-quote',
      types: [QUOTE_REQUEST, QUOTE_SUCCESS, QUOTE_FAILURE]
    }
  }
}

// Same API middlware is used to get a
// secret quote, but we set authenticated
// to true so that the auth header is sent
export function fetchSecretQuote() {
  return {
    [CALL_API]: {
      endpoint: 'protected/random-quote',
      authenticated: true,
      types: [QUOTE_REQUEST, QUOTE_SUCCESS, QUOTE_FAILURE]
    }
  }
}

...
We're using computed property syntax in our action functions here. Notice that we set authenticated to true for the call to the protected endpoint.
Our quotes reducer now needs to handle these actions.
// reducers.js

...

import {
  LOGIN_REQUEST, LOGIN_SUCCESS, LOGIN_FAILURE, LOGOUT_SUCCESS,
  QUOTE_REQUEST, QUOTE_SUCCESS, QUOTE_FAILURE
} from './actions'

...

// The quotes reducer
function quotes(state = {
    isFetching: false,
    quote: '',
    authenticated: false
  }, action) {
  switch (action.type) {
    case QUOTE_REQUEST:
      return Object.assign({}, state, {
        isFetching: true
      })
    case QUOTE_SUCCESS:
      return Object.assign({}, state, {
        isFetching: false,
        quote: action.response,
        authenticated: action.authenticated || false
      })
    case QUOTE_FAILURE:
      return Object.assign({}, state, {
        isFetching: false
      })
    default:
      return state
    }
}

...
Now we just need our Quotes component to have a place to fetch and display our quotes.
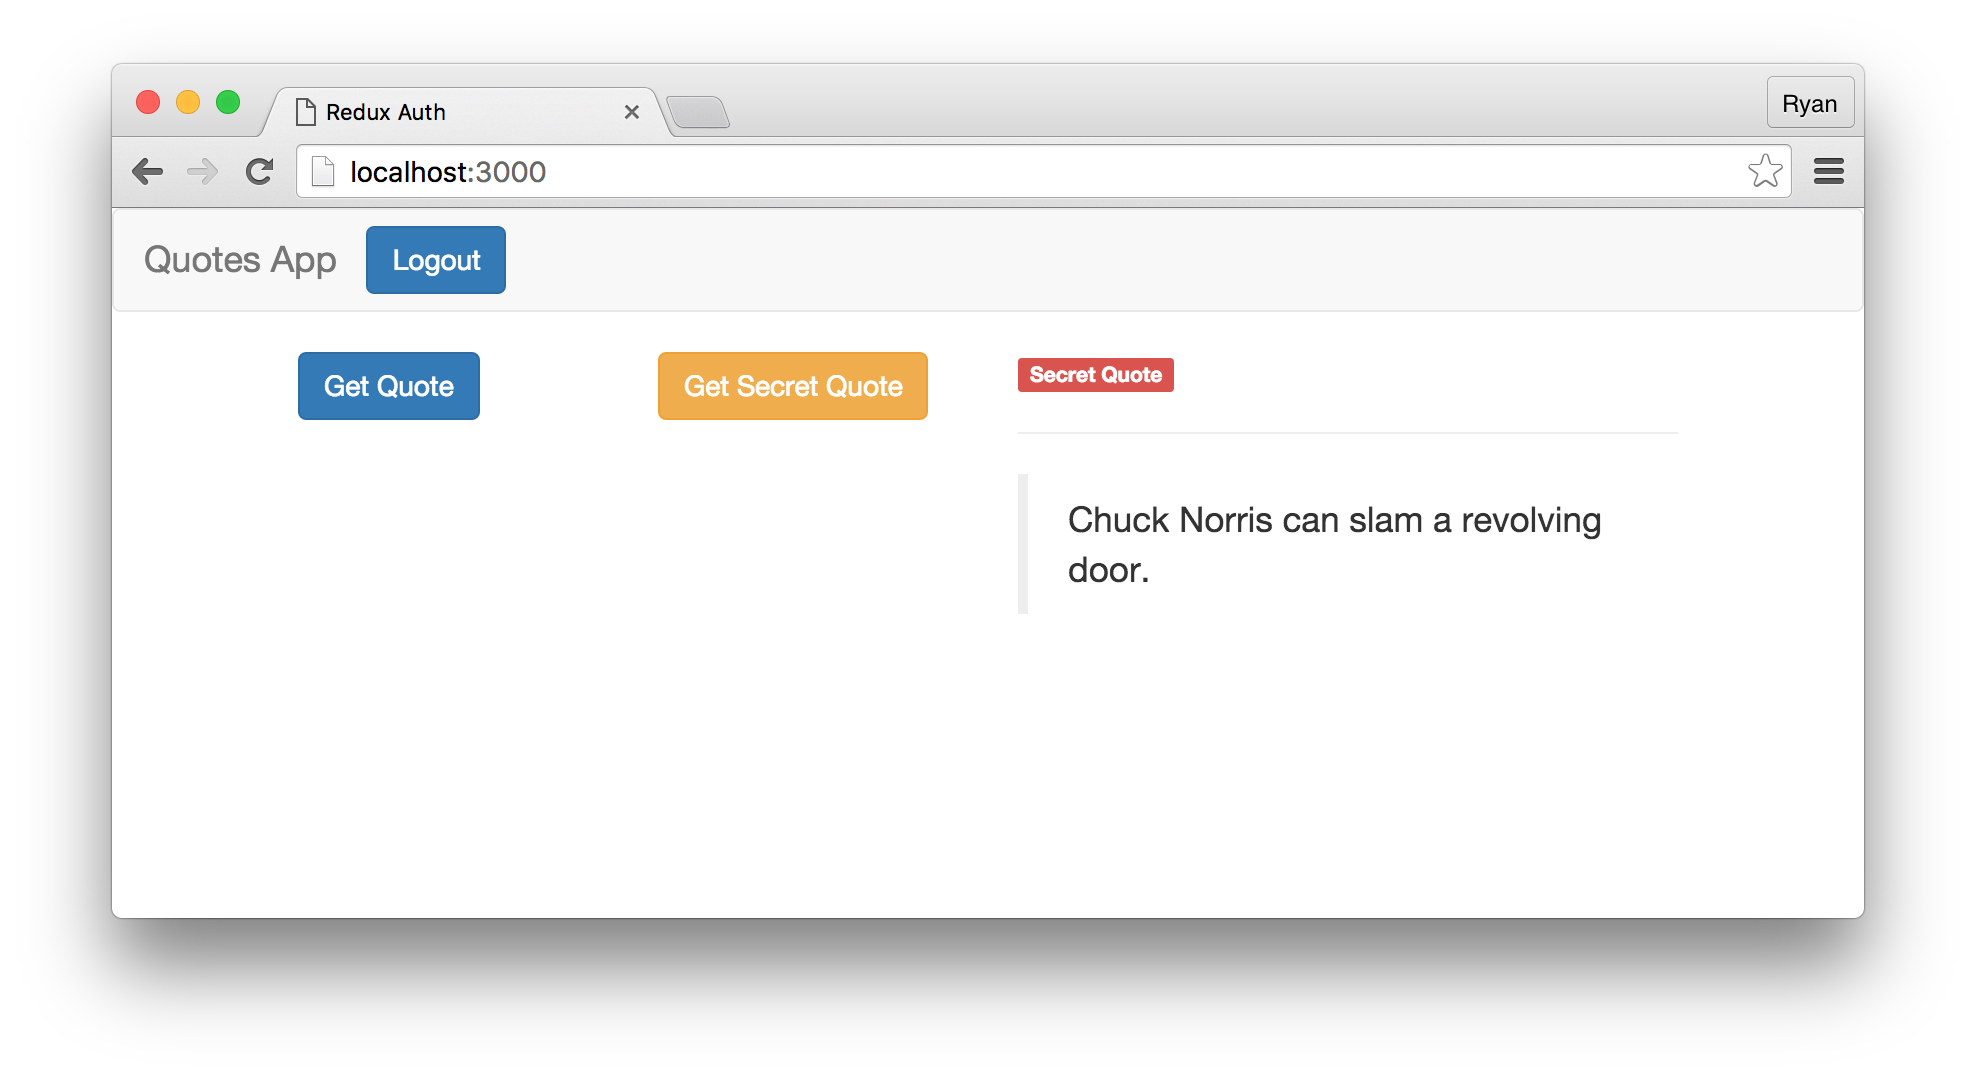
// components/Quotes.js

import React, { Component, PropTypes } from 'react'

export default class Quotes extends Component {

  render() {
    const { onQuoteClick, onSecretQuoteClick, isAuthenticated, quote, isSecretQuote } = this.props

    return (
      <div>
        <div className='col-sm-3'>
          <button onClick={onQuoteClick} className="btn btn-primary">
            Get Quote
          </button>
        </div>

        { isAuthenticated &&
          <div className='col-sm-3'>
            <button onClick={onSecretQuoteClick} className="btn btn-warning">
              Get Secret Quote
            </button>
          </div>
        }

        <div className='col-sm-6'>
          { quote && !isSecretQuote &&
            <div>
              <blockquote>{quote}</blockquote>
            </div>
          }

          { quote && isAuthenticated && isSecretQuote &&
            <div>
              <span className="label label-danger">Secret Quote</span>
              <hr/>
              <blockquote>
                {quote}
              </blockquote>
            </div>
          }
        </div>
      </div>
    )
  }
}

Quotes.propTypes = {
  onQuoteClick: PropTypes.func.isRequired,
  onSecretQuoteClick: PropTypes.func.isRequired,
  isAuthenticated: PropTypes.bool.isRequired,
  quote: PropTypes.string,
  isSecretQuote: PropTypes.bool.isRequired
}
With the middleware and the quotes component in place, we should be able fetch quotes from the API.
Aside: Using Auth0 in Your Redux Application
This tutorial uses an outdated version of our API. We are working to update it to the latest version with working code and examples. We apologize for any inconvenience this may cause.
Adding authentication to any app is easy with Auth0 and we can implement a Redux flow in a few simple steps. Don't have an Auth0 account yet? Create a Free Account to follow along with these steps!
First, add the Auth0 Lock script to your index.html file.
  ...

  <!-- Auth0Lock script -->
  <script src=“https://cdn.auth0.com/js/lock/10.0/lock.min.js"></script>

  <!-- Setting the right viewport -->
  <meta name="viewport" content="width=device-width, initial-scale=1.0, maximum-scale=1.0, user-scalable=no" />

  ...
Note: Lock is also available through NPM if you want to add it to your build process.
Next, create some actions for showing Lock and responding to the authentication states. The functions that return these action types should also include data we get from Lock.
// actions.js

...

export const SHOW_LOCK = 'SHOW_LOCK'
export const LOCK_SUCCESS = 'LOCK_SUCCESS'
export const LOCK_ERROR = 'LOCK_ERROR'

function showLock() {
  return {
    type: SHOW_LOCK
  }
}

function lockSuccess(profile, token) {
  return {
    type: LOCK_SUCCESS,
    profile,
    token
  }
}

function lockError(err) {
  return {
    type: LOCK_ERROR,
    err
  }
}

...
Now we need a function that handles showing Lock and also a function for saving the returned token and user profile when the user has been authenticated.
// actions.js

...

const lock = new Auth0Lock('YOUR_CLIENT_ID', 'YOUR_CLIENT_DOMAIN');

export function login() {
  // display lock widget
  return dispatch => {
    lock.show();
  }
}

// Listen to authenticated event and get the profile of the user
export function doAuthentication() {
    return dispatch => {
      lock.on("authenticated", function(authResult) {
            lock.getProfile(authResult.idToken, function(error, profile) {

              if (error) {
                // handle error
                return dispatch(lockError(error))
              }

              localStorage.setItem('profile', JSON.stringify(profile))
              localStorage.setItem('id_token', authResult.idToken)
              return dispatch(lockSuccess(profile))
            });
      });
    }
}

...
In this function we are dispatching the lockError function if there are any errors. If authentication is successful, we set the profile and token in local storage and dispatch the lockSuccess action.
Important API Security Note: If you want to use Auth0 authentication to authorize API requests, note that you'll need to use a different flow depending on your use case. Auth0 idToken should only be used on the client-side. Access tokens should be used to authorize APIs. You can read more about making API calls with Auth0 here.
With these actions in place, we can now add them to our reducer to handle authentication state change just like we would with any other action. The login action can be dispatched from the Login button in our React component.
// components/Navbar.js

...

<Login
  errorMessage={errorMessage}
  onLoginClick={ creds => dispatch(login(creds)) }
/>

...
Make sure you import the method in your App Component and add a constructor that calls the doAuthentication function like so:
// App.js
import { loginUser, fetchQuote, doAuthentication, fetchSecretQuote } from '../actions'

// add a constructor
constructor(props) {
    super(props)
    this.props.doAuthentication()
  }
Wrapping Up
Redux offers an alternative to libraries like Flux for implementing one-way data flow in single page apps. Like Flux, Redux isn't limited to React. However, there are a lot of modules out there that are used with the two technologies, so putting them together is a natural choice.
“Redux offers an alternative to libraries like Flux for implementing one-way data flow in single page apps.”
Tweet This
As we've seen, we can add JWT authentication to our Redux apps and use actions and reducers to track changes to the login state. We made use of Redux middleware to make secure calls to our API, and by abstracting the API communication away to a middleware, we just need to pass a property that specifies whether an Authorization header with a JWT should be sent with the request.
Big thanks to Dan Abramov for Redux and the great information he provides for it.
About the author

Ryan Chenkie
Developer
Ryan is a Google Developer Expert, the host of the Entrepreneurial Coder Podcast, the author of Securing Angular Applications, and an all-around fanatic about application security.View profile