
TL;DR: This tutorial will walk you through options for migrating users into Auth0, focusing specifically on the challenges you may face when migrating from on-premises identity solutions.
The Basics of Migrating to Cloud Solutions
There may be many reasons that you're migrating away from your on-premises solution. To name just a few:
- The provider might be sunsetting or deprecating the solution you use.
- Licensing fees and vendor lock-in might be proving too restrictive.
- Proprietary or non-standard authentication/authorization approaches might be limiting compatibility with new cloud-based products and services.
- The complexity of managing a suite of identity products yourselves might be proving too cumbersome to maintain.
Regardless of the reasons, Auth0 provides several solutions for migrating user data into Auth0. Whether you're trying to migrate all of your users at once — a common scenario if a license is expiring or a product is being deprecated — or more gradually, there are options at your disposal to bring your user data into Auth0's database. Migration can even include hashed passwords, so your users won't have to reset their credentials after their data has been moved! Once migrated, you can rely on Auth0's standards-based approach to authentication and authorization and easy integration with any number of other identity providers. And, if you ever need to extract user data, Auth0 provides bulk user export as well.
User Migration Your Way
Download the ebook
Migration Strategies: Bulk vs. Automatic
Auth0 offers multiple strategies for migrating users from an existing application. Bulk Importing users, either via the Management API or the User Import/Export Extension, provides an easy way to shift your existing user base to Auth0 all at once. Bulk import is a great approach when you rely on a soon-to-be-deprecated identity service or application. If time is a critical factor, bulk import allows you to remove your use of the old application as quickly as possible. That said, this migration process can be time-consuming if you have a large set of user data, and it might require downtime for your application while you switch your users over.
Thanks to a recent release, hashed user passwords can now be migrated through bulk import if they use a supporting hash algorithm. Password migration was previously only possible when running an Automatic Migration.
The other option for user import is Automatic Migration via custom database connections. This option only migrates users when they sign in through Auth0, removing the need for a costly all-in-one database migration. On the other hand, this approach takes longer than bulk migration owing to its one-at-a-time approach, so if your identity service is being deprecated, this approach may present some difficulties.
Each of these approaches is explained in more detail below.
Considerations When Migrating from On-Premises Solutions
The list of on-premises identity providers is by no means small, and going through how to extract your user data from each one would make the length of this article somewhat untenable! Regardless, if you're migrating from an on-premises identity provider to Auth0, there are some caveats to watch out for during the user export process. The exact state and availability of your user data will depend on the specifics of your provider — Oracle's on-premises offerings, for example, can differ significantly from IBM's in approach, architecture, and storage. However, there are a few general items to consider when looking to migrate your data.
First, not all on-premises solutions offer easy export of their user databases. Some may not offer export options at all; in cases like this, Automatic Migration of your user data could be an option. This method lazily migrates user data from your existing system to Auth0 when users sign in. This approach may require additional custom work — for example, if your identity solution isn't available to the public internet, you may need to build or configure a reverse proxy to allow external requests to reach your identity server. A custom solution like this is non-trivial to implement, but a future blog post will walk through this process in detail.
Secondly, the complexity of an on-premises solution can present a challenge. Some identity solutions are sold as a single product but, under the hood, store their information across multiple databases or servers in their backend. An in-depth understanding of how user data is stored in your current provider is critical to a successful migration.
Lastly, it's necessary to format your data correctly. Auth0 expects user data in a JSON-formatted file following a well-documented schema. Your data almost certainly won't come out of your current system in a ready-to-import format, so depending on what state it's in, it'll probably need to be re-shaped to match the schema expected by Auth0's import processes.
These considerations aren't meant to scare you off, but it's important to know what you're getting into when it comes to migrating user data. Depending on your in-house resources, it may be beneficial to reach out to us, so we can connect you with a technology partner to help with the specifics of your migration.
With all that said, let's get to the import approaches themselves!
User Migration Strategy #1: Bulk Import
As mentioned, if you use an identity solution that's being deprecated or an on-premises identity solution, bulk migration might be the right approach for you. This section will walk through setting up an Auth0 Database and importing users.
First and foremost, you should start by extracting the data from your existing identity solution and reformatting it to match the Auth0 user import schema, which expects a JSON file containing user information. Ultimately, an email is the only required field to import a user, though the more complete your data set is, the better off you are.
As mentioned above, bulk import allows importing users' hashed passwords into Auth0. Previously, bulk importing required all customers to reset their passwords once their user accounts had been migrated due to password information not being viable for migration. However, that's now changed: Auth0 now supports importing hashed passwords by specifying a custom password hash in the import schema. The Import & Export Users documentation contains details on how to format password hashes for import. The bulk importer supports several standard common hashing algorithms.
Once you format your users' data to match the schema, you're ready to configure your database in Auth0 for storing those users.
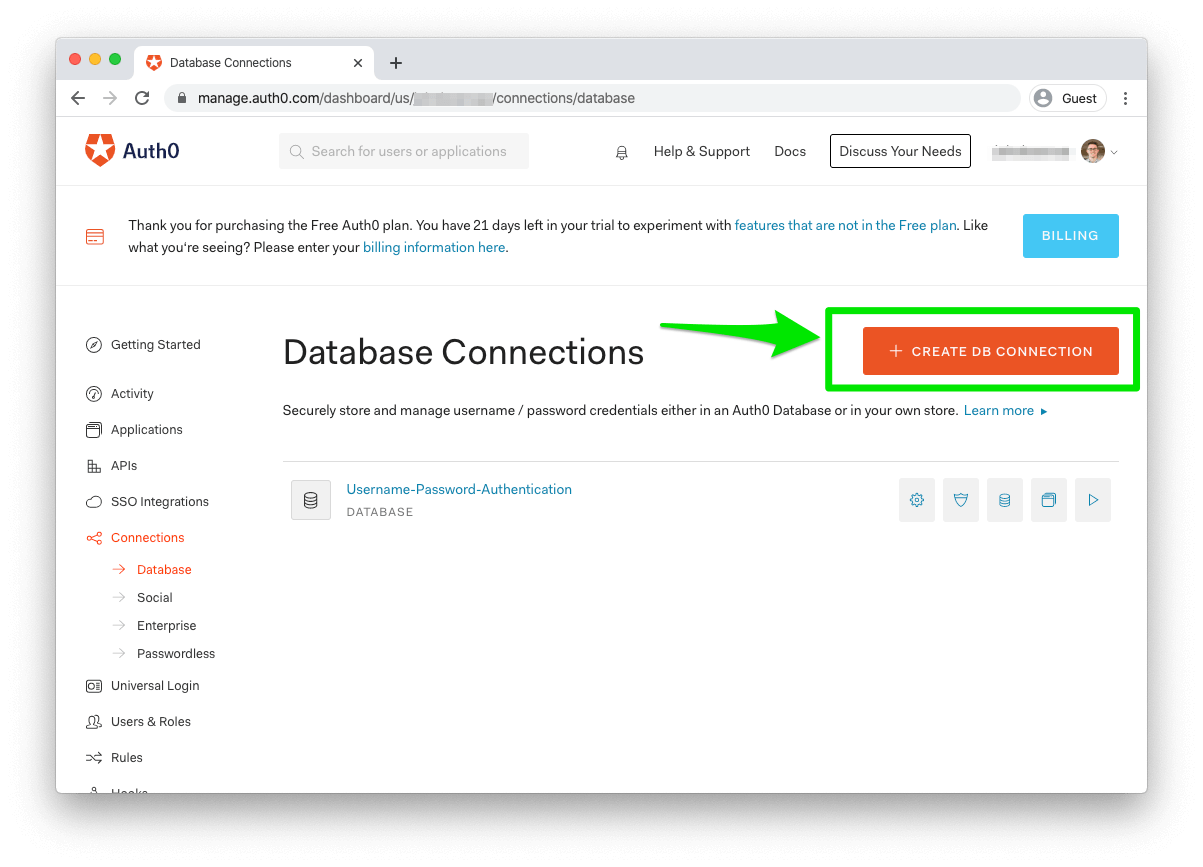
First, you'll need to create a Database Connection that will store your imported users in an Auth0 User Store. Head to your Auth0 Dashboard, then click the "Connections" link in the left-hand menu. Click "Databases" in the submenu, and then click the "Create DB Connection" button in the top right of the page.
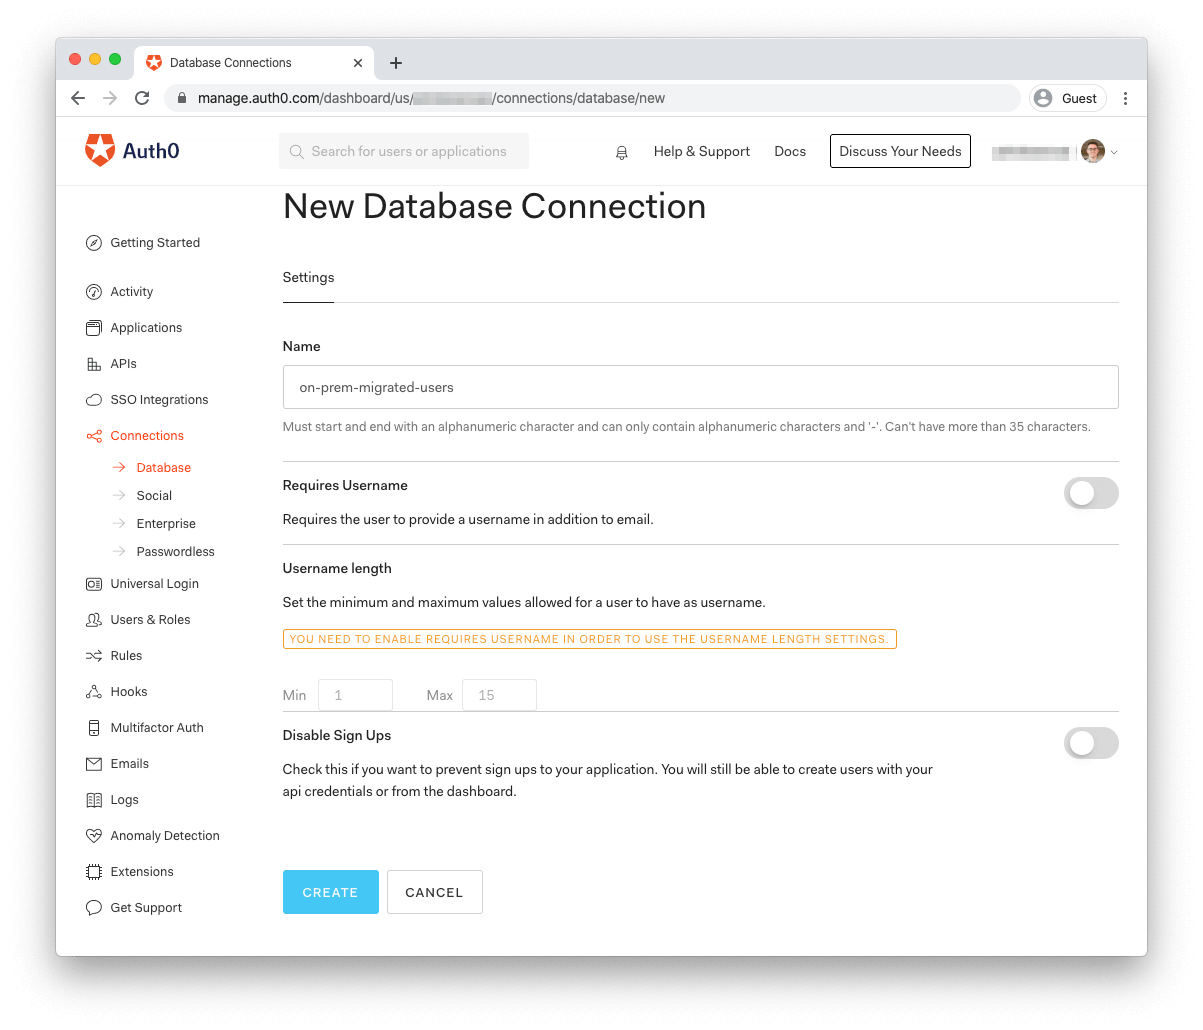
In the "New Database Connection" form, give your new database a name like on-prem-migrated-users. If your current identity provider requires usernames instead of email addresses for login, you can enable that feature here. You can also specify if you want to disable sign-ups for this user store.
Once you've filled out the form, click "Create" and your database connection is ready.
Now that you've created your user store, there are two ways to import your user data: using the Management API or using the Import Users extension.
Importing Users via the Management API
The Management API provides an easy way to import your users into Auth0 programmatically. To do so, you'll first need to get a token with which to call the Management API.
Go to your Applications page and click the Create Application button. Select "Machine to Machine application" as the type and give it a name like "User Import."

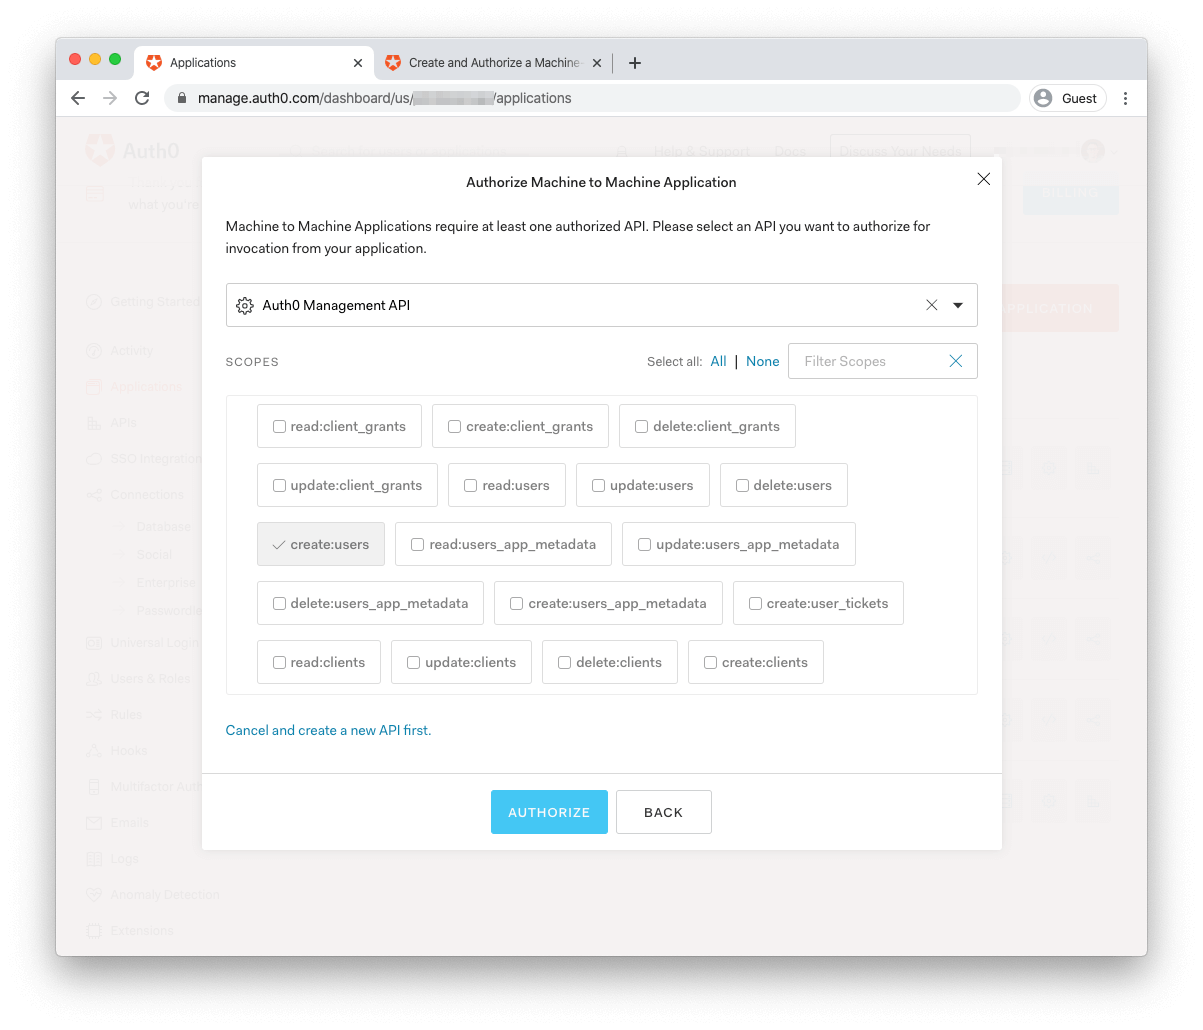
In the following form, select "Auth0 Management API" in the dropdown of APIs to authorize for this application. Lastly, select the create:users and read:connections scope in the select box so that you'll be able to create users with the token you generate. Lastly, click the "Authorize" button to create your application.
After the form saves, you'll land on the details page for the newly created application.
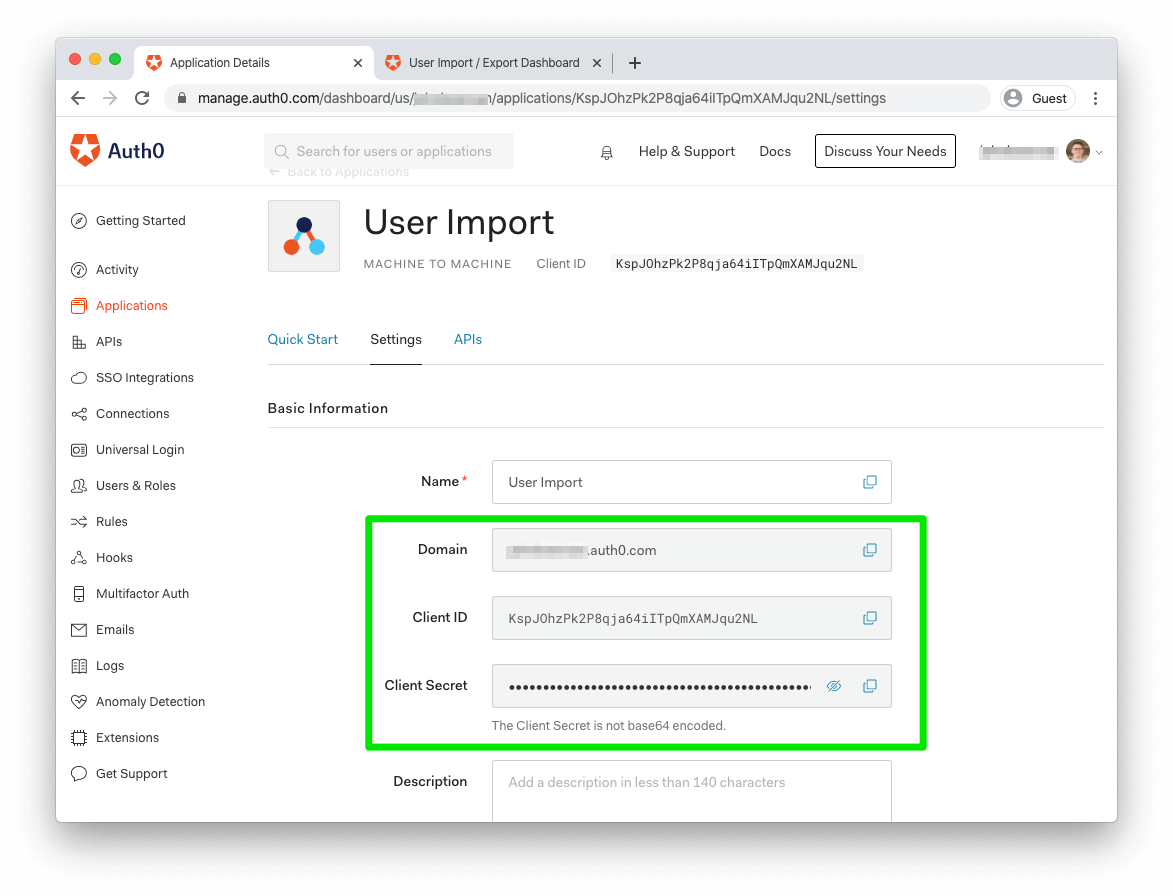
To call the API using the app you just created, you'll first need to request an access token to include in your user import API call. To do so, open a terminal window and use the following cURL command, filling in your app's values for YOUR_DOMAIN, YOUR_CLIENT_ID, and YOUR_CLIENT_SECRET.
curl --request POST \
  --url 'https://YOUR_DOMAIN/oauth/token' \
  --header 'content-type: application/x-www-form-urlencoded' \
  --data `grant_type=client_credentials` \
  --data 'client_id=YOUR_CLIENT_ID' \
  --data `client_secret=YOUR_CLIENT_SECRET` \
  --data 'audience=https://YOUR_DOMAIN/api/v2/'
These values can all be found on your application's details page, under the "Settings" tab:
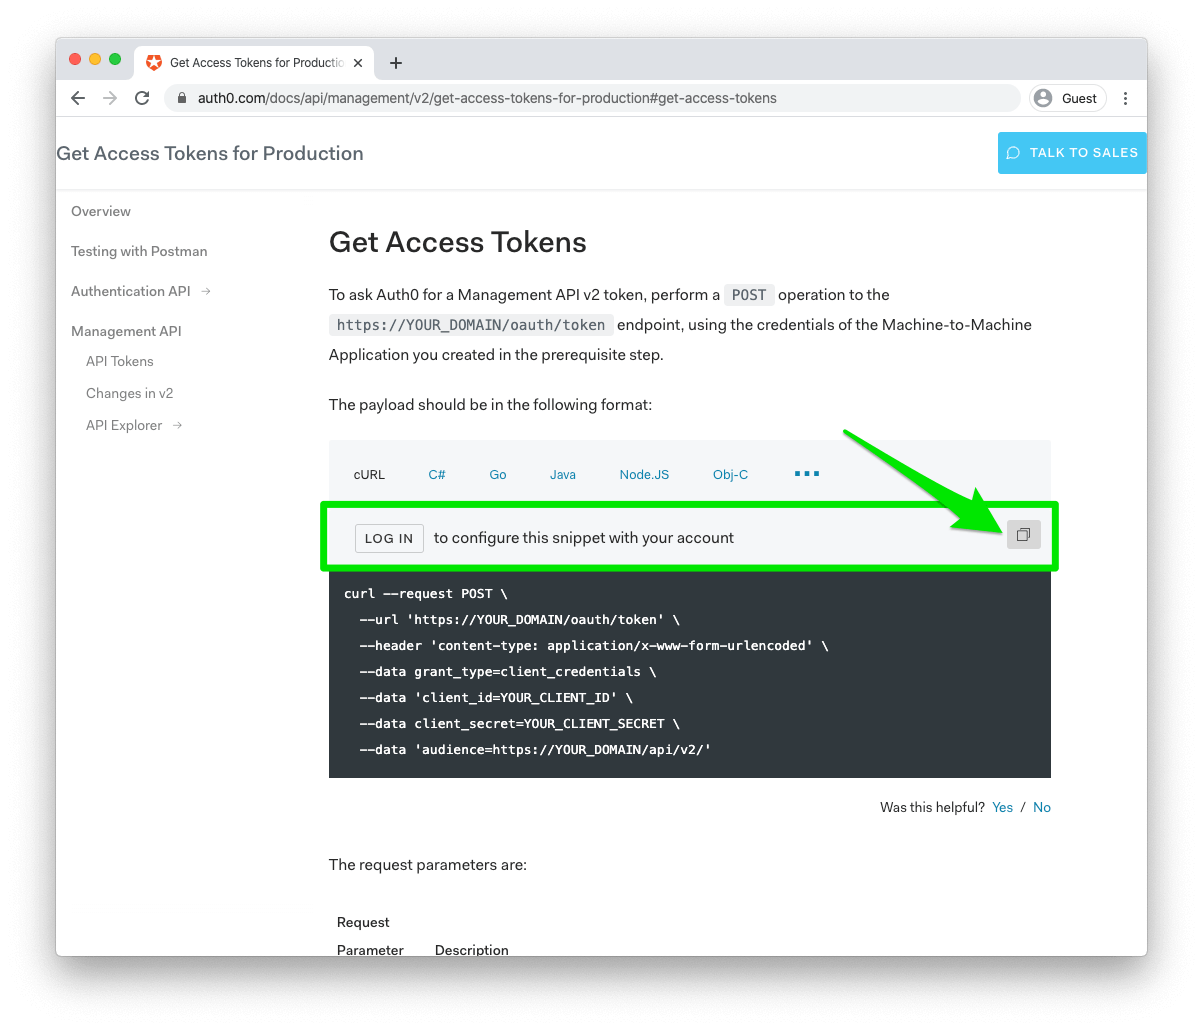
For an easy way to get the proper parameters set, you can go to the Management API Docs and sign in to copy the exact cURL request you'll need to request an access token.
With your token in hand, the next piece of information you'll need is the ID of your database connection. You can retrieve this with a request to the Management API's connections endpoint.
If you're going through the API, use the following command:
curl --request GET \
  --url 'https://johnbrennan.auth0.com/api/v2/connections?name=on-prem-migrated-users'
  --header 'authorization: Bearer MGMT_API_ACCESS_TOKEN'
You'll need to grab the id field from the JSON payload that's returned.
Now that you have the token and database ID, it's just a matter of making a cURL request to the Management API with your token and the JSON file of your users. Use the following command:
curl \
  -F users=@USERS_IMPORT_FILE.json \
  -F connection_id=CONNECTION_ID \
  -H 'authorization: Bearer MGMT_API_ACCESS_TOKEN' \
  https://johnbrennan.auth0.com/api/v2/jobs/users-imports
We're using cURL's -F flag as a shortcut for setting some basic properties; namely, setting the request type to POST and the content-type header to multipart/form-data.
Note that, when replacing USERS_IMPORT_FILE in the command above, you can either use your computer's absolute path to the user data file (e.g., @/users/johnbrennan/documents/users.json) or, if you're calling cURL from the same directory as the file, you can reference it as a local file (e.g., @users.json.)
If all goes well, you should get a JSON payload back as a response:
{"type":"users_import","status":"pending","connection_id":"con_v70Bv0ocb8dwTf92","connection":"on-prem-migrated-users","created_at":"2020-03-20T04:56:19.475Z","id":"job_wnt1clHt6VpGs7Lx"}
This response indicates that a long-running job has been kicked off to import your users. You can check the status of the job by calling the /api/v2/jobs/{id} endpoint, using the id property from the JSON response above in the URL.
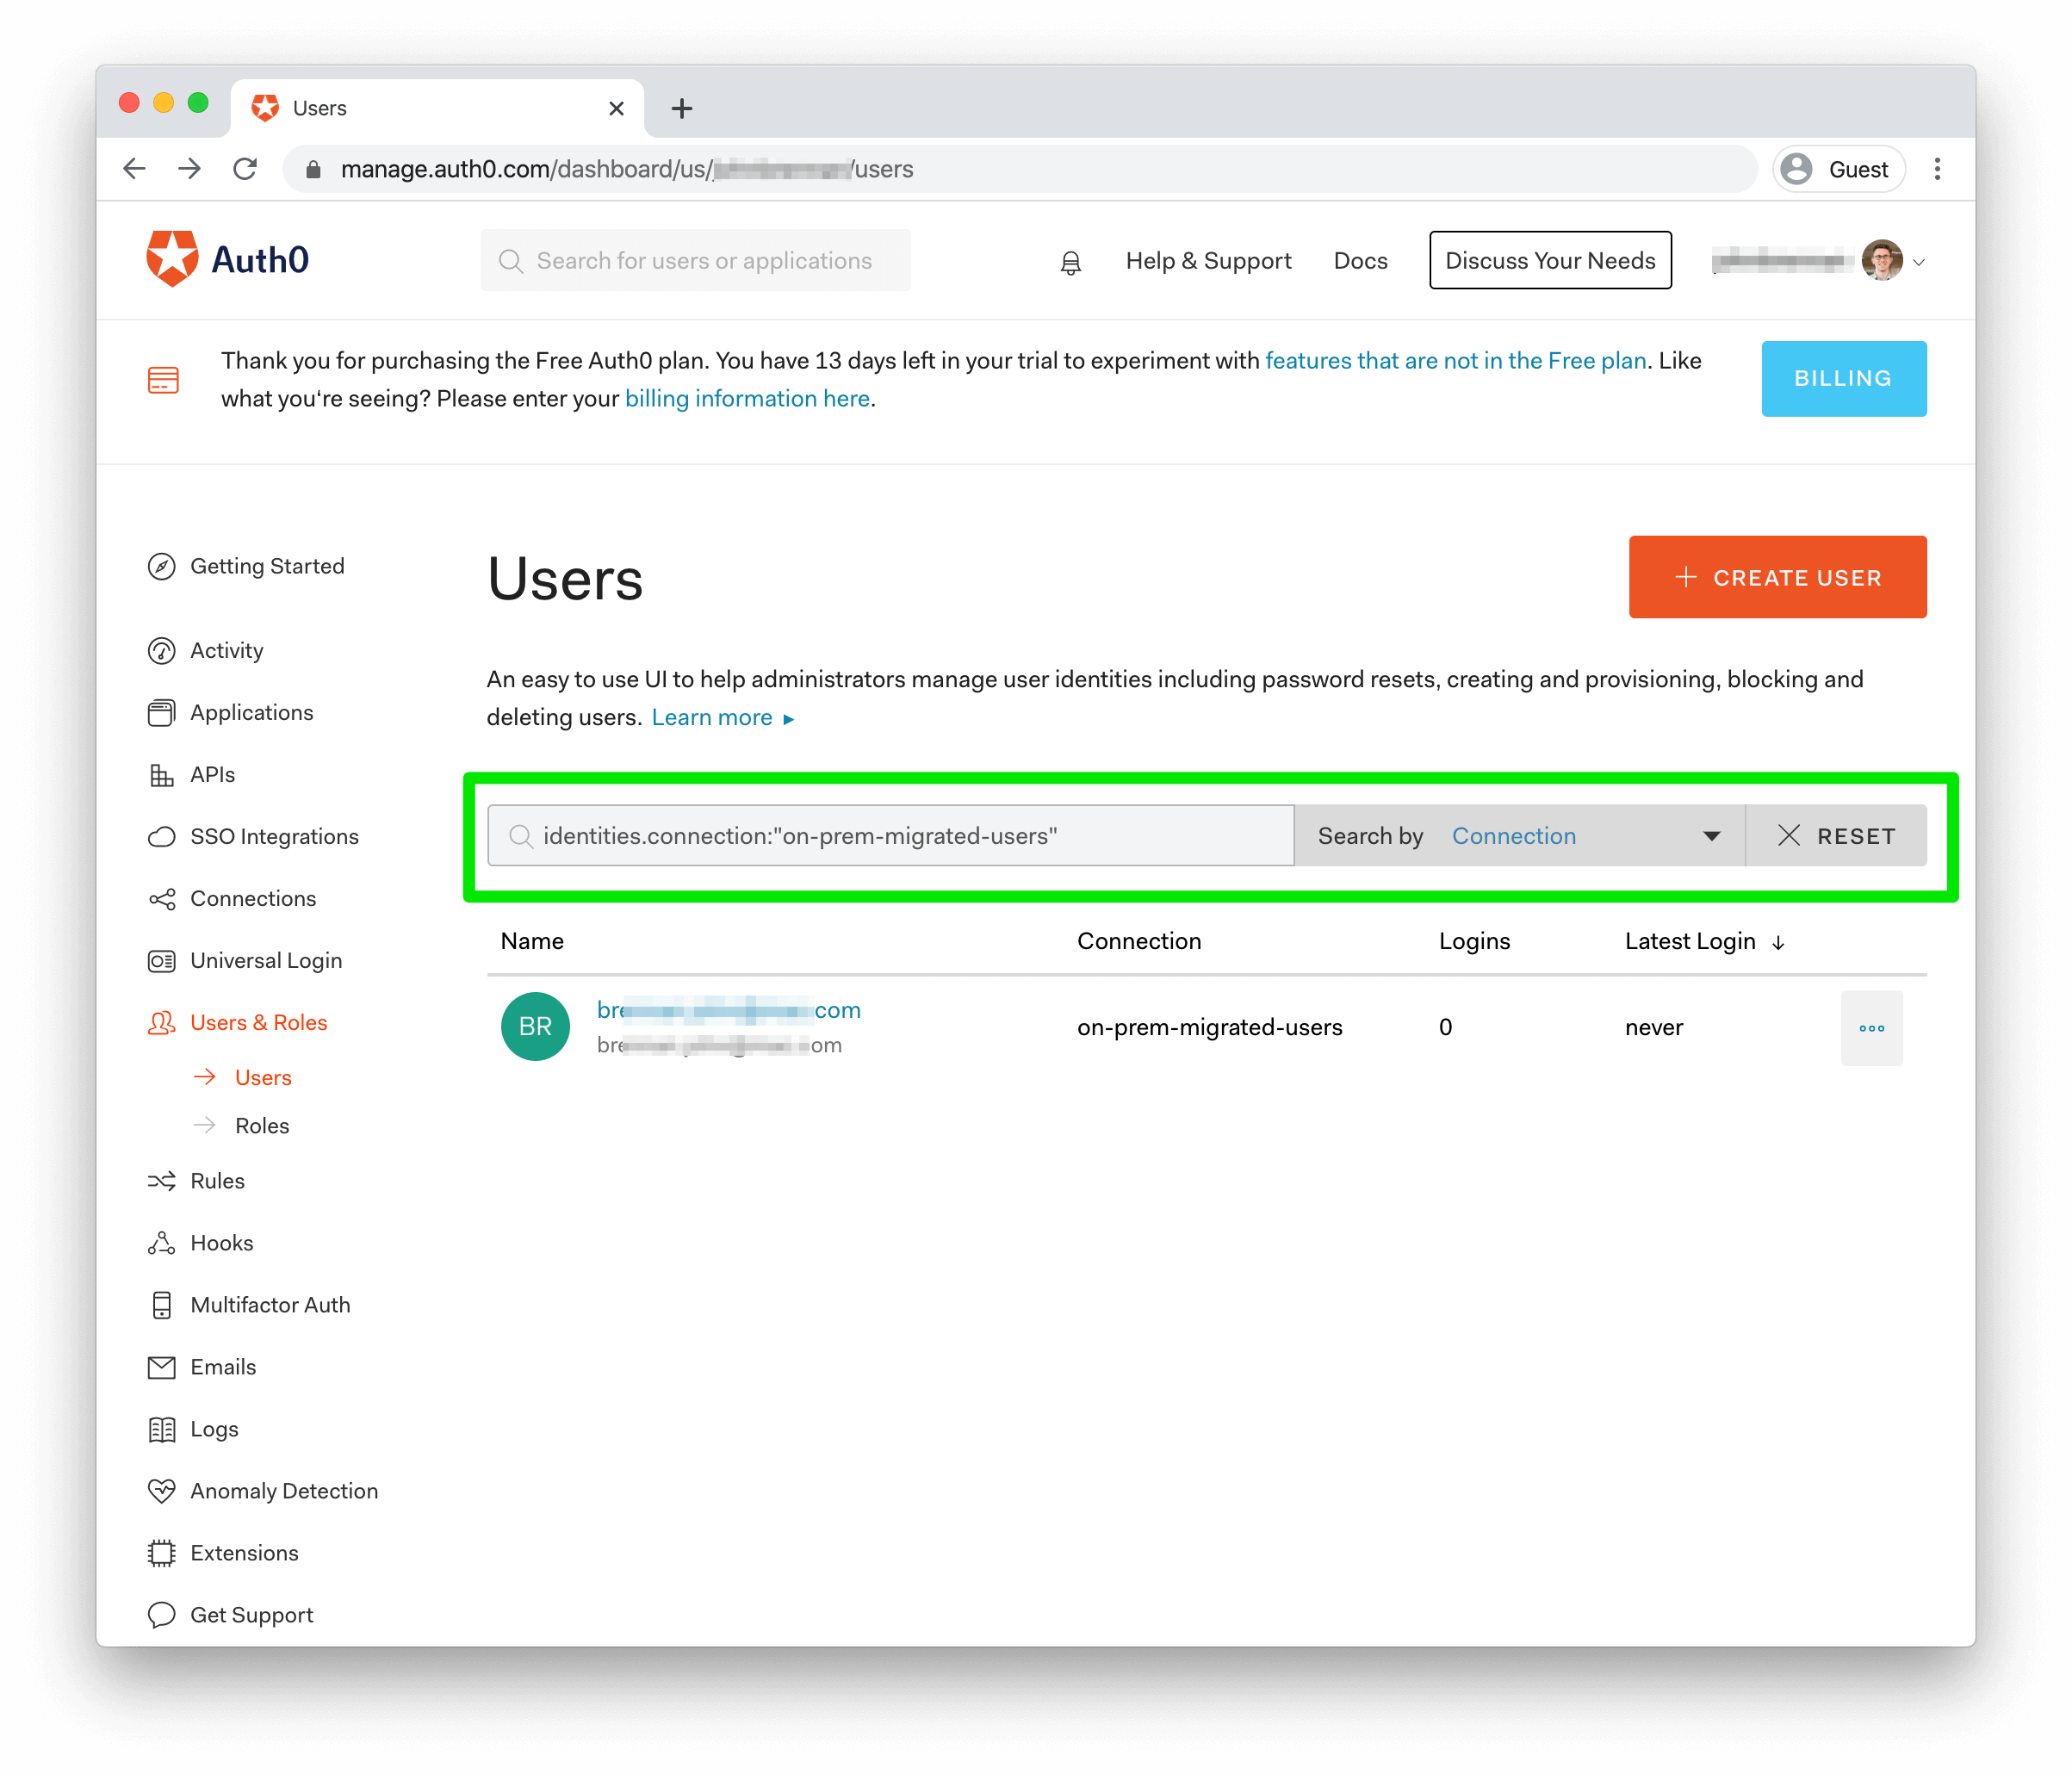
Once the job is complete, you can head to your Auth0 dashboard to see your imported users. Open the "Users & Roles" section in the lefthand menu and click "Users." Any user you've imported should show in the list; if you have multiple database connections in your Auth0 Tenant, you can filter users by their database connection in the search bar, selecting "Connection" in the "Search By" dropdown to the right of the text area.
Importing users via Import Users extension
The other option for Bulk Migration comes in the form of an Auth0 Extension called User Import/Export. Extensions are — as the name suggests — scripts and applications that extend the functionality of Auth0. The User Import/Export Extension is built and maintained by Auth0, but it does require installing and authorizing it on your tenant.
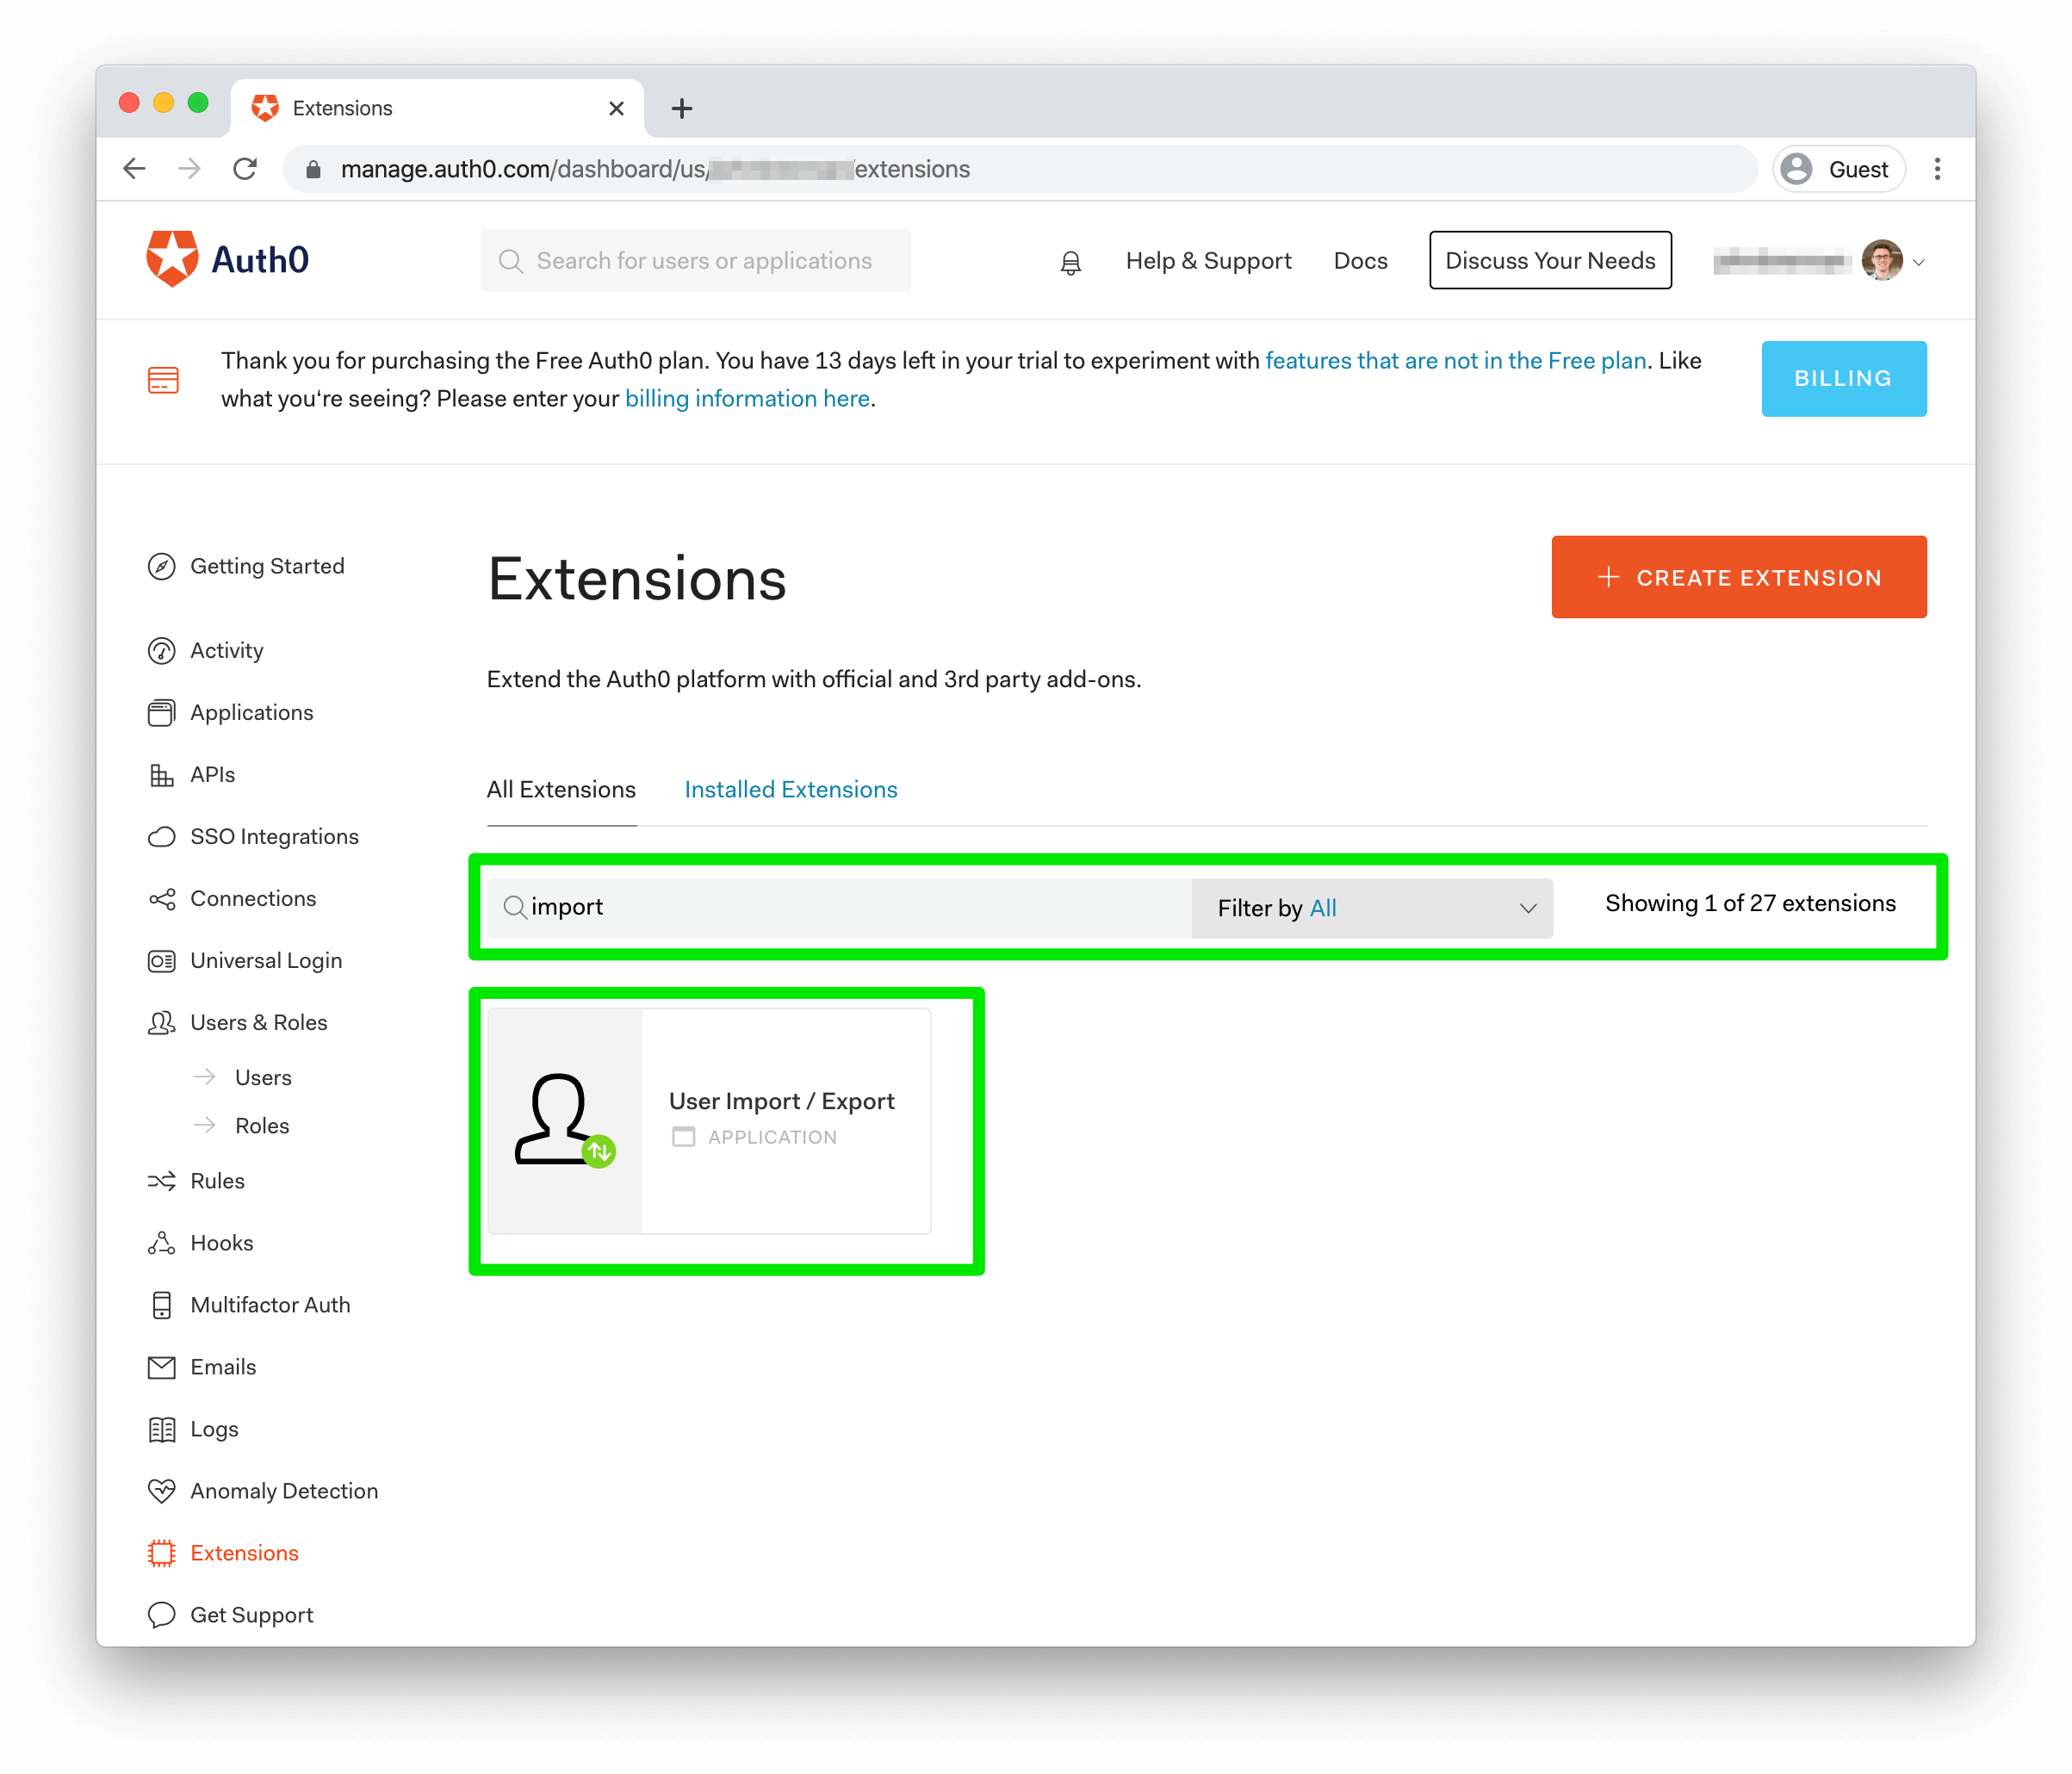
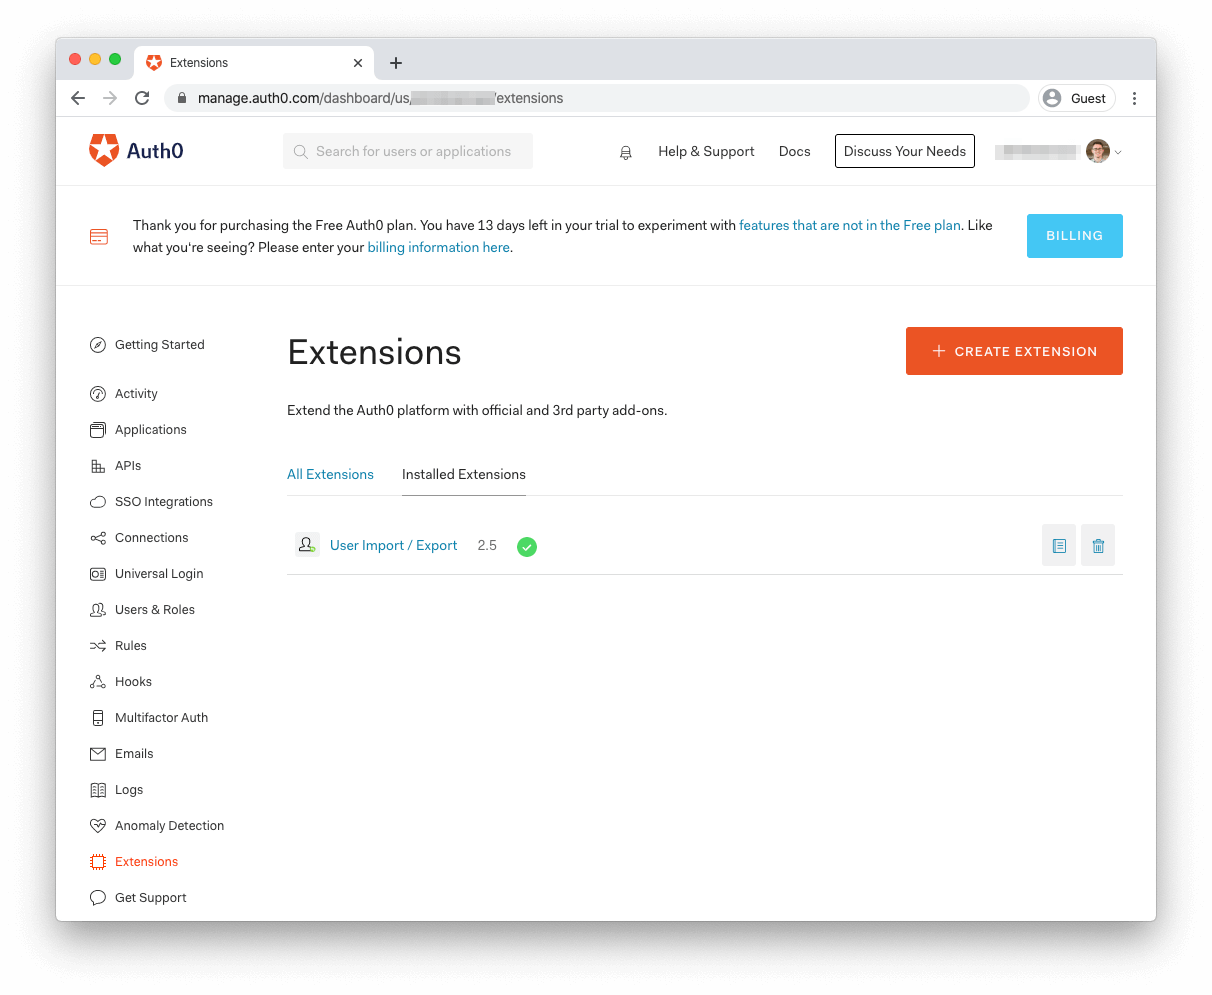
To install the extension, head to your Auth0 Dashboard and click "Extensions" in the left menu. Once on the page, type "import" into the search bar. The "User Import/Export" Extension should be the first result.
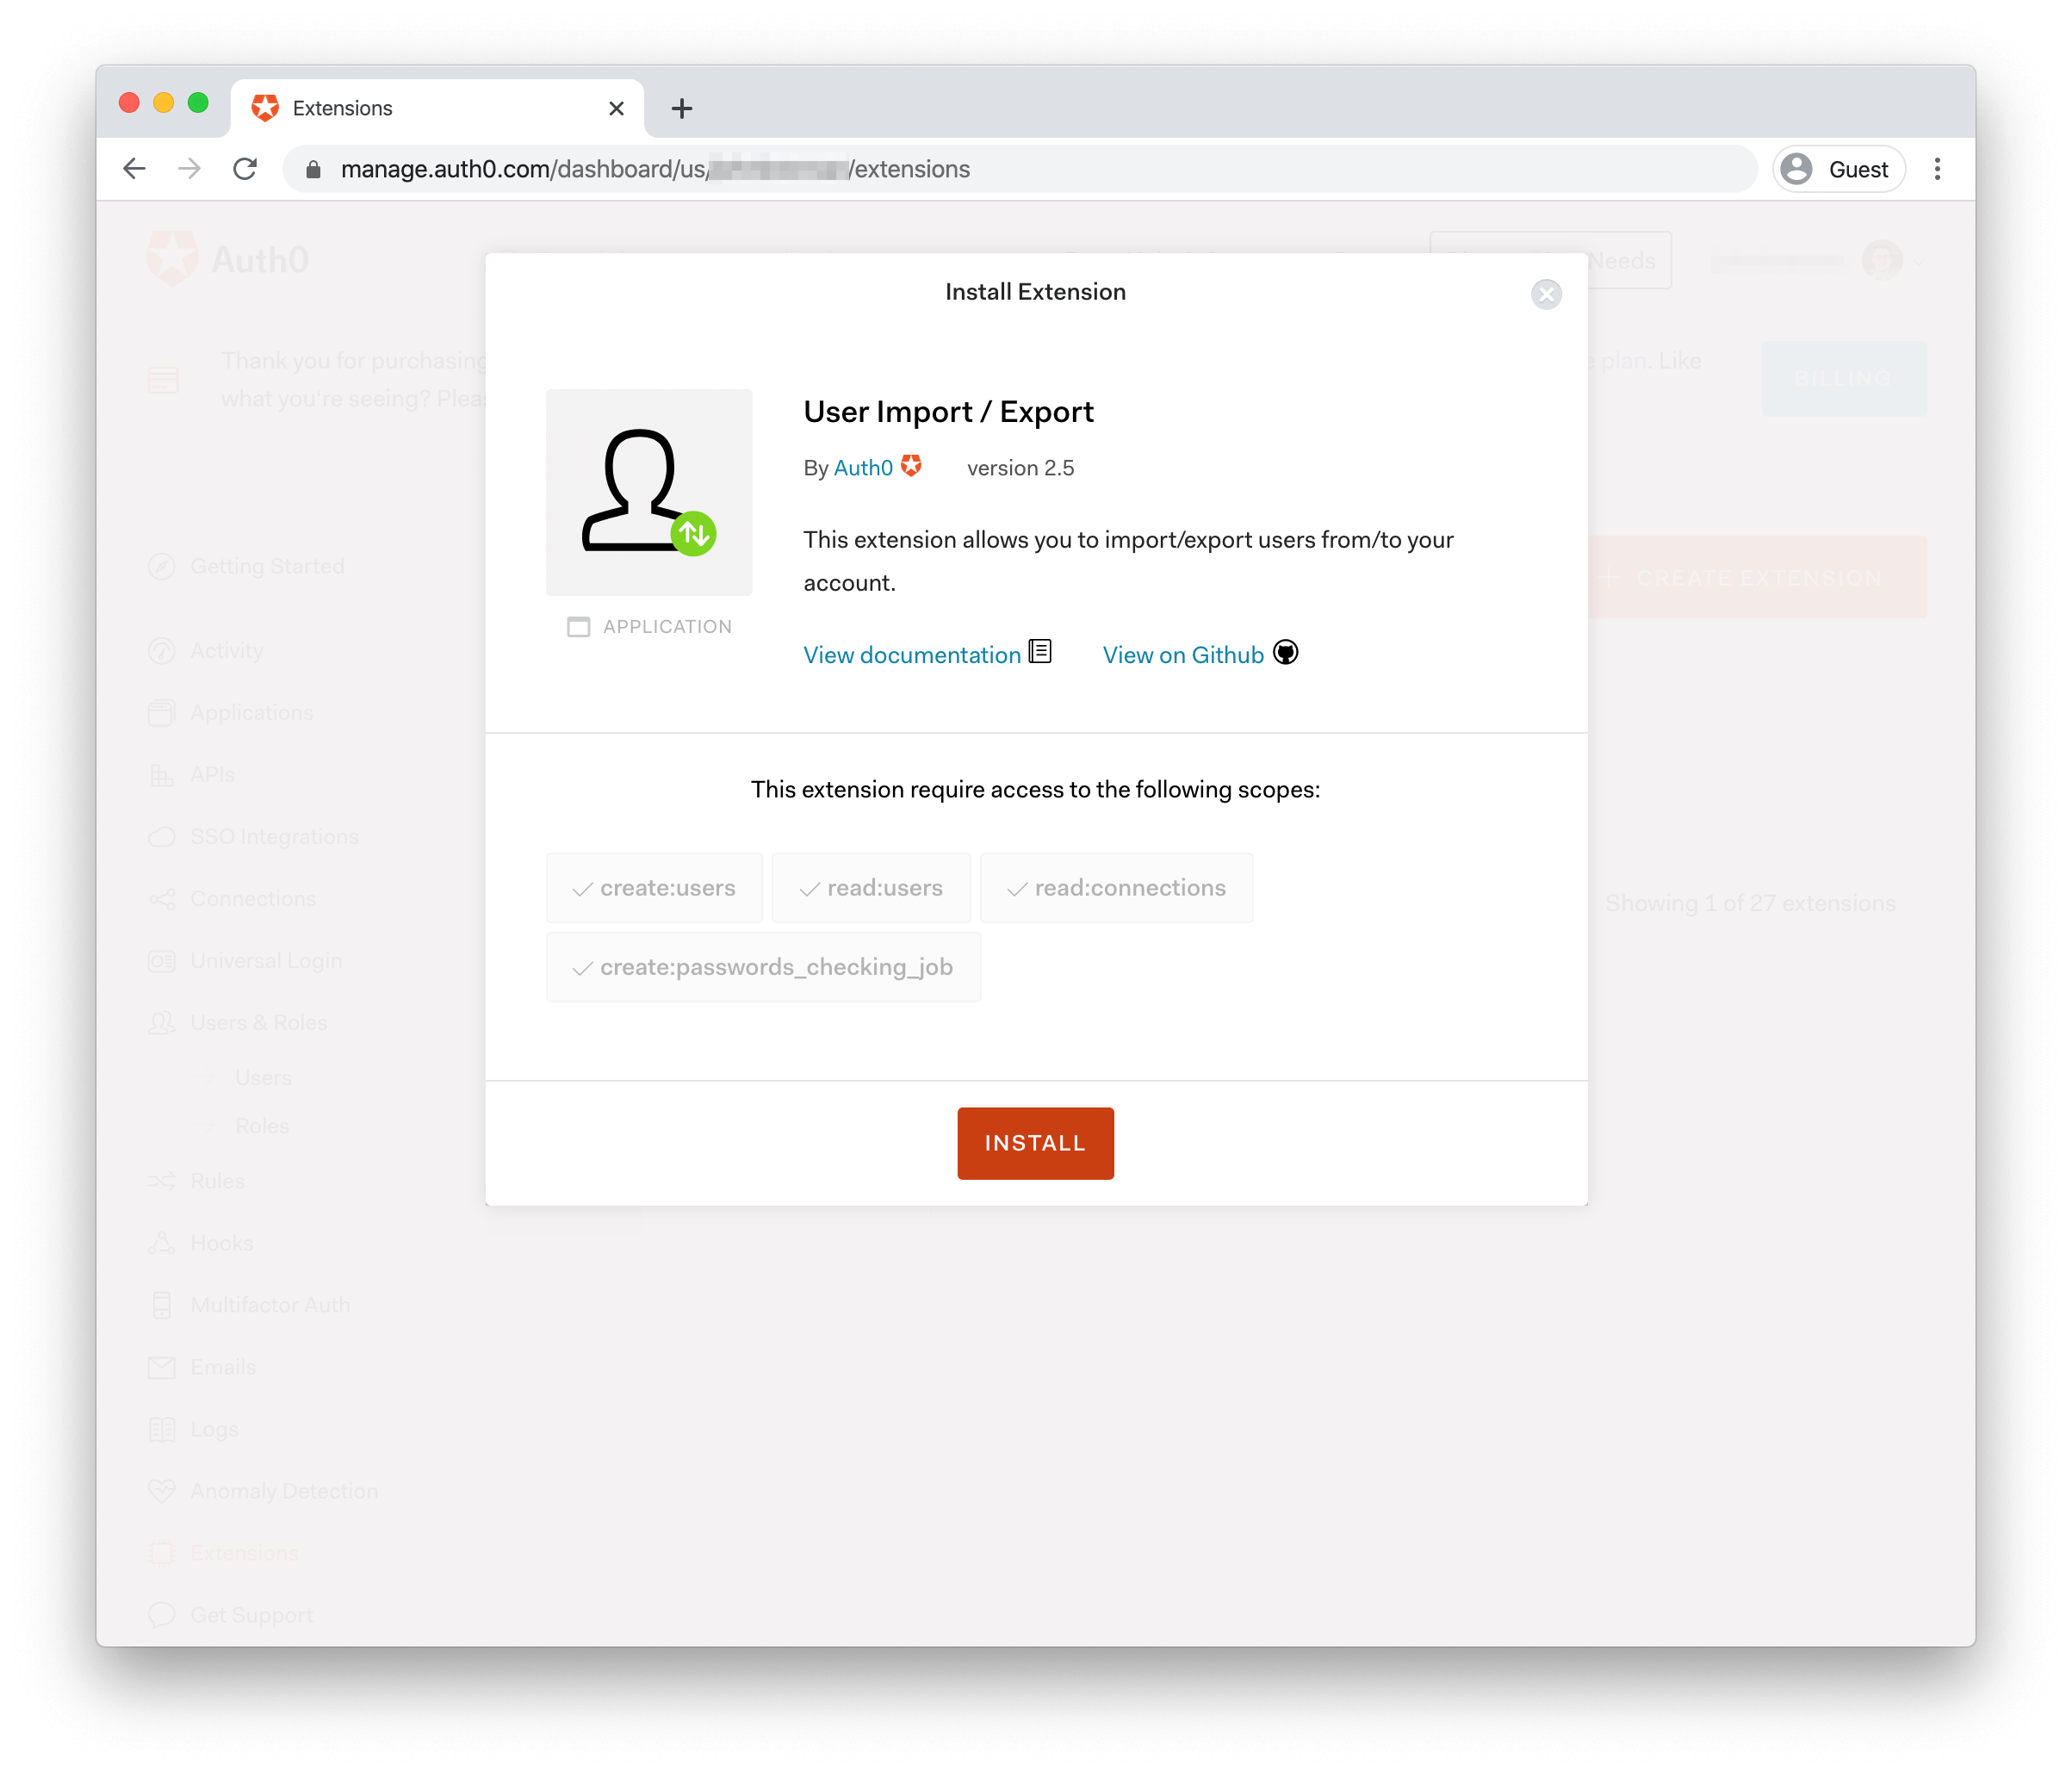
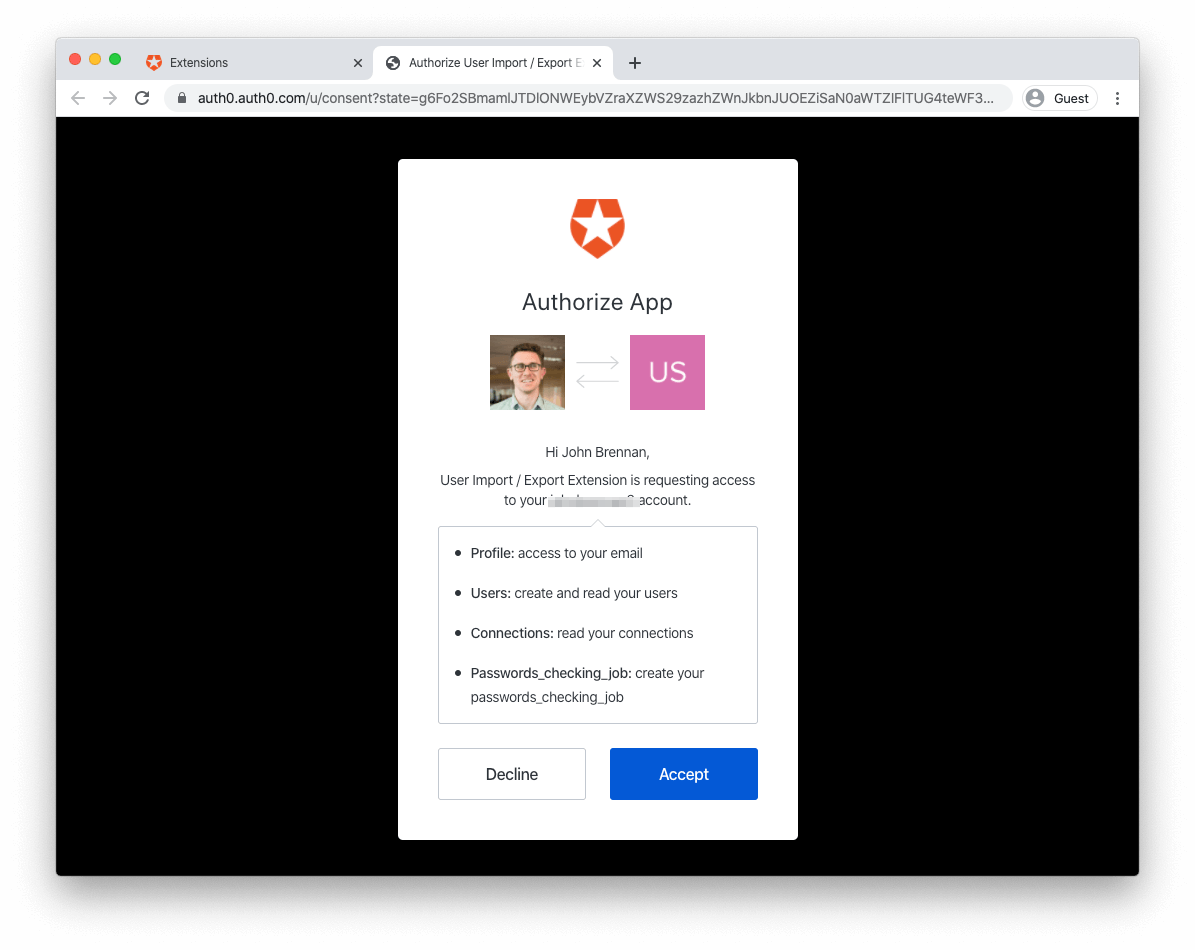
Click the extension to open the confirmation screen for adding the extension to your account. Here, you'll see what scopes the extension is requesting on the Auth0 Management API. Click "Install" to start the process.
Once installed, you can easily access the extension under the "Installed Extensions" tab on the main Extensions page.
You'll need to authorize the extension for use with your Auth0 account before using it. To do so, click on the extension's name to open the authorization screen:
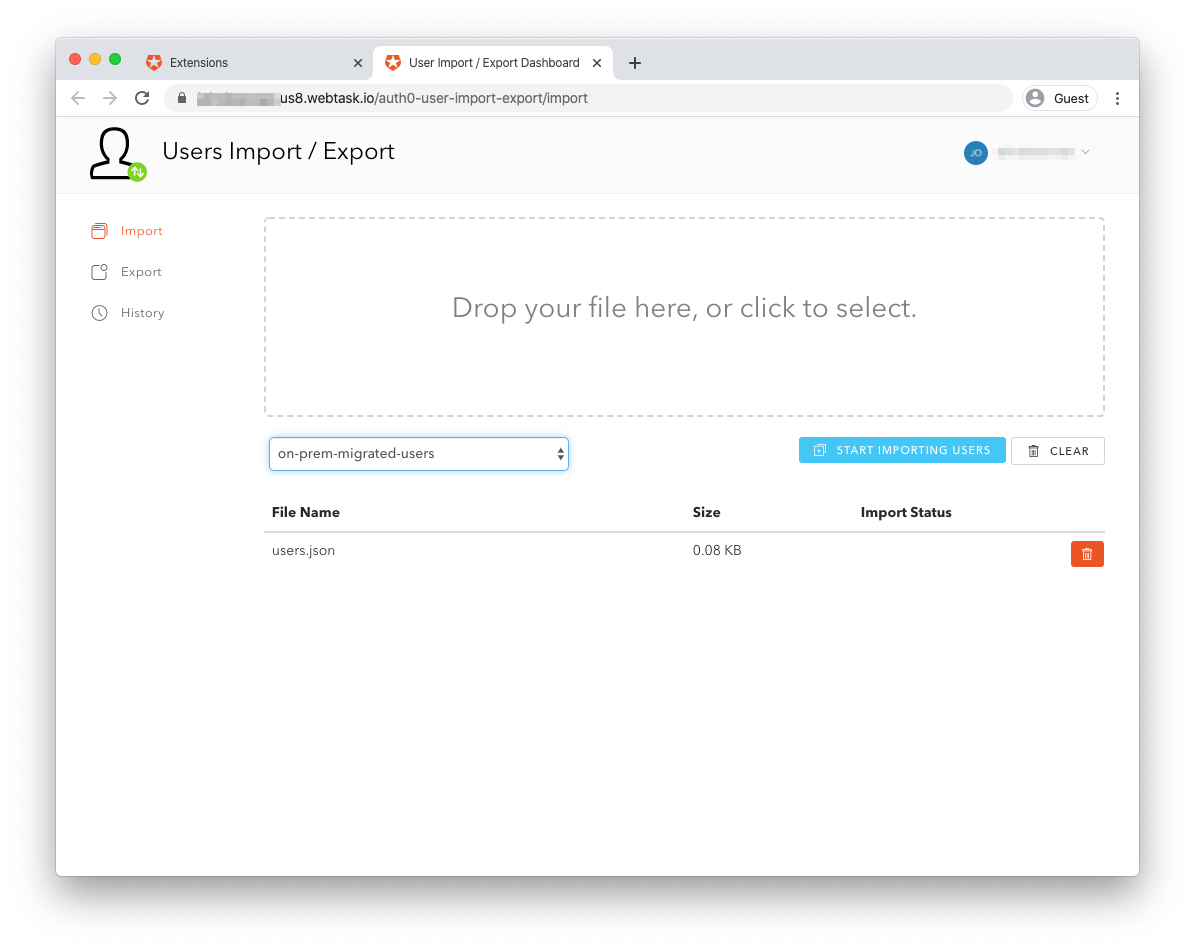
Once authorized, the extension provides a form from which you can upload your formatted JSON file containing user data.
For a more comprehensive explanation of the extension and its capabilities, you can check out the Auth0 Docs page for the User Import/Export Extension.
User Migration Strategy #2: Automatic Migration
If your current solution isn't immediately being deprecated, Automatic Migration is a convenient way to migrate users one at a time as they sign in.
As mentioned above, one key consideration with this solution is whether or not your existing identity solution is accessible from the public internet, which is required for Automatic Migration to work. If your user data isn't publicly available, you'll need to do some additional work to hook up a migration solution. Depending on your identity solution, one option is to create a reverse proxy (e.g., using NGINX or serverless functions) that's exposed to the public internet and will reformat and forward requests to your internal identity solution. The specifics are relatively complex and beyond the scope of this post, but we're planning a future post that explores this solution in detail!
Automatic Migration works by writing custom scripts, implemented in JavaScript, that call your existing identity provider's APIs when a user logs in to Auth0. When the script runs, Auth0 checks if the user exists in Auth0's database. If they do, they log in as expected. If they are not, the custom script calls the existing identity store to retrieve the user's information and store it in Auth0's database. This way, users are only migrated when they log in, meaning a seamless transition between identity providers.

As mentioned above, the tradeoff in this approach is the amount of time it takes. Since user data migrates only as a user logs in, infrequent or dormant users may not have their data migrated to Auth0 in a reasonable amount of time.
If you have some time in your migration strategy, you also have the option of a two-stage approach to migration. This hybrid approach involves starting with Automatic Migration to move your existing active users over to Auth0 quickly and seamlessly, followed by bulk importing remaining users after automatic migrations slow down.
Conclusion
Migrating your identity solution can feel like a daunting task. Even setting aside the business complexities, the act of retrieving user data from your existing system and moving it to a new one can present many logistical challenges. Auth0 aims to lower the complexity of this process as much as possible and, with multiple approaches to data migration, create a seamless experience for your customer base.
About the author

John Brennan
R&D Content Engineer (Auth0 Alumni)