
This tutorial shows you how to build a feature-complete API using Node.js, Express, and TypeScript that lets clients perform data operations on resources that describe a restaurant menu. Using TypeScript with Node.js gives you access to optional static type-checking along with robust tooling for large apps and the latest ECMAScript features.
Learn also how to define data models, create a data service, and quickly build modular endpoints. As an option, you can also learn how to secure the API using Auth0.
What You Will Build
You'll learn how to create and secure a feature-complete Express API through hands-on practice. You'll test your API locally using terminal commands. Additionally, you'll use a live client application, the "WHATABYTE Dashboard", as a testing harness to simulate production conditions and live user interactions.
The sleek web player from Spotify inspired the design of the live demo application.
For simplicity, you'll store data in-memory and not in an external database.
For security, you'll limit API access by following these business rules:
Anyone can read data.
Only authenticated users with a
menu-adminrole can create, update, or delete menu items. Themenu-adminrole will bundle the necessary permissions to execute these write operations.
We tested this tutorial using Node.js v14.15.1 and NPM 6.14.8. If you need to install any of them, follow the instructions provided by the Node.js Foundation for your operating system.
Get Starts with TypeScript in Node.js
Bootstrap a Node.js Project
Start by creating a project directory anywhere in your system and making it your current directory:
mkdir menu-api
cd menu-api
Next, initialize a Node.js project within the project directory by creating a package.json file with default settings:
npm init -y
Install Project Dependencies
Your Node.js project requires a couple of dependencies to create a secure Express server with TypeScript. Install them like so:
npm i express dotenv cors helmet
Here's what each of the above packages does in your project:
express: Fast, unopinionated, minimalist web framework for Node.js.dotenv: Zero-dependency module that loads environment variables from a.envfile intoprocess.env.cors: Express middleware to enable CORS with various options.helmet: Express middleware to secure your apps by setting various HTTP headers, which mitigate common attack vectors.
To use TypeScript, you also need to install a stable version of typescript as a developer dependency:
npm i -D typescript
To use TypeScript effectively, you need to install type definitions for the packages you installed previously:
npm i -D @types/node @types/express @types/dotenv @types/cors @types/helmet
When a package doesn't have built-in types, you can get its type definitions through the @types npm namespace, which hosts TypeScript type definitions from the DefinitelyTyped project. Once you install the packages, the TypeScript compiler automatically includes the types, and your IDE can use them to provide you with code assistance.
Initialize TypeScript in Node.js
To help the TypeScript compiler understand your project's structure, you need to create a tsconfig.json file within the directory you want to use as the root directory of the TypeScript project. In this case, your project directory and the TypeScript project directory are the same.
To easily generate the tsconfig.json file, ensure that you are under the project directory and issue the following command:
npx tsc --init
That's all that you need for now to configure your TypeScript project with sensible defaults.
Use Environmental Variables
Instead of using hard-coded configuration variables within files throughout your project, you can define all those variables in a central location and load them into the file modules that need them. Developers working with Node.js commonly define this central location as a hidden file named .env, which you can create as follows:
touch .env
Populate the .env hidden file with the following variable that defines the port your server can use to listen for requests:
PORT=7000
As seen in the next section, any module of your project can load the variables defined within .env using the dotenv package.
⚠️ Caution: A
.envfile may contain sensitive information, such as API keys or secrets. Thus, add it to a project's.gitignorefile to prevent it from being committed to version control.
Create an Express App with TypeScript
To keep your application well-organized, create an src directory to host your Node.js application files:
mkdir src
Under this src directory, create a file named index.ts to serve as the entry point of the application:
touch src/index.ts
Add to index.ts the following template that outlines an Express server:
/**
 * Required External Modules
 */

/**
 * App Variables
 */

/**
 *  App Configuration
 */

/**
 * Server Activation
 */
Next, under the Required External Modules section, import the project dependencies you installed earlier and load any environmental variables from the local .env file using the dotenv.config() method:
/**
 * Required External Modules
 */

import * as dotenv from "dotenv";
import express from "express";
import cors from "cors";
import helmet from "helmet";

dotenv.config();
Under the App Variables section, check if Node.js loaded the environmental variable PORT into process.env. If so, parse its value as a number type and create an instance of an Express application; otherwise, exit the application:
/**
 * App Variables
 */

if (!process.env.PORT) {
   process.exit(1);
}

const PORT: number = parseInt(process.env.PORT as string, 10);

const app = express();
Under the App Configuration section, mount the middleware functions from the packages that you are importing into this entry point module:
/**
 *  App Configuration
 */

app.use(helmet());
app.use(cors());
app.use(express.json());
helmet is a collection of 14 small middleware functions that set HTTP response headers. Mounting helmet() doesn't include all of these middleware functions but provides you with sensible defaults such as DNS Prefetch Control, Frameguard, Hide Powered-By, HSTS, IE No Open, Don't Sniff Mimetype, and XSS Filter.
By mounting cors(), you enable all CORS requests. With express.json(), you parse incoming requests with JSON payloads, which populates the request object with a new body object containing the parsed data.
Finally, under the Server Activation section, you create an Express server:
/**
 * Server Activation
 */

app.listen(PORT, () => {
  console.log(`Listening on port ${PORT}`);
});
Improve TypeScript Development Workflow
The TypeScript compilation process can increase the bootstrapping time of an application. However, you don't need to recompile the entire project whenever there's a change in its source code. You can set up ts-node-dev to significantly decrease the time it takes to restart your application when you make a change.
Start by installing this package to power up your development workflow:
npm i -D ts-node-dev
ts-node-dev restarts a target Node.js process when any of the required files change. However, it shares the Typescript compilation process between restarts, which can significantly increase the restart speed.
You can create a dev npm script in package.json to run your server:
{
  "name": "menu-api",
  "version": "1.0.0",
  "description": "",
  "main": "index.js",
  "scripts": {
    "dev": "ts-node-dev --respawn --pretty --transpile-only src/index.ts"
  },
  "keywords": [],
  "author": "",
  "license": "ISC",
  "dependencies": { ... },
  "devDependencies": { ... }
}
Let's briefly break down the options that ts-node-dev takes:
--respawn: Keep watching for changes after the script has exited.--pretty: Use pretty diagnostic formatter (TS_NODE_PRETTY).--transpile-only: Use TypeScript's fastertranspileModule(TS_NODE_TRANSPILE_ONLY).src/index.ts: This is the application's entry file.
Since ts-node-dev is a tweaked version of node-dev that uses ts-node under the hood, some of its options are the combined options of those two packages. Refer to its "Usage" document for more details and available options.
Now, simply run the dev script to launch your project:
npm run dev
If everything is working correctly, you'll see a message indicating that the server is listening for requests on port 7000.
You are ready to develop this application further using TypeScript interfaces to define data models, services to manipulate the API resources, and much more.
Model Data with TypeScript Interfaces
Before creating any controllers and services, define the structure of the data you want to manage. A menu item has the following properties:
id: (number) Unique identifier for the item record.name: (string) Name of the item.price: (number) Price of the item in cents.description: (string) Description of the item.image: (string) URL pointing to the item's image.
Why are you using cents to represent the item's price?
It's better to use integer values to store the item's price and perform arithmetic operations. Developers should never use floating-point numbers to represent monetary values. Floating-point numbers cannot precisely represent all real numbers. As such, floating-point operations cannot precisely represent true arithmetic operations, leading to many surprising situations.
For example, let's say you plan to sell a cup of tea for 1 dollar and 10 cents, $1.10. You have a customer who orders 162 cups. For what amount should you invoice the customer?
1.10 * 162 = 178.20000000000002
You need to apply a rounding function to 178.20000000000002 to get an appropriate invoice amount.
Now, what if you represent the price of a cup of tea in cents? It would be 110 cents, which makes finding the invoice amount much more accurate:
110 * 162 = 17820
All that you have to do now is to divide that number by 100 to display or print the dollar amount:
17820 / 100 = 178.2
Invoice amount: $178.20.
Remember: Store in cents. Display in dollars.
Since you are using TypeScript to build your API, you have different options to define and enforce the structure of objects during development. You can use either classes or interfaces to define custom types. You can use interfaces for the menu items as they are not part of the compiled JavaScript bundle, keeping it smaller, and your application won't need instances of a menu item.
To keep your project organized, create an items directory under the src directory to store all files related to menu items:
mkdir src/items
To start modeling your data, create a file to hold the definition of a BaseItem and an Item type:
touch src/items/item.interface.ts
Populate src/items/item.interface.ts with the following definition:
// src/items/item.interface.ts

export interface BaseItem {
  name: string;
  price: number;
  description: string;
  image: string;
}

export interface Item extends BaseItem {
  id: number;
}
There will be scenarios where you only need to assert the item's structure without its id, such as when you get a payload to create a new item or update an existing one. In those types of requests, POST and PUT, the client sends the item id as a query parameter. For those cases, you'll use the BaseItem interface.
Next, create a file to hold the definition of an Items type, a bundle of elements of type Item:
touch src/items/items.interface.ts
Populate src/items/items.interface.ts as follows:
// src/items/items.interface.ts

import { Item } from "./item.interface";

export interface Items {
  [key: number]: Item;
}
Create a Node.js Service with TypeScript
A service lets you encapsulate related business logic that you can share across multiple projects. As such, your application can use a service to access and manipulate records from your store.
Create a file to define a service module:
touch src/items/items.service.ts
Populate the src/items/items.service.ts file with the following template:
// src/items/items.service.ts

/**
 * Data Model Interfaces
 */


/**
 * In-Memory Store
 */


/**
 * Service Methods
 */
Now, under the Data Model Interfaces section, import the interfaces you created earlier:
/**
 * Data Model Interfaces
 */

import { BaseItem, Item } from "./item.interface";
import { Items } from "./items.interface";
To keep this tutorial simpler, you are not using an external database to store records. Instead, under the In-Memory Store section, you create a simple in-memory store represented as an object:
/**
 * In-Memory Store
 */

let items: Items = {
  1: {
    id: 1,
    name: "Burger",
    price: 599,
    description: "Tasty",
    image: "https://cdn.auth0.com/blog/whatabyte/burger-sm.png"
  },
  2: {
    id: 2,
    name: "Pizza",
    price: 299,
    description: "Cheesy",
    image: "https://cdn.auth0.com/blog/whatabyte/pizza-sm.png"
  },
  3: {
    id: 3,
    name: "Tea",
    price: 199,
    description: "Informative",
    image: "https://cdn.auth0.com/blog/whatabyte/tea-sm.png"
  }
};
It's important to note that anytime that you restart the server, Express wipes the in-memory store. However, since you are using ts-node-dev, that only happens when you make changes to the service module file.
Next, create methods to perform read and write operations on the items store. Start by creating two methods under the Service Methods section to find store elements:
/**
 * Service Methods
 */

export const findAll = async (): Promise<Item[]> => Object.values(items);

export const find = async (id: number): Promise<Item> => items[id];
To simulate the asynchronous nature of read and write operations, all the service methods are async methods. findAll returns the whole items store object, while find receives an id parameter that it uses to look up and return a single store element if found.
Next, define a method to create a new item in the store:
/**
 * Service Methods
 */

export const findAll = async (): Promise<Items> => {...};

export const find = async (id: number): Promise<Item> => {...};

export const create = async (newItem: BaseItem): Promise<Item> => {
  const id = new Date().valueOf();

  items[id] = {
    id,
    ...newItem,
  };

  return items[id];
};
The create method is simple: it receives an object of type BaseItem as an argument, providing all the required values to define a new item in the store, except the item's id. To create a unique id value for each new element added to the store, you use the value of the current Date, based on the number of milliseconds between 1 January 1970 00:00:00 UTC and the current time.
Right below, add a method to update an existing store item:
/**
 * Service Methods
 */

export const findAll = async (): Promise<Item[]> => {...};

export const find = async (id: number): Promise<Item> => {...};

export const create = async (newItem: BaseItem): Promise<Item> => {...};

export const update = async (
  id: number,
  itemUpdate: BaseItem
): Promise<Item | null> => {
  const item = await find(id);

  if (!item) {
    return null;
  }

  items[id] = { id, ...itemUpdate };

  return items[id];
};
The update method receives the item id property and an itemUpdate object as arguments. You use the id to find the item in the store to update it wit the properties of itemUpdate. If the store doesn't have the item, you return null.
Finally, define a method to remove an item from the store:
/**
 * Service Methods
 */

export const findAll = async (): Promise<Item[]> => {...};

export const find = async (id: number): Promise<Item> => {...};

export const create = async (newItem: BaseItem): Promise<Item> => {...};

export const update = async (
  id: number,
  itemUpdate: BaseItem
): Promise<Item | null> => {...};

export const remove = async (id: number): Promise<null | void> => {
  const item = await find(id);

  if (!item) {
    return null;
  }

  delete items[id];
};
The remove method receives an id value as a parameter and uses it to look up an item in the store and to delete it if found.
You've now completed the creation of a nimble service module using TypeScript and Node.js. Any other project can use the code of this service module as it's not tied to any particular framework. You use it in the next section to create your API controllers.
It's worth mentioning that you could have used a TypeScript class to define and encapsulate the service logic; however, using functions makes testing your service module much easier.
Create Express Controllers
For this application, you'll create endpoints to access an items resource to perform read and write operations on menu items:
# get all items
GET /api/menu/items

# get a single item using an id parameter
GET /api/menu/items/:id

# create an item
POST /api/menu/items

# update an item using an id parameter
PUT /api/menu/items/:id

# remove an item using an id parameter
DELETE /api/menu/items/:id
You can refer to the WHATABYTE Menu API document to get more details on the signature, input, and response of each endpoint.
Only the GET endpoints are public, so let's start with those.
Instead of defining the application routes inside the entry-point file, index.ts, you can create an Express router as a separate module with all your route handling details and import it wherever it's needed.
To start, under the /src/items directory, create an items.router.ts file:
touch src/items/items.router.ts
When a client application makes a request to your server, Express forwards the request to functions designed to handle that type of request (GET or POST) on the specified resource (items/). As such, each of these functions defines a route handler, which is also commonly referred to as a controller.
Populate src/items/items.router.ts with the following template that outlines the architecture of the router:
/**
 * Required External Modules and Interfaces
 */

/**
 * Router Definition
 */

/**
 * Controller Definitions
 */

// GET items

// GET items/:id

// POST items

// PUT items/:id

// DELETE items/:id
With the template in place, add the following under the Required External Modules and Interfaces section:
/**
 * Required External Modules and Interfaces
 */

import express, { Request, Response } from "express";
import * as ItemService from "./items.service";
import { BaseItem, Item } from "./item.interface";
Here, you are importing the express package and two of its internal type definitions, Request and Response, which you can use to type the callback functions of your Express controllers.
You also import all the exported functions from the items.service module and bundle them locally as an ItemService object, making it easier for you to avoid name collisions and to pinpoint from what package a function comes.
Finally, you also import the Item and Items interfaces, which are necessary to type the return values from the ItemService functions.
Next, define an Express router under the Router Definition section:
/**
 * Router Definition
 */

export const itemsRouter = express.Router();
Here, you use the express.Router class to create a modular and mountable bundle of route handlers. An Express router instance is often referred to as a "mini-app" because it functions as a complete middleware and routing system, which is essential for organizing the architecture of your Node.js project into components that you can easily test and re-use.
You export the itemsRouter right away, even though you have not defined its routing properties yet. Any property that you define later in the module on the itemsRouter object would be accessible by any module that imports it.
Define each controller function by adding the following under the Controller Definitions section:
/**
 * Controller Definitions
 */

// GET items

itemsRouter.get("/", async (req: Request, res: Response) => {
  try {
    const items: Item[] = await ItemService.findAll();

    res.status(200).send(items);
  } catch (e) {
    res.status(500).send(e.message);
  }
});

// GET items/:id

itemsRouter.get("/:id", async (req: Request, res: Response) => {
  const id: number = parseInt(req.params.id, 10);

  try {
    const item: Item = await ItemService.find(id);

    if (item) {
      return res.status(200).send(item);
    }

    res.status(404).send("item not found");
  } catch (e) {
    res.status(500).send(e.message);
  }
});

// POST items

itemsRouter.post("/", async (req: Request, res: Response) => {
  try {
    const item: BaseItem = req.body;

    const newItem = await ItemService.create(item);

    res.status(201).json(newItem);
  } catch (e) {
    res.status(500).send(e.message);
  }
});

// PUT items/:id

itemsRouter.put("/:id", async (req: Request, res: Response) => {
  const id: number = parseInt(req.params.id, 10);

  try {
    const itemUpdate: Item = req.body;

    const existingItem: Item = await ItemService.find(id);

    if (existingItem) {
      const updatedItem = await ItemService.update(id, itemUpdate);
      return res.status(200).json(updatedItem);
    }

    const newItem = await ItemService.create(itemUpdate);

    res.status(201).json(newItem);
  } catch (e) {
    res.status(500).send(e.message);
  }
});

// DELETE items/:id

itemsRouter.delete("/:id", async (req: Request, res: Response) => {
  try {
    const id: number = parseInt(req.params.id, 10);
    await ItemService.remove(id);

    res.sendStatus(204);
  } catch (e) {
    res.status(500).send(e.message);
  }
});
The logic of the controllers is compact as they delegate the bulk of their operations to the functions of the ItemService module. If you ever need to use a database like MongoDB or PostgreSQL to persist data, you only need to modify the logic of the service provider, the ItemService module, and not the logic of the consumers, your controllers.
To complete the setup of your controllers, you need to wire the itemsRouter with your Express app. To do so, open index.ts and import the router under the Required External Modules section:
/**
 * Required External Modules
 */

import * as dotenv from "dotenv";
import express from "express";
import cors from "cors";
import helmet from "helmet";
import { itemsRouter } from "./items/items.router";

dotenv.config();
Next, within this file, update the App Configuration section as follows to make use of the router:
/**
 *  App Configuration
 */

app.use(helmet());
app.use(cors());
app.use(express.json());
app.use("/api/menu/items", itemsRouter);
The app.use() method can take as an argument an optional path and a callback function that represents one or more middleware functions. In this case, you tell your Express app to invoke the itemsRouter middleware functions whenever the api/menu/items route path is requested.
Test the Express API Endpoints
With the controllers all set up, it's time to test them out. To make this process simple, you can use cUrl from your terminal, which should work across operating systems.
Are you developing on Windows? Learn more about Windows PowerShell Commands for Web Developers.
- Get all items:
curl http://localhost:7000/api/menu/items -i
The
-iflag includes protocol headers in the output.
You should get a 200 OK response with an array that includes three menu items.
- Get an item:
curl http://localhost:7000/api/menu/items/2 -i
You should get a 200 OK response with a JSON object describing a pizza.
- Add an item:
curl -X POST -H 'Content-Type: application/json' -d '{
  "name": "Salad",
  "price": 499,
  "description": "Fresh",
  "image": "https://images.ctfassets.net/23aumh6u8s0i/5pnNAeu0kev0P5Neh9W0jj/5b62440be149d0c1a9cb84a255662205/whatabyte_salad-sm.png"
}' http://localhost:7000/api/menu/items -i
You should get an 201 Created response with a JSON object describing a salad.
- Verify that you added the "Salad" menu item:
curl http://localhost:7000/api/menu/items/ -i
The last item in the JSON object response should describe a salad and match the data from the POST request you sent previously.
- Update an item:
curl -X PUT -H 'Content-Type: application/json' -d '{
  "name": "Spicy Pizza",
  "price": 599,
  "description": "Blazing Good",
  "image": "https://images.ctfassets.net/23aumh6u8s0i/2x1D2KeepKoZlsUq0SEsOu/bee61947ed648848e99c71ce22563849/whatabyte_pizza-sm.png"
}' http://localhost:7000/api/menu/items/2 -i
You should get a 200 OK response with a JSON object describing the updated menu item.
- Verify that your API updated the item:
curl http://localhost:7000/api/menu/items/2 -i
You should get a 200 OK response with the updated menu item.
- Delete an item:
curl -X DELETE http://localhost:7000/api/menu/items/2 -i
You should get an 204 No Content response from the server.
- Verify that you deleted the item:
curl http://localhost:7000/api/menu/items/ -i
You should get a 200 OK response with a JSON object that includes three menu items. None of the items is a pizza.
Implement Express Error Handling
In Express, the order in which you declare and invoke middleware is essential for the architecture of your application. What should happen when a client makes a server request that doesn't match any server routes? The ideal behavior is to respond to the client with a 400 Bad Request status code.
A good way to handle this is to create an HttpException class that helps you encapsulate errors related to HTTP requests and a middleware function to help you manage and issue the error response.
To continue having an organized application architecture, create a common directory under the src directory to host any classes or interfaces that you use across different project modules:
mkdir src/common
Within the src/common directory, create a file to define the HttpException class:
touch src/common/http-exception.ts
Populate src/common/http-exception.ts as follows:
// src/common/http-exception.ts

export default class HttpException extends Error {
  statusCode?: number;
  status?: number;
  message: string;
  error: string | null;

  constructor(statusCode: number, message: string, error?: string) {
    super(message);

    this.statusCode = statusCode;
    this.message = message;
    this.error = error || null;
  }
}
With this helper class in place, proceed to create a middleware directory under the src directory to host all the files that define custom middleware functions:
mkdir src/middleware
To start, define a middleware function that handles request errors in an error.middleware.ts file inside src/middleware as follows:
touch src/middleware/error.middleware.ts
Now, populate src/middleware/error.middleware.ts with this:
// src/middleware/error.middleware.ts

import HttpException from "../common/http-exception";
import { Request, Response, NextFunction } from "express";

export const errorHandler = (
  error: HttpException,
  request: Request,
  response: Response,
  next: NextFunction
) => {
  const status = error.statusCode || error.status || 500;

  response.status(status).send(error);
};
Here, you receive an error of type HttpException and return an appropriate error based on its properties. If error.status and error.message are defined, you include those in the server response. Otherwise, you default to a generic 500 Internal Server Error status code and a generic message.
It's important to note that you must provide four arguments to identify a function as an error-handling middleware function in Express. You must specify the next object to maintain the error-handling signature even if you don't use it. Otherwise, Express interprets the next object as a regular middleware function, and it won't handle any errors.
Now, also consider that the condition of a route not existing is not considered an error by Express when you use the framework to build a RESTful API. The REST architecture model uses HTTP status codes to respond to the client. A missing resource should not be an error but a condition you need to report to the client.
As such, Express won't call your errorHandler middleware function if you request the employees resource, for example:
curl http://localhost:7000/employees/ -i
Executing the request above returns the following generic HTML response:
HTTP/1.1 404 Not Found
X-DNS-Prefetch-Control: off
X-Frame-Options: SAMEORIGIN
Strict-Transport-Security: max-age=15552000; includeSubDomains
X-Download-Options: noopen
X-Content-Type-Options: nosniff
X-XSS-Protection: 1; mode=block
Access-Control-Allow-Origin: *
Content-Security-Policy: default-src 'none'
Content-Type: text/html; charset=utf-8
Content-Length: 149
Date: Thu, 30 Jan 2020 14:51:01 GMT
Connection: keep-alive
<!DOCTYPE html>
<html lang="en">
<head>
<meta charset="utf-8">
<title>Error</title>
</head>
<body>
<pre>Cannot GET /employees/</pre>
</body>
</html>
To customize how your app responds to undefined resources, create an additional middleware function to catch 404 conditions. Inside the src/middleware directory, create a not-found.middleware.ts file as follows:
touch src/middleware/not-found.middleware.ts
Then, add the following code to src/middleware/not-found.middleware.ts:
// src/middleware/not-found.middleware.ts

import { Request, Response, NextFunction } from "express";

export const notFoundHandler = (
  request: Request,
  response: Response,
  next: NextFunction
) => {

  const message = "Resource not found";

  response.status(404).send(message);
};
You now need to wire these middleware functions with your Express app. Open src/index.ts and update its Required External Modules section to import these error-handling middleware functions:
/**
 * Required External Modules
 */

import * as dotenv from "dotenv";
import express from "express";
import cors from "cors";
import helmet from "helmet";
import { itemsRouter } from "./items/items.router";
import { errorHandler } from "./middleware/error.middleware";
import { notFoundHandler } from "./middleware/not-found.middleware";

dotenv.config();
Next, update the App Configuration section to mount the errorHandler and notFoundHandler functions:
/**
 *  App Configuration
 */

app.use(helmet());
app.use(cors());
app.use(express.json());
app.use("/api/menu/items", itemsRouter);

app.use(errorHandler);
app.use(notFoundHandler);
Your application can't reach any routes you define after mounting the errorHandler middleware function because you close the request-response cycle within errorHandler by sending a response to the client. As such, you must mount the errorHandler middleware function after you have mounted all the controller functions of your application.
But, as noted earlier, errorHandler won't catch 404 errors. However, you can catch these errors by making notFoundHandler the last middleware function that you mount, which effectively creates a catch-all handler for your app.
Make the following request and observe that you now get your custom 404 response, Resource not found, instead of the generic HTML one:
curl http://localhost:7000/employees/ -i
Test the API with the Demo Client
You can use a demo application, the WHATABYTE Dashboard, to interact with your Menu API like any user would. The demo application lets you enable and disable its authentication features.
Since you have not yet implemented authorization in your API to protect your endpoints, you'll use the demo client without any authentication features, which allows you to perform read and write operations on your Menu API as an anonymous user.
Set up the demo client application
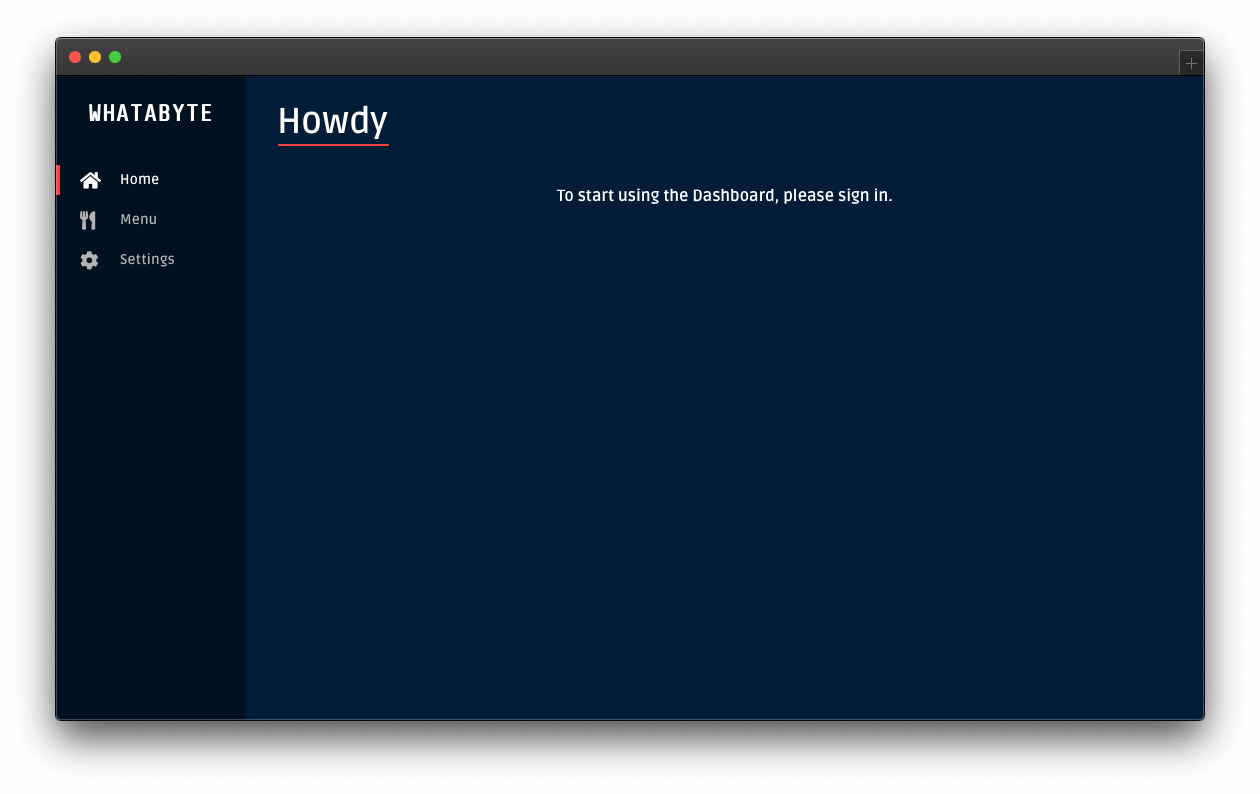
Head to https://dashboard.whatabyte.app to open the demo client. If this is your first time using this client application, the Auth0 Demo Settings view will open up.
Under the "Auth0 Demo Settings" view, ensure that the Enable Authentication Features option is off:

You should have a form with one field labeled API Server Base URL under its API Configuration section. The value of this field corresponds to your Express server base URL, in this case, http://localhost:7000.
If you are using any other base URL for your server, change the value of the form field.
Now, click the Save button to load the demo client application:
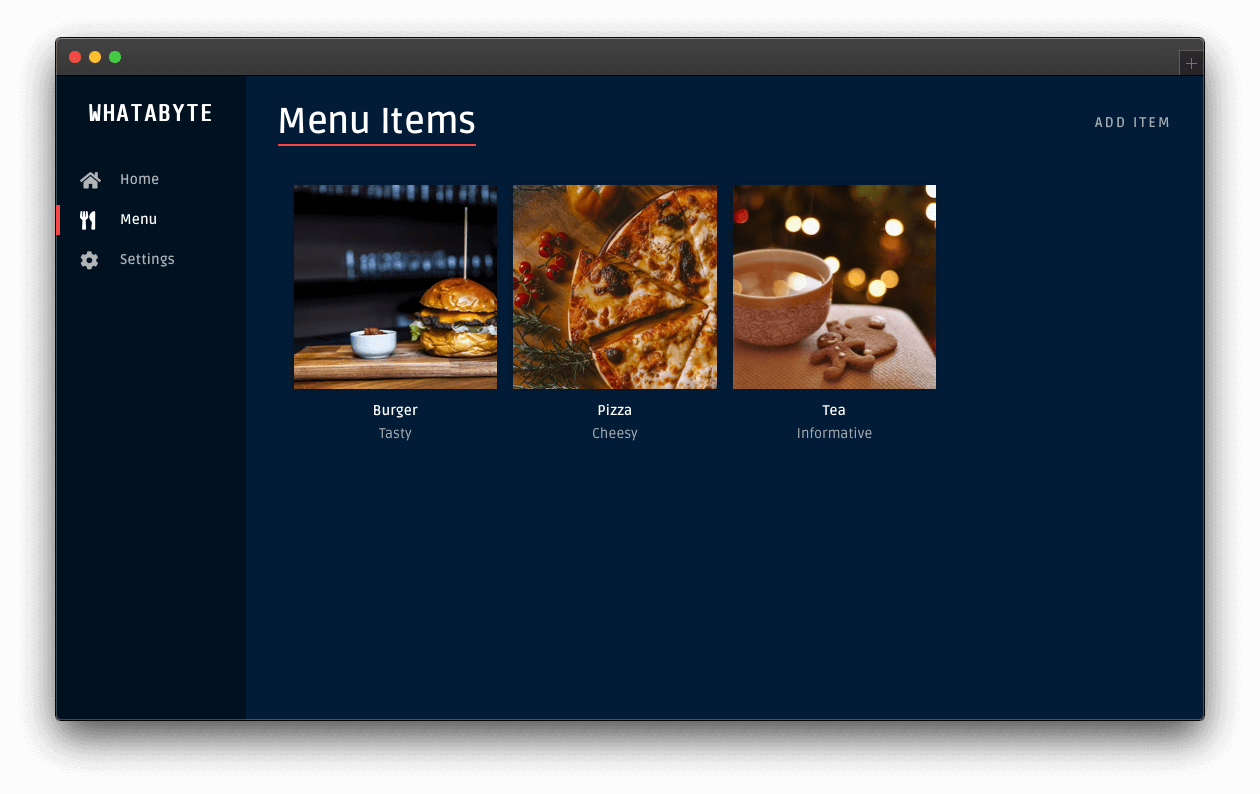
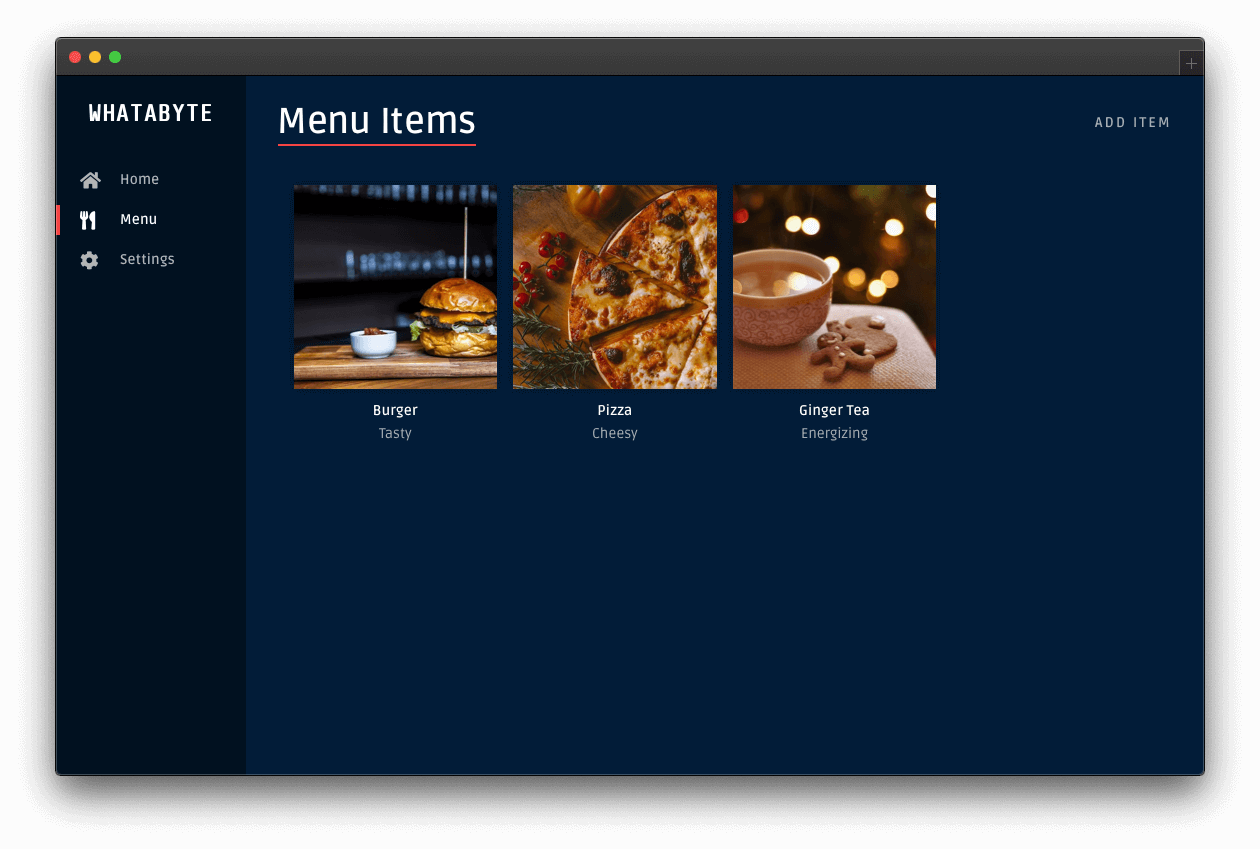
Locate the navigation bar on the left side of the page. Then, click on the Menu tab. Three menu items from your server's store should load up:

Create an item
On the "Menu Items" page, click on the Add Item button on the top-right corner. The "Add Menu Item" page should load up with a pre-populated form:

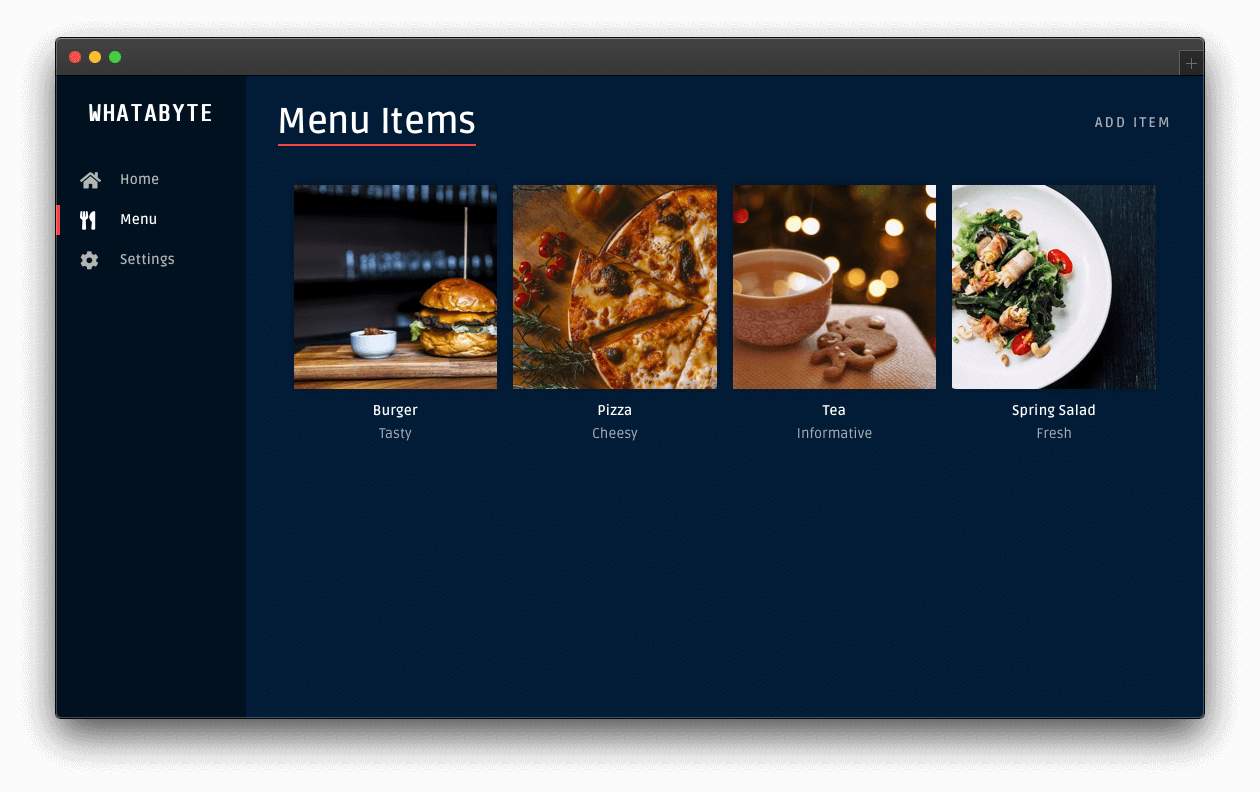
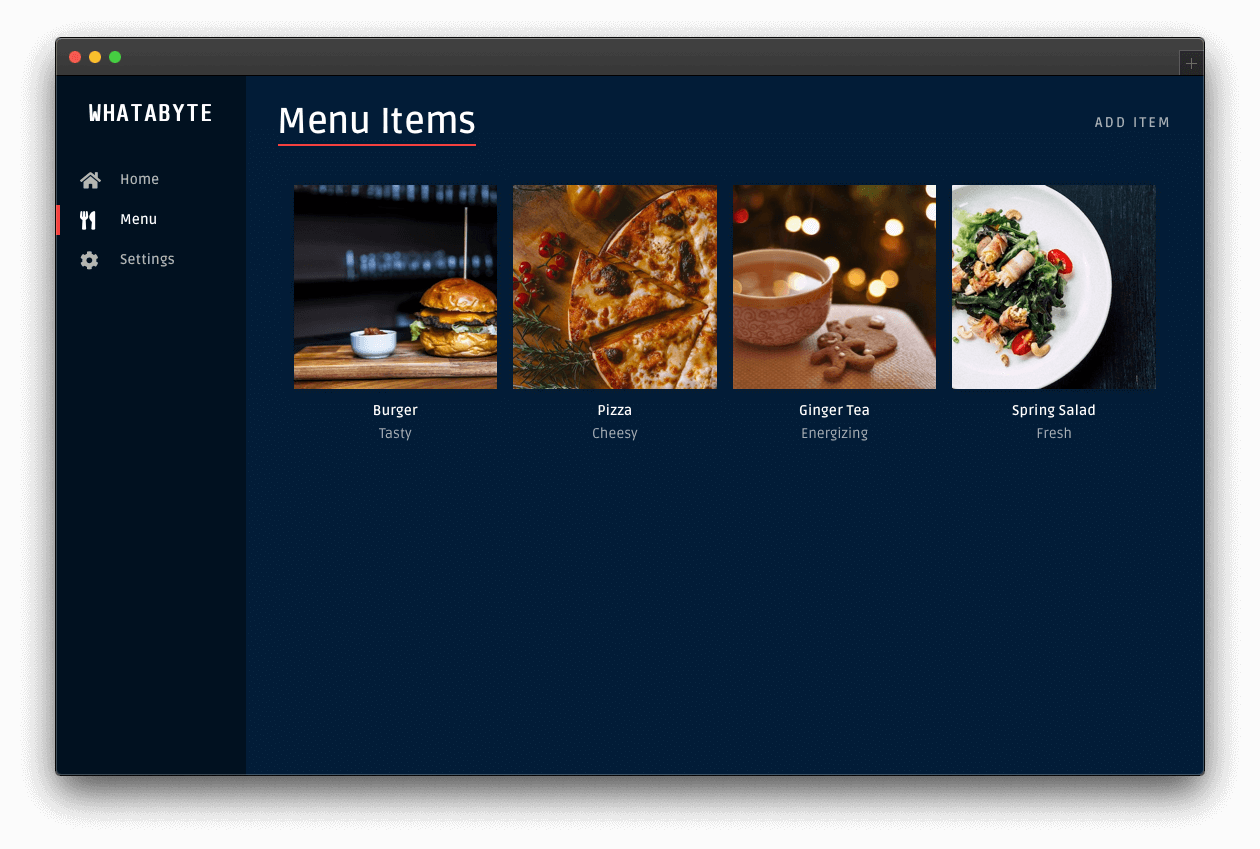
Click on the Save button to add a "Spring Salad" item to your menu.
Once the request-response cycle is complete between the client and the server, the client application loads the "Menu Items" page again. The menu grid now features four items, which includes the "Spring Salad":
Update an item
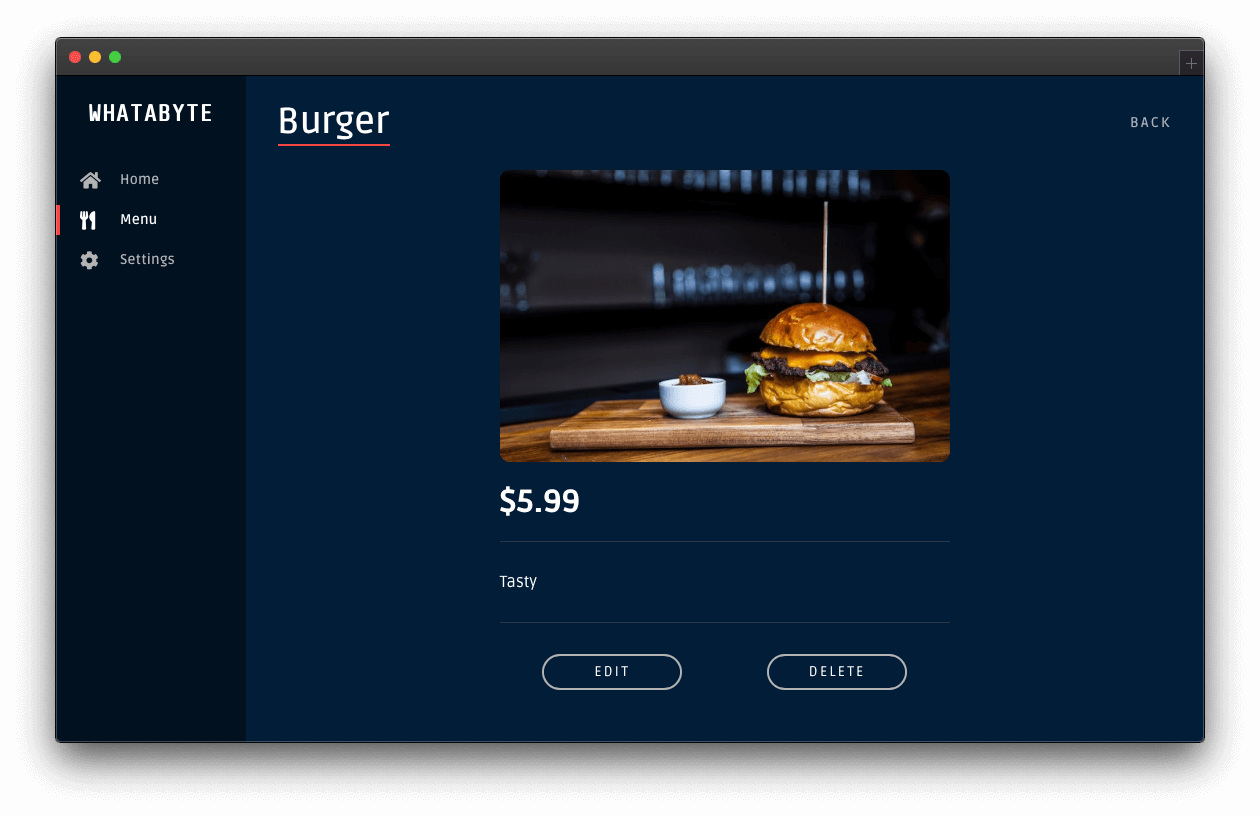
Now, try updating the property of an item. Click on the "Tea" item to load its item page:
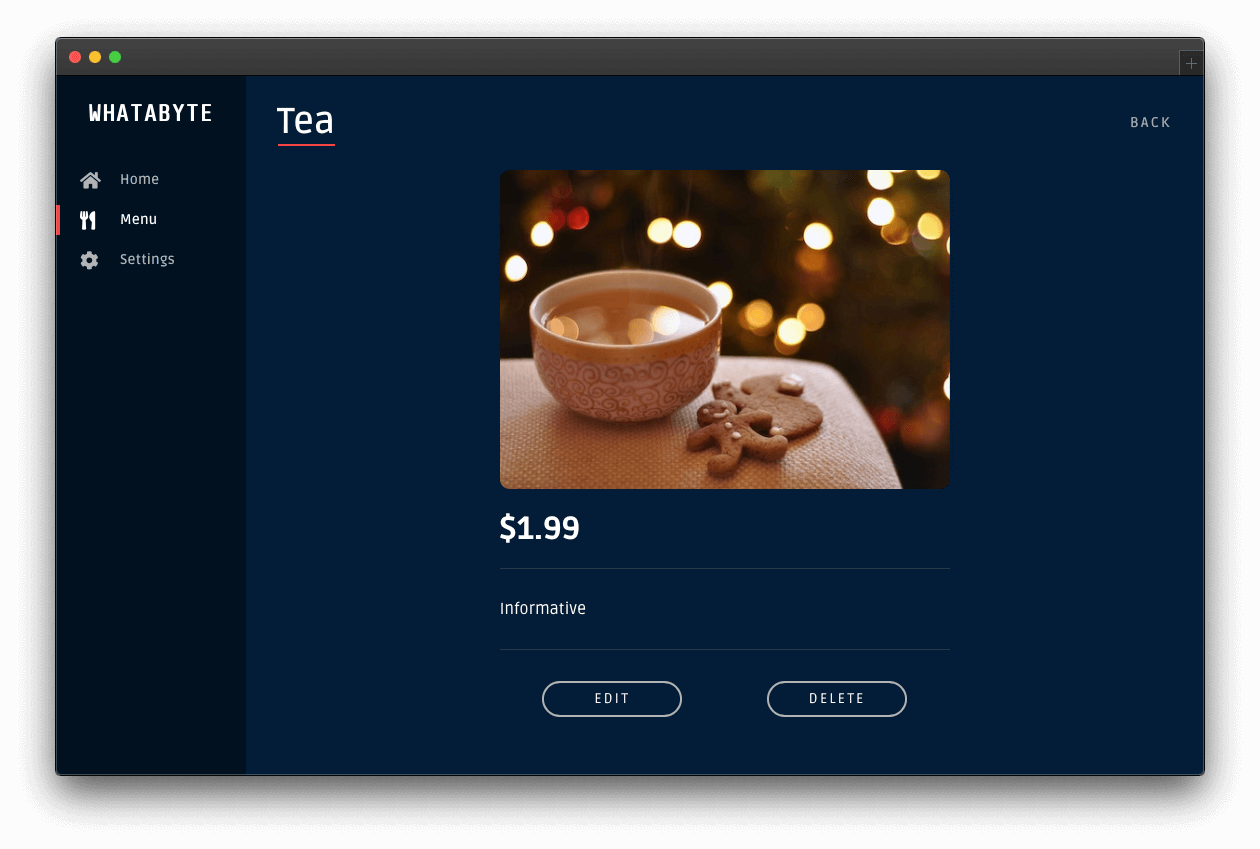
You'll notice two buttons at the bottom: Edit and Delete.
Click the Edit button and modify the form that loads up:
- Change the Name value from "Tea" to "Ginger Tea".
- Change the Description value from "Informative" to "Energizing".
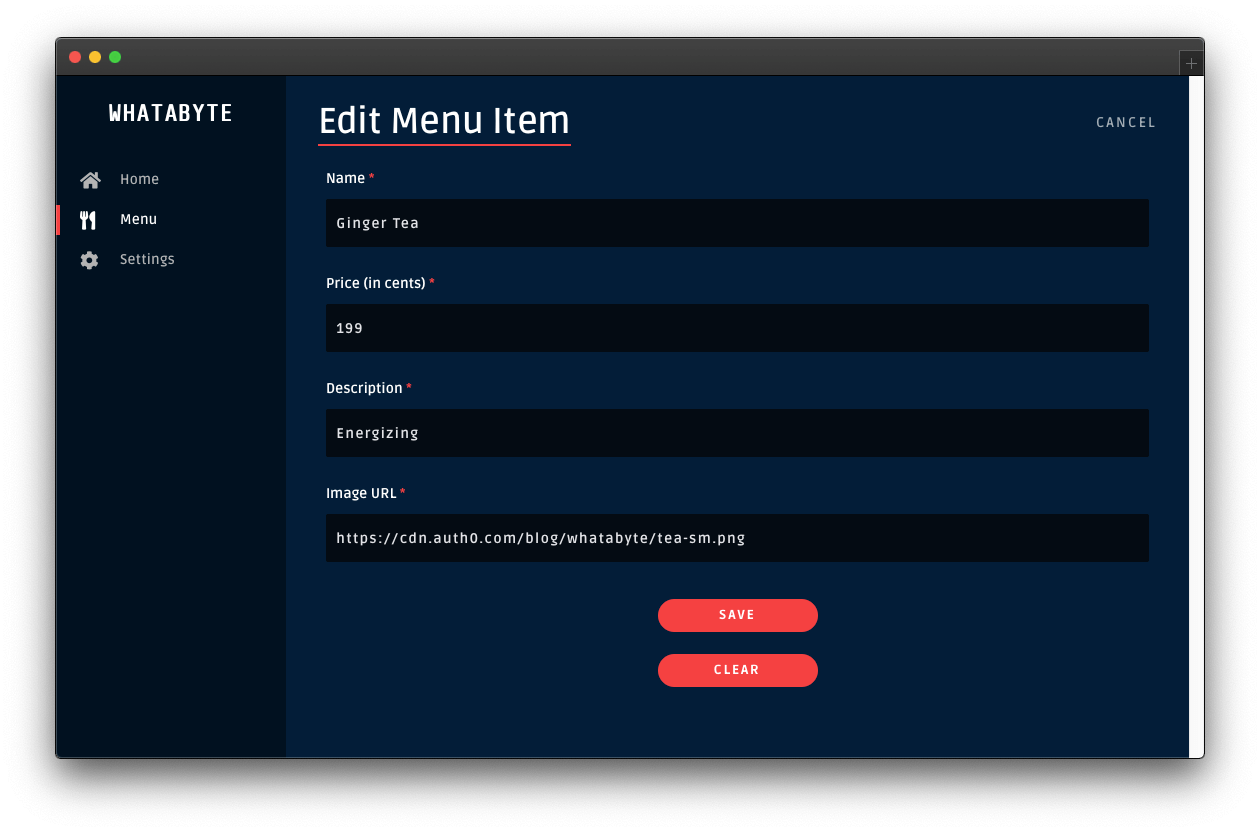
Then, click the Save button. Once the request-response cycle completes again, you'll see four items in the menu grid. However, the "Tea" item will show its new name and description:
Delete an item
Click on any item on the menu grid, such as the "Spring Salad". On the item page, click its Delete button. You'll load up the "Delete Menu Item" page, asking you to confirm if you what to delete the item:

Click the Delete button to confirm the operation. After the request-response cycle completes, the menu grid loads up without that particular item:
Security Considerations
Now that you have a working API with error handling to read and write data, it's time for you to learn how to protect it against unauthorized access by using Auth0.
Auth0 is a flexible, drop-in solution to add authentication and authorization services to your applications. Your team and organization can avoid the cost, time, and risk that comes with building your solution to authenticate and authorize users. Auth0 offers tons of guidance and SDKs for you to get started and integrate Auth0 in your stack easily.
As it is, anyone could use the client application to perform write operations. Someone could delete all the menu items:

To prevent such a data catastrophe from happening, you need to secure your write endpoints by implementing authorization on the API layer. Once your Menu API has authorization in place, you can enable the authentication features of the demo client to improve the UX of the end-users.
In the next part of this tutorial, you'll require users to log in to perform write operations on the API. Additionally, you'll further increase your API's security by requiring users to have a set of permissions (defined through a role) to perform any write operation.
About the author

Dan Arias
Software Engineer (Auth0 Alumni)