Make sure that your database has the appropriate fields to store user profiles attributes, such as
id, nickname, email, and password. To learn about Auth0’s user profile schema, read Normalized User Profiles. To learn more about updating user profiles, read Update User Profiles Using Your Database.- ASP.NET Identity
- MongoDB
- MySQL
- PostgreSQL
- SQLServer
- Windows Azure SQL Database
- Web services accessed via Basic Auth
Network firewall
If you are behind a firewall, this feature may require that you add the appropriate Auth0 IP addresses to the Allow List to work properly.
Create the connection in the Auth0 Dashboard
- Navigate to Auth0 Dashboard > Authentication > Database, and select Create DB Connection.
- Configure the connection’s settings, and select Create:
| Parameter | Definition |
|---|---|
| Name | The name of the connection. The name must start and end with an alphanumeric character, contain only alphanumeric characters and dashes, and not exceed 35 characters. |
| Choose one or more attributes as user identifiers | Choose the identifier attribute(s) for the connection. |
| Choose one or more authentication methods | Choose an authentication method to challenge users. |
| Use my own database | Toggle on if you have a database you want to connect with Auth0. |
| Disable Sign Ups | Prevents new user signups from public endpoints. |
| Promote Connection to Domain Level | Promote this connection to domain level to be used with third-party applications. |
- Attributes
- Authentication Methods
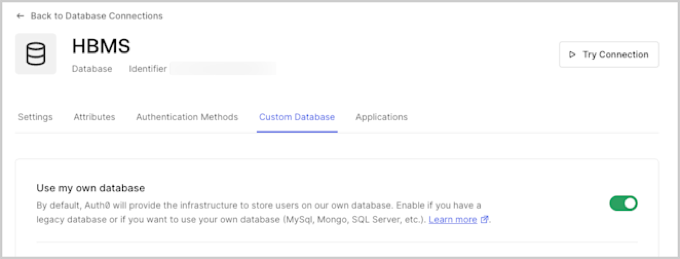
- Custom Database
- Applications
-
Select the Custom Database view, and enable the Use my own database switch.
Create database action scripts
Toggling the Use my own database switch enables the Database Action Scripts area where you will create scripts to configure how authentication works when using your database. You can write your database action scripts, or you can select a template from the Templates dropdown and modifying it as necessary. You must configure alogin script; additional scripts for user functionality are optional.
The available database action scripts are:
| Name | Description | Parameters |
|---|---|---|
| Login Required | Executes each time a user attempts to log in. | email, password |
| Create | Executes when a user signs up. | user |
| Verify | Executes after a user follows the verification link. | email |
| Change Password | Executes when a user clicks on the confirmation link after a reset password request. | email, newPassword |
| Get User | Retrieves a user profile from your database without authenticating the user. | email |
| Delete | Executes when a user is deleted using the API or Auth0 Dashboard. | id |
Create a Login script
Avoid user ID collisions with multiple databases
The
id (or alternatively user_id) property in the returned user profile will be used by Auth0 to identify the user.If you are using multiple custom database connections, then id value must be unique across all the custom database connections to avoid user ID collisions. Our recommendation is to prefix the value of id with the connection name (omitting any whitespace). To learn more about user IDs, read Identify Users.- After toggling the Use my own database switch, the Database Action Scripts area is enabled. Make sure you are on the Login tab.
-
Use the Templates dropdown to select the MySQL database script template.
The above script connects to a MySQL database and executes a query to retrieve the first user with
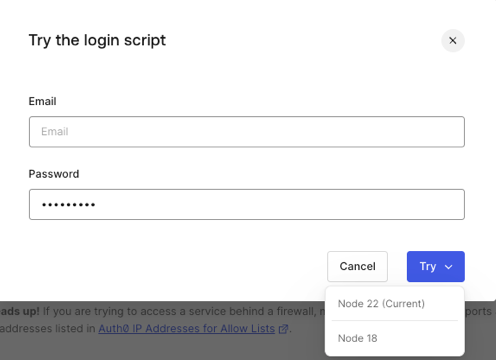
email == user.email. With thebcrypt.compareSyncmethod, it then validates that the passwords match, and if successful, returns an object containing the user profile information includingid,nickname, andemail. This script assumes that you have auserstable containing these columns. Theidreturned by Login script is used to construct the user ID attribute of the user profile. - Select Save and Try.
-
In the pop-up modal, enter your email and password and click Try. This provides a dropdown to select from a list of available runtimes, with your current runtime on top.
Custom database support for Organizations
If you use custom database connections in conjunction with Organizations, you can use thecontext parameter in the script signature to make Organization details like id, name, and metadata available to your custom database action scripts. Organization data is passed in the context object when the associated action happens in the context of an organization; for example, when a user authenticates on an organization’s login prompt, the login action script is passed. To learn more, read Database Connections.
Enable context object
- Navigate to Auth0 Dashboard > Authentication > Database.
- Select your database connection.
- Under the Custom Database tab, find Context objects in database scripts and select Enable.
- On the confirmation prompt, select Confirm.
Use Organization context
Once the context object is enabled in Dashboard, you can add acontext object to your custom database action scripts, inserted directly preceding the callback parameter. When events are triggered with Organization context, the corresponding data is made available to your custom database action scripts in the format below:
- Login
- Create
- Verify
- Change Password
- Get User
- Delete
An empty context will always be passed to the
delete script.Add configuration parameters
You can store parameters, like the credentials required to connect to your database, in the Settings section below the script editor. These will be available for all of your scripts, and you can access the parameter values using theconfiguration object in your database action scripts (i.e., configuration.MYSQL_PASSWORD).
Use the added parameters in your scripts to configure the connection. For example, you might add the following to the MySQL Login script: