Auth0 no longer supports the Auth0Claims Provider for SharePoint 2010 / 2013. This package is deprecated for existing tenants and unavailable for new tenants.
Setup
Step 1. Adding the Integration to your account
The first thing you need to do is go to the SSO Integrations section in the Dashboard and choose SharePoint from the list of apps.Step 2. Follow the Live Documentation
If your SharePoint server does not have Internet access, manually download the installation files. (Learn more about offline installation).

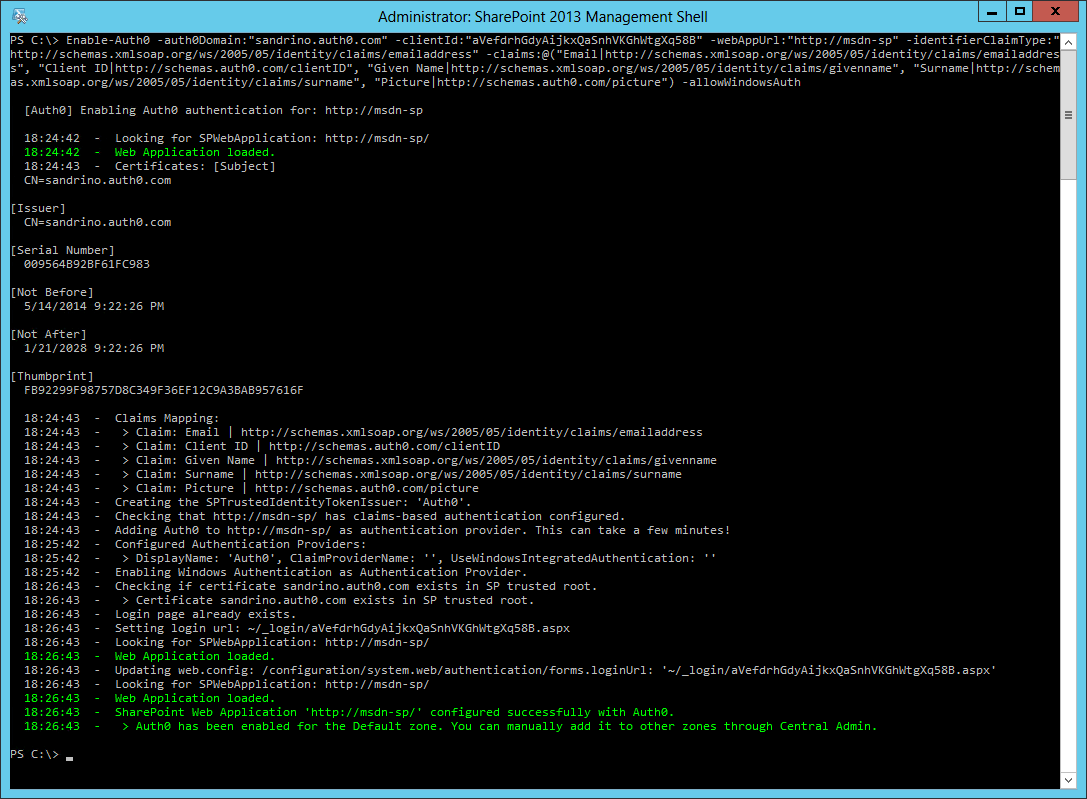
Enable-Auth0 can be adapted to:
- Change the unique identifier for users (such as email or a user id)
- Allow additional claims to be passed through to SharePoint
- Enable or disable the default Windows Authentication
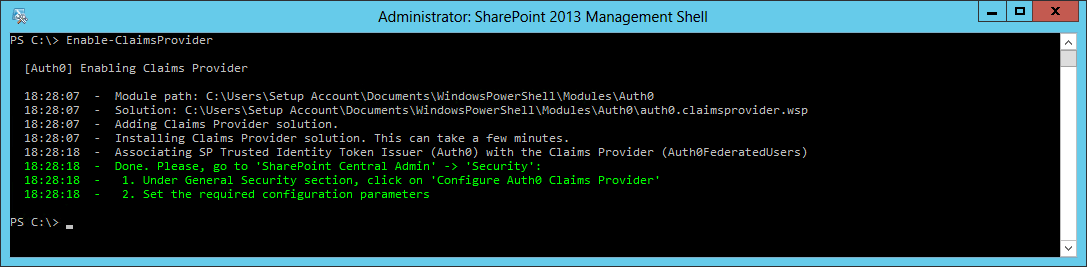
Step 3. You now have Sharepoint configured
You have configured SharePoint to use Auth0 as the SSO broker. When your users visit your site they’ll be presented with a login page showing all the connections enabled for that application. Depending on which claims have been mapped when installing the claims provider this additional information will also be available in the user’s personal settings page: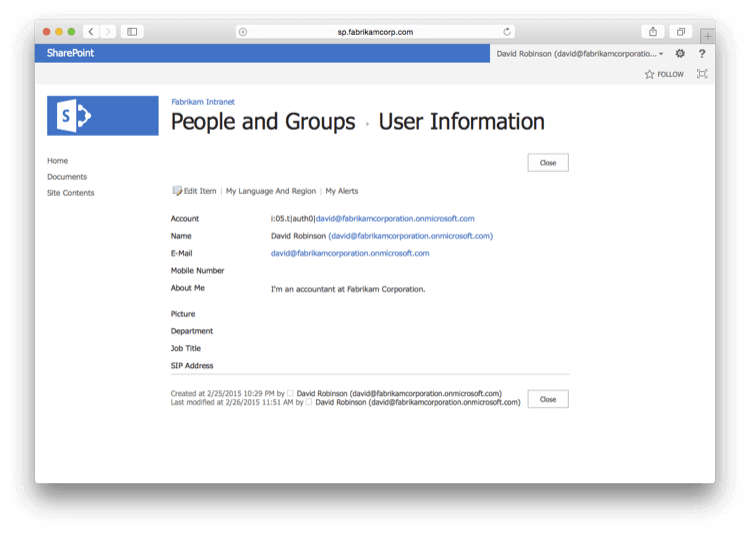
Enable-Auth0 to:
- Change the unique identifier for users (such as email or a user id)
- Allow additional claims to be passed through to SharePoint
- Enable or disable the default Windows Authentication
Customizing the Login Page
You can customize the login page by following Auth0 Universal Login instructions. You might wish to provide a way to let users authenticate with Sharepoint using Windows Authentication, bypassing Auth0. You can do that by customizing the login page, adding a link to the Windows Authentication endpoint (usually similar tohttps://yoursharepointserver/_windows/default.aspx?ReturnUrl=/_layouts/15/Authenticate.aspx).
On way of doing it is by using jQuery to modify the Lock widget and add a link to the Windows Authentication endpoint.
You need to add a reference to jQuery at the top of the <body> section of the customized login page.
lock.show(), add code to modify the HTML DOM that adds the link.
Troubleshooting
When working with additional claims and authorization it can always be useful to view the claims for the current user. Microsoft Professional Liam Clearly’s article, Claims Viewer Web Part, can be used to troubleshoot any issues with the user’s claims:Logs in SP2010
Errors and warnings are logged to SharePoint’s Unified Logging Service and tools like the ULS Viewer can be used to troubleshoot any issues you might have when using the Claims Provider. To read more about ULS View and retrieve specifications, see Microsoft documentation ULS Viewer.Logs in SP2013
For SharePoint 2013 we no longer use the Unified Logging Service for our logs, but we’ve moved to Event Tracing for Windows instead. This delivers more performance and gives you multiple ways of capturing all the logged events. To view the logs in real-time you can download the Auth0 Logs Processor from Github. Run this tool on your SharePoint Server(s) to see every call SharePoint is making to the Claims Provider:Next Steps
Authorization
The claims being passed through from Auth0 can also be used for authorization in SharePoint. For example, a user with the Role claim containing Fabrikam HR should have access or be a Contributor on a specific site. Let’s take Azure AD as an example. In this Cloud Directory users can be part of groups and David is part of Fabrikam HR. When David logs in using his Azure AD account (and the Security Groups attribute is enabled for that connection) the group memberships will be stored in thegroups attribute of the user’s profile.
If we want to make these groups available as Roles in SharePoint we’ll need to write a Rule that adds this to the configuration. This rule will only run for the application named Fabrikam Intranet (SharePoint).
http://schemas.microsoft.com/ws/2008/06/identity/claims/role containing the groups and which will be used by SharePoint for authorization.
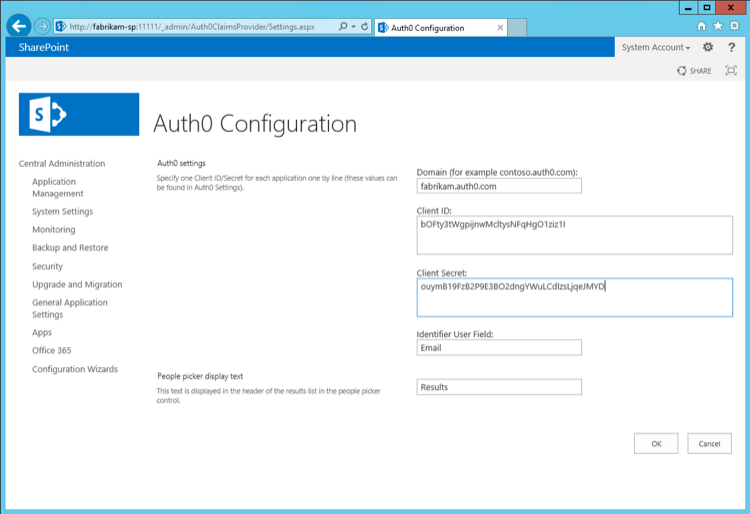
When installing the Claims Provider we need to allow the Role claim to be passed through to SharePoint, by adding it to the claims mapping list: