

TL;DR VueJS has a new version coming out. Check out all the changes here. There is a working example of an application built using this new version here. The code can be found on Github. Get out there and make something awesome!
VueJS is coming out with a new version. For those of you who don't know about VueJS, you can check it out on their website. It's another JavaScript framework that combines some things from the AngularJS and React frameworks. The first version of VueJS may have been best described as "AngularJS lite." It has a templating system that looks like Angular's and used "dirty checking" but uses ES5 getters and setters to monitor things that needed to be changed in the DOM instead of "dirty checking." However, it keeps its API small by not including extra utilities like AJAX, much like React does.
However, in the next version, it switches some things around. It moves to a "Virtual DOM" model like React. It also opens the door for developers to use whatever kind of templating they choose. Because of this, the maintainers have also implemented streaming server-side rendering, which is always welcome in today's Web landscape. Luckily, the API itself hasn't really changed. Much of the tooling around VueJS development still needs to be updated to work with the new version, but we can use Vueify to develop components in one file still. For a good look at what is implemented in the current alpha versions and what has changed, read this Github issue in the VueJS repository.
“VueJS 2.0, like React, uses a ‘Virtual DOM’ and allows you to choose the kind of templating you want”
Tweet This
Let's build a simple application using Express, PassportJS, and VueJS 2.0 to demonstrate how to setup authentication in an application and then how to communicate with our backend server from the client side. The application will let a user view, add, and delete "Exclamations." You can view anyone's exclamations. You can only add them if you have that "scope." You can always delete your own exclamations, but you can also delete other users' exclamations if you have the delete scope.
First things first. Let's create a directory to hold our code and then bring in our initial dependencies. We will install them using npm.
mkdir vuejs2-authentication
cd vuejs2-authentication
npm init -y
npm install --save-dev nodemon
npm install --save express body-parser express-session connect-mongo flash node-uuid passport passport-local pug
These are all going to be used to create our server. Next, let's create some mock data and put it in a file called data.json.
{
  "users": [
    {
      "username": "rachel@friends.com",
      "password": "green",
      "scopes": ["read", "add", "delete"]
    },
    {
      "username": "ross@friends.com",
      "password": "geller",
      "scopes": ["read"]
    }
  ],
  "exclamations": [
    {
      "id": "10ed2d7b-4a6c-4dad-ac25-d0a56c697753",
      "text": "I'm the holiday armadillo!",
      "user": "ross@friends.com"
    },
    {
      "id": "c03b65c8-477b-4814-aed0-b090d51e4ca0",
      "text": "It's like...all my life, everyone has always told me: "You're a shoe!"",
      "user": "rachel@friends.com"
    },
    {
      "id": "911327fa-c6fc-467f-8138-debedaa6d3ce",
      "text": "I...am over...YOU.",
      "user": "rachel@friends.com"
    },
    {
      "id": "ede699aa-9459-4feb-b95e-db1271ab41b7",
      "text": "Imagine the worst things you think about yourself. Now, how would you feel if the one person that you trusted the most in the world not only thinks them too, but actually uses them as reasons not to be with you.",
      "user": "rachel@friends.com"
    },
    {
      "id": "c58741cf-22fd-4036-88de-fe51fd006cfc",
      "text": "You threw my sandwich away?",
      "user": "ross@friends.com"
    },
    {
      "id": "dc8016e0-5d91-45c4-b4fa-48cecee11842",
      "text": "I grew up with Monica. If you didn't eat fast, you didn't eat!",
      "user": "ross@friends.com"
    },
    {
      "id": "87ba7f3a-2ce7-4aa0-9827-28261735f518",
      "text": "I'm gonna go get one of those job things.",
      "user": "rachel@friends.com"
    },
    {
      "id": "9aad4cbc-7fff-45b3-8373-a64d3fdb239b",
      "text": "Ross, I am a human doodle!",
      "user": "rachel@friends.com"
    }
  ]
}
Also, make sure to add the following scripts to your package.json file. We will be adding more later once we get to writing the VueJS part.
"start": "node server.js",
"serve": "nodemon server.js"
Note: I am using Node 6.2 for building the server portion of this application so I can natively use most of the ES2015 syntax. If you aren't using Node 6+, then you will want to
npm install --save-dev babel-cli babel-preset-es2015. Then theservescript will instead need to be"serve": "nodemon --exec babel-node --presets=es2015 server.js". I would also recommend using nvm to make working with multiple Node version much easier.
Create a file called server.js, and let's start putting some code in it.
// Import needed modules
const express = require('express');
const bodyParser = require('body-parser');
const session = require('express-session');
const MongoStore = require('connect-mongo')(session);
const flash = require('flash');
const passport = require('passport');
const LocalStrategy = require('passport-local');
const uuid = require('node-uuid');
const appData = require('./data.json');

// Create app data (mimics a DB)
const userData = appData.users;
const exclamationData = appData.exclamations;

function getUser(username) {
  const user = userData.find(u => u.username === username);
  return Object.assign({}, user);
}

// Create default port
const PORT = process.env.PORT || 3000;

// Create a new server
const server = express();

// Configure server
server.use(bodyParser.json());
server.use(bodyParser.urlencoded({ extended: false }));
server.use(session({
  secret: process.env.SESSION_SECRET || 'awesomecookiesecret',
  resave: false,
  saveUninitialized: false,
  store: new MongoStore({
    url: process.env.MONGO_URL || 'mongodb://localhost/vue2-auth',
  }),
}));
server.use(flash());
server.use(express.static('public'));
server.use(passport.initialize());
server.use(passport.session());
server.set('views', './views');
server.set('view engine', 'pug');
Let's go through this slowly. First, we are bringing in our dependencies. Next, we are bringing in our JSON file as data to be used in our application. Normally, you would use some sort of external database, but for our uses, this will do fine. Lastly, we are creating an Express server and configuring it with sessions and body parsers. We also enable flash messages and a static server so we can serve our JavaScript files through our Node server. Then we add Pug as our templating engine we will use for the index page and our dashboard page.
Note: I am passing a
MongoStoreto the session middleware so sessions will be stored in Mongo. This is not required in development. Session will useMemoryStoreby default. Just remove thestorefrom the session configuration object if you don't need it.
Next, let's configure Passport to give us local authentication. We will create the form that interacts with it later.
// Configure Passport
passport.use(new LocalStrategy(
  (username, password, done) => {
    const user = getUser(username);

    if (!user || user.password !== password) {
      return done(null, false, { message: 'Username and password combination is wrong' });
    }

    delete user.password;

    return done(null, user);
  }
));

// Serialize user in session
passport.serializeUser((user, done) => {
  done(null, user.username);
});

passport.deserializeUser((username, done) => {
  const user = getUser(username);

  delete user.password;

  done(null, user);
});
This is pretty standard Passport code. We are telling Passport about our local strategy. When it tries to authenticate, we look for the user in our user data. If it exists and the password is right, then we move forward. Otherwise, we return a message to the user. We also put the user's username in the session and find the user based on that username when we need to get the user information.
The next piece of code we will write will be a few custom middleware functions we will use on our routes to ensure a user is allowed to do certain things.
// Create custom middleware functions
function hasScope(scope) {
  return (req, res, next) => {
    const { scopes } = req.user;

    if (!scopes.includes(scope)) {
      req.flash('error', 'The username and password are not valid.');
      return res.redirect('/');
    }

    return next();
  };
}

function canDelete(req, res, next) {
  const { scopes, username } = req.user;
  const { id } = req.params;
  const exclamation = exclamationData.find(exc => exc.id === id);

  if (!exclamation) {
    return res.sendStatus(404);
  }

  if (exclamation.user !== username && !scopes.includes('delete')) {
    return res.status(403).json({ message: "You can't delete that exclamation." });
  }

  return next();
}

function isAuthenticated(req, res, next) {
  if (!req.user) {
    req.flash('error', 'You must be logged in.');
    return res.redirect('/');
  }

  return next();
}
Let's go through these. hasScope checks that the user in the request has the particular scope we say they need. We will invoke it with a string of the scope, and it will return the middleware that the server will use. Closures to the rescue! canDelete is similar, but it checks that the user either owns the exclamation in question or has the delete scope. Otherwise they can't delete it. This will only be used on a single route later. Lastly, we have isAuthenticated, which simply just checks that the user is logged in by checking there is a user in the request.
Next, let's create our two main routes: our home route and our dashboard route.
// Create home route
server.get('/', (req, res) => {
  if (req.user) {
    return res.redirect('/dashboard');
  }

  return res.render('index');
});

server.get('/dashboard',
  isAuthenticated,
  (req, res) => {
    res.render('dashboard');
  }
);
Here, we create a home route. We check if the user is logged in. If they are, we send them to the dashboard page. We also create a dashboard route. We first use our isAuthenticated middleware to make sure the user is logged in and then just render the dashboard template.
Now we need to create our routes for authentication.
// Create auth routes
const authRoutes = express.Router();

authRoutes.post('/login',
  passport.authenticate('local', {
    failureRedirect: '/',
    successRedirect: '/dashboard',
    failureFlash: true,
  })
);

server.use('/auth', authRoutes);
We create a router that is mounted at /auth that has a single route at /login. This is where our form will submit to later.
Next, we will create our the routes for our API. The API will allow us to get all the exclamations, add an exclamation to a user, and delete an exclamation from a user. There is also a route to get the information about the currently logged in user at /api/me. To keep ourselves organized, we create a new router, add our routes to it, and then mount it to our server at /api.
// Create API routes
const apiRoutes = express.Router();

apiRoutes.use(isAuthenticated);

apiRoutes.get('/me', (req, res) => {
  res.json({ user: req.user });
});

// Get all of a user's exclamations
apiRoutes.get('/exclamations',
  hasScope('read'),
  (req, res) => {
    const exclamations = exclamationData;

    res.json({ exclamations });
  }
);

// Add an exclamation
apiRoutes.post('/exclamations',
  hasScope('add'),
  (req, res) => {
    const { username } = req.user;
    const { text } = req.body;
    const exclamation = {
      id: uuid.v4(),
      text,
      user: username,
    };

    exclamationData.unshift(exclamation);

    res.status(201).json({ exclamation });
  }
);

// Delete an exclamation
apiRoutes.delete('/exclamations/:id',
  canDelete,
  (req, res) => {
    const { id } = req.params;
    const exclamationIndex = exclamationData.findIndex(exc => exc.id === id);

    exclamationData.splice(exclamationIndex, 1);

    res.sendStatus(204);
  }
);

server.use('/api', apiRoutes);
Now we just need to start our server.
// Start the server
server.listen(PORT, () => {
  console.log(`The API is listening on port ${PORT}`);
});
That is all we need for our server! We still need to create our templates. Create a file at views/index.pug and put the following in it.
doctype html
html(lang='en')
  head
    title Exclamations!
    link(rel='stylesheet' href='https://maxcdn.bootstrapcdn.com/bootstrap/3.3.6/css/bootstrap.min.css' integrity='sha384-1q8mTJOASx8j1Au+a5WDVnPi2lkFfwwEAa8hDDdjZlpLegxhjVME1fgjWPGmkzs7' crossorigin='anonymous')

    style.
      h1 {
        margin-bottom: 20px;
      }
  body
    .container-fluid
      .row
        .col-md-4.col-md-offset-4
          while message = flash.shift()
            .alert.alert-danger
              p= message.message
          h1.text-center Exclamations!
          form(action='/auth/login' method='POST')
            .form-group
              label(for='username') Email Address
              input.form-control(name='username')
            .form-group
              label(for='password') Password
              input.form-control(name='password' type='password')
            button.btn.btn-primary(type='submit') Login
This is a basic HTML page. We are using bootstrap to give us some basic styles. We create a simple form that will submit to our server. We also print out any error messages that may be flashed to the session.
Now, if you start up the server using npm run serve and go to localhost:3000 in your browser, you will see the login page.
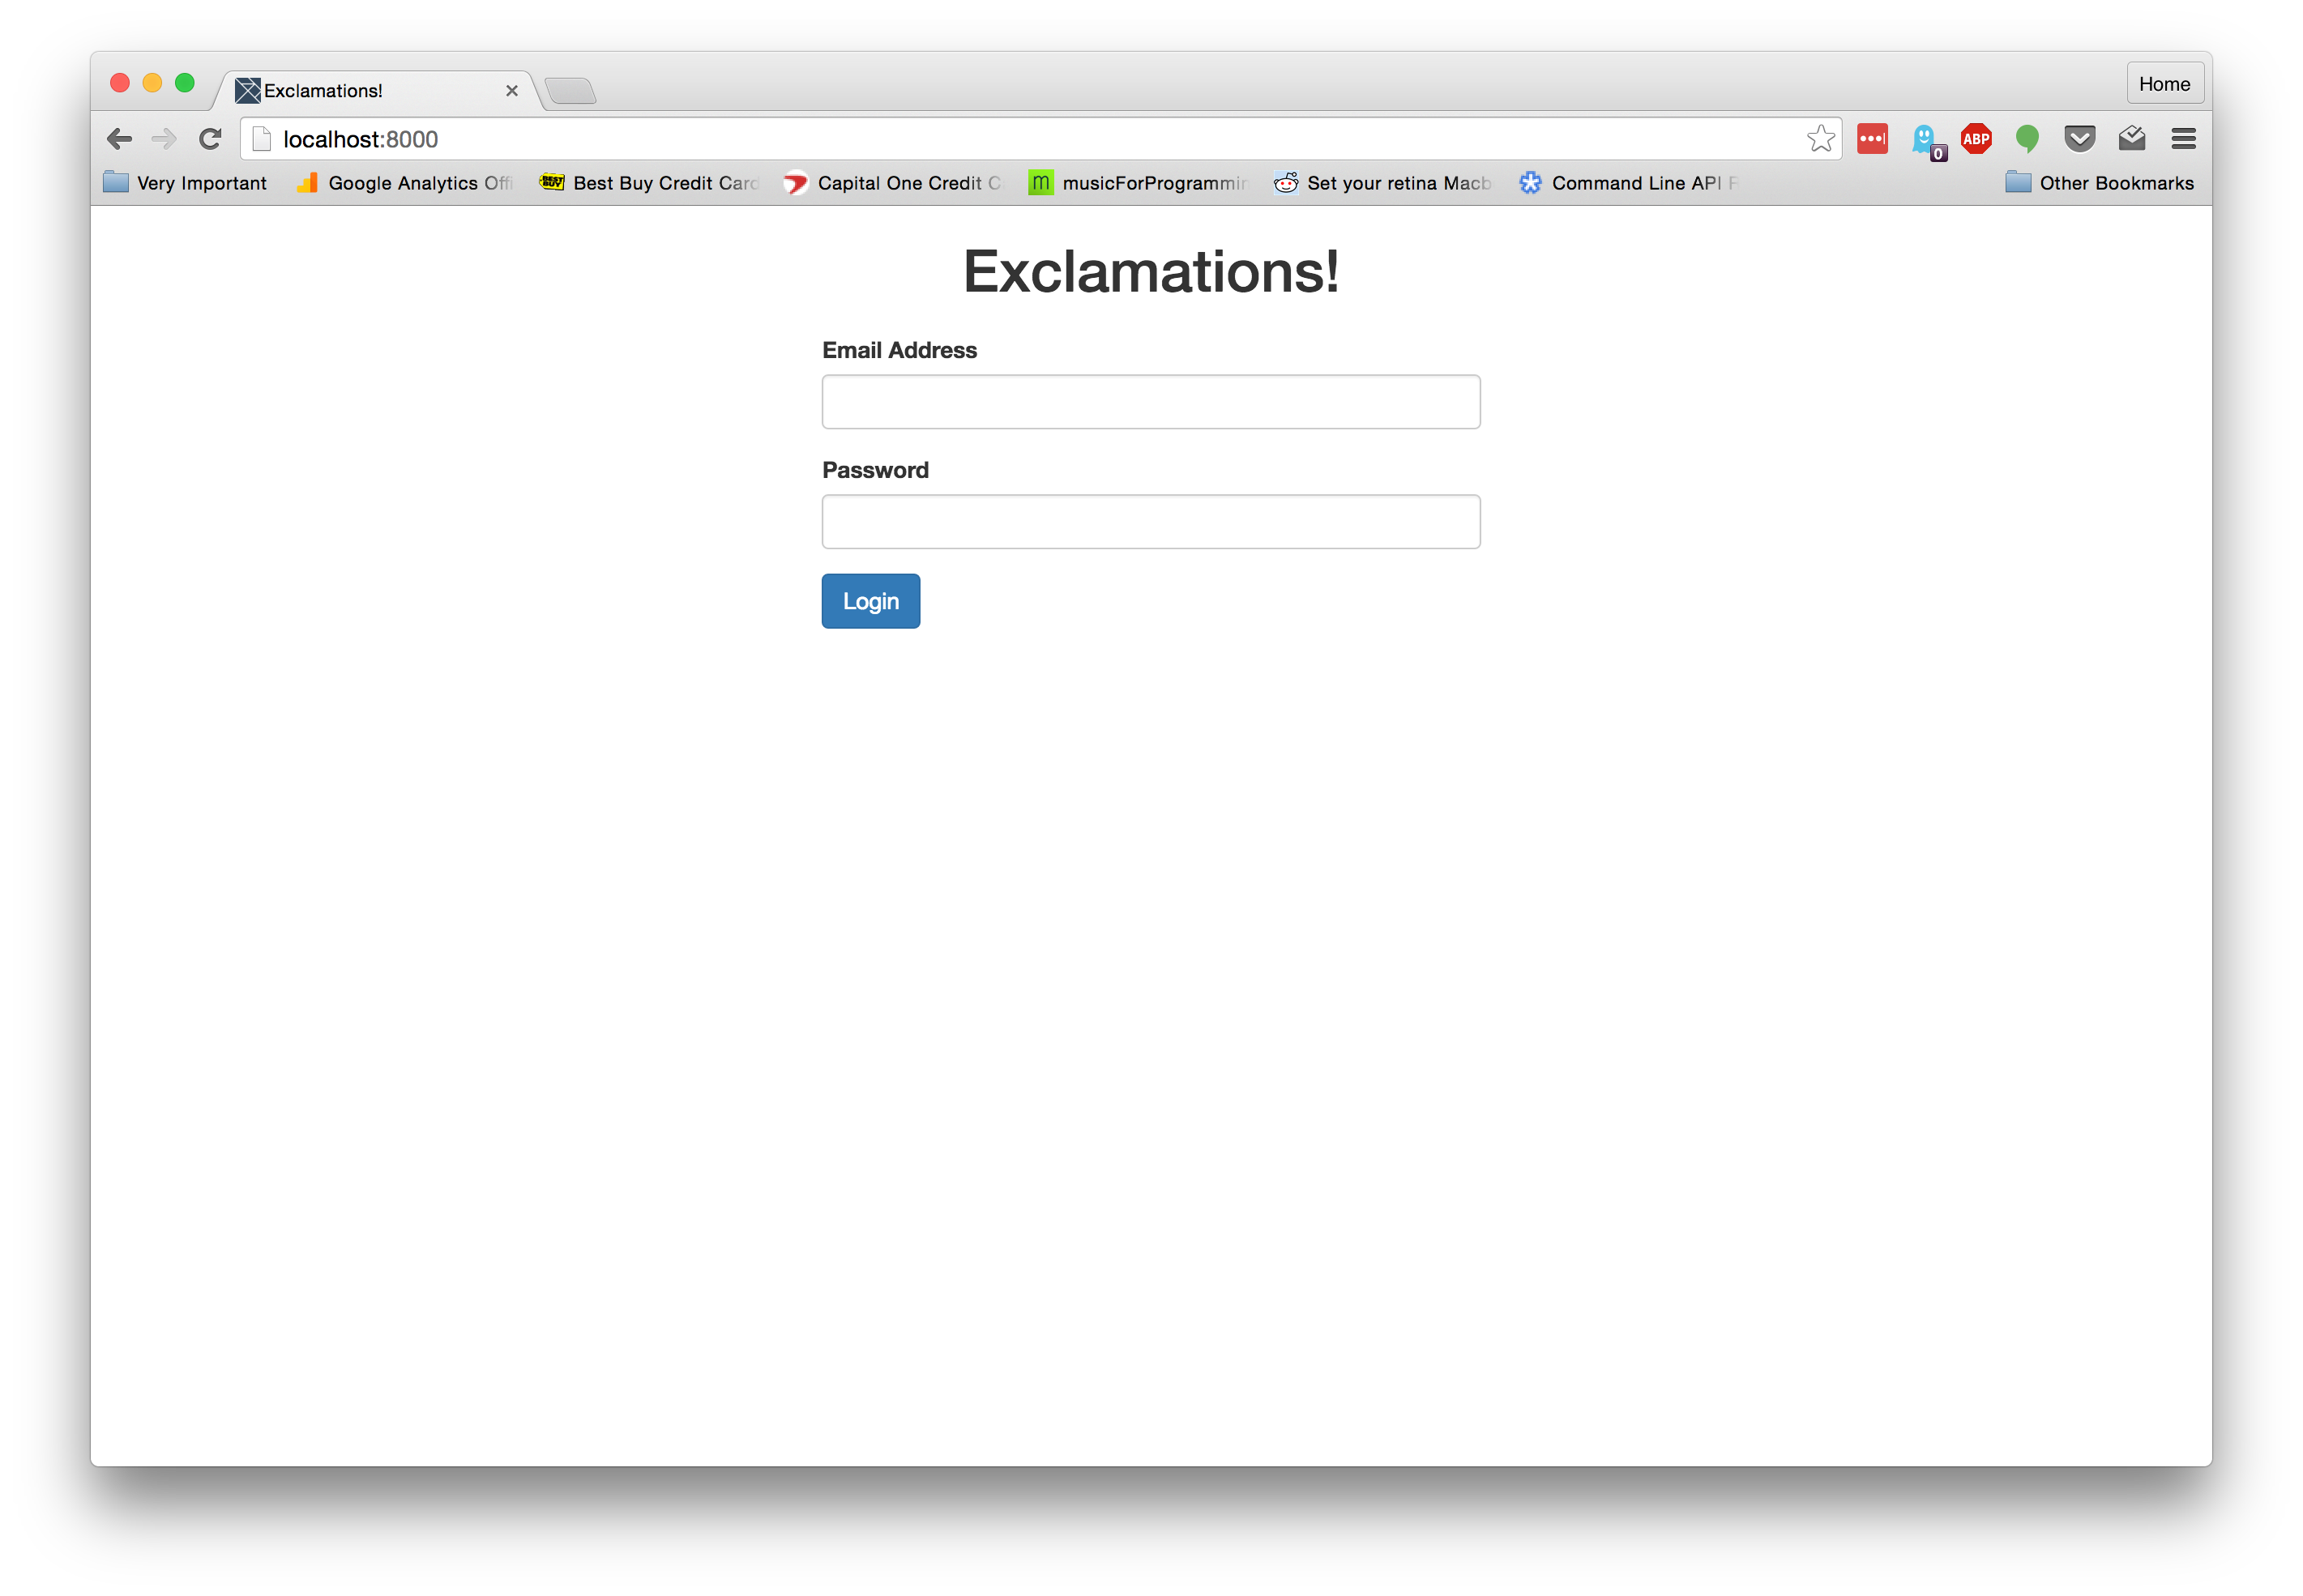
Go ahead and login with one of the emails and passwords in the data.json file. Once you log in, though, you will get an error saying we don't have a dashboard template. So let's create that now!
doctype html
html(lang='en')
  head
    title Dashboard
    link(rel='stylesheet' href='https://maxcdn.bootstrapcdn.com/bootstrap/3.3.6/css/bootstrap.min.css' integrity='sha384-1q8mTJOASx8j1Au+a5WDVnPi2lkFfwwEAa8hDDdjZlpLegxhjVME1fgjWPGmkzs7' crossorigin='anonymous')
    link(rel='stylesheet' href='/styles.bundle.css')
  body
    #app-container
    script(src='app.bundle.js')
There's so little! Where is it all? Well, all we need to give VueJS is a place to mount its initial component. That's why all we need is an app-container and a script that contains our code.
This won't do anything without us creating these files first and setting up a development pipeline to get us working. Let's create these files and then download the dependencies we need first.
mkdir public
touch public/app.bundle.js public/styles.bundle.css
npm install --save vue@next axios
npm install --save-dev babel-core babel-runtime babel-plugin-transform-runtime babel-preset-es2015 browserify babelify vueify@next browserify-hmr vue-hot-reload-api watchify concurrently
That's a lot of dependencies, I know. It's all pretty simple though. It will allow us to use Babel in all its power. We bring in browserify to bring all our code together. We also use vueify so we can put our components all in one file. Notice we bring in the next version of vue and vueify. This will bring in the most recent alpha version of VueJS and the version of vueify that works with the new version of Vue. Let's put some scripts in our package.json to make compiling our application much easier.
"prestart": "npm run build:js",
"build:js": "browserify src/app.js -t vueify -p [ vueify/plugins/extract-css -o public/styles.bundle.css ] -t babelify -o public/app.bundle.js",
"watch:js": "watchify src/app.js -t vueify -t babelify -p browserify-hmr -p [ vueify/plugins/extract-css -o public/styles.bundle.css ] -o public/app.bundle.js",
"dev": "concurrently "npm run serve" "npm run watch:js""
We also need to configure Babel. Create a file called .babelrc and put the following in it.
{
  "presets": [
    "es2015"
  ],
  "plugins": [
    "transform-runtime"
  ]
}
Now that we have our pipeline setup, run npm run dev from the command line. It will start up our server, compile our assets, and then watch our JavaScript files for changes. Now that everything is setup, let's get down to making our Vue application. Create a file at src/app.js and put the following in it.
import Vue from 'vue';
import ExclamationsViewer from './exclamations_viewer.vue';

new Vue({
  el: '#app-container',
  render(createElement) {
    return createElement(ExclamationsViewer);
  },
});
Here we are simply bringing in Vue and an ExclamationsViewer component that we will create later. Then we are creating a new Vue instance. When we do this, we pass it a configuration object. This object has an el attribute that takes a query selector for our app container. In this case, it's an element with an ID of app-container. We also pass it a render method. This is a new way to create templates in Vue. Previously, we would pass it a template attribute that took a string that represented the template. Now, we can programmatically create templates like we would in React if using React.createElement. render is passed the createElement method of the parent component. We use it to create components inside the parent. In this case, we just want to instantiate an ExclamationsViewer.
Let's create the ExclamationsViewer component now. Create a file at src/exclamations_viewer.vue and put the following in it.
  <style>
    .exclamations-viewer,
    .add-form-container {
      margin-top: 20px;
    }
  </style>

  <template>
    <div class="container">
      <div class="row exclamations-viewer">
        <div class="col-md-4">
          <Exclamation-List :user='user' title='All Exclamations' :exclamations='exclamations'></Exclamation-List>
        </div>
      </div>
    </div>
  </template>

  <script>
    import axios from 'axios';
    import ExclamationList from './exclamation_list.vue';

    export default {
      name: 'ExclamationsViewer',
      data: () => ({
        user: {
          scopes: [],
        },
        exclamations: [],
      }),
      beforeMount() {
        axios.all([
          axios.get('/api/me'),
          axios.get('/api/exclamations'),
        ]).then(([{ data: meData }, { data: exclamationData }]) => {
          this.user = meData.user;
          this.exclamations = exclamationData.exclamations;
        });
      },
      components: {
        ExclamationList,
      },
    };
  </script>
Here we have a simple Vue component. Since we are using vueify, we can separate the CSS, template, and script portions of our component into three separate parts all in the same file. The CSS is surrounded by <style></style> tags. We haven't put much in there. Just a little spacing. Inside our template we are setting up a typical Bootstrap grid and have put another custom component we will create in it - Exclamation-List. To pass "props" to the component we add attributes on it prefixed with a colon. Then we pass a string to it that represents the piece of data we want to pass to it. So :user='user' means we pass the user in our component's data to the Exclamation-List as a user prop.
Then, in our <script></script> tags, we bring in axios and our ExclamationList component. We instantiate our component's data by setting the data attribute to a function that will be called to set the data. Here, we are just returning an object that has a user object with an empty scopes array and an empty exclamations array. It's very important that any data that will be used is first instantiated in this data object. Otherwise, Vue may not be able to efficiently monitor changes to that piece of data.
Next, we use a lifecycle method to hit the API and get the data about the currently logged in user and all the exclamations. We then save that data on our component. This will replace the data we created in the data method and Vue will pick this up seemlessly. Lastly, we tell our component about the ExclamationList component by adding it to the components object on our configuration object. Without adding it, VueJS wouldn't know anything about it. One note: we put the component in our components object in PascalCase or camelCase, but we use it in our template using lisp-case.
Next thing we need to do is create the ExclamationList component. Create a file at src/exclamation_list.vue and put the following in it.
  <style scoped>
    .exclamation-list {
      background-color: #FAFAFA;
      border: 2px solid #222;
      border-radius: 7px;
    }

    .exclamation-list h1 {
      font-size: 1.5em;
      text-align: center;
    }

    .exclamation:nth-child(2) {
      border-top: 1px solid #222;
    }

    .exclamation {
      padding: 5px;
      border-bottom: 1px solid #222;
    }

    .user {
      font-weight: bold;
      margin-top: 10px;
      margin-bottom: 5px;
    }
  </style>

  <template>
    <div class="exclamation-list">
      <h1>{{ title }}</h1>
      <div class="exclamation" v-for='exclamation in exclamations' :key='exclamation.id'>
        <p class="user">{{ exclamation.user }}</p>
        <p class="text">{{ exclamation.text }}</p>
        <button v-if='canDelete(exclamation.user)' class="btn btn-danger">Remove</button>
      </div>
    </div>
  </template>

  <script>
    export default {
      props: {
        title: {
          type: String,
          default: '',
        },
        exclamations: {
          type: Array,
          default: () => ([]),
        },
        user: {
          default: {},
        },
      },
      methods: {
        canDelete(user) {
          return this.user.scopes.includes('delete') || this.user.username === user;
        },
      },
    };
  </script>
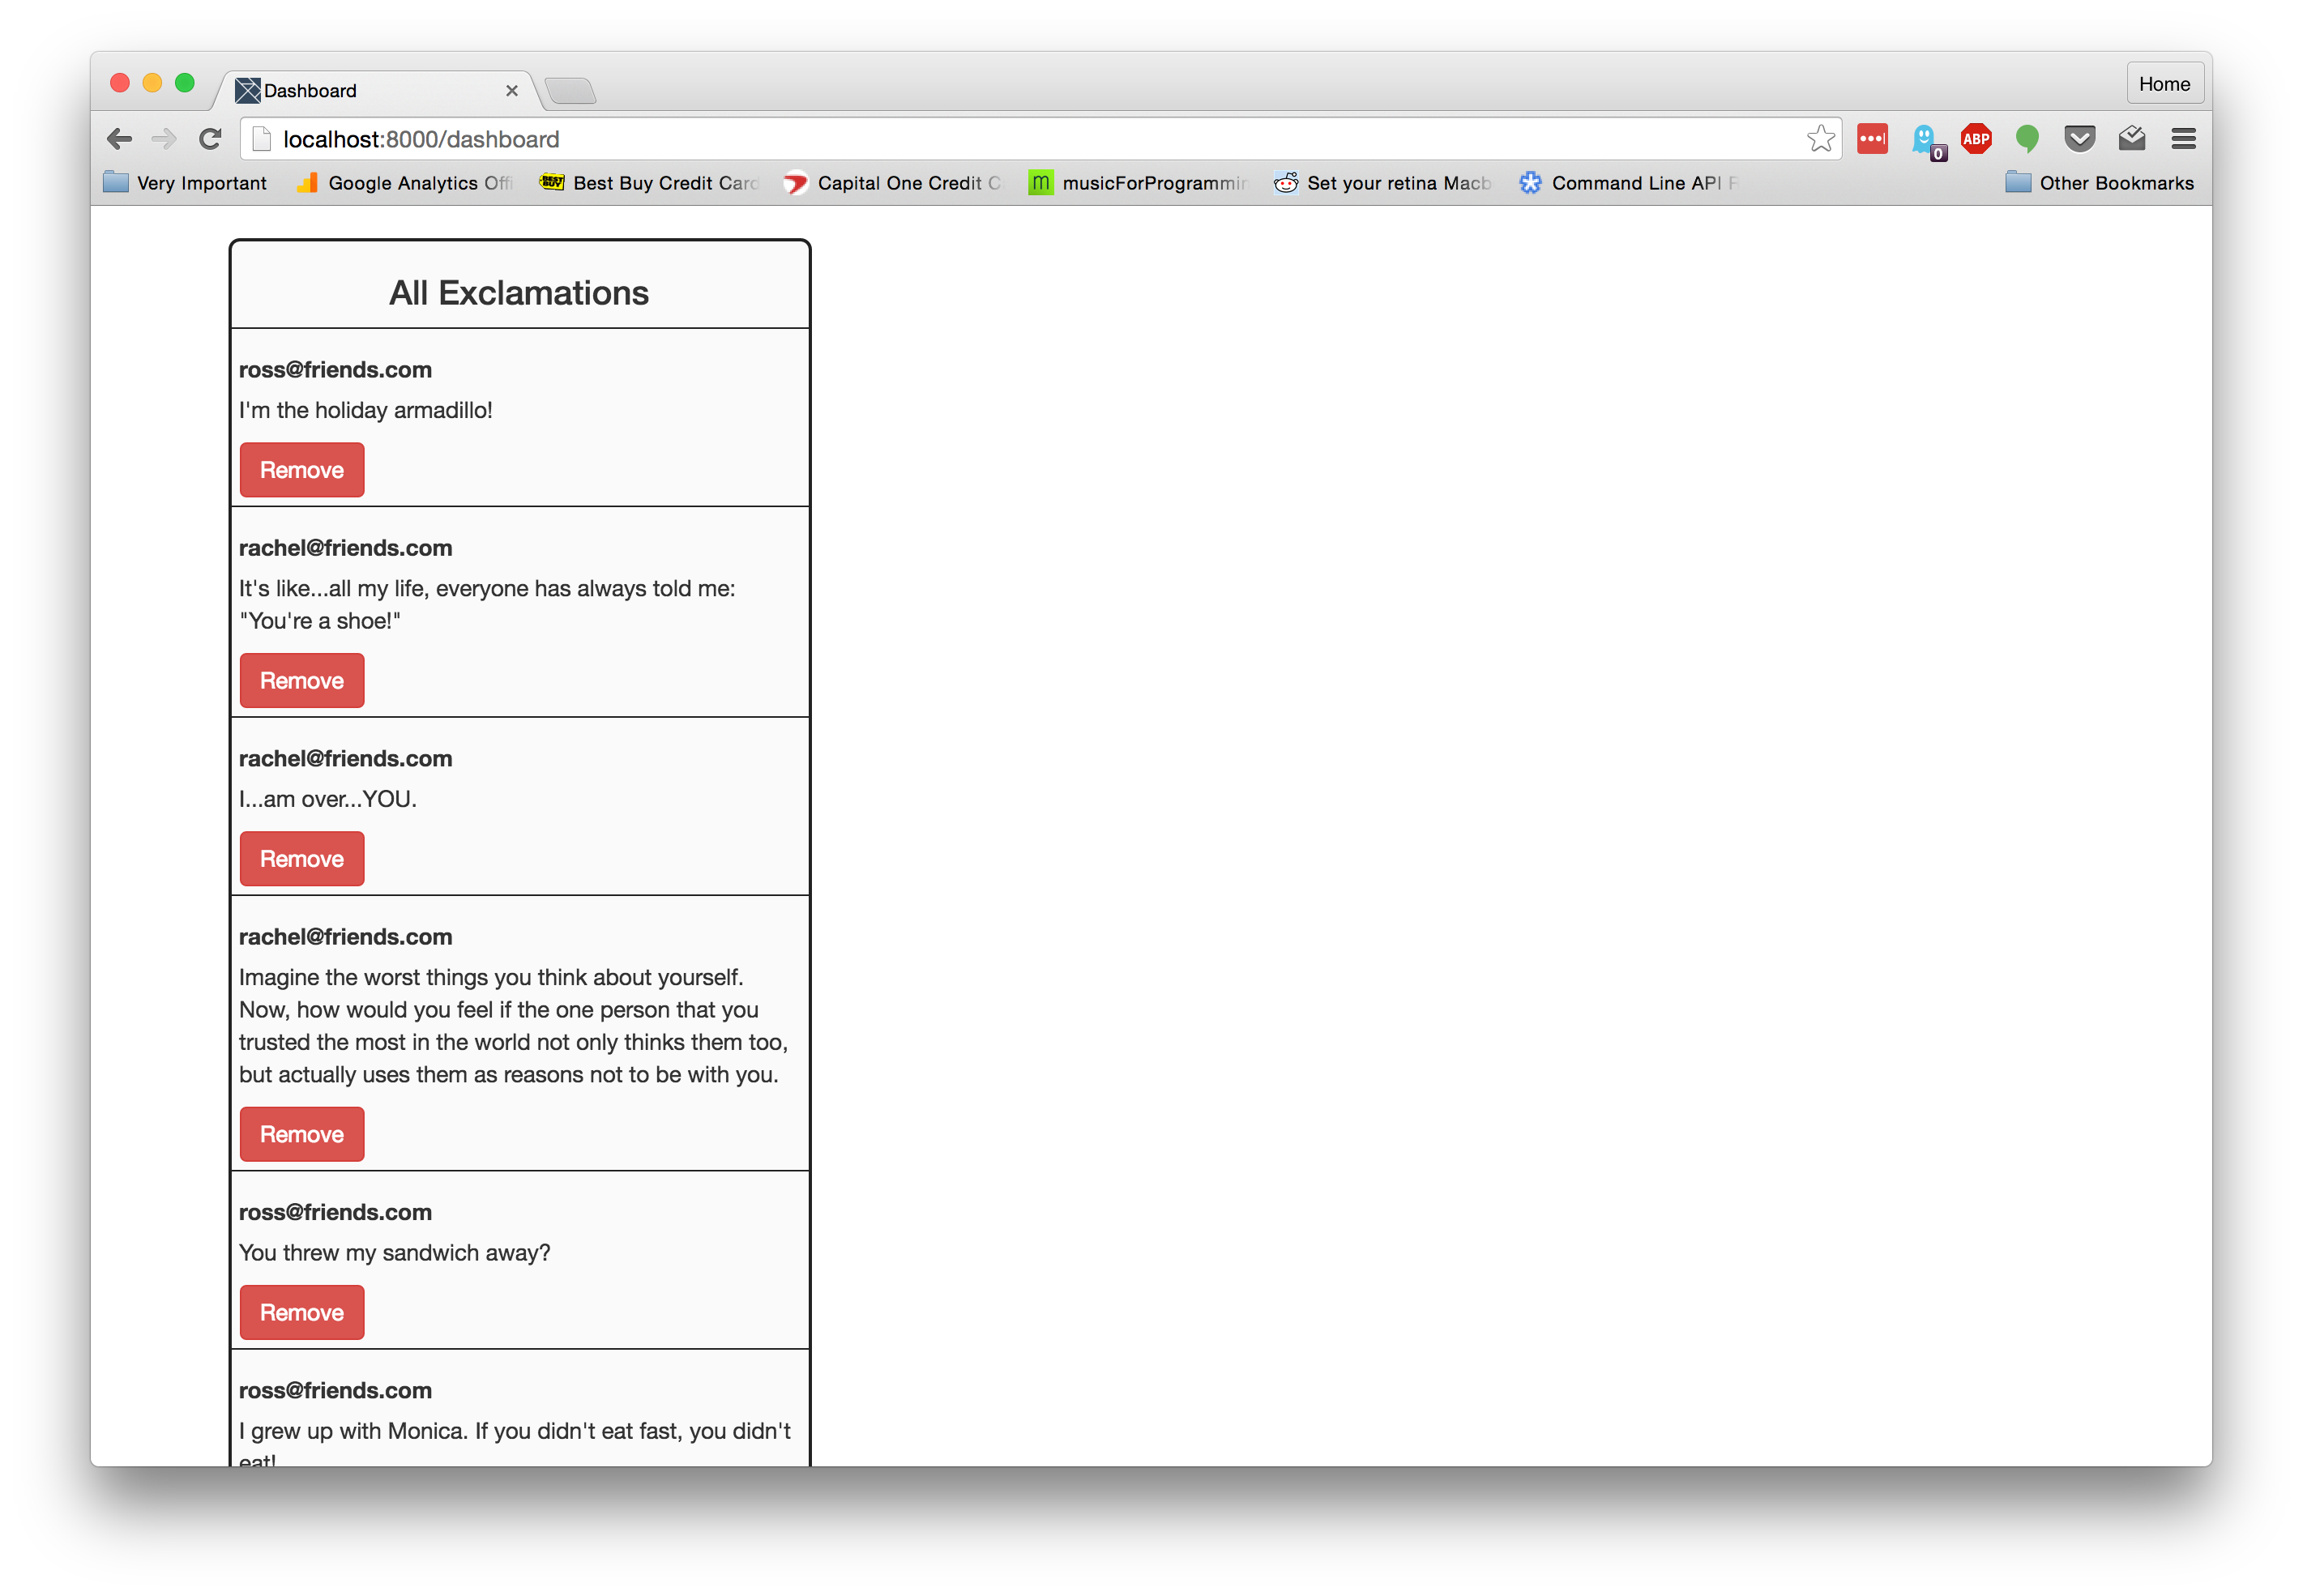
In this component, we have a bit more CSS. Nothing crazy there. In our template, we iterate over each of the exclamations we are passed as props. The v-for directive iterates over each exclamation and provides the exclamation for use in the elements inside the div. Here we print out the user and the text of the exclamation. Also notice that we have a key prop passed to the div. This replaces the track-by prop in previous versions of Vue. It helps Vue optimize the DOM modifications it needs to make. We also have a delete button that will only be shown if the user has the delete scope. We use the v-if directive to optionally show the delete button. It is set equal to the output of the canDelete function when we pass it the user of the exclamation. We will add this to our component next.
In our script portion of the component, we export an object that designates the props that will be passed to our components. We expect a title that's a string, exclamations that are an array, and a user that is an object. Next, we create a methods object that has the canDelete function on it. This method takes a user and checks if it has a delete scope or owns the exclamation.
If we view this in the browser, you will see that we can see all our exclamations. If we log in as Rachel, the delete button will show up for all of them, but Ross will only show a delete button for the ones he owns.
Since we have this button here, let's make it work! Since our parent component owns all the data, we will pass a function down to this child component that will delete the exclamation from the API and the local data in the parent component.
In the ExclamationsViewer, add the following to the configuration object.
methods: {
  onExclamationRemoved(id) {
    axios.delete(`/api/exclamations/${id}`)
      .then(() => {
        this.exclamations = this.exclamations.filter(e => e.id !== id);
      });
  },
},
We have added a methods object that contains an onExclamationRemoved method that takes an exclamation ID. It sends a DELETE request to the API and then filters the exclamation out of the local data. This will automatically be updated in all components using this piece of data. Now, we need to pass this method down to our child component. Update the template like so.
<Exclamation-List :user='user' :onRemove='onExclamationRemoved' title='All Exclamations' :exclamations='exclamations'></Exclamation-List>
We pass it down as a prop called onRemove. Now let's add this prop to the list in the ExclamationList component.
props: {
  ...
  onRemove: {
    default: () => {},
  },
  ...
},
We also add a method to our methods object.
methods: {
  onRemoveClicked(id) {
    this.onRemove(id);
  },
  ...
}
This simply wraps the onRemove prop and passes it the ID of the exclamation. And now we can use it in our ExclamationList template.
<button v-on:click='onRemoveClicked(exclamation.id)' v-if='canDelete(exclamation.user)' class="btn btn-danger">Remove</button>
Here we have added the v-on directive with a click modifier. This is a nice way of telling Vue to fire the expression when the element is clicked on. We are running onRemoveClicked and passing it the exclamation ID. This will in turn be passed to the parent who will delete it through the API and then from its local data.
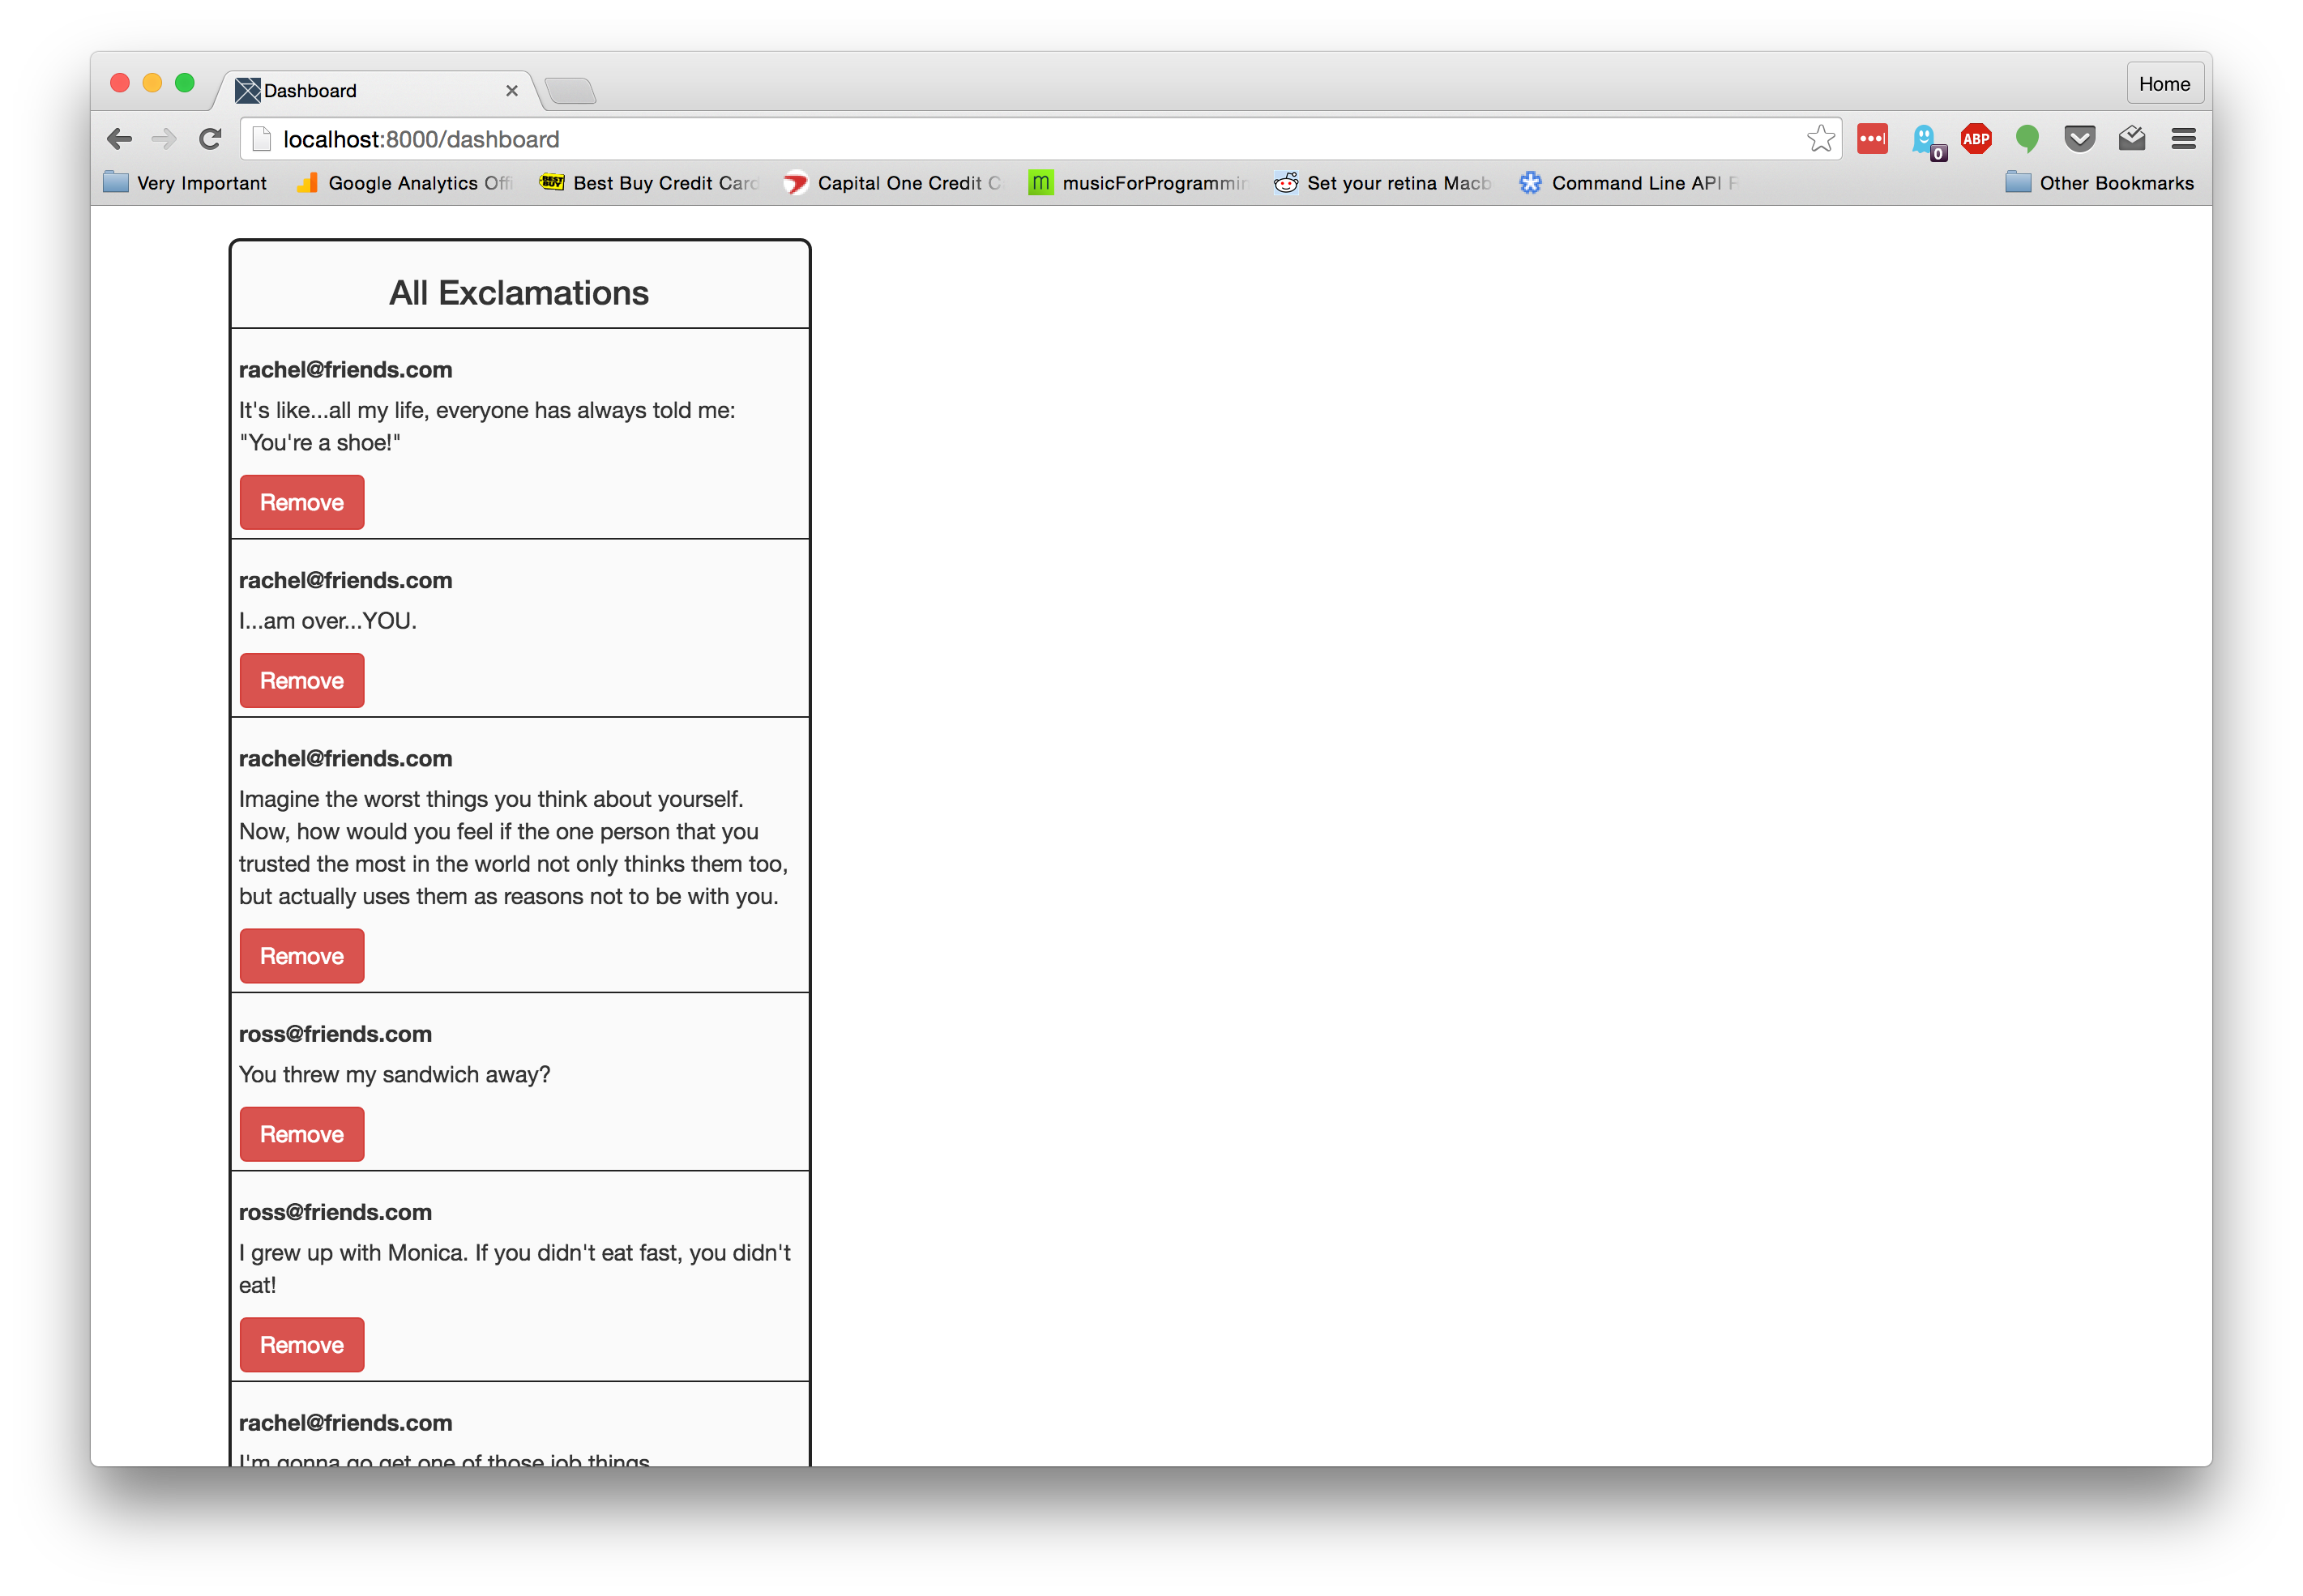
Now if you try and delete an exclamation, it will disappear from the list. If you refresh the page, it won't come back! Boom!
To see how cool this can be, let's create another list but only show the exclamations that the user owns. Add the following to the ExclamationsViewer component.
    <div class="col-md-4">
      <Exclamation-List :user='user' :onRemove='onExclamationRemoved' title='Your Exclamations' :exclamations='userExclamations'></Exclamation-List>
    </div>
Here, we are adding another list, but notice we are only passing userExclamations as the exclamations prop. userExclamations is a computed property. This is a concept Vue has where it will run a function that is used as a regular variable in the template but is only calculated once unless the data it uses changes at some point. We will calculate userExclamations by filtering the current exclamation list. This lets us work with both lists separately, and we don't have to alter the original list at all. Add the following to the configuration object in the ExclamationsViewer component.
computed: {
  userExclamations() {
    return this.exclamations.filter(exc => exc.user === this.user.username);
  },
},
Now if you view our application in the browser, you will see we have two lists. The new one only shows the exclamations owned by the currently logged in user.
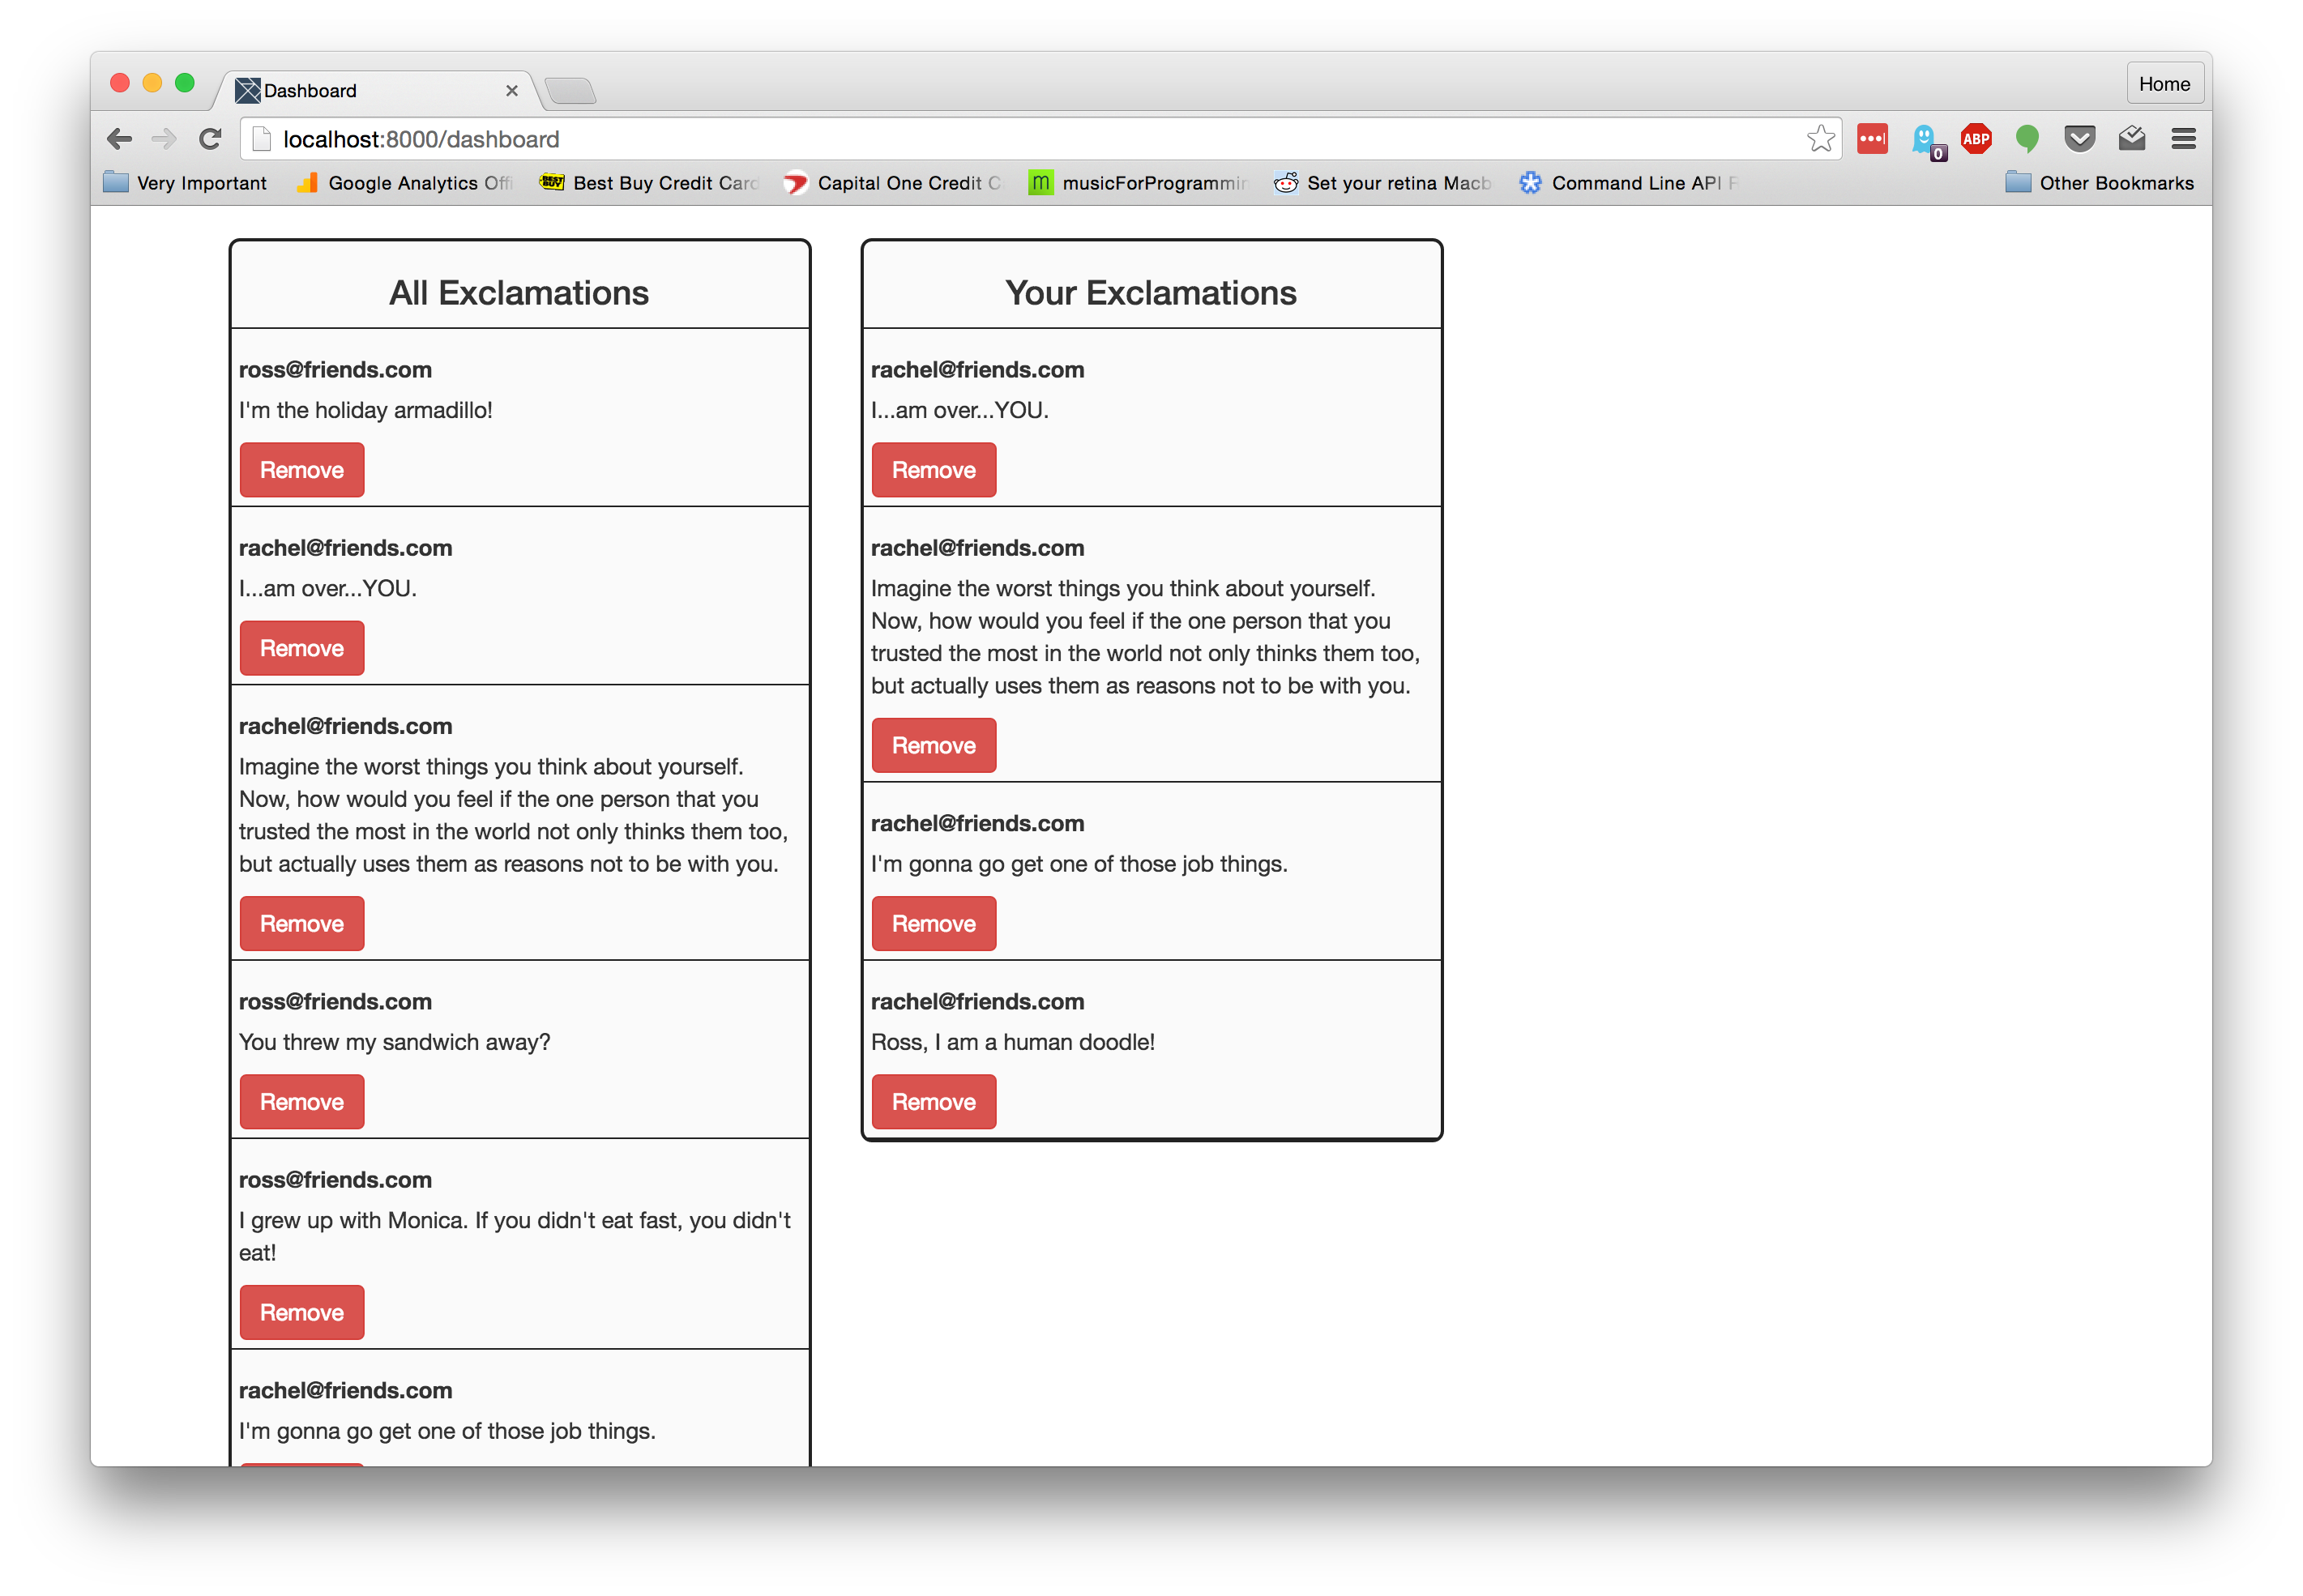
This is the power behind writing our code in components. We can easily reuse each component in multiple places.
Once there are alot of exclamations, it will be hard to find a particular one. Let's add a list that also has a search box on it. We will implement this in a new component. This new component will reuse our current ExclamationList in it. Create a file at src/exclamation_search_list.vue, and put the following in it.
  <template>
    <div>
      <div class="input-container">
        <div class="form-group">
          <label for='searchTerm'>Search:</label>
          <input v-model='searchTerm' type="text" class='form-control' placeholder="Search term">
        </div>
      </div>
      <Exclamation-List :user='user' :onRemove='onRemove' title='Filtered Exclamations' :exclamations='exclamationsToShow'></Exclamation-List>
    </div>
  </template>

  <script>
    import ExclamationList from './exclamation_list.vue';

    export default {
      data() {
        return {
          searchTerm: '',
        };
      },
      props: {
        exclamations: {
          type: Array,
          default: () => ([]),
        },
        onRemove: {
          default: () => {},
        },
        user: {
          default: {},
        },
      },
      computed: {
        exclamationsToShow() {
          let filteredExclamations = this.exclamations;

          this.searchTerm.split(' ')
            .map(t => t.split(':'))
            .forEach(([type, query]) => {
              if (!query) return;

              if (type === 'user') {
                filteredExclamations = filteredExclamations.filter(e => e.user.match(query));
              } else if (type === 'contains') {
                filteredExclamations = filteredExclamations.filter(e => e.text.match(query));
              }
            });

          return filteredExclamations;
        },
      },
      components: {
        ExclamationList,
      },
    };
  </script>
Here we have a template that consists of a form and an ExclamationList. There isn't much special about the form; it's just a label and a text input. However, notice there is a v-model attribute on the input. The string passed to it (in this case 'searchTerm') corresponds to a piece of data we want to keep in sync with the value of this input. If we change the value of the input by typing in it, Vue will update the piece of data on this component. We can then use that piece of data to filter the exclamations that are being shown.
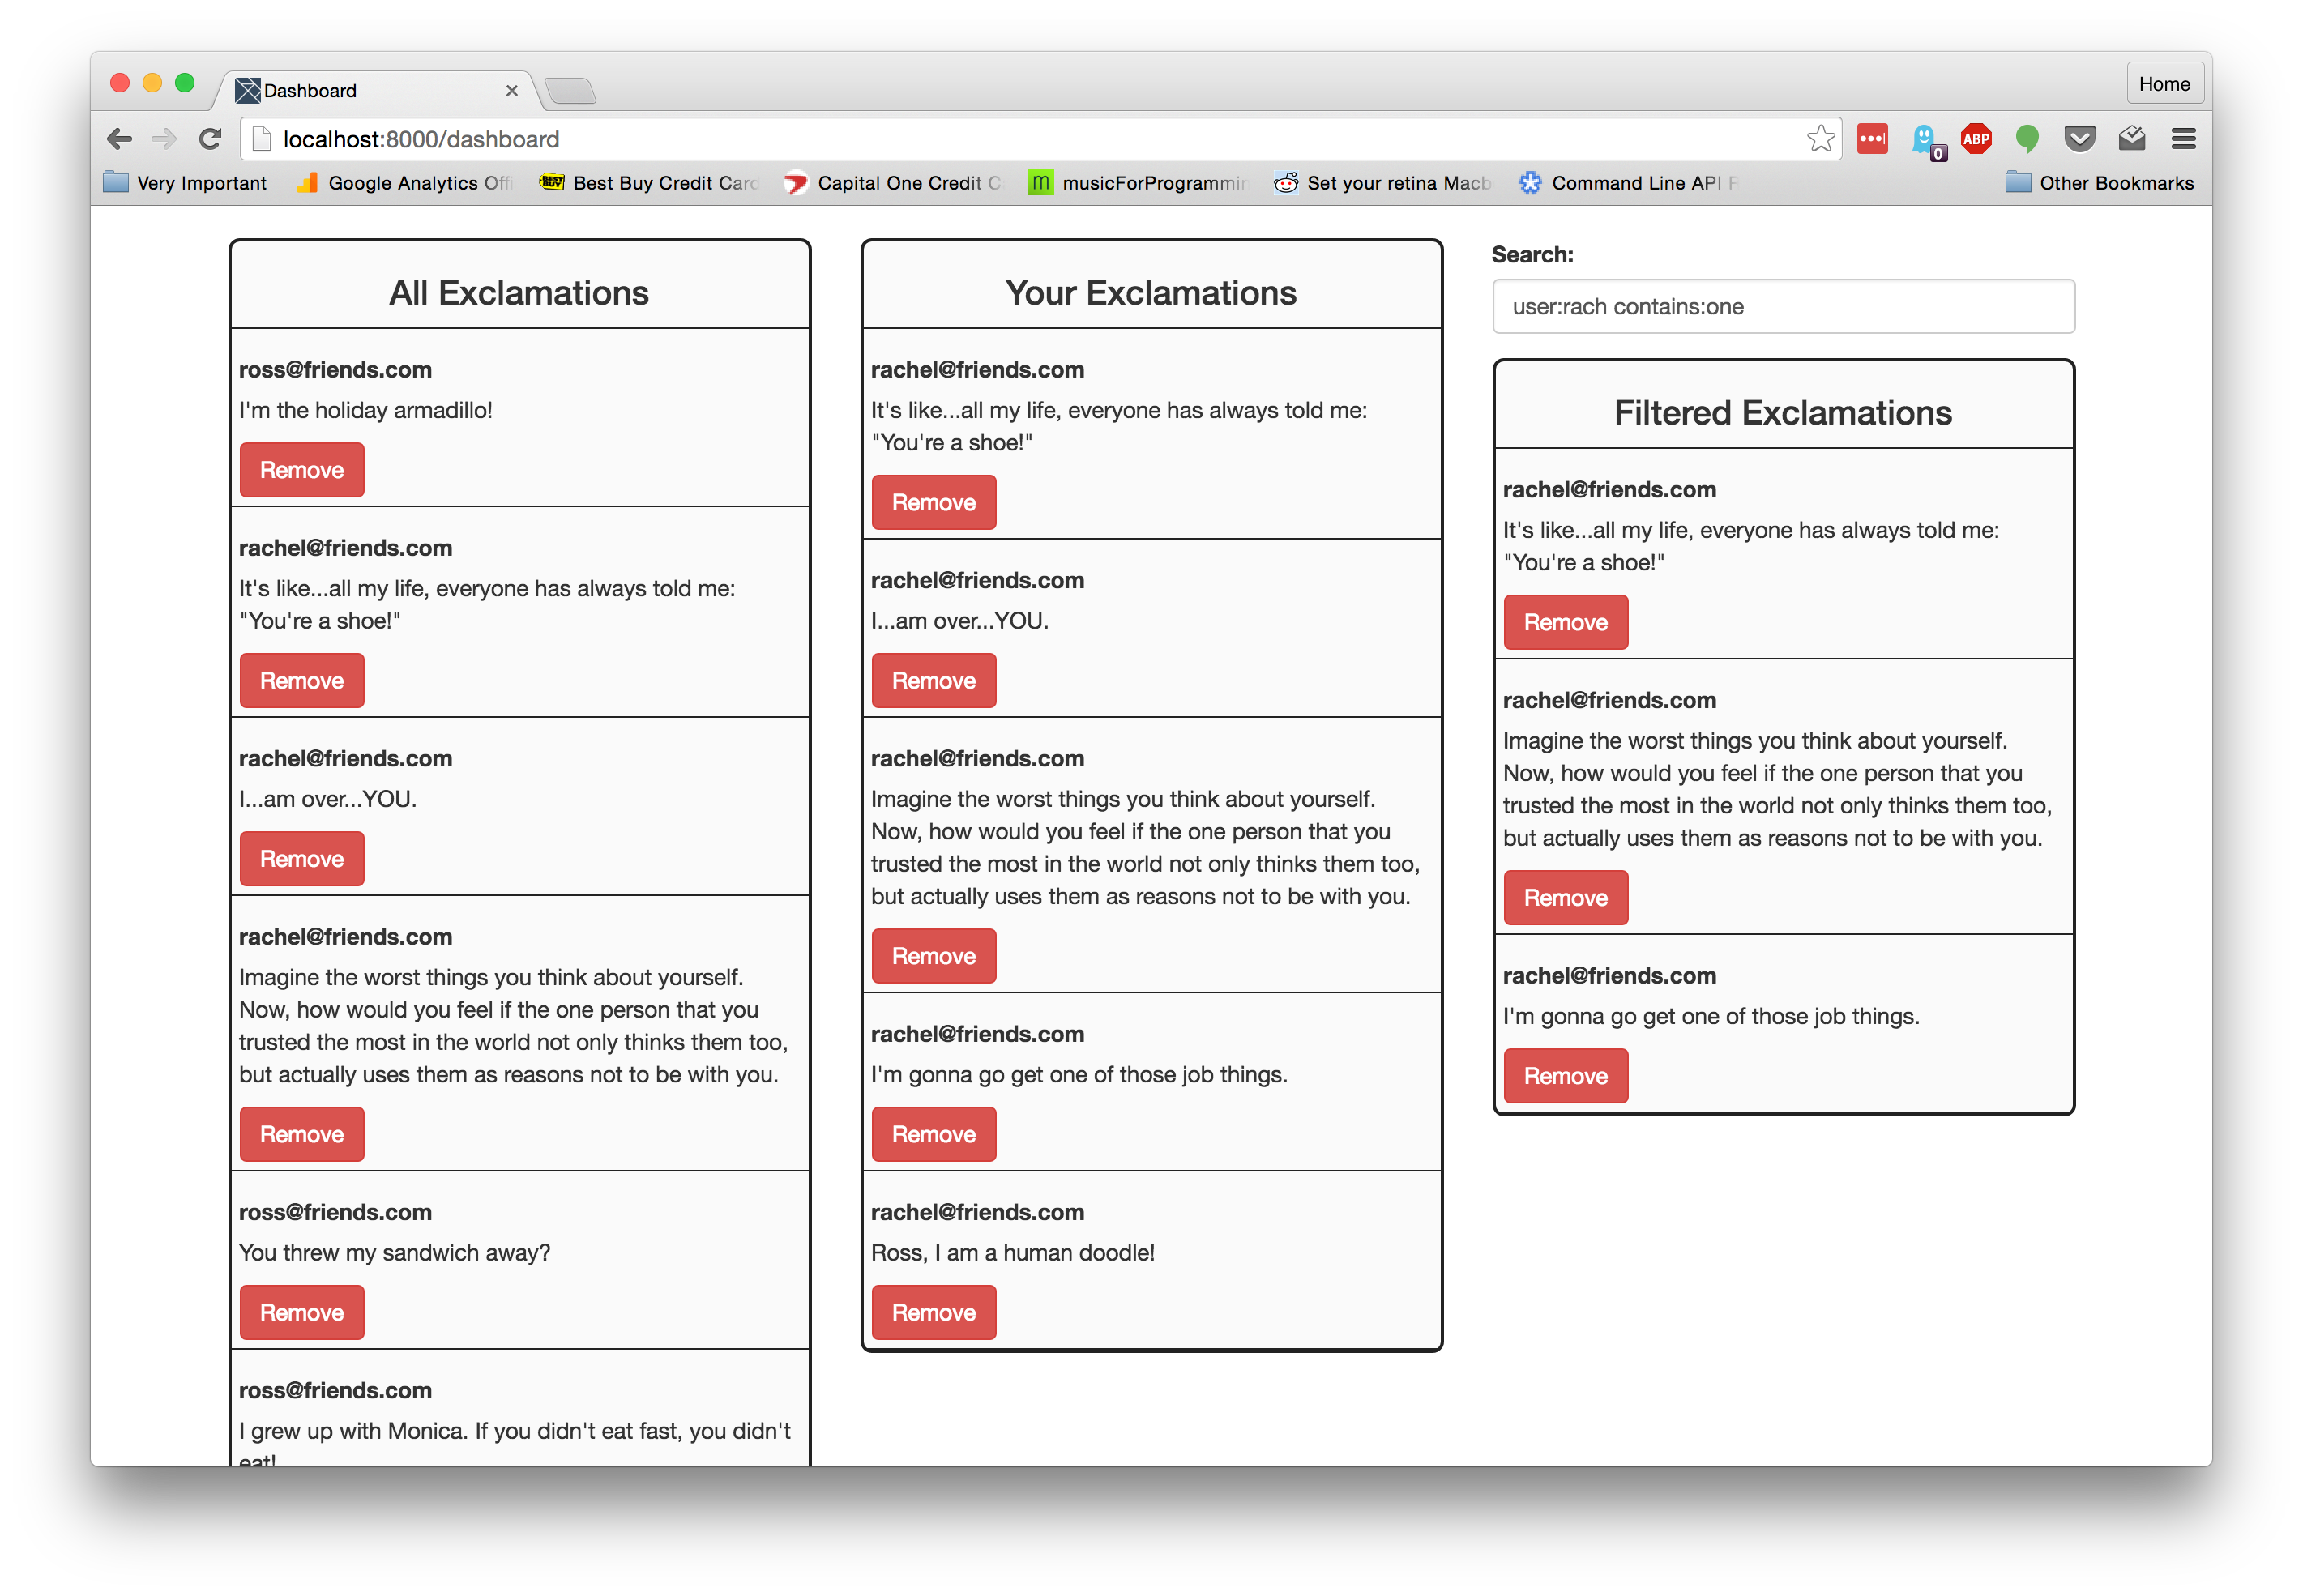
To filter the exclamations, we will use another computed property. The filtering in the text box allows us to filter on user or the text content. If we want to filter by user, we type user:searchTerm, where searchTerm is the user we are filtering for. If we want to filter by text content, we type contains:searchTerm. We simply split by spaces since we could have multiple filters, then split each of those by colons to get the type and query. Lastly, we iterate through each of those and filter the exclamations. We then return the exclamations.
Look in the template where we have added the ExclamationList. Notice how we pass the same props to it as we passed to this component except for passing the exclamationsToShow as the exclamations. As we filter them in this component, they will change in the ExclamationList.
View our handiwork in the browser! It still doesn't show...well of course not! We created the component, but we never added it to our ExclamationsViewer. Open up that file, add the ExclamationSearchList to the template, import it in the script, and then add it to the components object.
  <template>
  ...
  <div class="col-md-4">
    <Exclamation-Search-List :user='user' :onRemove='onExclamationRemoved' :exclamations='exclamations'></Exclamation-Search-List>
  </div>
  ...
  </template>

  <script>
  ...
  import ExclamationSearchList from './exclamation_search_list.vue';
  ...
  components: {
    ExclamationList,
    ExclamationSearchList,
  },
  ...
  </script>
Now view it in the browser! We have a third column that has a list of exclamations with an input that allows us to filter what we see. Try typing user:rac in it. It should only show exclamations from Rachel. Boom.
We only have one piece left: the add form. Create a file at src/exclamation_add_form.vue and put the following in it.
  <template>
    <form class="form-inline" v-on:submit.prevent='onFormSubmit'>
      <div class="form-group">
        <label for='exclamationText'>Exclamation</label>
        <textarea cols="30" rows="2" class="form-control" placeholder="Enter exclamation here." v-model='exclamationText'></textarea>
      </div>
      <input type="submit" value="Submit" class="btn btn-success">
    </form>
  </template>

  <script>
    export default {
      data() {
        return {
          exclamationText: '',
        };
      },
      props: ['onAdd'],
      methods: {
        onFormSubmit() {
          this.onAdd(this.exclamationText);
          this.exclamationText = '';
        },
      },
    };
  </script>
This is a pretty simple component. The template is just a form with a textarea and a submit button. There is a v-on directive on this form. v-on is the way we add event listeners to elements in Vue. We use :submit to say we are listening for the submit event. .prevent will automatically run preventDefault on the event so that we don't have to. In our script, we are keeping track of the text in the textarea in the exclamationText piece of data. We accept an onAdd function from the parent and have a method that is called when the form is submitted that calls the onAdd function, passing it the exclamationText, and then emptying out the exclamationText piece of data.
We need to add this to our ExclamationsViewer.
  <template>
  <div class="container">
    <div class="row add-form-container" v-if='canAdd()'>
      <div class="col-md-12">
        <Exclamation-Add-Form :onAdd='onExclamationAdded'></Exclamation-Add-Form>
      </div>
    </div>
    <div class="row exclamations-viewer">
    ...
  </template>

  <script>
  import ExclamationAddForm from './exclamation_add_form.vue';
  ...
  methods: {
    onExclamationAdded(text) {
      axios.post('/api/exclamations', { text }).then(({ data }) => {
        this.exclamations = [data.exclamation].concat(this.exclamations);
      });
    },
    canAdd() {
      return this.user.scopes.includes('add');
    },
    onExclamationRemoved(id) {
    ...
  components: {
    ...
    ExclamationAddForm,
    ...
  },
  </script>
We added the add form to our template and pass it an onAdd prop. We also use v-if to conditionally show the form. It will only be shown if the user has the add scope. We have added the onExclamationAdded and canAdd methods to our configuration object, along with adding the component to the components object. onExclamationAdded sends the text as a POST request to the API. It then adds the exclamation that is returned to our array of exclamations. Luckily, everything else updates to show our new exclamation. Yay!
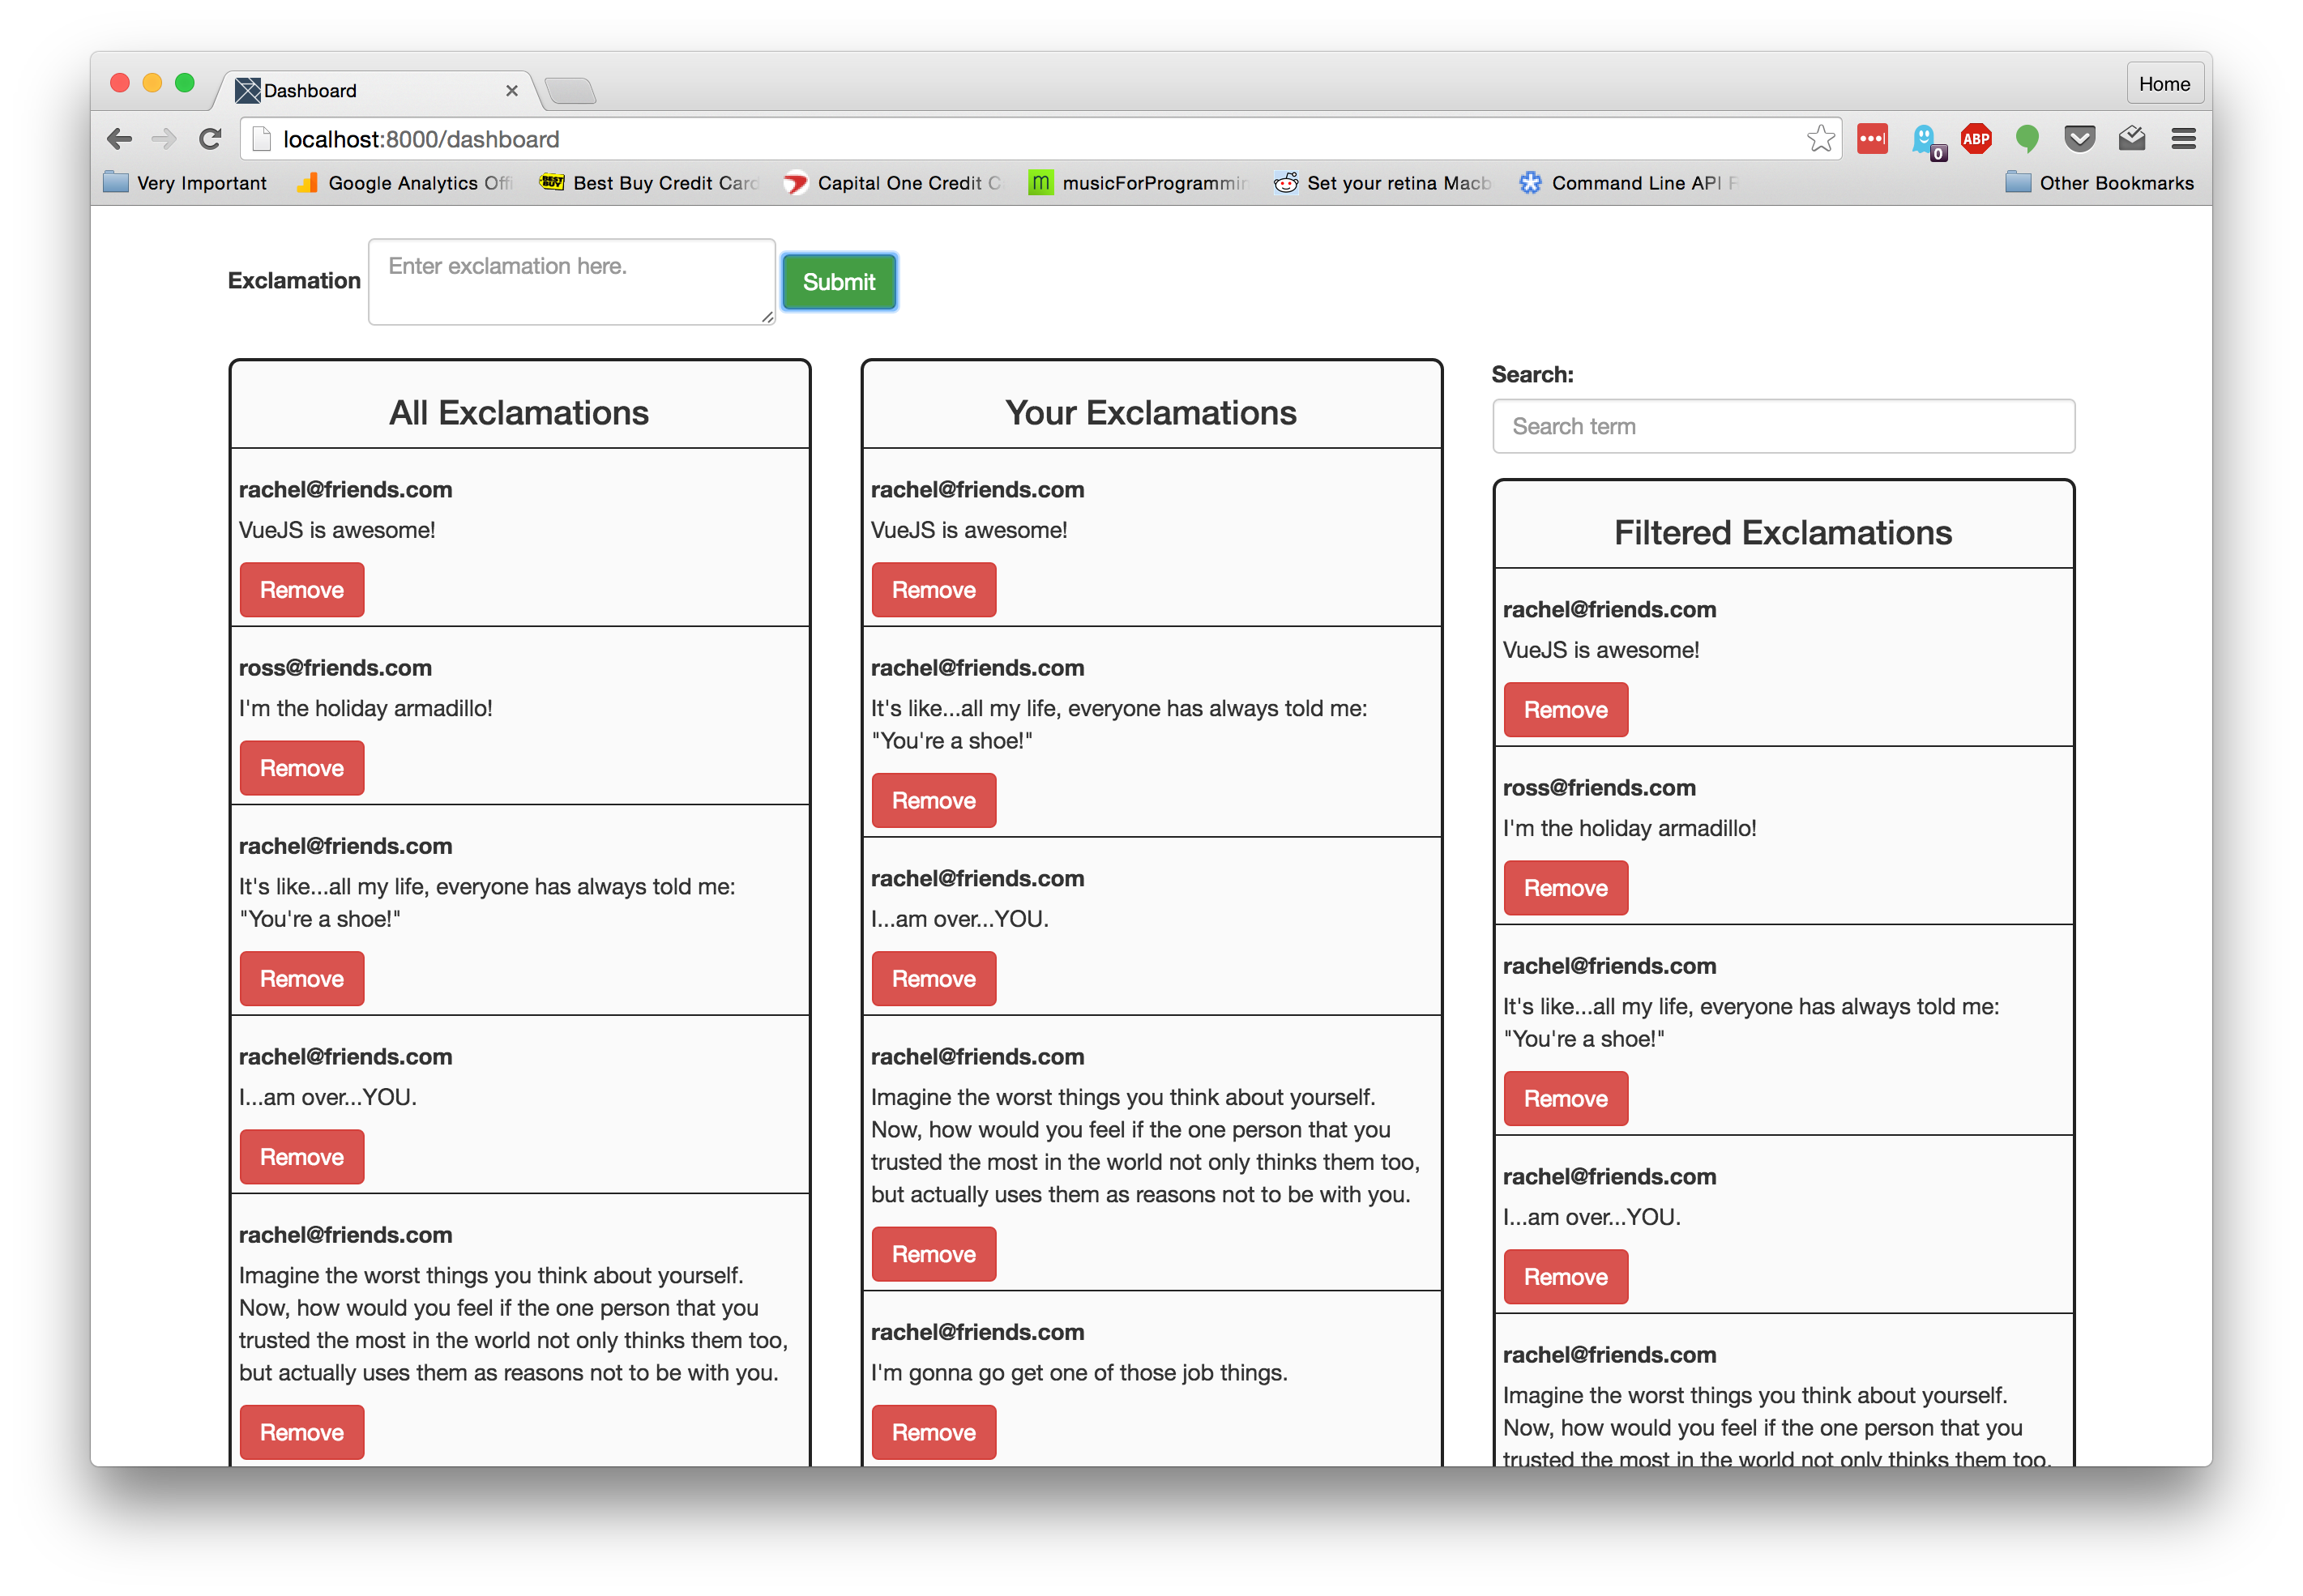
If we view our application in the browser, we can now add an exclamation. If you refresh the browser after adding one, it will still be there! Baller.
Aside: Using Auth0 With Your Vue.js App
Auth0 issues JSON Web Tokens on every login for your users. This means that you can have a solid identity infrastructure, including single sign-on, user management, support for social identity providers (Facebook, Github, Twitter, etc.), enterprise identity providers (Active Directory, LDAP, SAML, etc.) and your own database of users with just a few lines of code.
We can easily set up authentication in our Vue.js apps with Auth0's Centralized Login Page. If you don't already have an Auth0 account, sign up for one now. Navigate to the Auth0 management dashboard, select Applications from the navigational menu, then select the app you want to connect with Vue.js.
Step 1: Include auth0.js
  <!-- index.html -->

  ...

  <!-- Auth0.js script -->
  <script src="https://cdn.auth0.com/js/auth0/9.0.0/auth0.min.js"></script>

  ...
Step 2: Configure an instance of auth0.js
// src/index.js

...

export var webAuth = new auth0.WebAuth({
  domain: 'YOUR_DOMAIN',
  clientID: 'YOUR_CLIENT_ID',
  responseType: 'token',
  redirectUri: 'YOUR_REDIRECT_URI'
});

...
Step 3: Call auth0.js from a Vue.js Component
  <!-- src/components/Login.vue -->

  <template>
    <div class="col-sm-4 col-sm-offset-4">
      <h2>Log in</h2>
      <button class="btn btn-primary" @click="login()">Log in</button>
    </div>
  </template>

  <script>
  import {webAuth} from '../index'

  export default {
    ready() {
      // Parse the hash
      if (window.location.hash) {
        webAuth.parseHash({ hash: window.location.hash }, function(err, authResult) {
          if (err) {
            return console.log(err);
          }
          if (authResult) {
            webAuth.client.userInfo(authResult.accessToken, function(err, user) {
              localStorage.setItem('profile', JSON.stringify(user))
              localStorage.setItem('id_token', authResult.idToken)
            });
          }
        });
      }
    },
    methods: {
      login() {
        // Redirect to the centralized login page
        webAuth.authorize();
      },
      logout() {
        // Remove the profile and token from localStorage
        localStorage.removeItem('profile');
        localStorage.removeItem('id_token');
      }
    }
  }

  </script>
Important Note: The id_token should not be used to secure an API; instead use an access_token with the appropriate configuration. You can read about how to implement API authentication with Auth0 with implicit grant.
Update: 21/04/2017 There is an excellent post that clearly illustrates how to use Auth0 for authentication in a Vuejs 2 application. In this post, you'll learn how to obtain both id_token and access_token from Auth0, validate the access_token passed on from the client app to your server and retrieve API resources after successfully validating the token.
Where do we go from here?
We have only scratched the surface of what Vue can do. And with this new version of Vue, many improvements have been made. Not only is it faster, the API has been cleaned up and the tooling around it will be getting better as it gets closer to the official release of Vue 2.0. To stay on top of the changes as they happen, monitor this Github issue on the Vue repo. As always, reach out in the comments and let us know how you're liking Vue!