Even if you are an experienced C# developer, there are features you might not be aware of. In this article, you will explore five little-known C# features that allow you to accomplish things in a slightly different way than you are used to. These features allow you to declare local variables in an unusual way, create conditions with the switch command and the try/catch block, reduce the number of lines to set up a console program, define properties that can only be initialized, and access private variables of a class instance.
Let's get started.
Variable Scope and Braces
In C#, you can declare variables within code blocks surrounded by braces to define methods, conditional statements, loops, among others. For example, the braces define a variable scope within a method:
static void Main(string[] args)
{
  Console.Write("Enter your name: ");
  var name = Console.ReadLine();

  Console.WriteLine($"Hello, {name}!");
}
Also, you can define a variable scope with an if statement:
if (name.Trim() != "")
{
  var dayOfWeek = DateTime.Today.ToString("dddd");
  Console.WriteLine($"Happy {dayOfWeek}, {name}!");
}
And with a while statement as well:
while (name.Trim() != "")
{
  var dayOfWeek = DateTime.Today.ToString("dddd");
  Console.WriteLine($"Happy {dayOfWeek}, {name}!");

  Console.Write("Enter your name: ");
  name = Console.ReadLine();
}
Regardless of the context, the braces delimit the scope of the variable. Did you know that you can define a variable scope with braces even without a specific statement? Consider the following code:
using System;

namespace variable_scope
{
  class Program  {
    static void Main(string[] args)
    {
      Console.WriteLine("Hello World!");
      {
        var theVariable = "I'm the variable";
        Console.WriteLine(theVariable);
      }
    }
  }
}
Here, we have a code block delimited by braces inside the Main() method. The code block defines and initializes the variable theVariable and writes its value to the console. Notice that no if, while, for, or any other statement stands right before the braces.
This program works as expected: it will write both strings as shown below:
Hello World!
I'm the variable
What happens if we add the following statement outside the code block, as in the following example?
using System;

namespace variable_scope
{
  class Program  {
    static void Main(string[] args)
    {
      Console.WriteLine("Hello World!");
      {
        var theVariable = "I'm the variable";
        Console.WriteLine(theVariable);
      }
      //👇 new statement outside the code block
      Console.WriteLine(theVariable);
    }
  }
}
If you attempt to run this program, you will get the following error:
error CS0103: The name 'theVariable' does not exist in the current context
As you can see, the variable defined inside the code block is not accessible outside it.
In other words, you can create a variable scope by simply using braces anywhere in your code. This feature may be useful when you have a short sequence of statements that need to share a value through a variable. You create a code block on the fly, declare the variable, and use it. However, I suggest not to abuse it. Sometimes, it's a better idea to create a method and invoke it. It may be more readable than a code block.
The when keyword
Another little-known C# feature is the when keyword. You can use it to apply a filter condition in the context of a switch statement or a try/catch block.
Let’s start by seeing how to use it in the context of a switch statement. Consider the following code:
private static string evaluateScore(int score)
{
  var result = "";

  switch (score)
  {
    case int n when (n < 6):
      result = "Your score doesn't look good...";
      break;

    case int n when (n >= 6 && n <= 7):
      result = "Your score is not bad!";
      break;

    case int n when (n > 7 && n <= 9):
      result = "Your score is pretty good!";
      break;

    case int n when (n > 9):
      result = "Your score is awesome!";
      break;
  }

  return result;
}
Here we have the evaluateScore() method that evaluates an integer value (score) and returns a message string. As you can see, its logic is totally based on a switch statement. Each case declares a variable n that takes the current value of the score parameter. This variable is inspected in the when clause to determine the message to be returned. Of course, you can use any boolean expression with the when clause.
You can also use the when keyword with catch, as shown in this example:
public static async Task<string> MakeRequest()
{
  var client = new System.Net.Http.HttpClient();
  var streamTask = client.GetStringAsync("https://auth0.com/this-page-doesnt-exist");

  try
  {
    var responseText = await streamTask;
    return responseText;
  }
  catch (HttpRequestException e) when (e.StatusCode == HttpStatusCode.MovedPermanently)
  {
    return "The page moved.";
  }
  catch (HttpRequestException e) when (e.StatusCode == HttpStatusCode.NotFound)
  {
    return "The page was not found";
  }
  catch (HttpRequestException e)
  {
    return e.Message;
  }
}
Here, you catch an HttpRequestException and analyze its status code through a when clause.
In both cases, the when keyword is extremely useful when you need to match a complex condition since it allows you to keep your code pretty readable.
Top-Level Statements
Typically, a minimal console application has at least the following code:
using System;

namespace standard_console
{
  class Program
  {
    static void Main(string[] args)
    {
      Console.WriteLine("Hello World!");
    }
  }
}
This program is composed of eleven lines of code, but only one line is actually operative. All the other lines are needed to set up the program infrastructure: a namespace, a class, and a method.
Do you know that you can get rid of this stuff and focus on just one line? In fact, you can replace the code shown above with just the following:
System.Console.WriteLine("Hello World!");
This is possible thanks to the top-level statement feature introduced by C# 9. You can try it starting with .NET 5.
Of course, you can use multiple top-level statements to create your console application, as in this example.
using System;

Console.Write("Enter your name: ");
var userName = Console.ReadLine();

Console.WriteLine($"Hello {userName}!");
However, remember that you can have only one file using this feature in your .NET project.
Using the top-level statements feature enables a script-oriented approach for C# programming. This may be a more friendly approach for new C# learners or a handy alternative to quickly set up a small console application. For complex applications, you may feel the top-level statements approach is inappropriate because of the lack of a structure.
The init Setter
Assume you have the following Person class:
public class Person
{
  public string FirstName { get; set; }
  public string LastName { get; set; }
  public string Address { get; set; }
}
It's a very simple class with just FirstName, LastName, and Address properties. As it usually happens in the real world, once you assign a first name and last name to a person, you do not want anyone to change it anymore. So, you would like to assign the values for the FirstName and the LastName properties to a Person instance at the creation time, and those values should not be changed anymore. How can you accomplish this behavior?
If you define the Person class by using the usual get and set accessors, you will not be able to get the expected result. After creating an instance of the Person class, you can change the value of its FirstName and LastName properties whenever you want, as in the following example:
var person = new Person
{
  FirstName = "John",
  LastName = "Doe",
  Address = "124 Conch Street, Bikini Bottom, Pacific Ocean"
};

person.Address = "17 Cherry Tree Lane";
person.FirstName = "Jack";

Console.WriteLine($"Hello {person.FirstName} {person.LastName}!");
Fortunately, C# 9 provides you with the init accessor. If you apply the init accessor to the FirstName and LastName properties in place of set, you will achieve your goal:
public class Person
{
  public string FirstName { get; init; }  //👈 changed code
  public string LastName { get; init; }   //👈 changed code
  public string Address { get; set; }
}
This way, after the instance is created, the FirstName and LastName properties become read-only.
Remember that this feature is supported only starting with C# 9.
Accessing Private Variables
Of course, you know that a private variable is not accessible from outside a class. In the following example, you have a Life class that defines the birthTime private variable:
public class Life
{
  private DateTime birthTime;

  public Life()
  {
    birthTime = DateTime.Now;
  }

  public int GetLength()
  {
    return DateTime.Now.Subtract(birthTime).Milliseconds;
  }
}
The birthTime private variable is assigned in the class constructor and is used within the GetLength() method. Normally, the birthTime variable is not accessible from outside the Life class. However, there is a special case where you can access the birthTime private variable. Take a look at this new YoungerThan() method:
public class Life
{
  // ...other code...

  public bool YoungerThan(Life livingBeing)
  {
    return livingBeing.birthTime < birthTime;
  }
}
Within this new method, you are actually accessing the birthTime private variable of a Life instance!
You may be scared by the consequences of accessing a private variable. Don’t panic! Only instances of a class can access private variables of other instances of the same class. In other words, the context of this access possibility is limited to one specific class.
This feature is useful when you need to implement some sort of internal comparison methods like the one shown above. However, you should use this approach only when you don't want to expose a private value. Otherwise, you should expose the private variable through a public property or method and use it for any processing. This way, you keep the idiomatic Object-Oriented Programming approach.
Summary
In this article, you discovered five C# features that maybe you didn't know. The C# language and the .NET platform are growing and evolving very quickly to adapt to developers' needs and simplify their work. So there's nothing bad with missing some feature.
If you know other little-known C# features, please share them with us in the comments below.
Aside: Securing ASP.NET Core with Auth0
Securing ASP.NET Core applications with Auth0 is easy and brings a lot of great features to the table. With Auth0, you only have to write a few lines of code to get a solid identity management solution, single sign-on, support for social identity providers (like Facebook, GitHub, Twitter, etc.), and support for enterprise identity providers (like Active Directory, LDAP, SAML, custom, etc.).
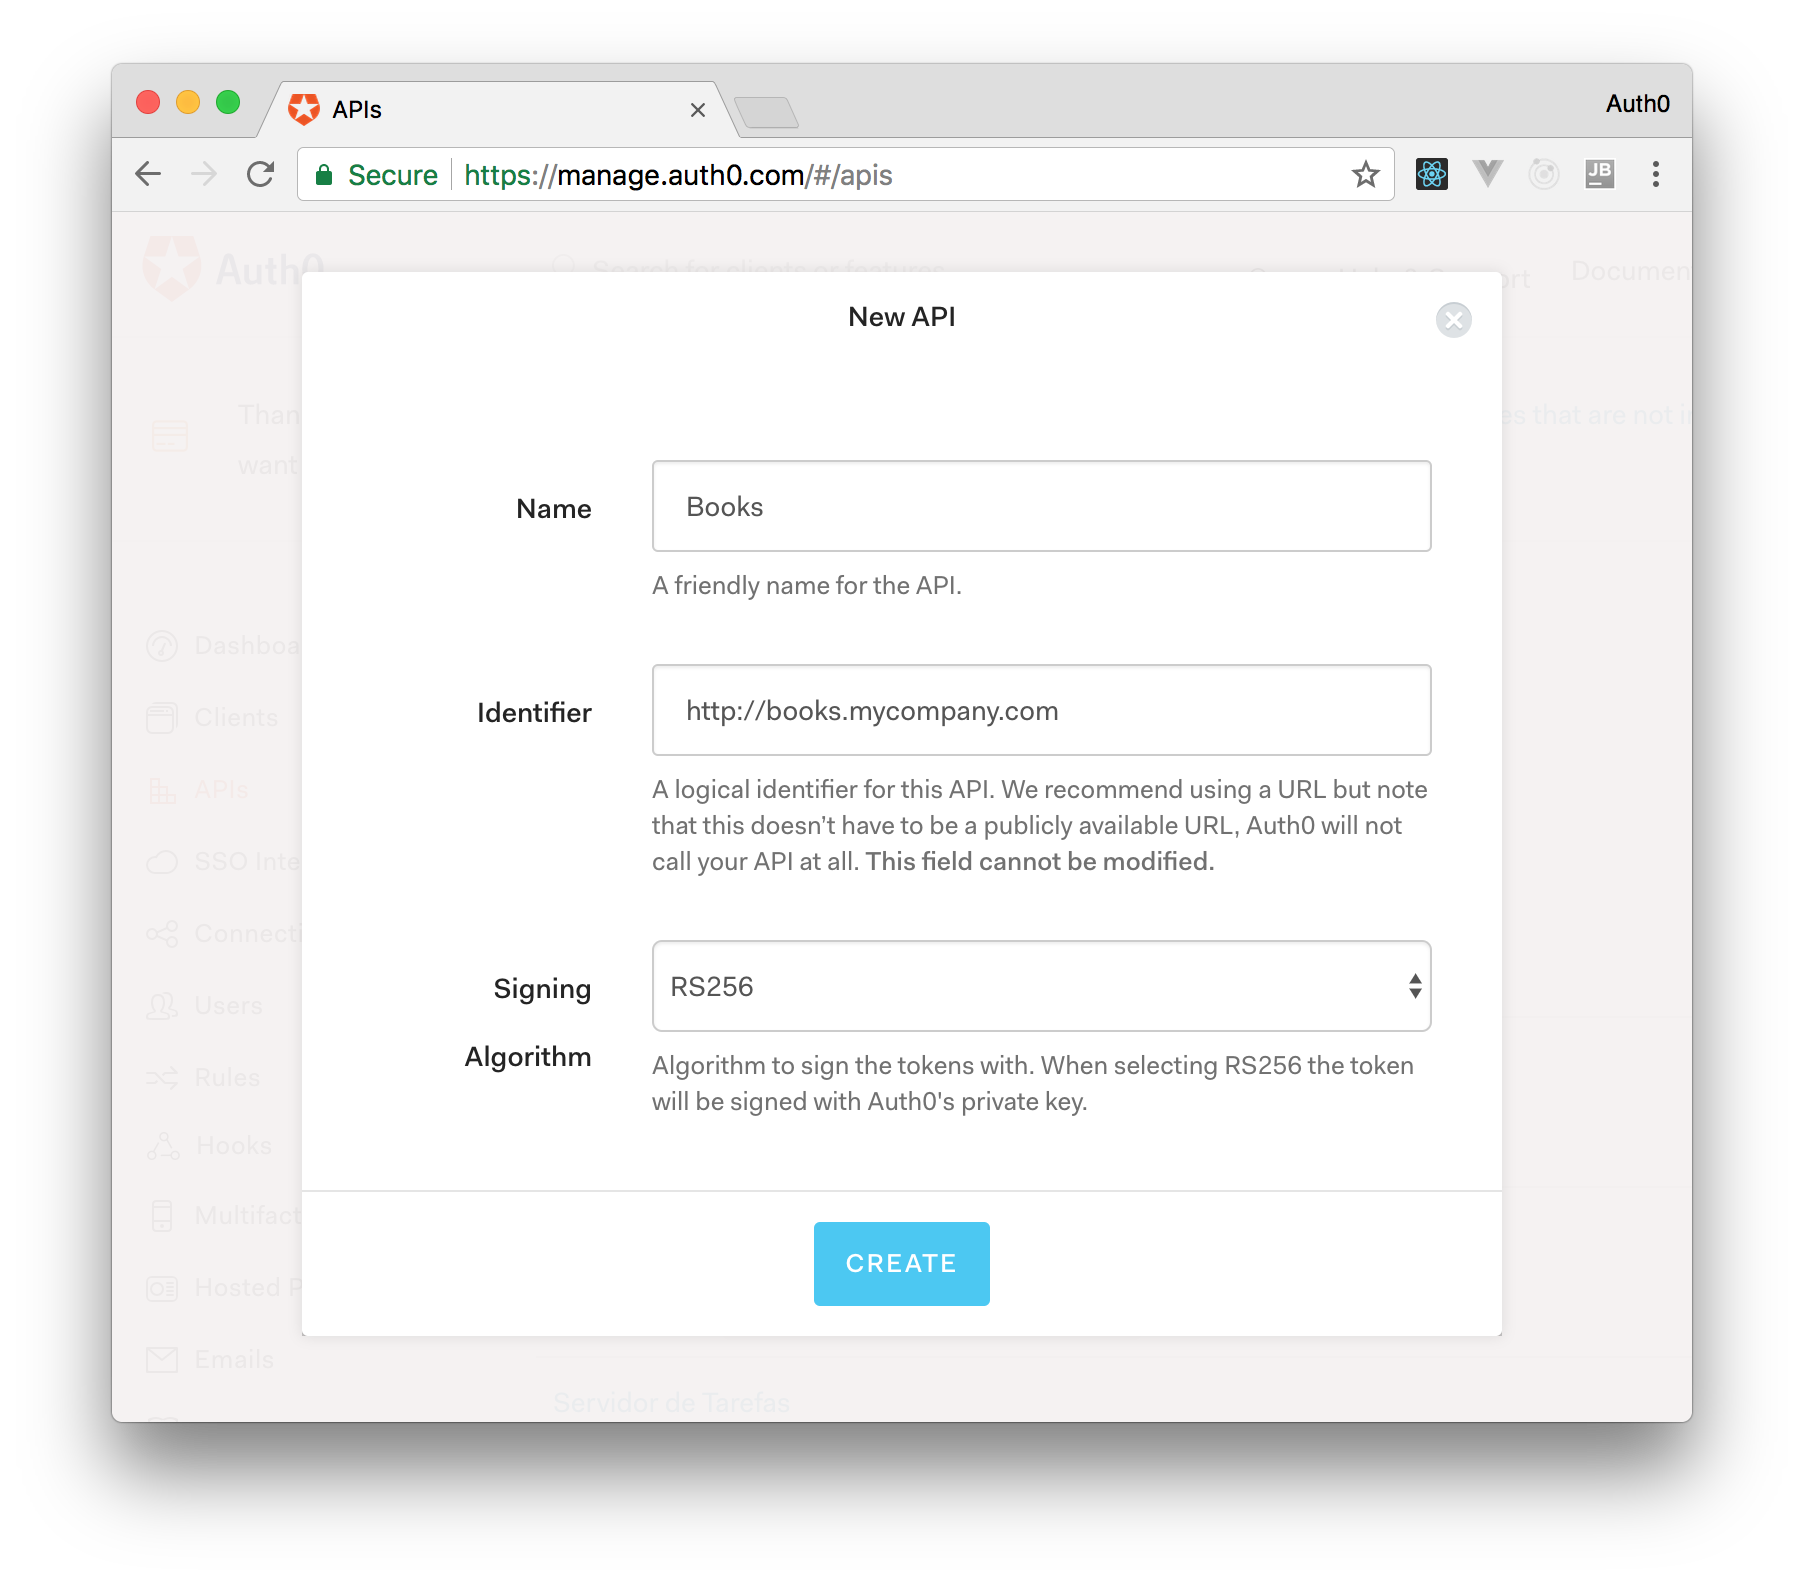
On ASP.NET Core, you need to create an API in your Auth0 Management Dashboard and change a few things on your code. To create an API, you need to sign up for a free Auth0 account. After that, you need to go to the API section of the dashboard and click on "Create API". On the dialog shown, you can set the Name of your API as "Books", the Identifier as "http://books.mycompany.com", and leave the Signing Algorithm as "RS256".
After that, you have to add the call to services.AddAuthentication() in the ConfigureServices() method of the Startup class as follows:
string authority = $"https://{Configuration["Auth0:Domain"]}/";
string audience = Configuration["Auth0:Audience"];

services.AddAuthentication(options =>
{
  options.DefaultAuthenticateScheme = JwtBearerDefaults.AuthenticationScheme;
  options.DefaultChallengeScheme = JwtBearerDefaults.AuthenticationScheme;
}).AddJwtBearer(options =>
{
  options.Authority = authority;
  options.Audience = audience;
});
In the body of the Configure() method of the Startup class, you also need to add an invocation to app.UseAuthentication() and app.UseAuthorization() as shown below:
app.UseRouting();
app.UseAuthentication();
app.UseAuthorization();
app.UseEndpoints(endpoints =>
{
    endpoints.MapControllers();
});
Make sure you invoke these methods in the order shown above. It is essential so that everything works properly.
Finally, add the following element to the appsettings.json configuration file:
{
  "Logging": {
    // ...
  },
  "Auth0": {
    "Domain": "YOUR_DOMAIN",
    "Audience": "YOUR_AUDIENCE"
  }
}
Note: Replace the placeholders
YOUR_DOMAINandYOUR_AUDIENCEwith the actual values for the domain that you specified when creating your Auth0 account and the Identifier you assigned to your API.
About the author

Andrea Chiarelli
Principal Developer Advocate
I have over 20 years of experience as a software engineer and technical author. Throughout my career, I've used several programming languages and technologies for the projects I was involved in, ranging from C# to JavaScript, ASP.NET to Node.js, Angular to React, SOAP to REST APIs, etc.
In the last few years, I've been focusing on simplifying the developer experience with Identity and related topics, especially in the .NET ecosystem.