TL;DR: In this tutorial, you will learn how to easily build a secured API with Lumen. The complete source code for this tutorial can be found here on GitHub.
Built on Laravel's core components, Lumen is able to provide speed without sacrificing any of the goodies we love about Laravel - clean and concise syntax; flexibility, and out-of-the-box support for just about anything you can think of. The scalability of an application is also not affected as Lumen is built to upgrade directly to Laravel painlessly should the application needs to outgrow Lumen's offerings.
Features Overview
These are some of the built-in features of Lumen:
- Routing is provided out of the box in Lumen. This includes basic routing, routing parameters, named routes, and route groups such as middleware.
- Authentication does not support the session state. However, incoming requests are authenticated via stateless mechanisms such as tokens.
- Caching is implemented the same as in Laravel. Cache drivers such as Database, Memcached, and Redis are supported. For example, you can install the
illuminate/redispackage via Composer to use a Redis cache with Lumen. - Errors and Logging are implemented via the Monolog library, which provides support for various log handlers.
- Queuing services are similar to the ones offered by Laravel. A unified API is provided across a variety of different queue back-ends.
- Events provide a simple observer implementation that allows you to subscribe and listen for events in your application.
- Bootstrapping processes are located in a single file.
Lumen Key Requirements
To use Lumen, you need to have the following tools installed on your machine:
- PHP: Make sure PHP >= 7.3 is installed on your machine. Furthermore, ensure that the following PHP extensions are installed. OpenSSL, PDO, and Mbstring.
- Composer: Navigate to the Composer website and install it on your machine. A composer is needed to install Lumen's dependencies.
- Postman: You also need to ensure that Postman, or a similar application, to test endpoints is installed.
Note: You'll need MySQL for this tutorial. Navigate to the MySQL website and install the community server edition. If you are using a Mac, I recommend following these instructions. For this tutorial, you can use MySQL straight from the terminal, but if you'd prefer a MySQL GUI, check out Sequel Pro for Mac or HeidiSQL for Windows.
Building a Fast Authors API Rapidly With Lumen
At Auth0, we have many technical writers, otherwise known as authors. A directive has been given to developing an app to manage Auth0 authors. The front-end app will be built with ReactJS. However, it needs to pull data from a source and also push to it. Yes, we need an API!
An author will have the following attributes:
- Name
- Email address
- Link to Twitter profile
- Link to GitHub profile
- Location
- Title of the latest article published by the author
Additionally, we will have timestamps for each author corresponding to when the author was added or edited.
The API will provide endpoints for basic CRUD (Create, Read, Update and Delete) operations related to authors. These endpoints are as follows:
- Get all authors —
GET /api/authors - Get one author —
GET /api/authors/23 - Create an author —
POST /api/authors - Edit an author —
PUT /api/authors/23 - Delete an author —
DELETE /api/authors/23
Getting Started
Run the following command in your terminal to create a new project with Lumen:
composer create-project --prefer-dist laravel/lumen authors
Navigate into the newly created project using the cd command.
cd authors
You can run the application using the following command.
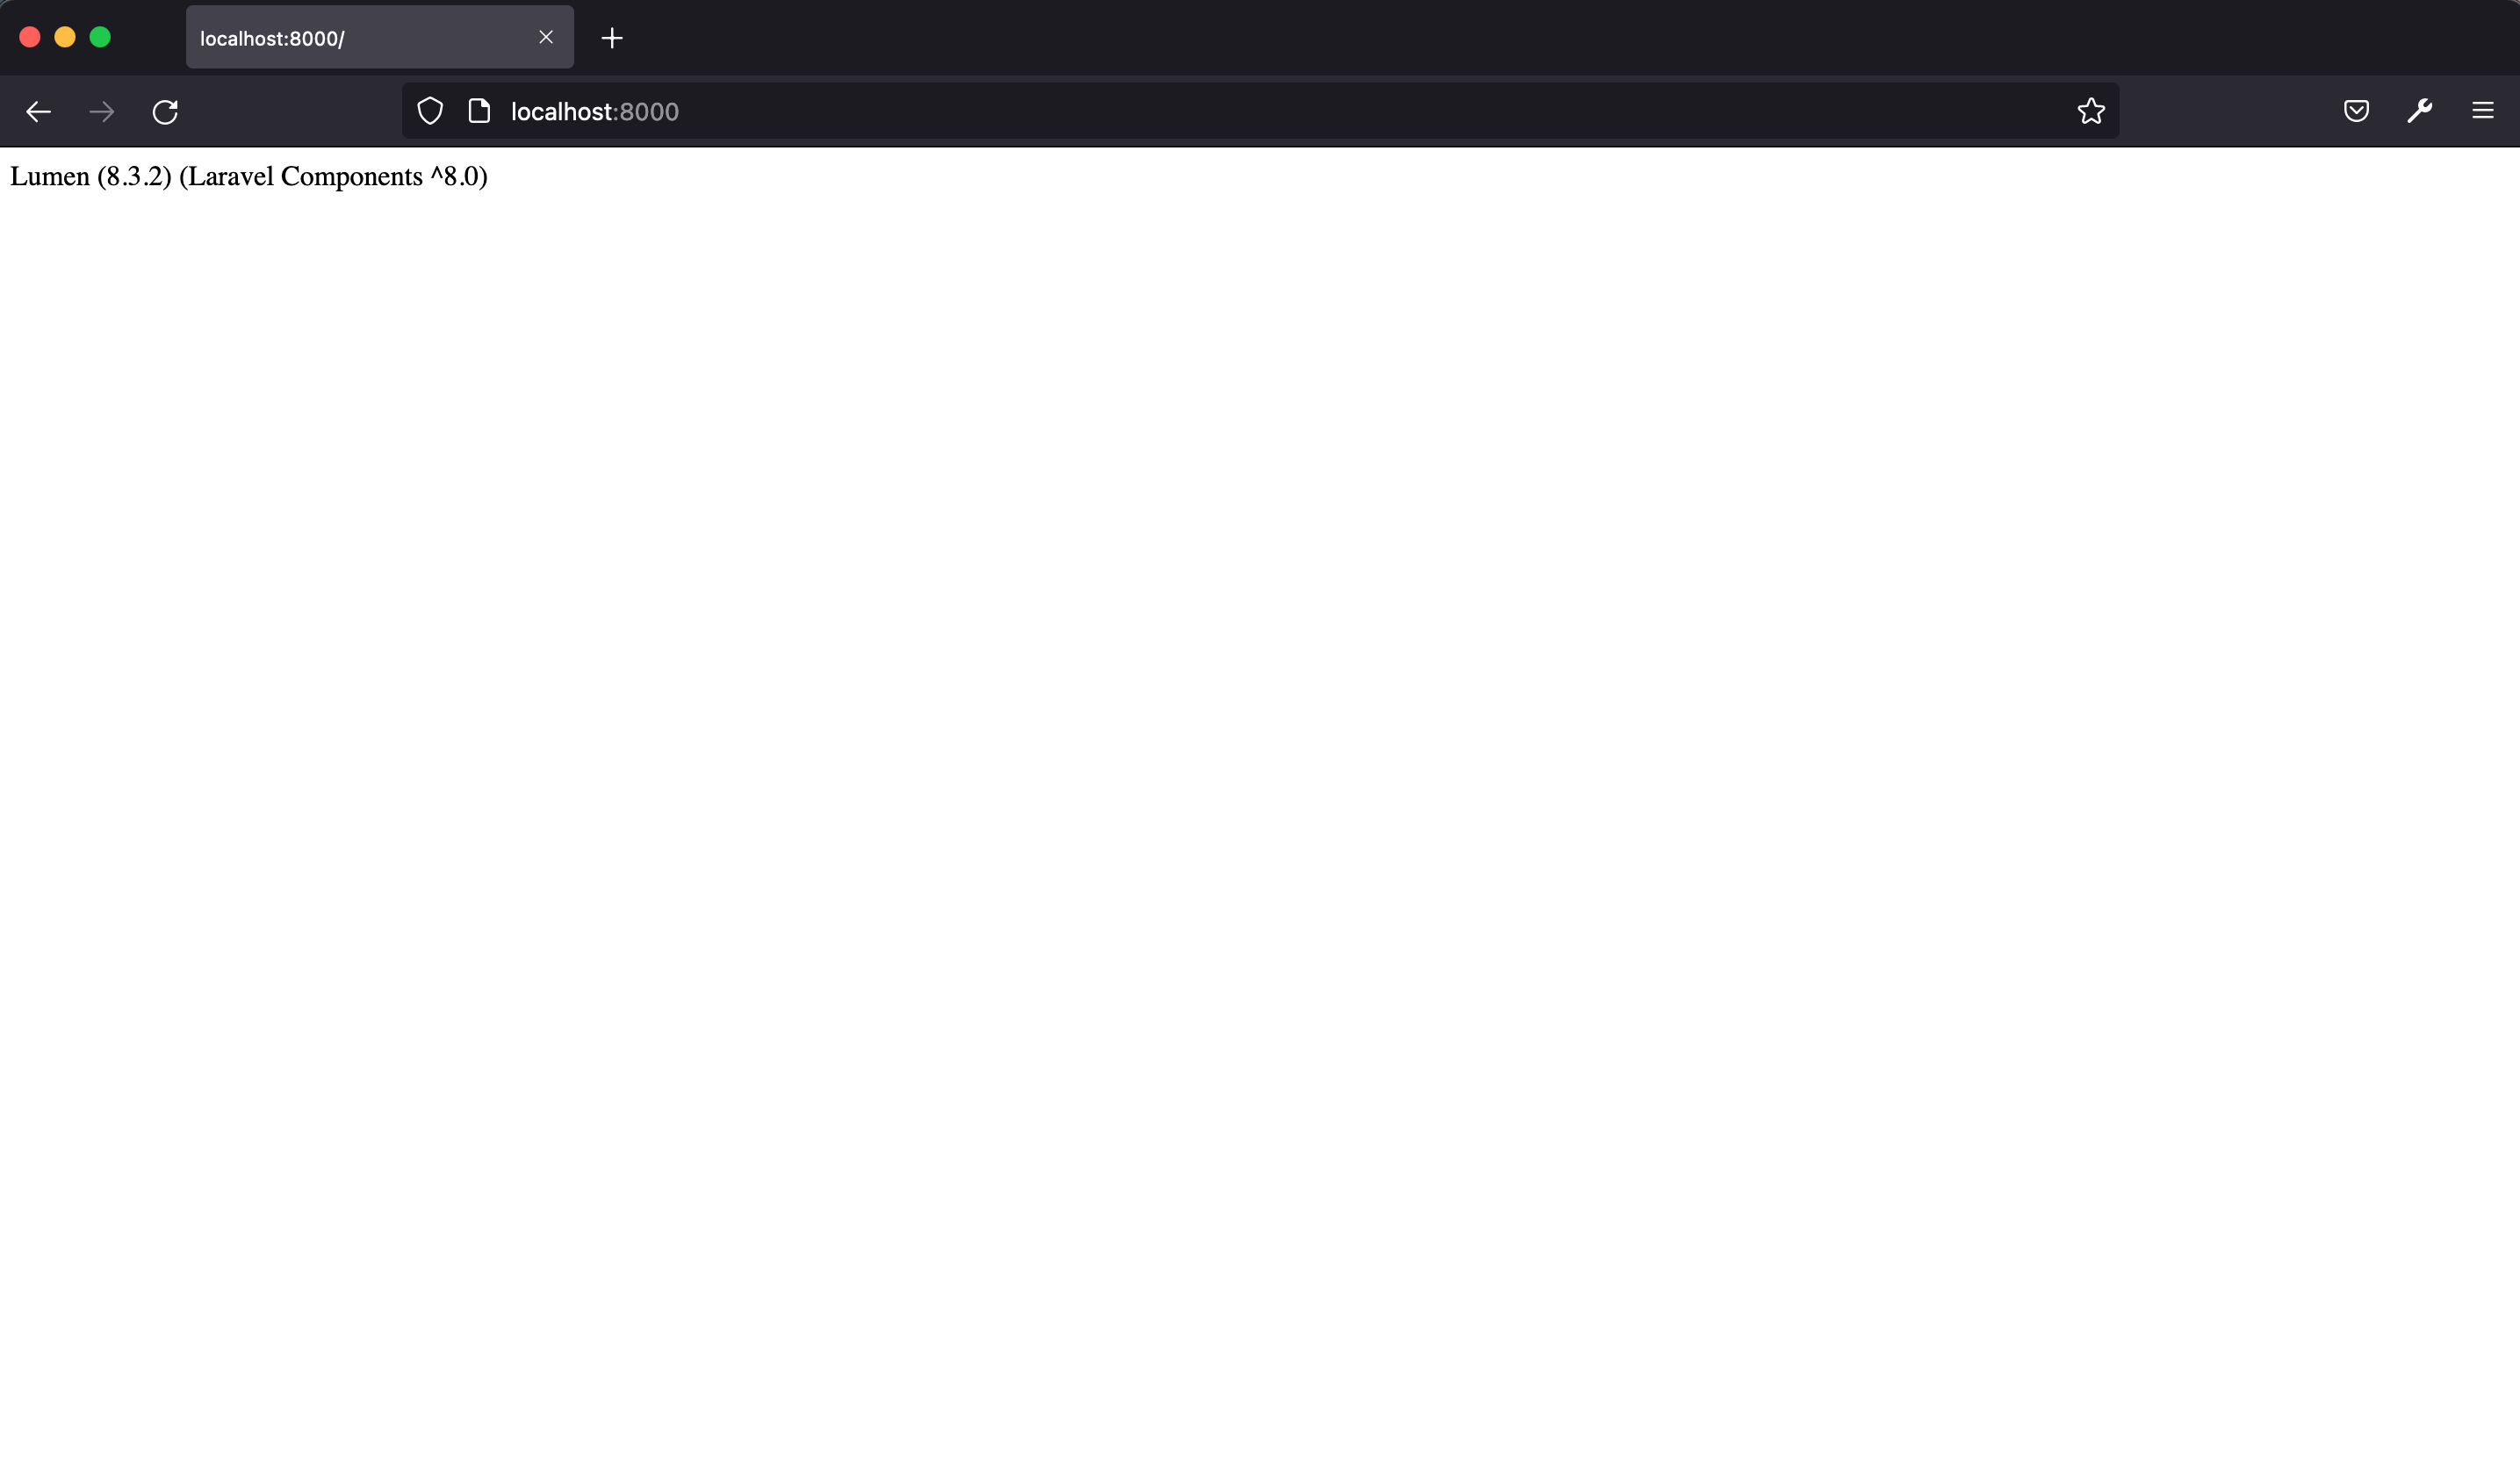
php -S localhost:8000 -t public
This will make the application available at http://localhost:8000, which will return the index page shown below.
Activate Eloquent and Facades
As I mentioned earlier, the entire bootstrap process is located in a single file.
Open up the bootstrap/app.php and uncomment the following lines.
// $app->withFacades();

// $app->withEloquent();
Once uncommented, the withEloquent function instructs Lumen to hook the Eloquent ORM with your database using the connections configured in the .env file.
Make sure you set the right details for your database in the .env file.
In the same vein, calling the withFacades function call enables the use of Facades in our project.
Setup Database, Models, and Migrations
At the time of this writing, Lumen supports four database systems: MySQL, Postgres, SQLite, and SQL Server. We are making use of MySQL in this tutorial. First, we'll create a migration for the authors table.
Migrations are like version control for your database, allowing your team to modify and share the application's database schema easily.
Stop the application from running using CTRL + C from the terminal and hit return on your keyboard. Now, run the command below in the terminal to create the authors table migration:
php artisan make:migration create_authors_table
The new migration will be placed in your database/migrations directory. The migration file name is prepended with a timestamp in the format YYYY_MM_DD_HHMMSS. This allows Lumen to determine the order of the migrations.
Open the migration file database/migrations/YYYY_MM_DD_HHMMSS_create_authors_table.php update it to match the following.
<?php

use Illuminate\Database\Migrations\Migration;
use Illuminate\Database\Schema\Blueprint;
use Illuminate\Support\Facades\Schema;

class CreateAuthorsTable extends Migration {

    /**
     * Run the migrations.
     *
     * @return void
     */
    public function up() {

        Schema::create('authors', function (Blueprint $table) {

            $table->increments('id');
            $table->string('name');
            $table->string('email');
            $table->string('github');
            $table->string('twitter');
            $table->string('location');
            $table->string('latest_article_published');
            $table->timestamps();
        });
    }

    /**
     * Reverse the migrations.
     *
     * @return void
     */
    public function down() {

        Schema::dropIfExists('authors');
    }
}
In the up function, we specify the columns to be added to the authors table. A column is declared for each author attribute we highlighted earlier.
Now, go ahead and run the migration like so:
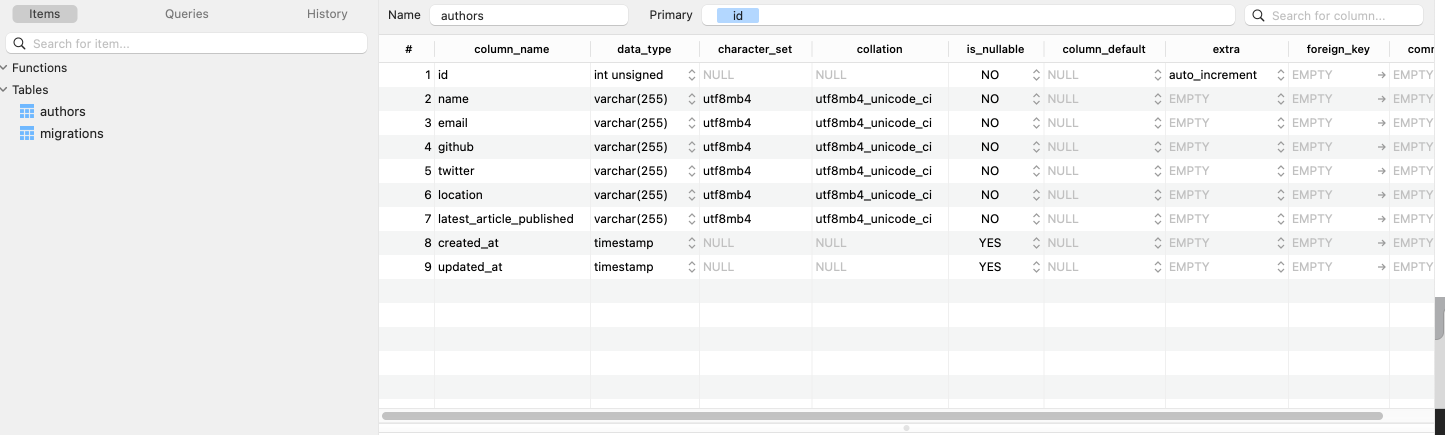
php artisan migrate
Check your database. You should now have the authors and migrations tables present.
Next, let's create the Author model. Create an app/Models/Author.php file and add the code below to it:
<?php

namespace App\Models;

use Illuminate\Database\Eloquent\Model;

class Author extends Model {

    /**
     * The attributes that are mass assignable.
     *
     * @var array
     */
    protected $fillable = [
        'name',
        'email',
        'github',
        'twitter',
        'location',
        'latest_article_published',
    ];

    /**
     * The attributes are excluded from the model's JSON form.
     *
     * @var array
     */
    protected $hidden = [];
}
In the code above, we made the author attributes mass assignable.
Set up Routes
Routing is fairly straightforward. Open up routes/web.php and modify it like so:
<?php

/** @var Router $router */

/*
|--------------------------------------------------------------------------
| Application Routes
|--------------------------------------------------------------------------
|
| Here is where you can register all of the routes for an application.
| It is a breeze. Simply tell Lumen the URIs it should respond to
| and give it the Closure to call when that URI is requested.
|
*/

use Laravel\Lumen\Routing\Router;

$router->get('/', function () use ($router) {

    return $router->app->version();
});

$router->group(['prefix' => 'api'], function () use ($router) {

    $router->get('authors', ['uses' => 'AuthorController@showAllAuthors']);

    $router->get('authors/{id}', ['uses' => 'AuthorController@showOneAuthor']);

    $router->post('authors', ['uses' => 'AuthorController@create']);

    $router->delete('authors/{id}', ['uses' => 'AuthorController@delete']);

    $router->put('authors/{id}', ['uses' => 'AuthorController@update']);
});
In the code above, we have abstracted the functionality for each route into a controller, AuthorController. Route groups allow you to share route attributes, such as middleware or namespaces, across a large number of routes without needing to define those attributes on each route. Therefore, every route will have a prefix of /api. Next, let's create the AuthorController.
Set up Author Controller
Create a new file, AuthorController.php in app/Http/Controllers directory and add the following code to it:
<?php

namespace App\Http\Controllers;

use App\Models\Author;
use Illuminate\Http\JsonResponse;
use Illuminate\Http\Request;
use Illuminate\Http\Response;

class AuthorController extends Controller {

    public function showAllAuthors()
    : JsonResponse {

        return response()->json(Author::all());
    }

    public function showOneAuthor($id)
    : JsonResponse {

        return response()->json(Author::find($id));
    }

    public function create(Request $request)
    : JsonResponse {

        $author = Author::create($request->all());

        return response()->json($author, Response::HTTP_CREATED);
    }

    public function update($id, Request $request)
    : JsonResponse {

        $author = Author::findOrFail($id);
        $author->update($request->all());

        return response()->json($author, Response::HTTP_OK);
    }

    public function delete($id) {

        Author::findOrFail($id)->delete();

        return response('Deleted Successfully', Response::HTTP_OK);
    }
}
Let's analyze the code above. First, we have use App\Author, which allowed us to require the Author model that we created earlier.
Next, we've created the following five methods:
showAllAuthors— /GETshowOneAuthor— /GETcreate— /POSTupdate— /PUTdelete— /DELETE
These will allow us to use that Author model to interact with author data. For example, if you make a POST request to /api/authors API endpoint, the create function will be invoked, and a new entry will be added to the authors table.
Author controller method overview:
showAllAuthors(): checks for all the author resourcescreate():creates a new author resourceshowOneAuthor(): checks for a single author resourceupdate(): checks if an author resource exists and allows the resource to be updateddelete(): checks if an author resource exists and deletes it
Controller responses:
response(): global helper function that obtains an instance of the response factoryresponse()->json(): returns the response in JSON format.Response::HTTP_OK: This is a constant that represent the200HTTP status code. This indicates that the request was successful.Response::HTTP_CREATED: This is a constant that represent the201HTTP status code. This indicates that a new resource (in this case, author) was created.findOrFail: throws aModelNotFoundExceptionif no result is not found.
At this point, we can test the API routes with Postman. To do that, restart the application with:
php -S localhost:8000 -t public
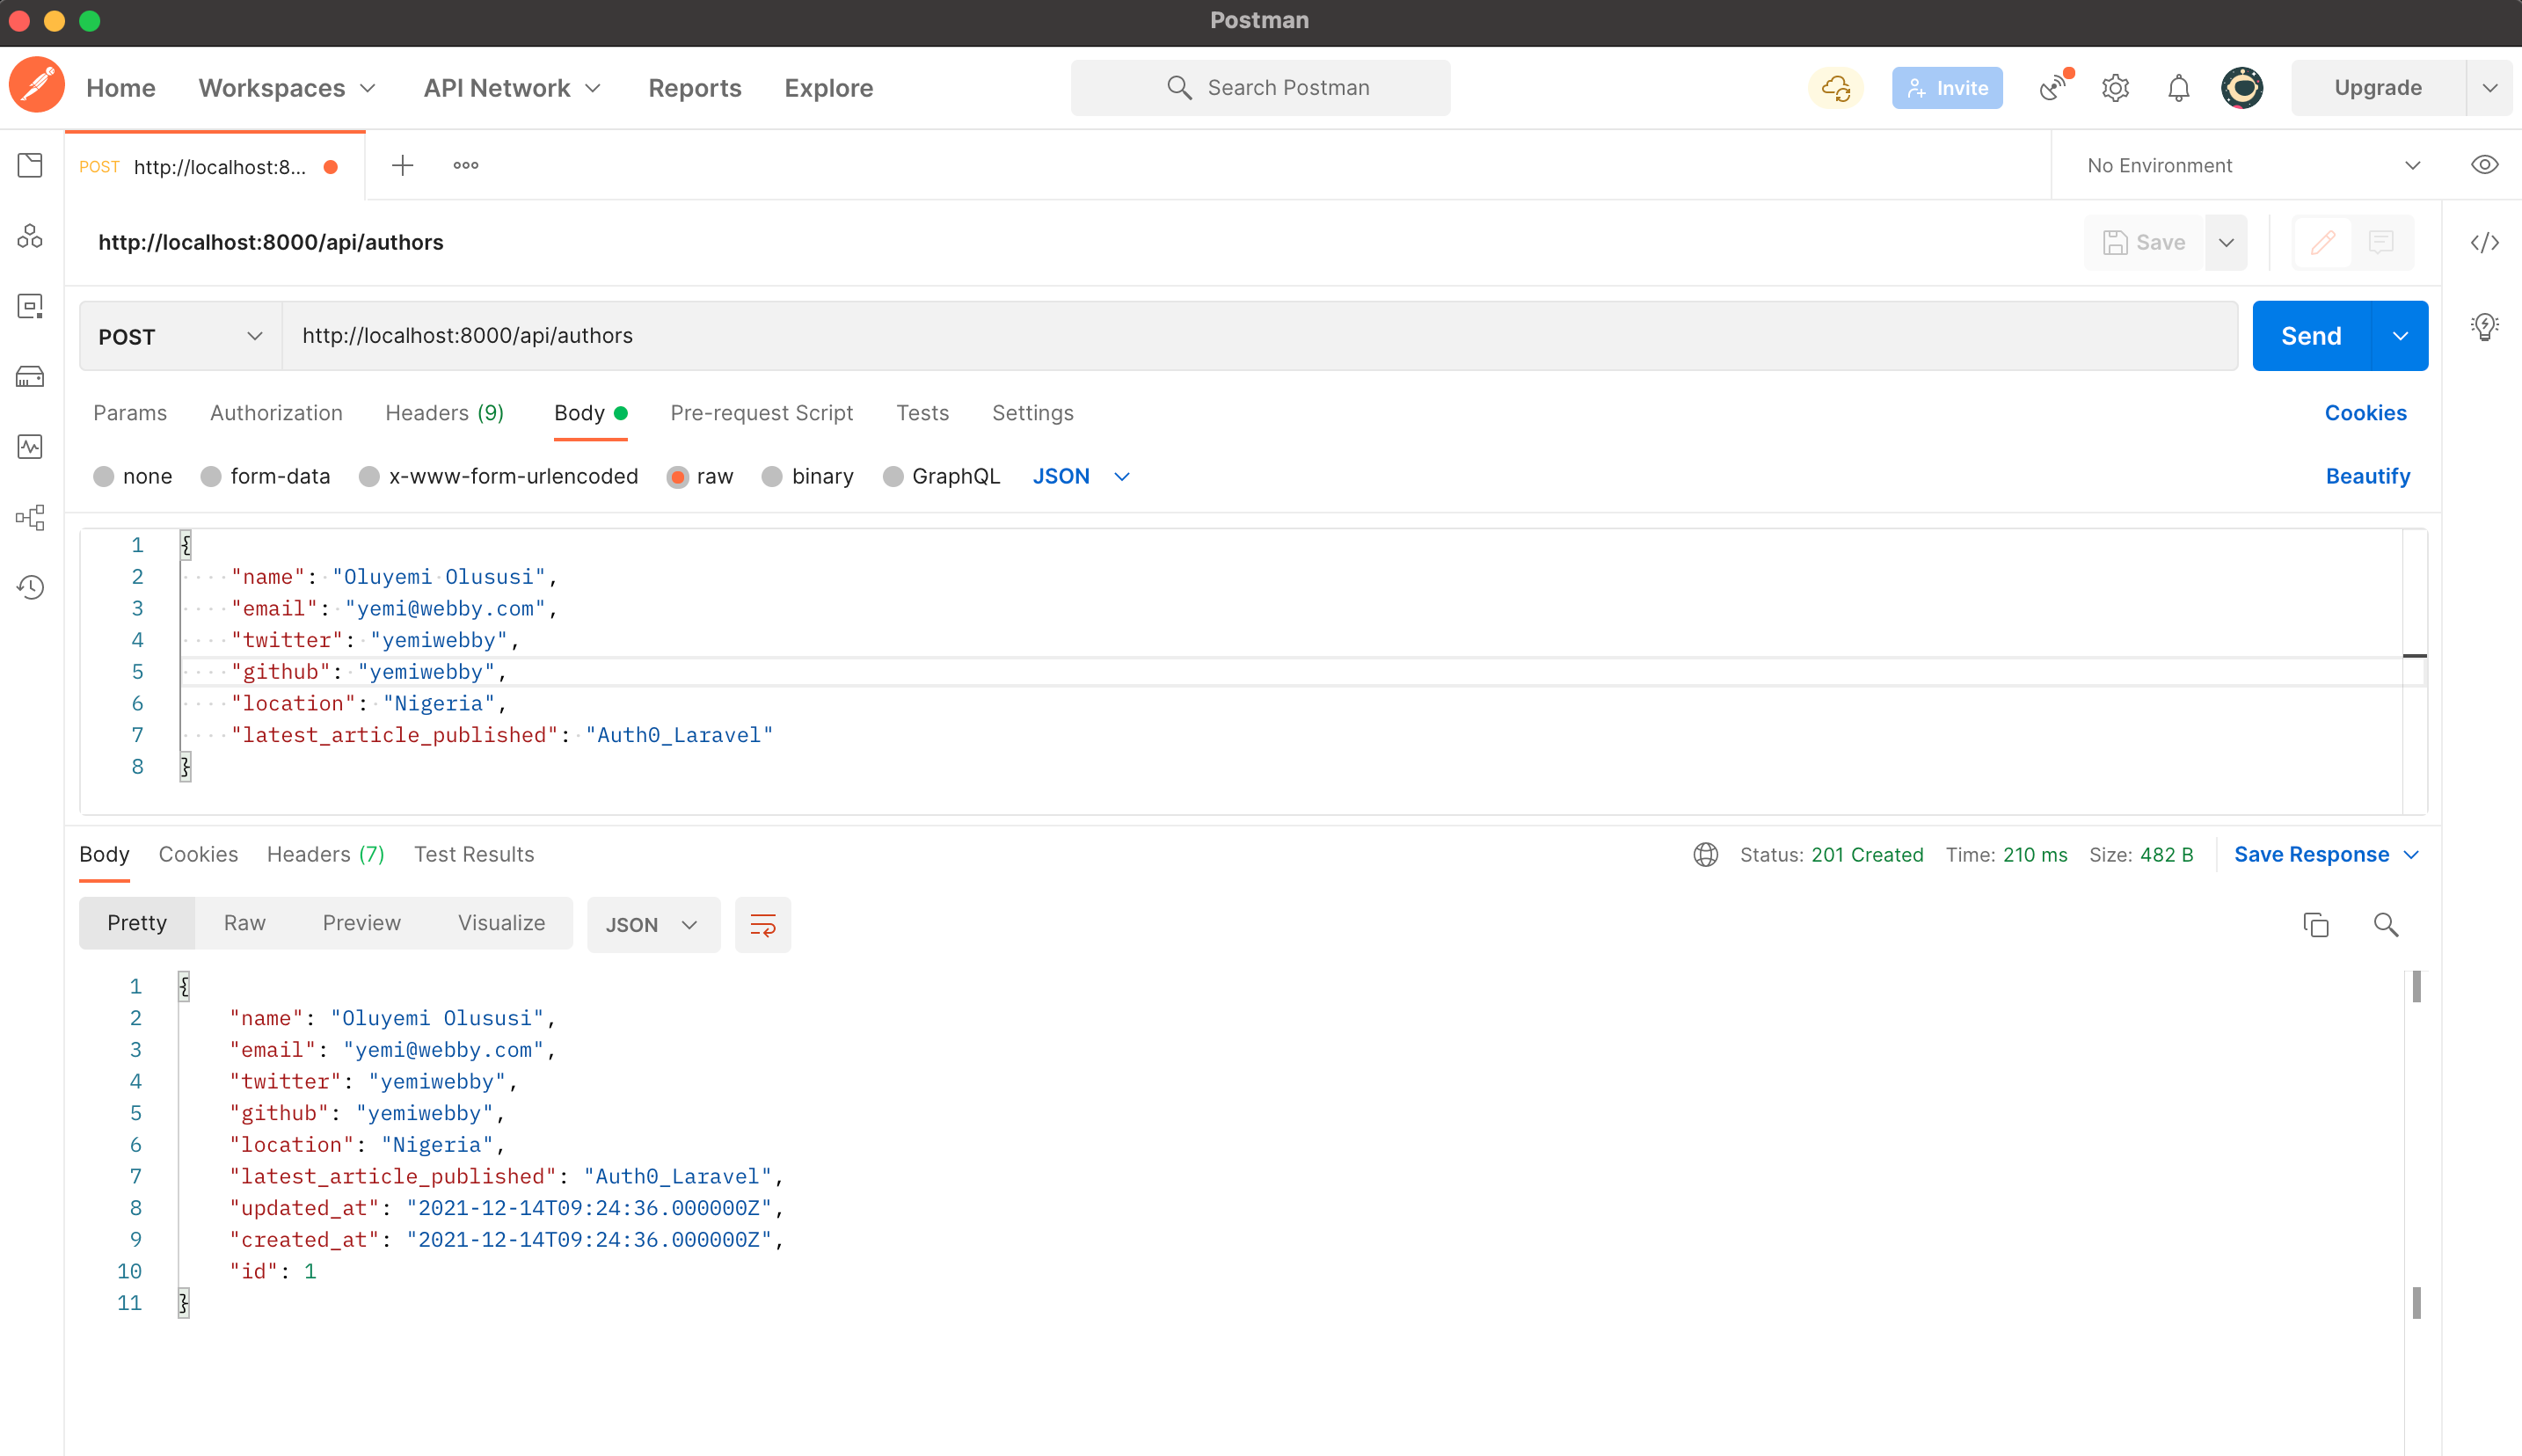
Author POST operation - POST http://localhost:8000/api/authors
Use the JSON requests below:
{
  "name": "John Doe",
  "email": "john@john.ng",
  "twitter": "yemiwebby",
  "github": "yemiwebby",
  "location": "Nigeria",
  "latest_article_published": "Auth0_laravel"
}
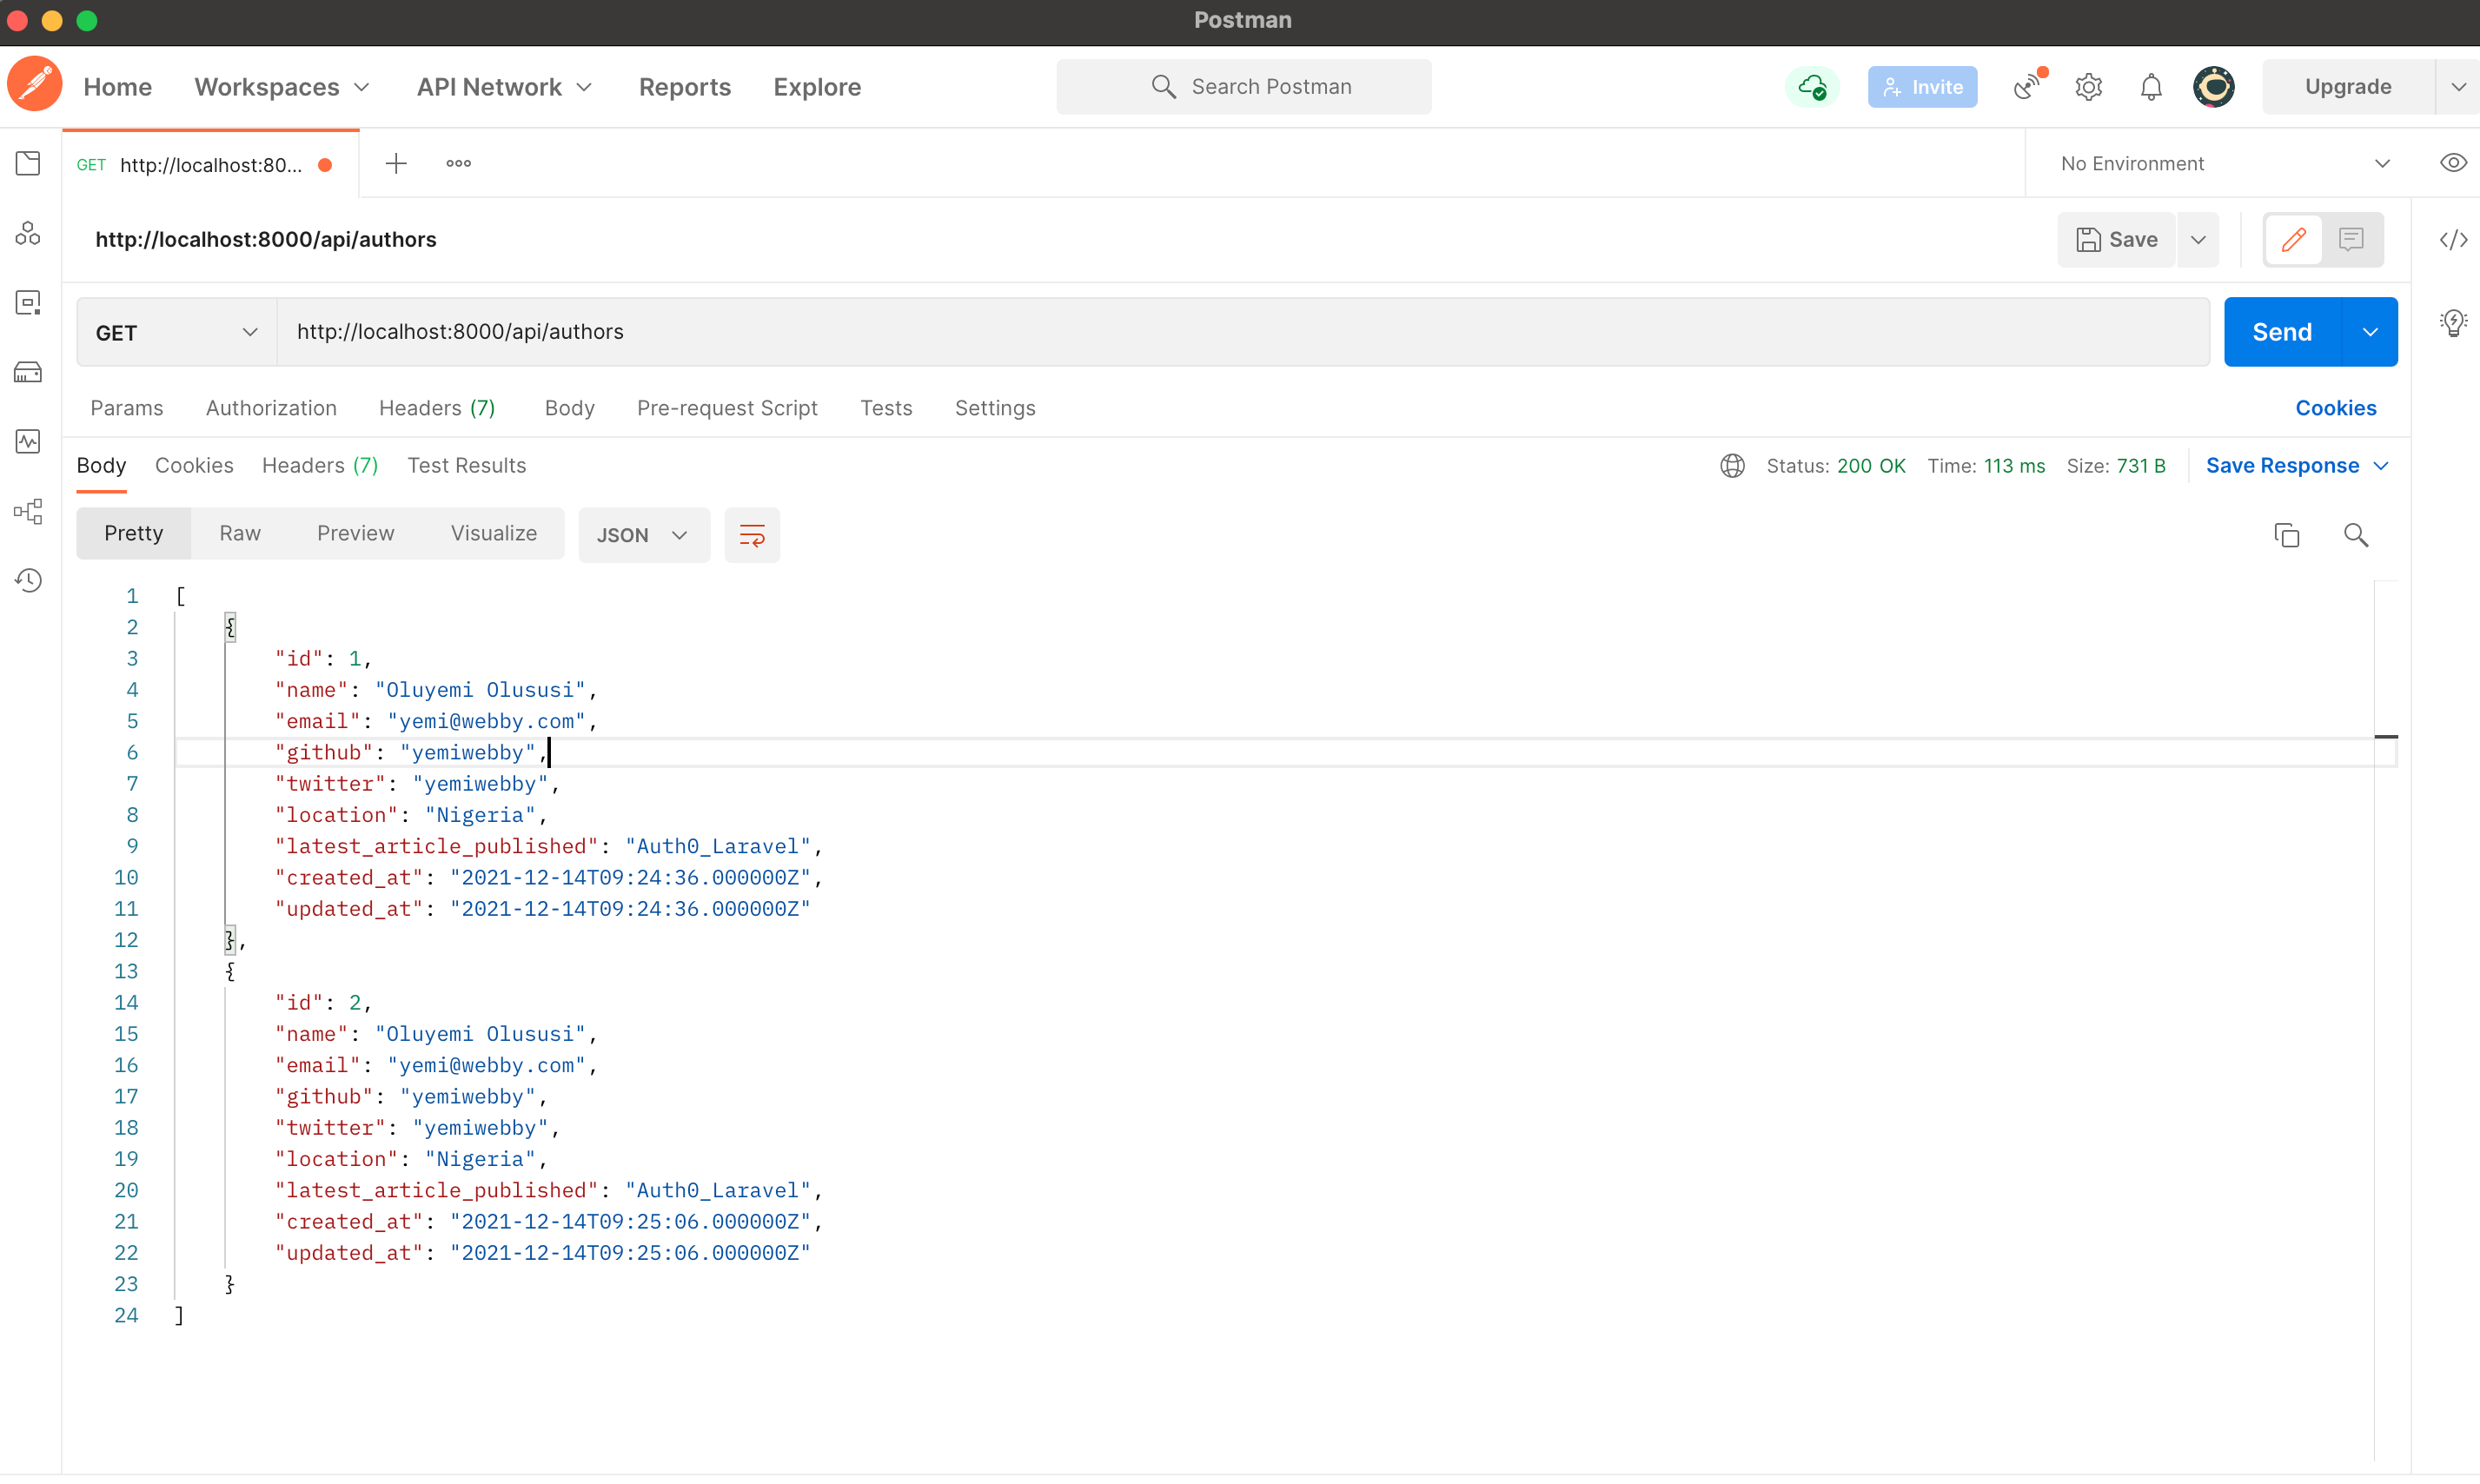
Author GET operation - GET http://localhost:8000/api/authors
You should now see an array of objects, including the author you just created, plus any others in the database.
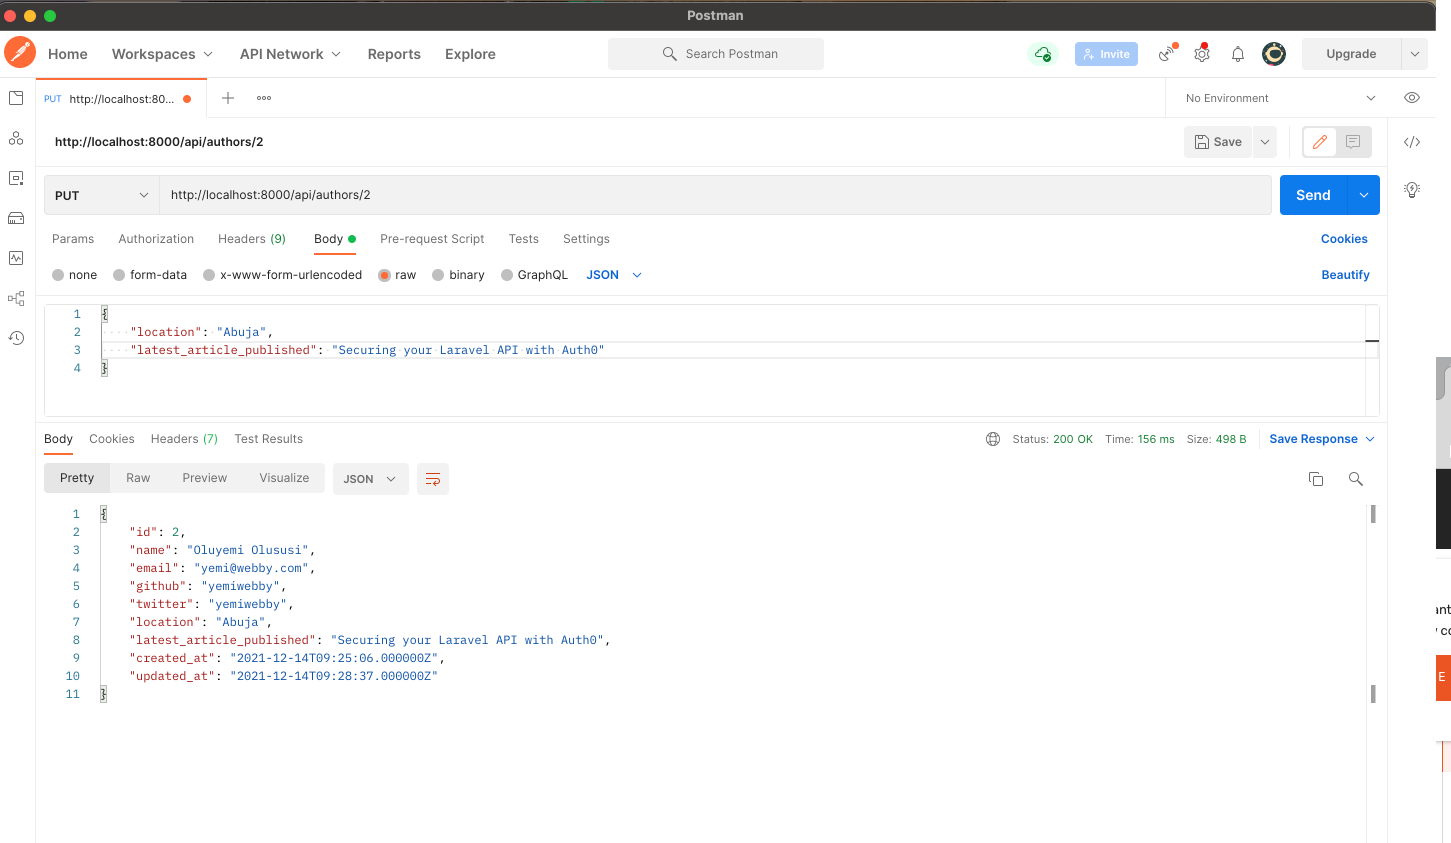
Author PUT operation
The PUT operation allows us to edit an existing author. Notice the author's id in the URL.
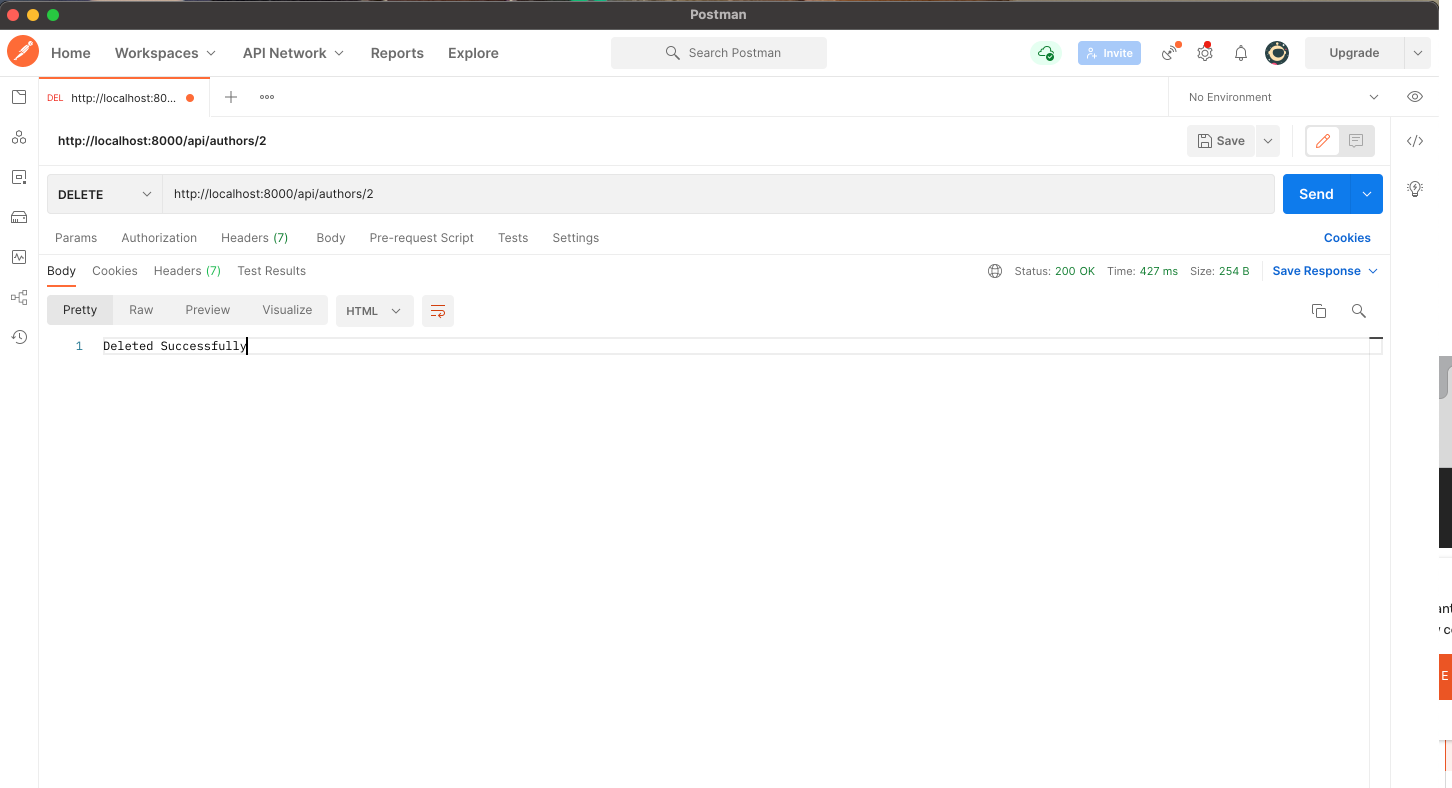
Author DELETE operation
Finally, we can delete a specific author as well.
Now we have a working API. Awesome!
Lumen API Validation
In Lumen, it's very easy to validate your application's incoming data. Lumen provides access to the $this->validate helper method from within Route closures.
Currently, we're not checking what people are sending through to our create method in our API. Let's fix that now. Open up the AuthorController file and modify the create method as shown below.
// ...
public function create(Request $request)
    : JsonResponse {

        $this->validate($request, [
            'name' => 'required',
            'email' => 'required|email|unique:authors',
            'location' => 'required|alpha'
        ]);

        $author = Author::create($request->all());

        return response()->json($author, Response::HTTP_CREATED);
    }
// ...
Now test the API POST route with Postman.
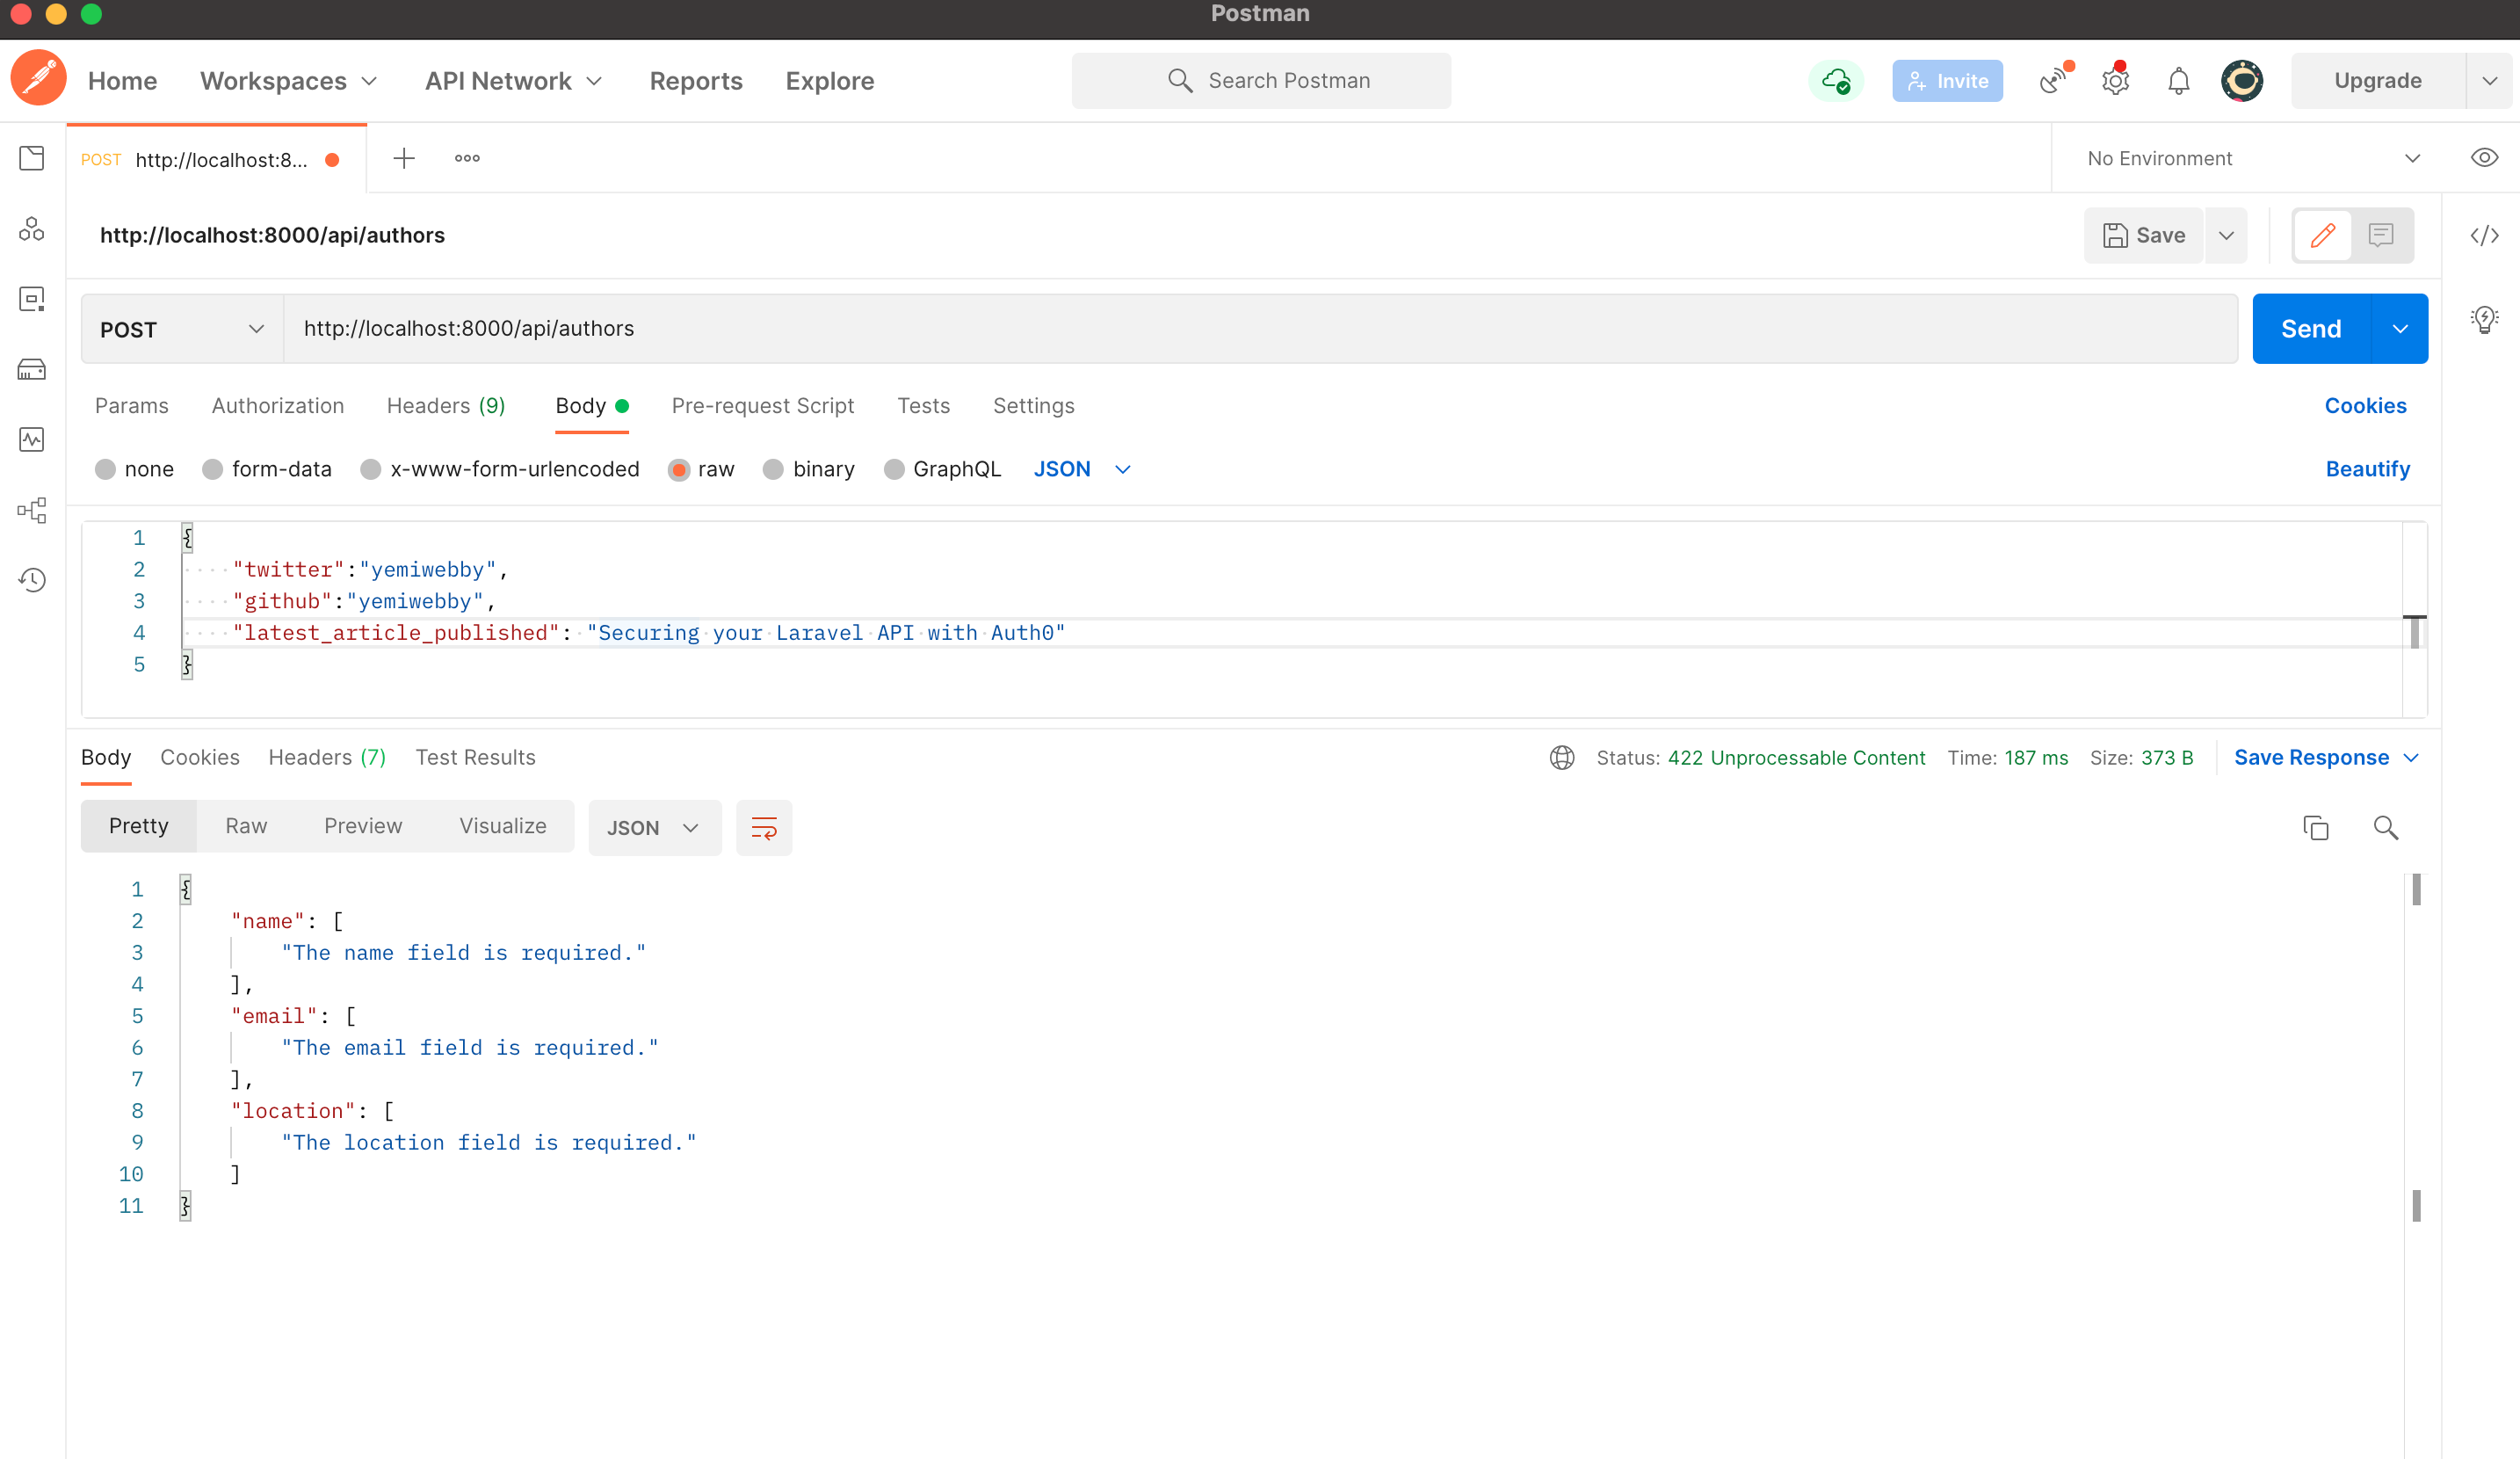
It validated the incoming requests and returned the appropriate error message.
- name, email, and location were required. In testing the API, name and email were not provided.
- email was required to be in email format.
- location was required to be entirely alphabetic characters,
alpha. Nothing more. Numbers were provided as the value for location.
Lumen comes with a plethora of validation rules that you can use to ensure that the incoming request meets the expected quality before it can be handled.
Securing the Authors API with Auth0
Right now, an application can make requests to any of the endpoints present in our API. In a real-world scenario, we would want to restrict our API so that only authorized users have the ability to do this. A few things need to happen here.
- A user signs in with their credentials (to prove who they are, i.e., authenticate)
- If the user is authorized to use the API, the application is issued an API access token
- Whenever an API request is made, the application will send that API access token along with the request
- If the access token is valid, the API will respond with the requested data
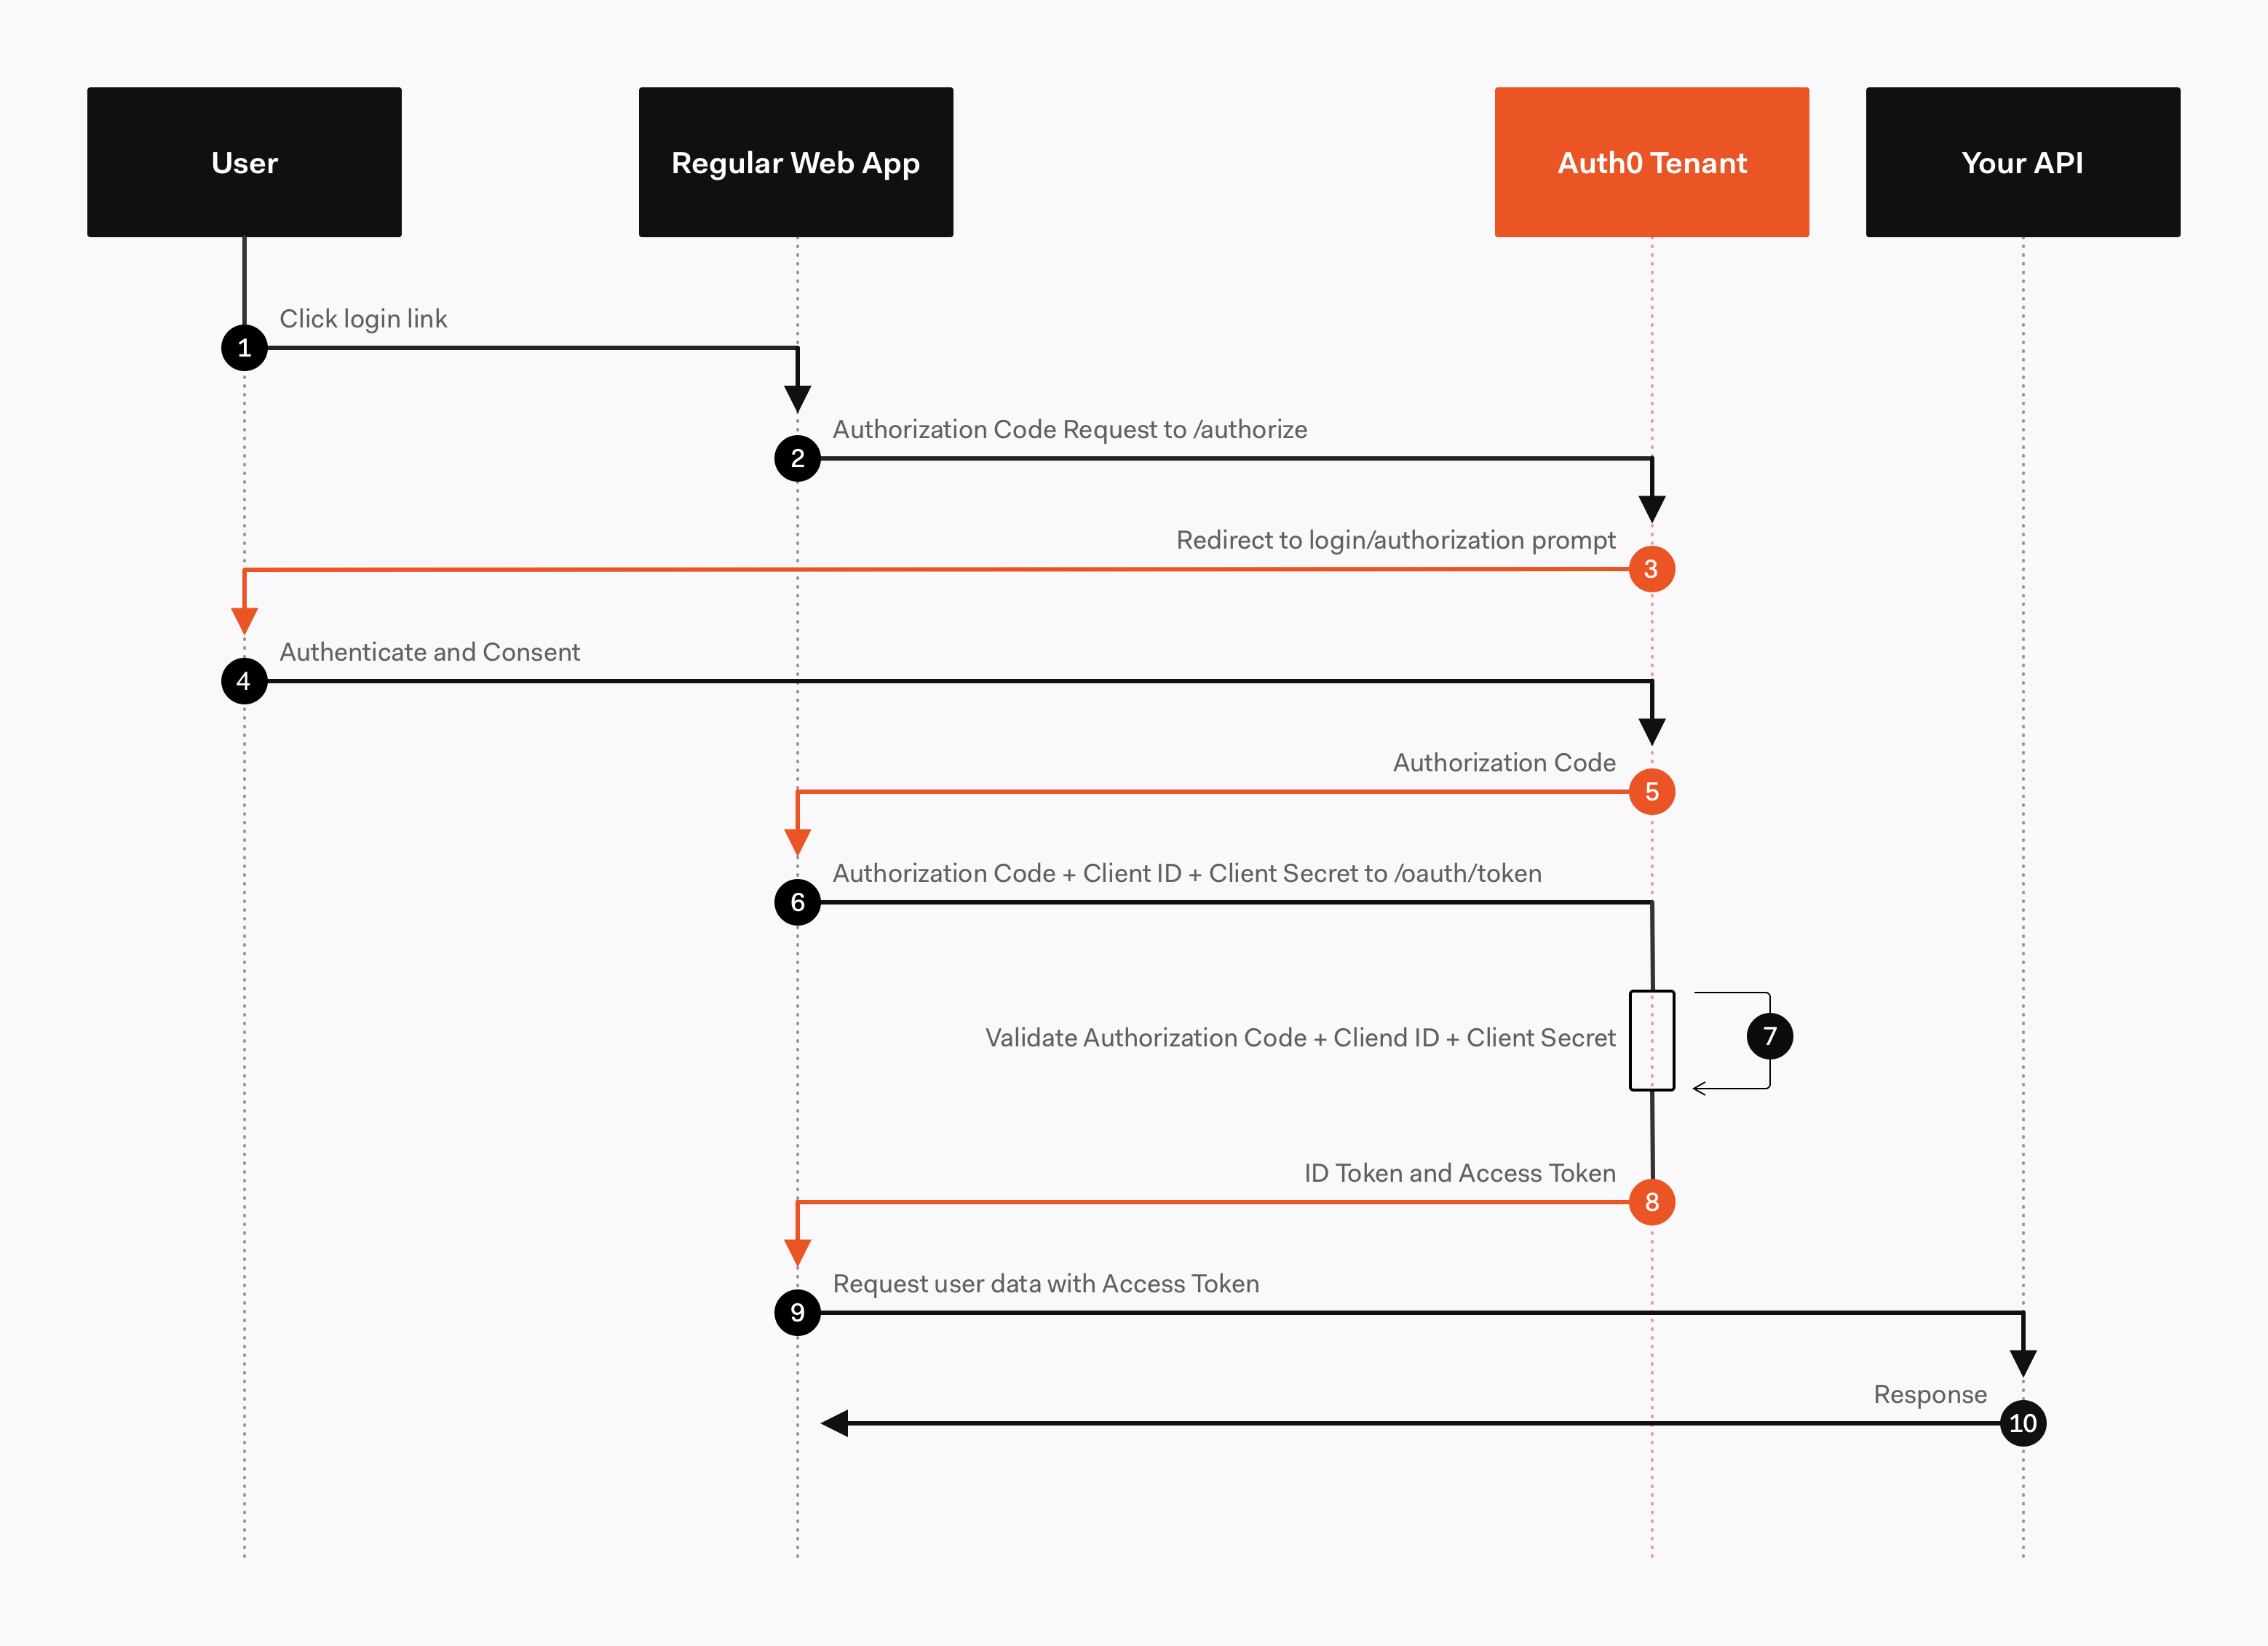
In this tutorial, we're going to focus on what happens in step 4 of that list (step 9-10 in the diagram). Since we're only building the backend API here, you'll need to create a separate front-end to accomplish the first two steps. Here is an awesome example of how you can do that using Auth0 with React. For now, let's focus on generating access tokens using JSON Web Tokens.
JSON Web Token, commonly known as JWT, is an open standard for creating JSON-based access tokens that make some claim, usually authorizing a user or exchanging information. This technology has gained popularity over the past few years because it enables backends to accept requests simply by validating the contents of these JWTs.
JWTs can be used for authorization or information exchange. In this tutorial, we'll use JWTs to grant applications (users) authorization using our API.
Whenever the user wants to access a protected route or resource (an endpoint), the user agent must send the JWT, usually in the Authorization header using the Bearer schema, along with the request.
When the API receives a request with an access token, the first thing it needs to do is validate the token. If the validation fails, then the request must be rejected.
For more information about JSON Web Tokens, check out our free ebook below.
Interested in getting up-to-speed with JWTs as soon as possible?
Download the free ebook
We will make use of Auth0 to issue our access tokens. With Auth0, we only have to write a few lines of code to get an in-depth identity management solution which includes:
- Single sign-on
- User management
- Support for social identity providers (like Facebook, GitHub, Twitter, etc.)
- Enterprise (Active Directory, LDAP, SAML, etc.)
- Your own database of users
If you haven't done so yet, this is a good time to sign up for a free Auth0 account.
Try out the most powerful authentication platform for free. Get started →
Once you have your Auth0 account, go ahead and create a new API in the dashboard. An API is an entity that represents an external resource, capable of accepting and responding to requests made by clients, such as the authors API we just made.
Auth0 offers a generous free tier to get started with modern authentication.
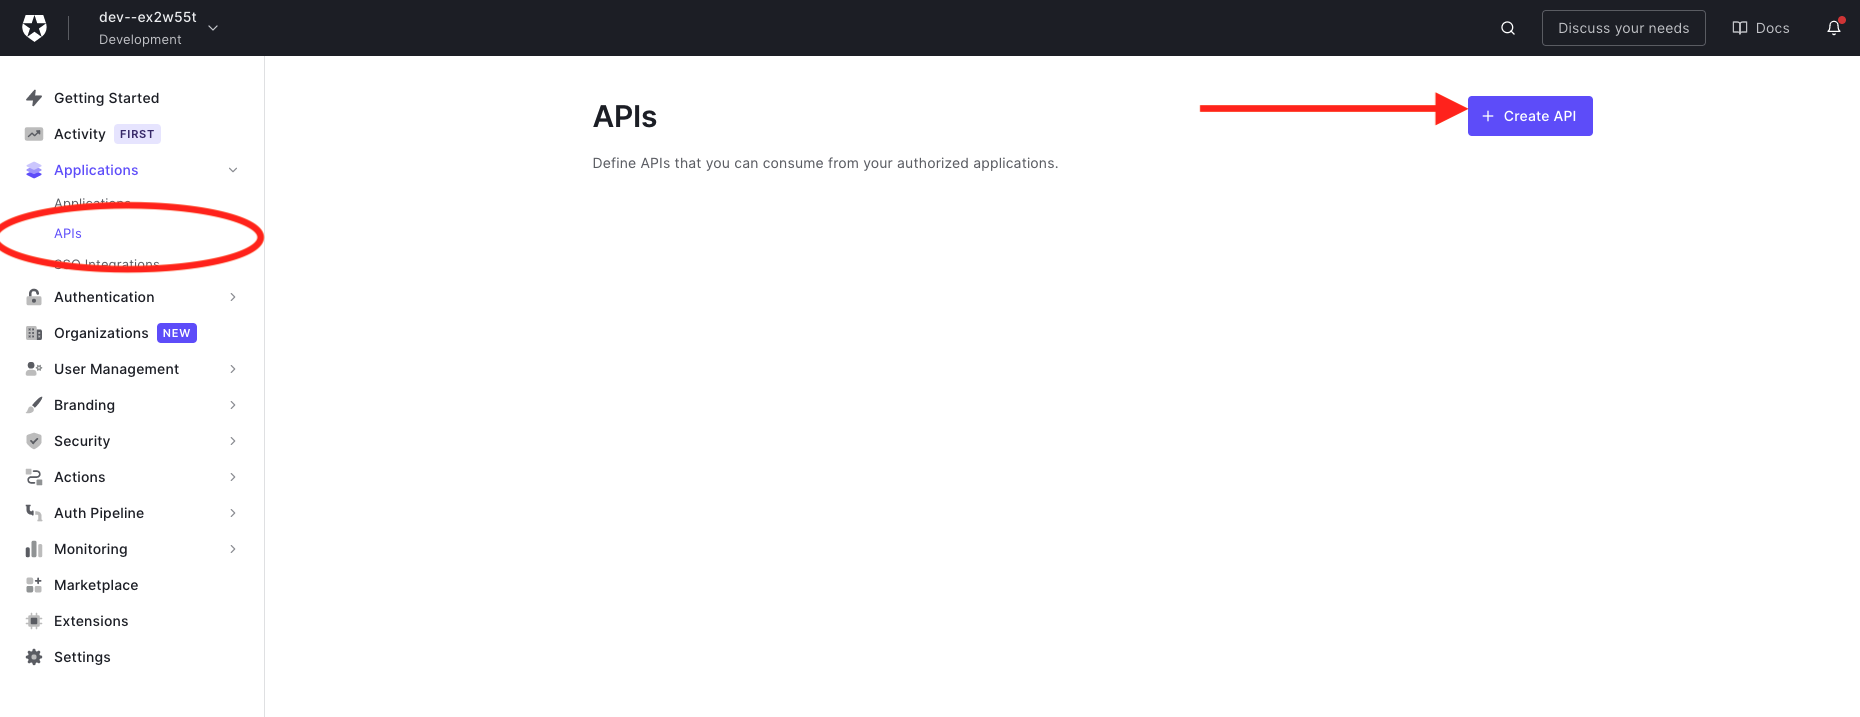
Login to your Auth0 management dashboard and create a new API client.
Click on the APIs menu item and then the Create API button.
Create a New API
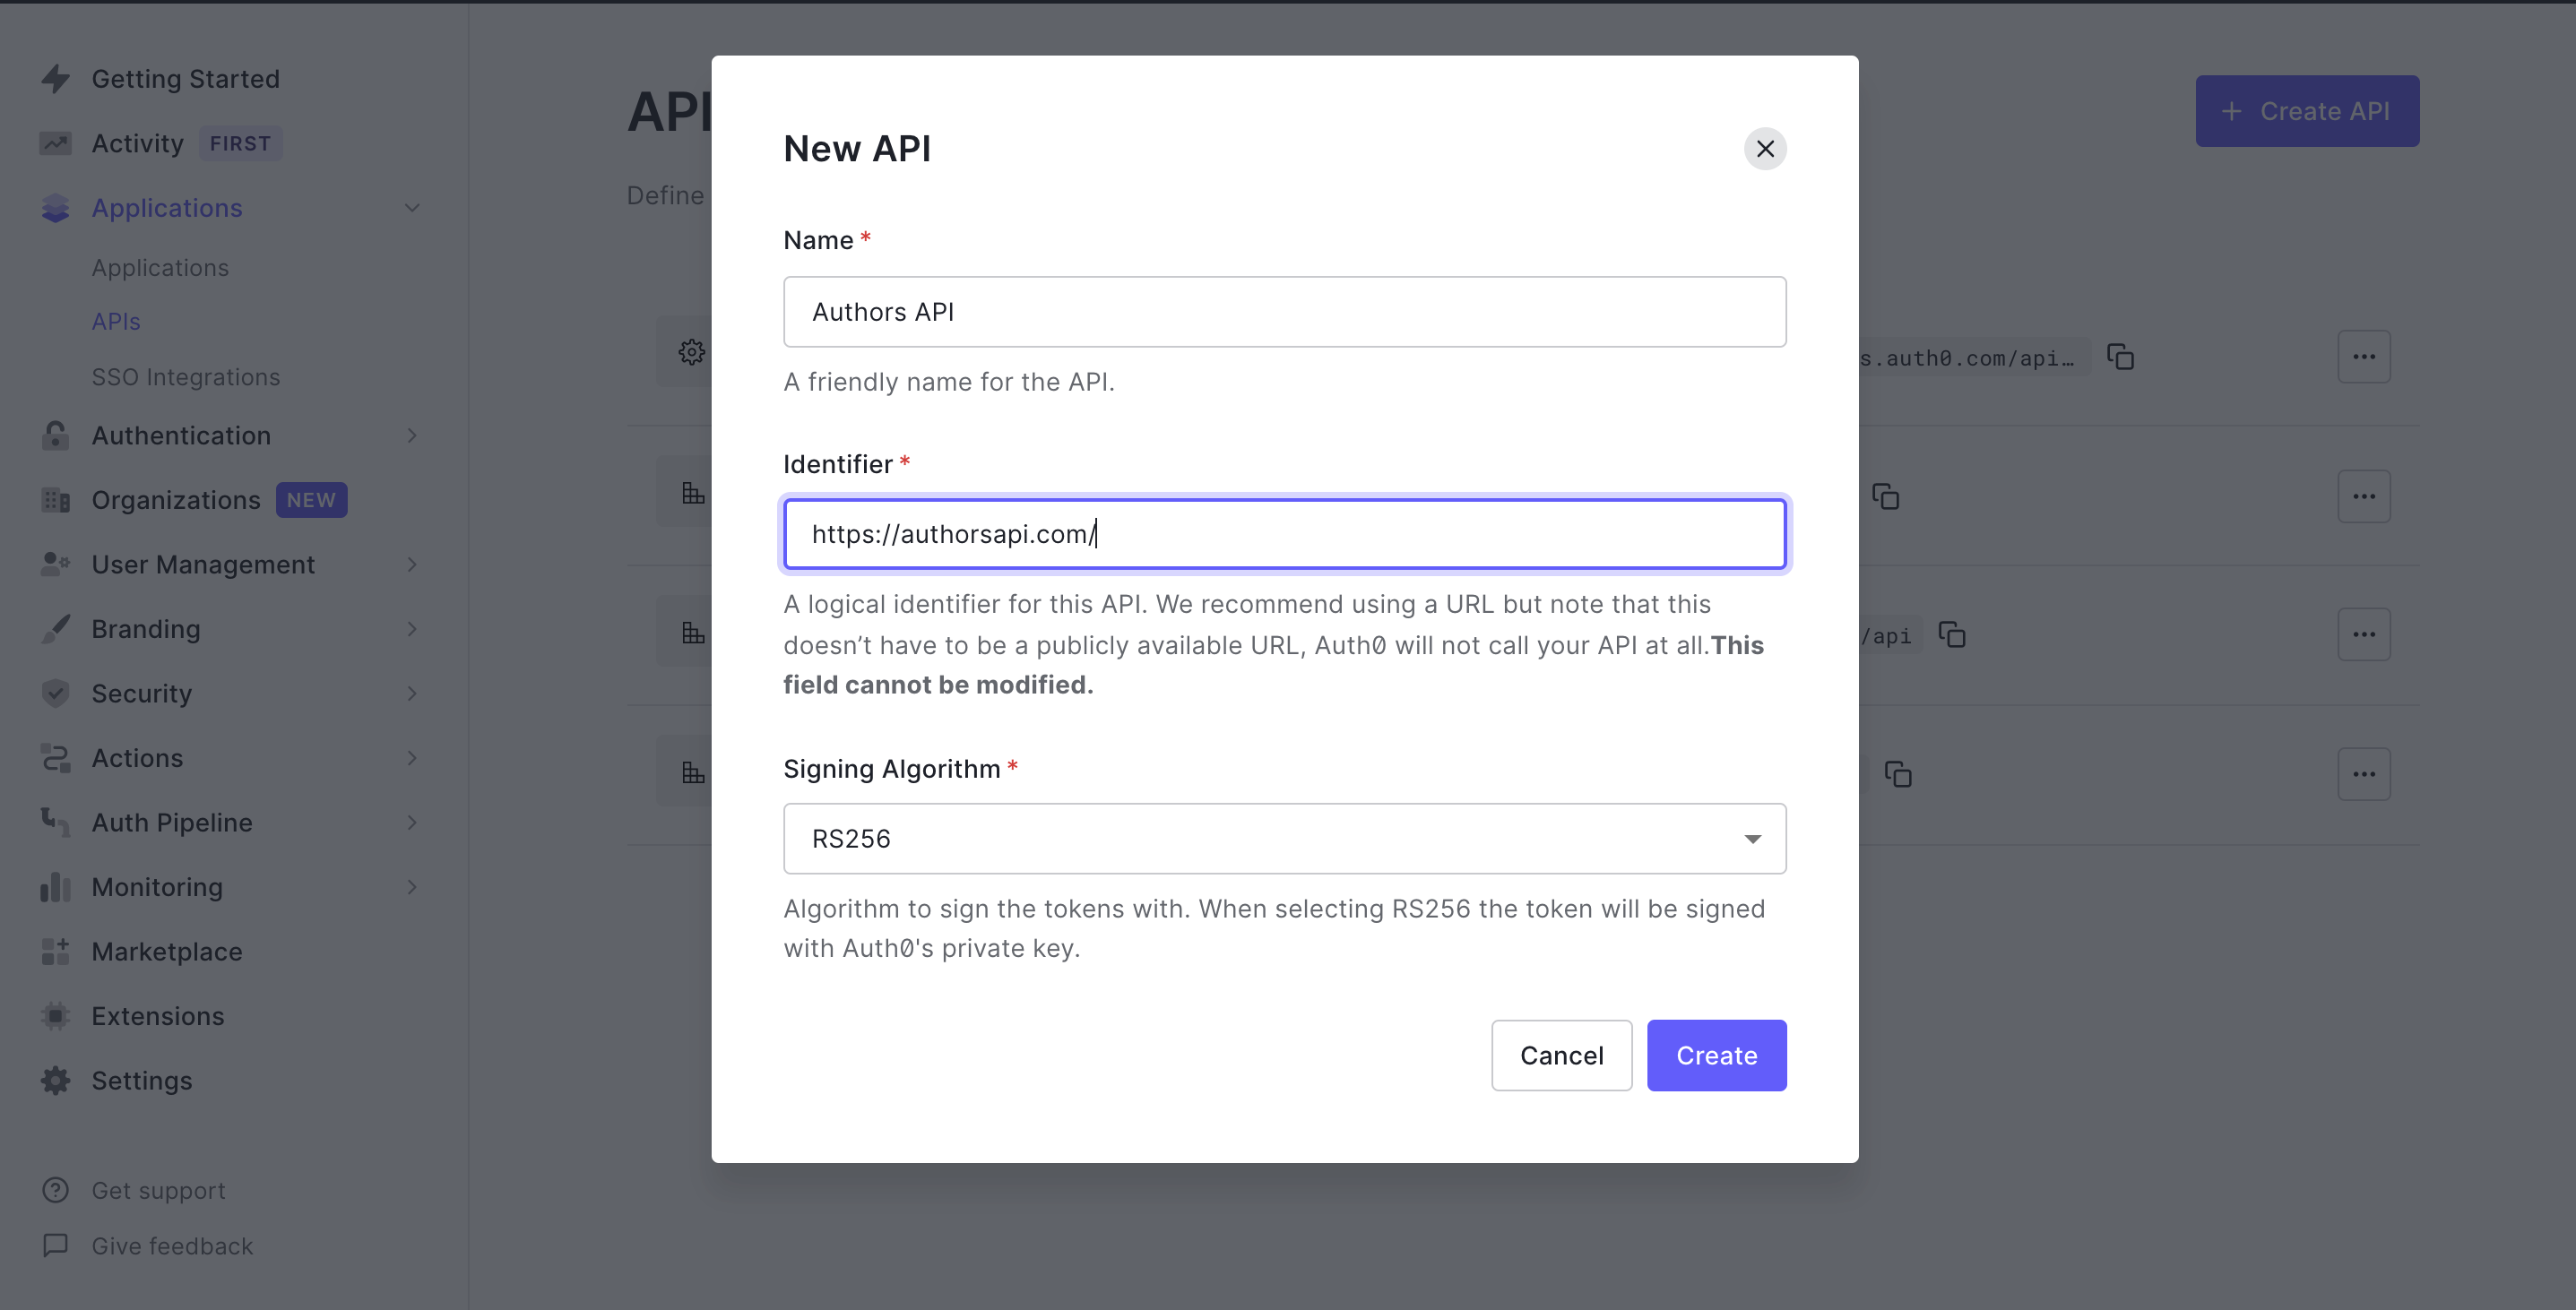
Next, you will need to give your API a Name and an Identifier. The Name can be anything you choose, so make it as descriptive as you want. The Identifier will be used to specify your API and cannot be changed once set. We'll be using it as an audience later when configuring the access token verification.
Here's my setup for the author's API:
- Name: Authors API
- Identifier: https://authorsapi.com.
- Signing algorithm: RS256
Once you have yours filled out, click on the Create API button.
Creating the Authors API
Next, head over to your terminal and install the Auth0 PHP SDK in your project's root directory:
composer require auth0/auth0-php guzzlehttp/guzzle
guzzlehttp/guzzle provides psr/http-client-implementation which the auth0 PHP SDK requires.
Setting up environment variables
In this section, we're going to create the middleware to validate access tokens. The middleware will use some environment variables, so let's set those up first.
Open up .env and add the following:
AUTH0_DOMAIN=https://your-domain.auth0.com/

AUTH0_AUD=https://authorsapi.com
Replace these values with your own from the Auth0 dashboard.
AUTH0_DOMAIN
Click on APIs > Authors API > Quick Start > PHP in the dashboard to find your domain. Copy the value listed for authorized_iss and paste it into .env as AUTH0_DOMAIN.
When specifying the
AUTH0_DOMAINvalue, make sure you add the trailing slash:https://xyz.auth0.com/.
AUTH0_AUD
You can find this value in the Auth0 dashboard in the same place as the domain:
APIs > Quick Start > PHP.
Copy the value listed for valid_audiences and paste it in for AUTH0_AUD. If you followed the naming conventions of this tutorial, it would be https://authorsapi.com.
Create the Auth0 Middleware
Create a new middleware file, Auth0Middleware.php, in the app/Http/Middleware directory. Add the following code to it:
<?php

namespace App\Http\Middleware;

use Auth0\SDK\Auth0;
use Auth0\SDK\Exception\InvalidTokenException;
use Closure;
use Illuminate\Http\Request;
use Illuminate\Http\Response;

class Auth0Middleware {

    /**
     * Run the request filter.
     *
     * @param Request $request
     * @param Closure $next
     * @return mixed
     */
    public function handle(Request $request, Closure $next) {

        $token = $request->bearerToken();

        if (!$token) {
            return response()
                ->json('No token provided', Response::HTTP_UNAUTHORIZED);
        }

        try {
            $this->validateToken($token);
        } catch (InvalidTokenException $exception) {
            return response()
                ->json($exception->getMessage());
        }

        return $next($request);
    }

    public function validateToken($token) {

        $auth0 = new Auth0(
            [
                'domain' => env('AUTH0_DOMAIN'),
                'strategy' => 'api',
                'audience' => [
                    env('AUTH0_AUD'),
                ],
            ]
        );
        $auth0->decode($token);
    }
}
The handle function is the entry point for this middleware. When a route (or group of routes) applies this middleware, the handle function will be called before the request can proceed to the application. For now, we only want to ensure that the request has a valid JWT token.
The first check in the handle function ensures that a bearer token exists for the request. A response is returned with status code 403 and an appropriate error message in the absence of one.
Next, the handle function tries to validate the token by calling the validateToken function - passing the token as an argument. Using the Auth0 SDK, we try to decode the token by calling the decode function. If the token cannot be decoded successfully, an InvalidTokenException will be thrown; hence the validate token is wrapped in a try-catch block. A JSON response is returned with the message and code gotten from the exception when the exception is caught.
If all of this passes, the token is decoded, and the middleware allows the HTTP request to execute.
While the
decodefunction returns an object with which we can interact, we do not need that at the moment; hence the return value is ignored.
Assign middleware to routes
Now that the middleware is set up, we need to add it to our routes. The first step is to assign the middleware a short-hand key in bootstrap/app.php file's call to the $app->routeMiddleware() method.
Go ahead and open up bootstrap/app.php and uncomment this line of code:
...
// $app->routeMiddleware([
//     'auth' => App\Http\Middleware\Authenticate::class,
// ]);
...
Once uncommented, replace the Authenticate::class portion with Auth0Middleware::class like so:
$app->routeMiddleware([
    'auth' => App\Http\Middleware\Auth0Middleware::class,
]);
This will allow us to use the Auth0Midddleware that we just created. And now we can use the middleware key in the route options array in the routes/web.php file like so:
...

$router->group(
    ['prefix' => 'api', 'middleware' => 'auth'],

    function () use ($router) {

        $router->get(
            'authors',
            ['uses' => 'AuthorController@showAllAuthors']
        );

        $router->get(
            'authors/{id}',
            ['uses' => 'AuthorController@showOneAuthor']
        );

        $router->post(
            'authors',
            ['uses' => 'AuthorController@create']
        );

        $router->delete(
            'authors/{id}',
            ['uses' => 'AuthorController@delete']
        );

        $router->put(
            'authors/{id}',
            ['uses' => 'AuthorController@update']
        );
    }
);
Now, if a request is made to any endpoint, it first runs the Auth0Middleware. If the request doesn't have a valid access token or no token at all, it returns an error. Let's try all of this out.
Accessing any endpoint without an authorization header
When accessing the endpoint without an authorization header, we receive a "no token provided" message.
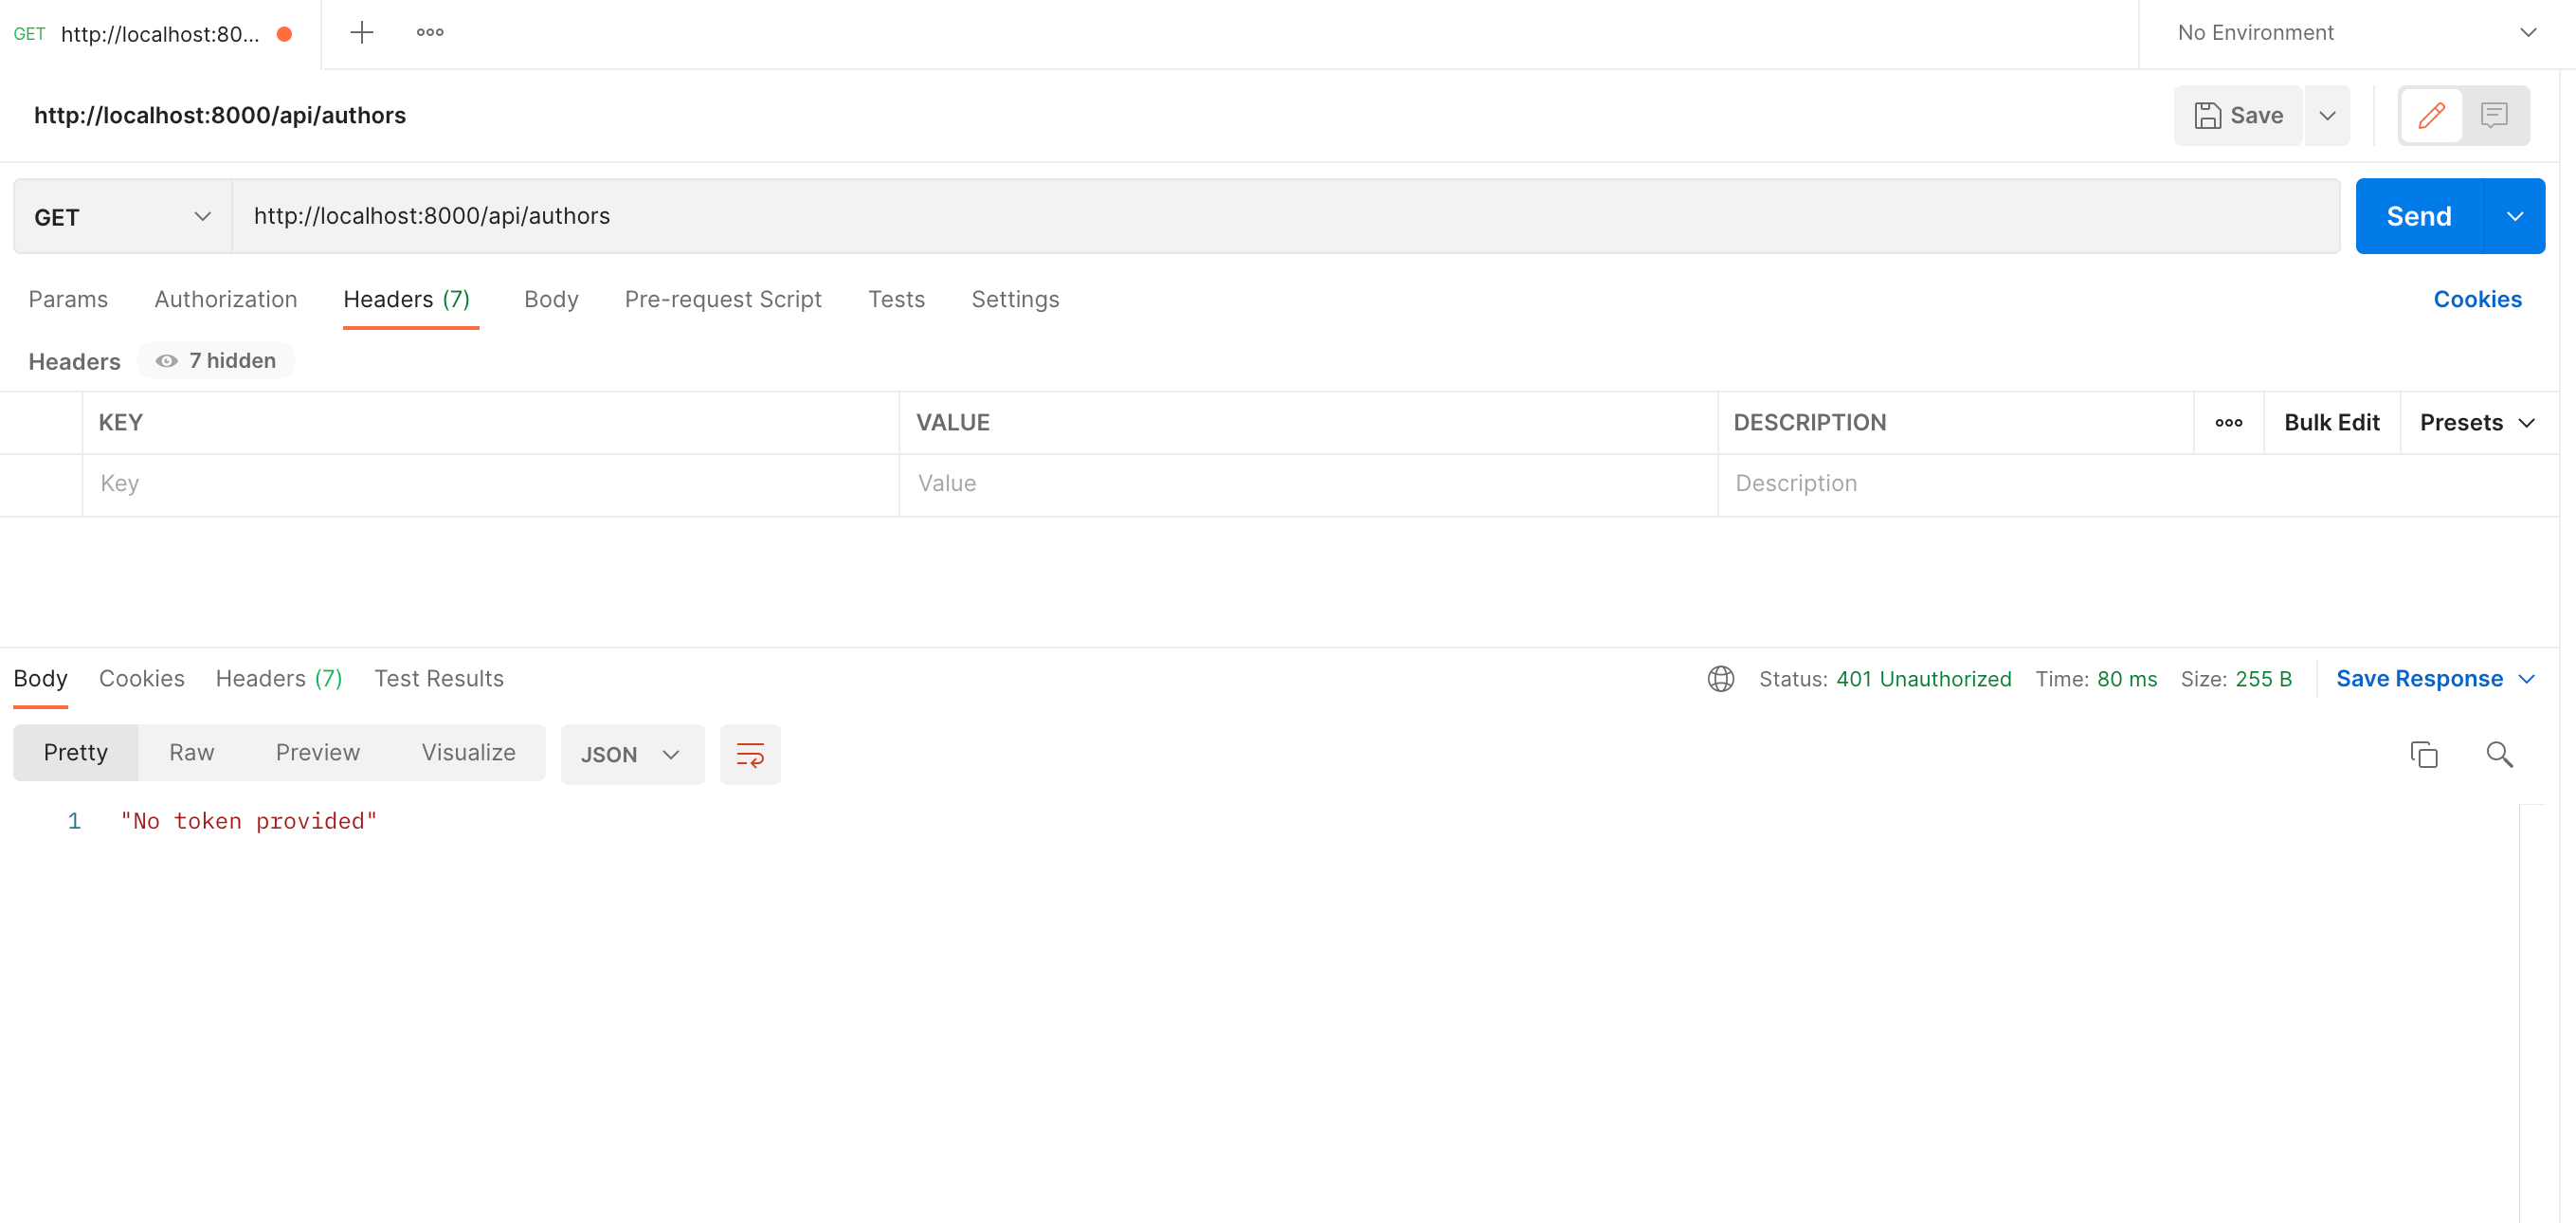
Accessing any endpoint without any token provided
When accessing the endpoint without a token, we receive a "no token provided" message.
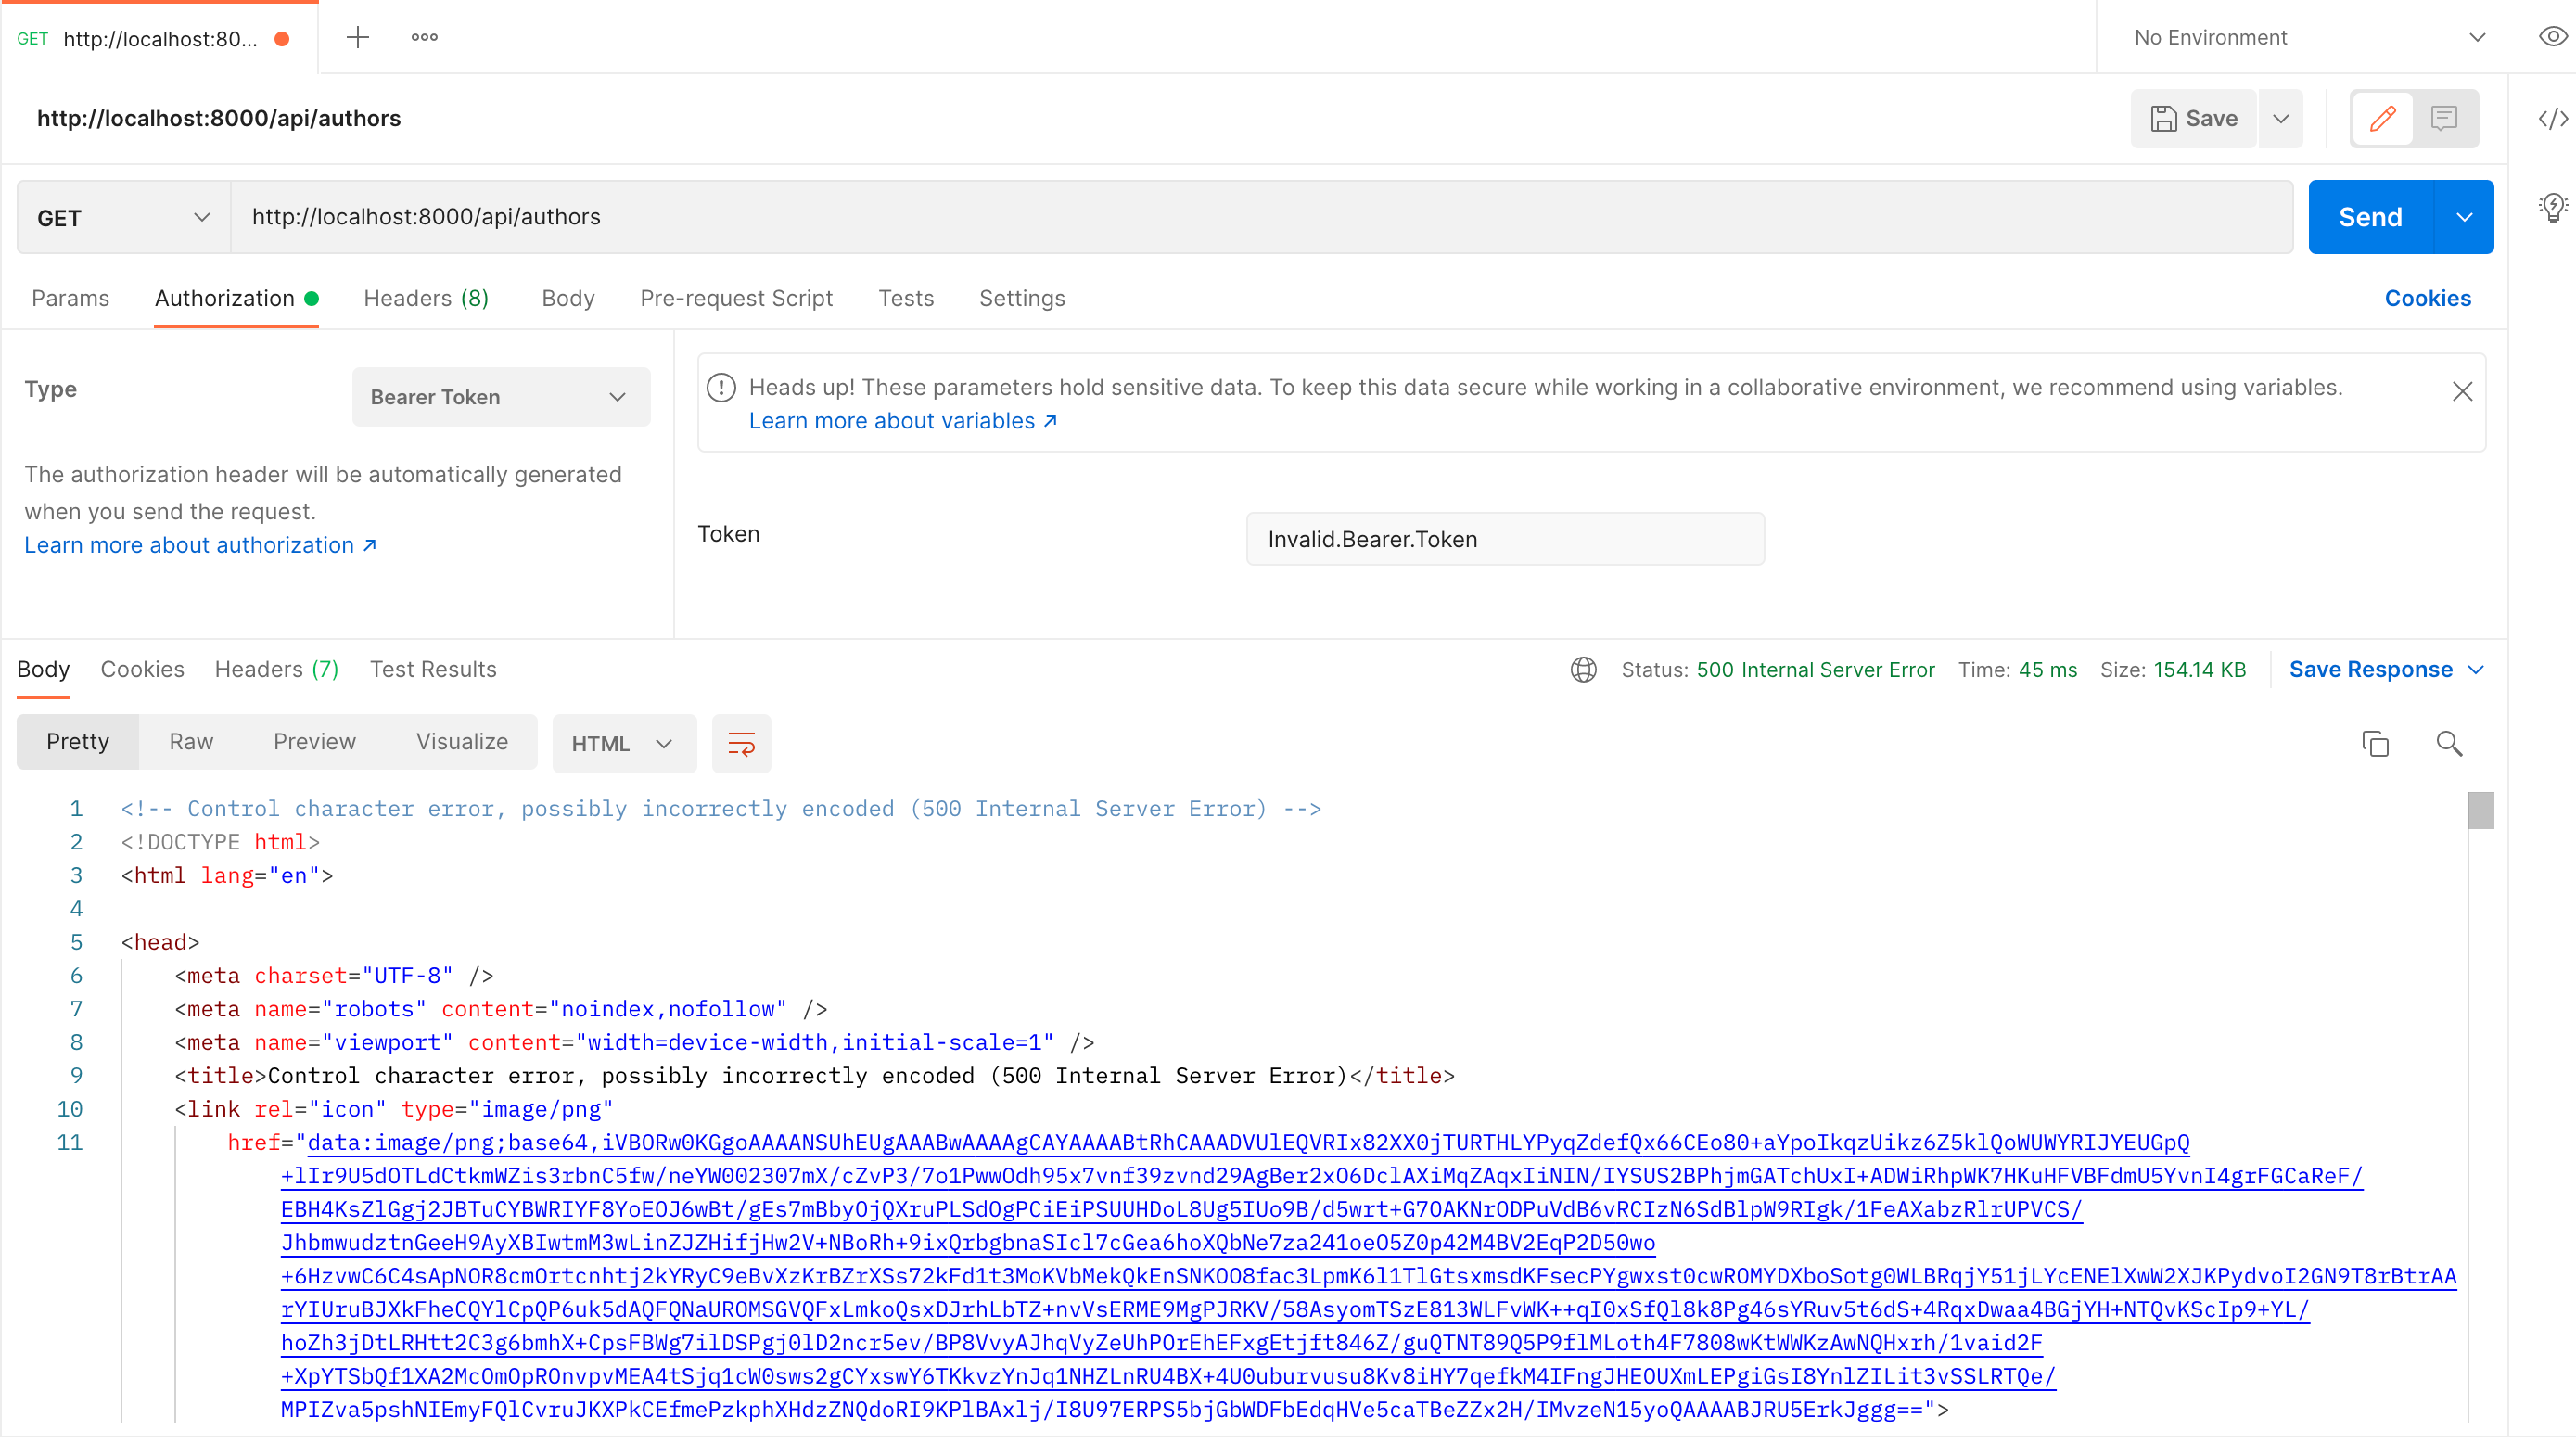
Accessing any endpoint without a valid access token
When accessing endpoint without a valid access token:
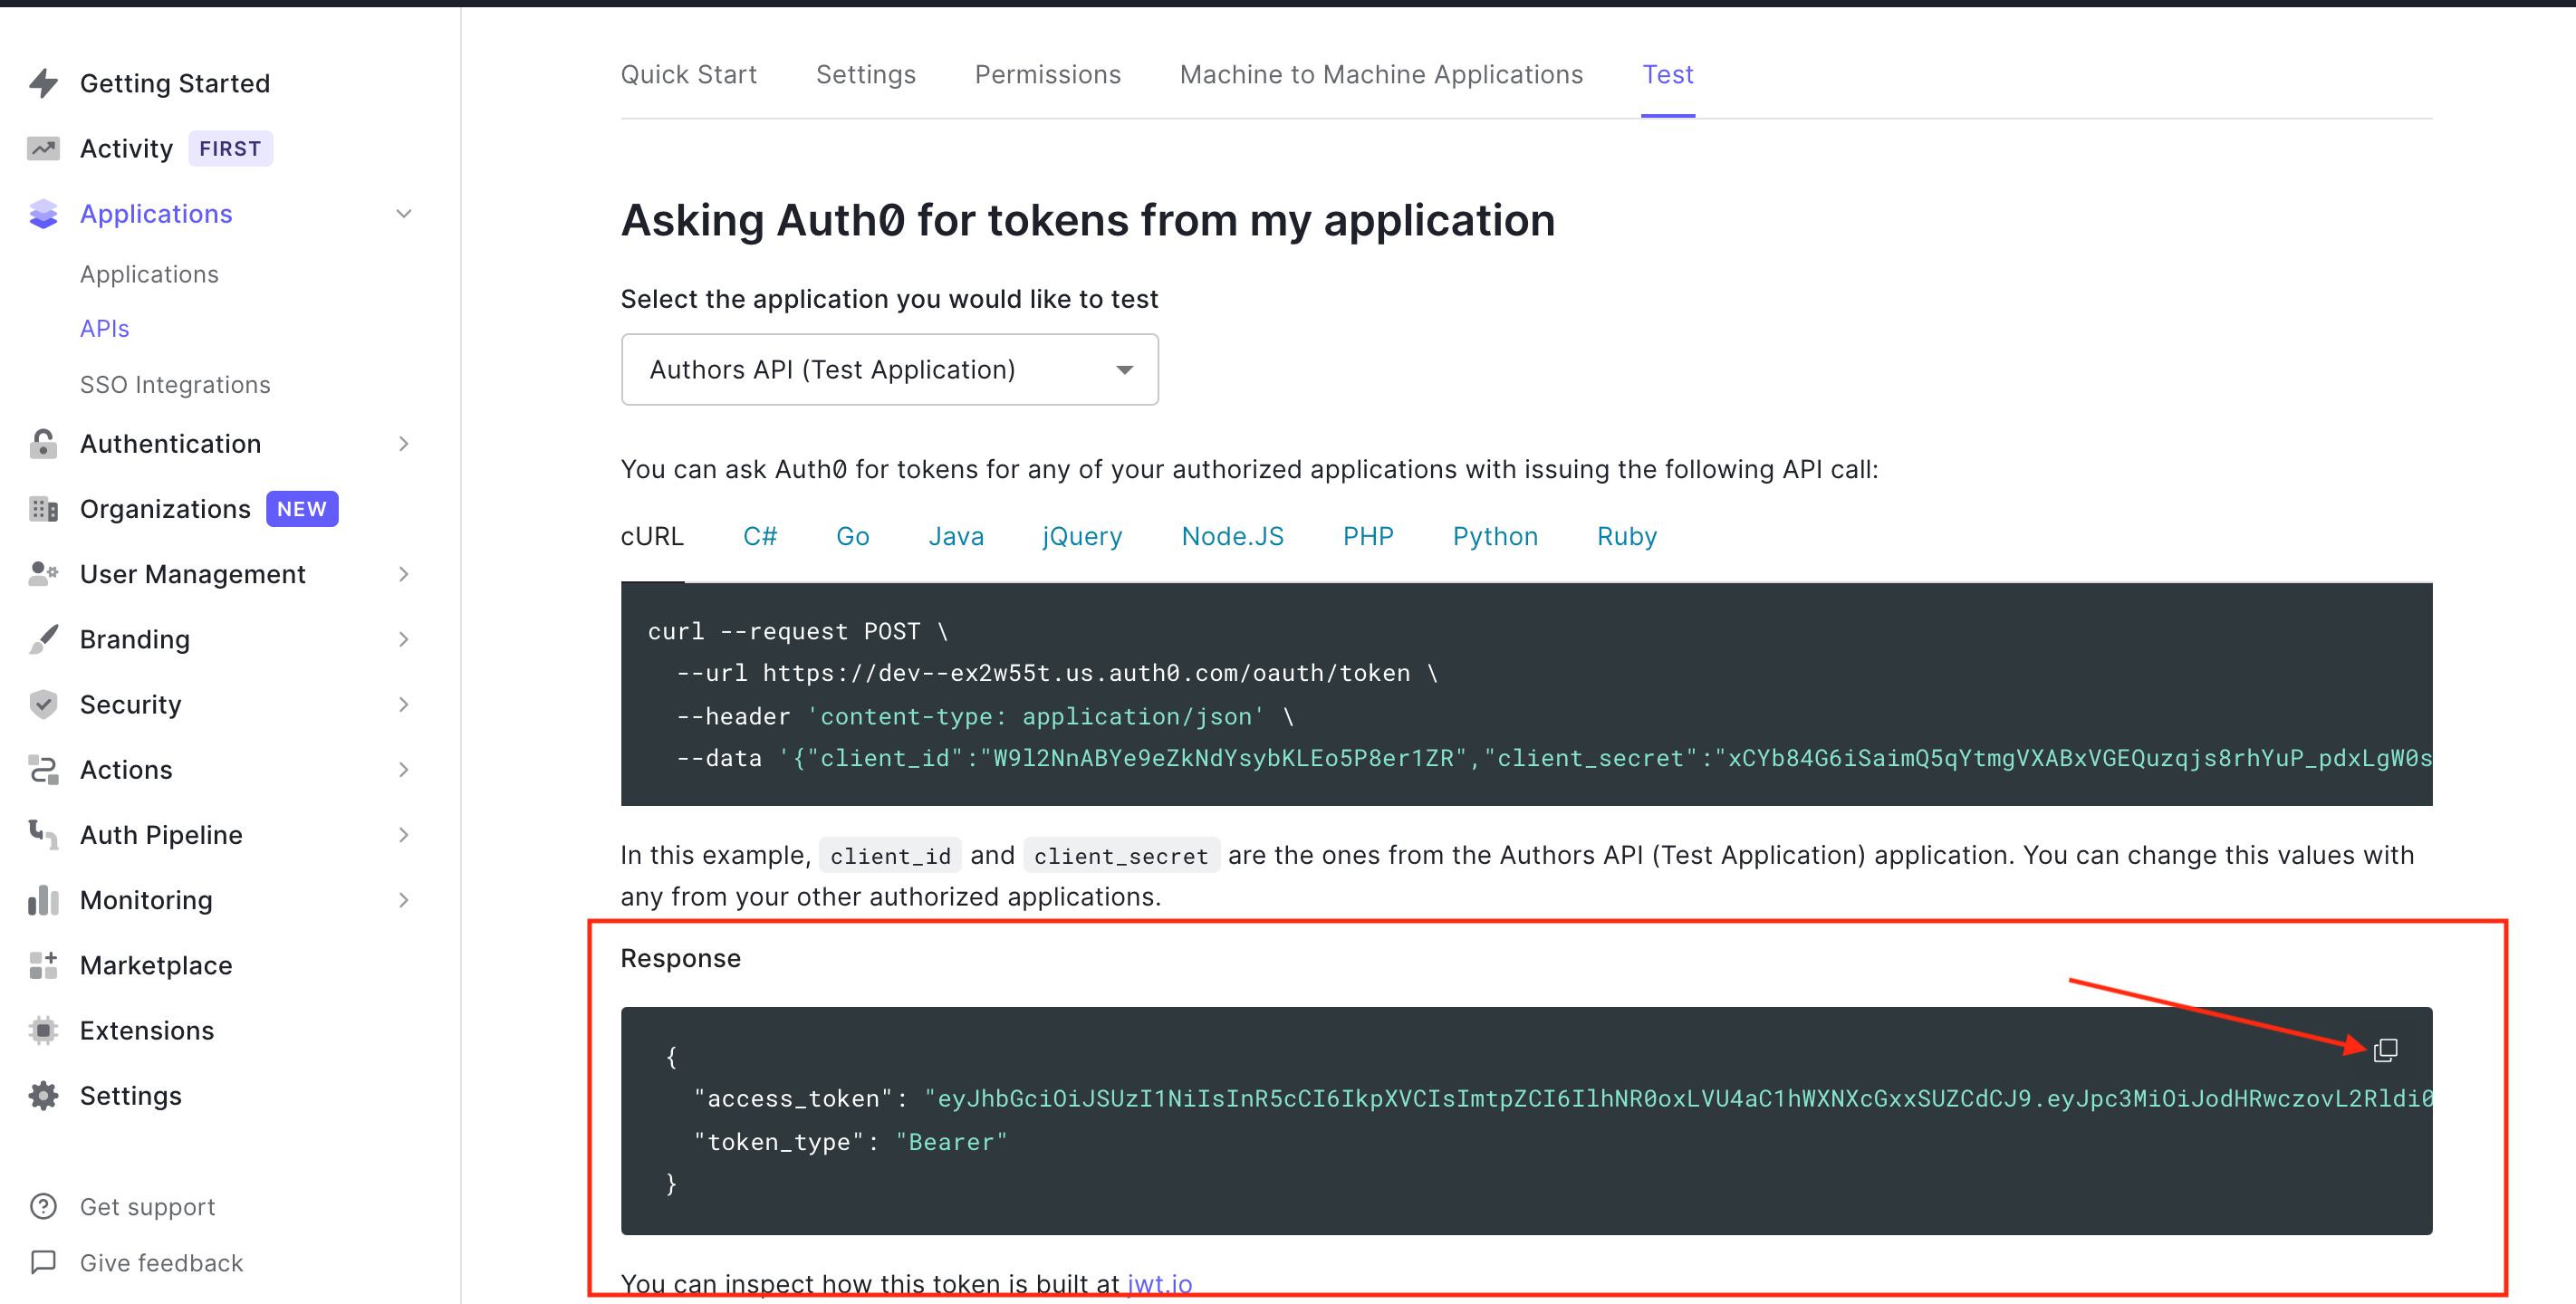
Now, let's test it with a valid access token. Head over to the test tab of your newly created API on your Auth0 dashboard.
Grab the Access token from the Test tab
Grab the Access Token
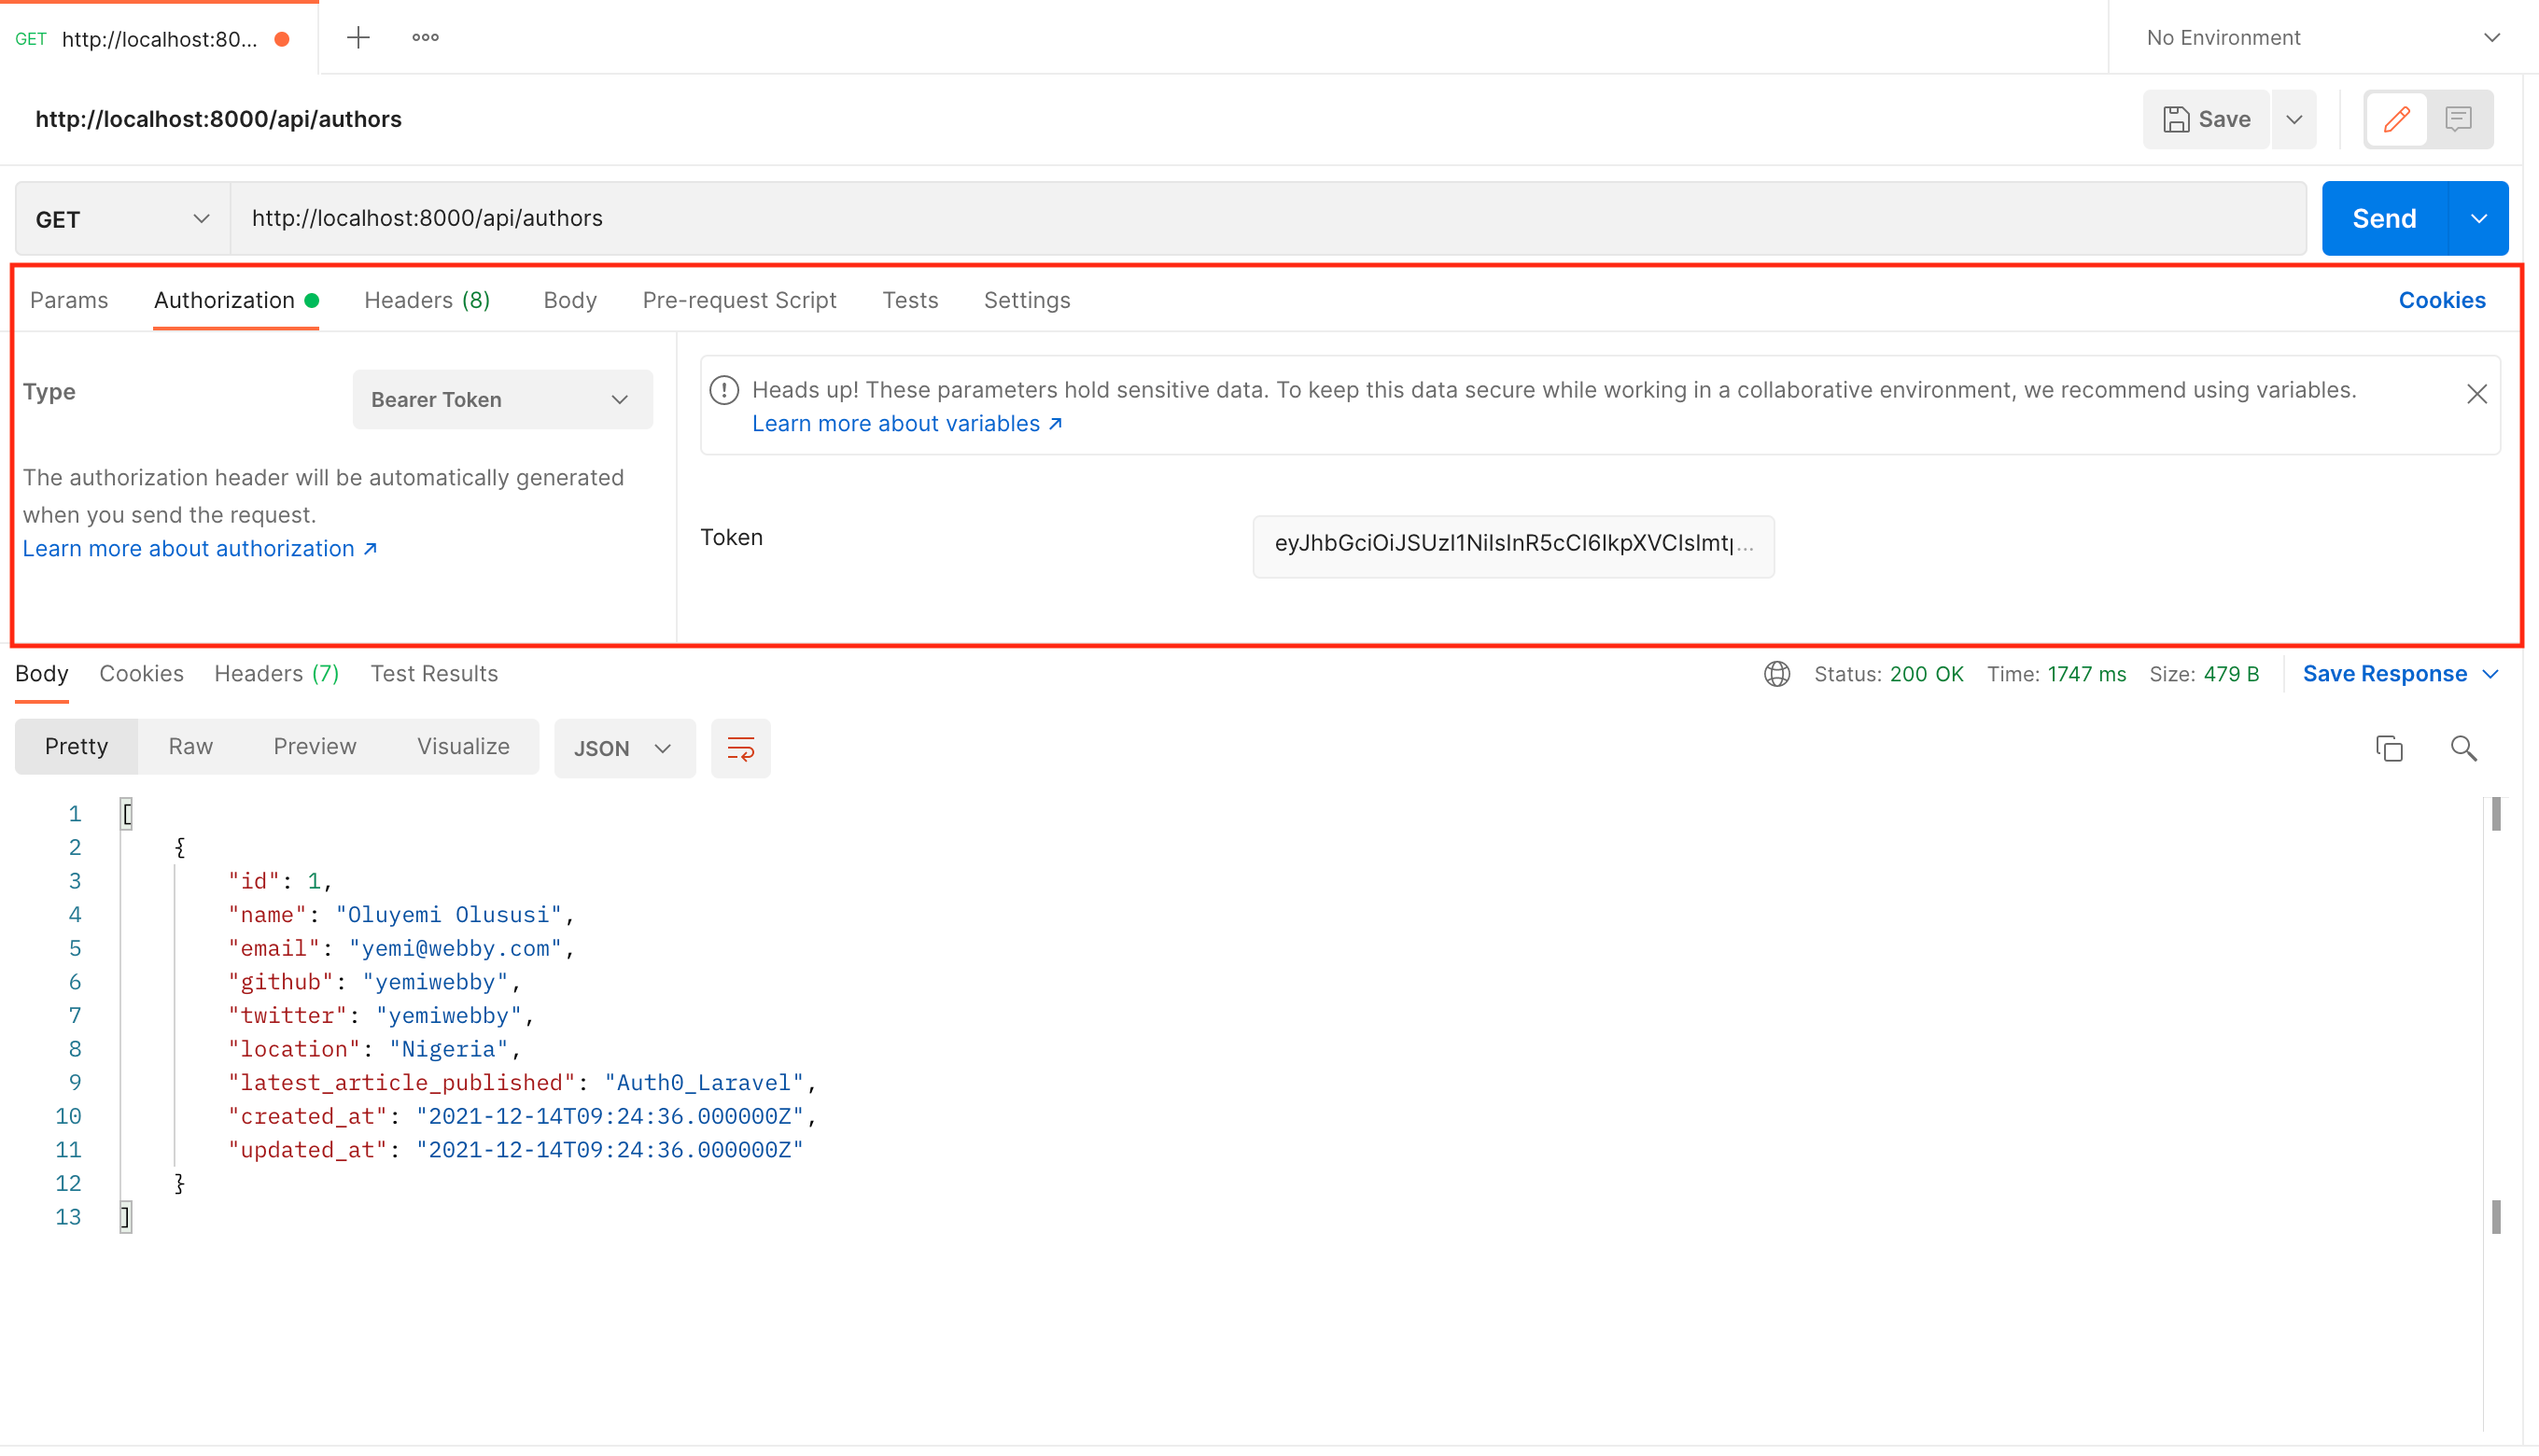
Now use this access token in Postman by sending it as an Authorization header to make a POST request to the api/authors endpoint.
Accessing the endpoint securely
Adding permissions
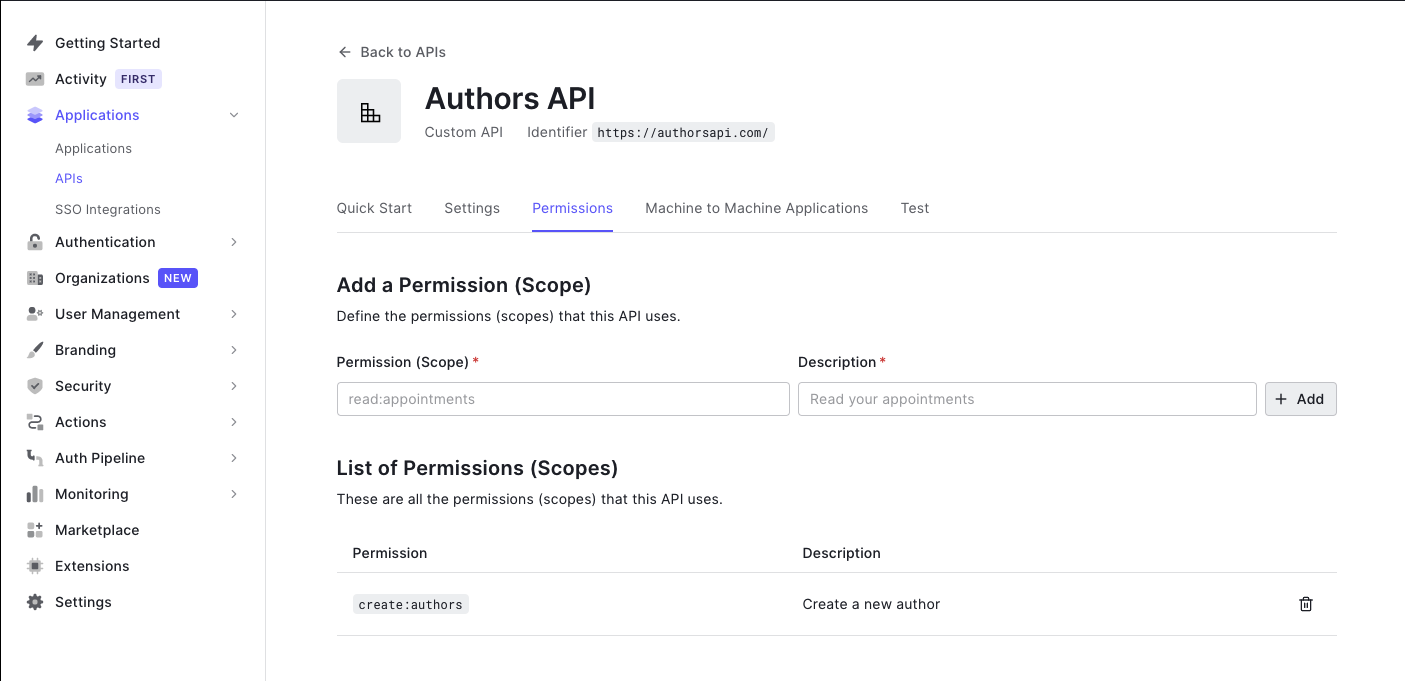
Currently, this single access token will allow an application to run any requests, as long as it has a valid token. Eventually, you may want to issue certain permissions with the access token. Let's try it out.
In the Auth0 dashboard, find the API we've been using and click on Permissions. Create a new scope that will grant permission to create a new author (e.g. create:authors). Then add a short description of what that scope does and click "Add".
Now our API expects that when an application makes a request to create a new author, it must also send an access token that includes the create:authors scope. To check for this, we need to update our middleware so that it checks the scope in the access token. Open up Auth0Middleware.php and replace it with:
<?php

namespace App\Http\Middleware;

use App\Exceptions\InsufficientScopeException;
use Auth0\SDK\Auth0;
use Auth0\SDK\Exception\InvalidTokenException;
use Closure;
use Illuminate\Http\Request;
use Illuminate\Http\Response;

class Auth0Middleware {

    public function handle(
        Request $request,
        Closure $next,
        ?string $requiredScope = null
    ) {

        $token = $request->bearerToken();
        if (!$token) {
            return response()
                ->json('No token provided', Response::HTTP_UNAUTHORIZED);
        }

        try {
            $this->validateToken($token, $requiredScope);
        } catch (InsufficientScopeException | InvalidTokenException $exception) {
            return response()
                ->json($exception->getMessage(), $exception->getCode());
        }

        return $next($request);
    }

    public function validateToken($token, ?string $requiredScope) {

        $auth0 = new Auth0(
            [
                'domain' => env('AUTH0_DOMAIN'),
                'strategy' => 'api',
                'audience' => [
                    env('AUTH0_AUD'),
                ],
            ]
        );
        $decodedToken = $auth0->decode($token);
        if (!empty($requiredScope)) {
            $this->ensureTokenHasScope($decodedToken->toArray(), $requiredScope);
        }
    }

    private function ensureTokenHasScope(array $decodedToken, string $requiredScope) {

        $tokenScope = $decodedToken['scope'] ?? '';
        if (empty($tokenScope) || !$this->tokenHasScope($tokenScope, $requiredScope)) {

            throw new InsufficientScopeException;
        }

    }

    private function tokenHasScope(string $scopeString, string $requiredScope)
    : bool {

        $tokenScopes = explode(' ', $scopeString);

        return in_array($requiredScope, $tokenScopes);
    }
}
We've made a few changes to the middleware. First, we added a third parameter named requiredScope to the handle function. When this value is not null, our middleware should check and ensure that the provided token has that scope.
We also modified the validateToken function. Using the decoded token returned by the decode function, we check for the scopes in the token. To do this, we split the string value for scope in the decoded token and check if requiredScope is present in the array of split values. If not, we throw an InsufficientScopeException which is caught by the handle function and handled accordingly.
Next, we need to declare the InsufficientScopeException class. Create a new file in the app/Exceptions folder named InsufficientScopeException.php. Add the following to the newly created file.
<?php

namespace App\Exceptions;

use Exception;
use Illuminate\Http\Response;

class InsufficientScopeException extends Exception {

    public function __construct() {

        parent::__construct('Insufficient scope', Response::HTTP_FORBIDDEN);
    }
}
Next, we need to update our router and specify the required scope for the route to create authors. To do this, we append the scope to the middleware name (separated by a :). Modify routes/web.php to match the following.
<?php

/** @var Router $router */

/*
|--------------------------------------------------------------------------
| Application Routes
|--------------------------------------------------------------------------
|
| Here is where you can register all of the routes for an application.
| It is a breeze. Simply tell Lumen the URIs it should respond to
| and give it the Closure to call when that URI is requested.
|
*/

use Laravel\Lumen\Routing\Router;

$router->get('/', function () use ($router) {

    return $router->app->version();
});

$router->group(
    ['prefix' => 'api', 'middleware' => 'auth'],

    function () use ($router) {

        $router->get(
            'authors',
            ['uses' => 'AuthorController@showAllAuthors']
        );

        $router->get(
            'authors/{id}',
            ['uses' => 'AuthorController@showOneAuthor']
        );

        $router->delete(
            'authors/{id}',
            ['uses' => 'AuthorController@delete']
        );

        $router->put(
            'authors/{id}',
            ['uses' => 'AuthorController@update']
        );
    }
);

$router->post(
    'api/authors',
    [
        'middleware' => 'auth:create:authors',
        'uses' => 'AuthorController@create',
    ]
);
Notice we removed the
postroute from the group. We did this to allow us to pass the custom scope to the middleware.
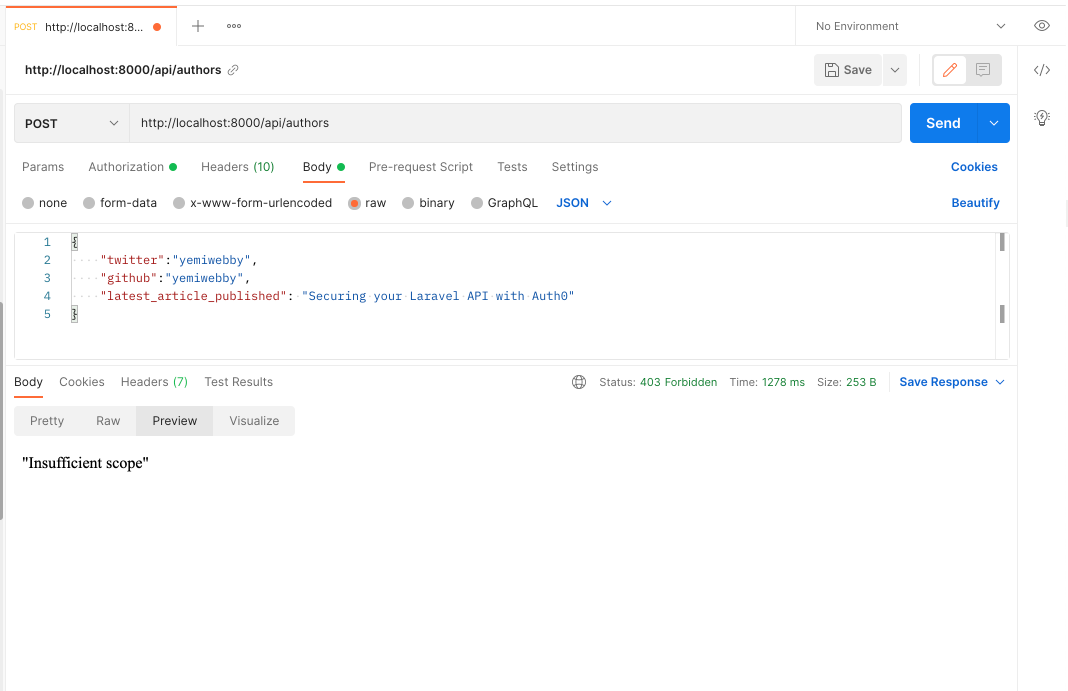
Now, if you try to create a new author in Postman using that same token as before, you'll receive the "Insufficient scope" message.
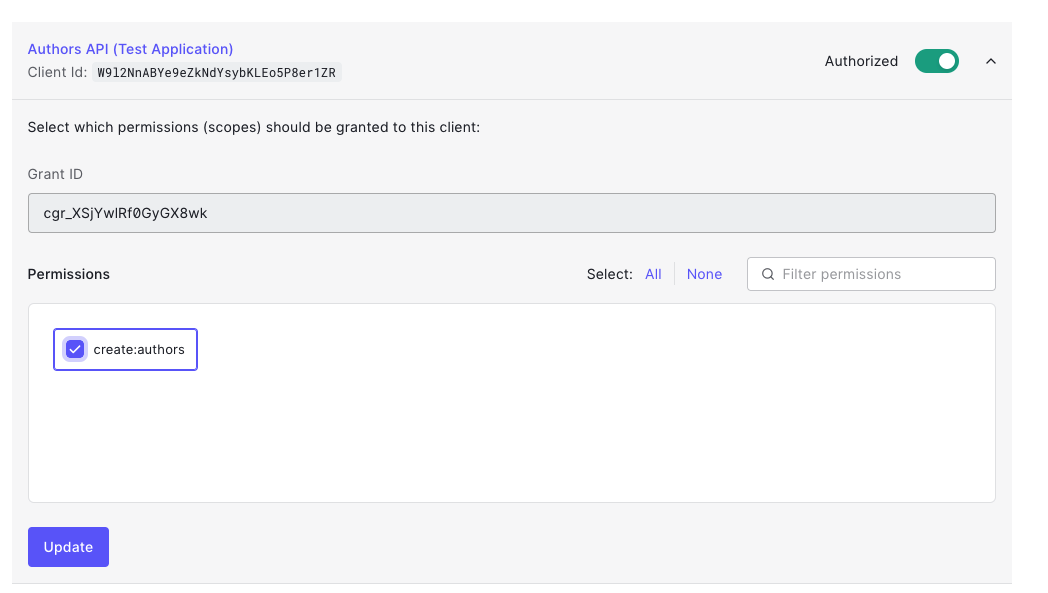
To test that it works, make sure you're on the page with your API in the Auth0 dashboard and then go to the Permissions tab. Click on Machine to Machine Applications and find the API Application you've been using. Make sure the Authorized toggle is on, and then click on the arrow. Now select the create:authors scope and press "Update".
The permission for create:authors has been added to our test token. Head back to the "Test" tab and press "Copy token" to get the updated one.
Paste that token into the Authorization header as you did before (make sure you have Bearer before it), try the POST request again, and now it should have worked!
Adding a front-end
This is just an example of how to create API access tokens. Once you're ready to actually issue and use them, you need to create a front-end. Here are some amazing React and Vue.js authentication tutorials that cover how you can accomplish that.
Conclusion
Well done! You have learned how to build a rest API with the powerful PHP micro-framework Lumen and secure it using JWTs. Need to use PHP to build your API or micro-service? I'd bet on Lumen as the tool of choice for speed and ease of use.
As you've seen, Auth0 can help secure your API with ease. Auth0 provides more than just username-password authentication. It provides features like multifactor auth, breached password detection, anomaly detection, enterprise federation, single sign-on (SSO), and more.
Sign up today so you can take the stress out of authentication and instead focus on building unique features for your app.
The code for this article is available on GitHub. Happy coding!
About the author

Olususi Oluyemi
Software Engineer / Technical Content Creator