

Auth0 is a service that allows you to easily authenticate the users of your application using methods like social network logins and passwordless systems.
Pusher is a platform that allows you to build scalable realtime apps via WebSockets with a simple Publish/Subscribe model and other features.
Together, they make a powerful combination. For example, imagine if you could notify other systems when a login happens in realtime and with just a few lines of code. This is possible when you use Auth0 and Pusher together.
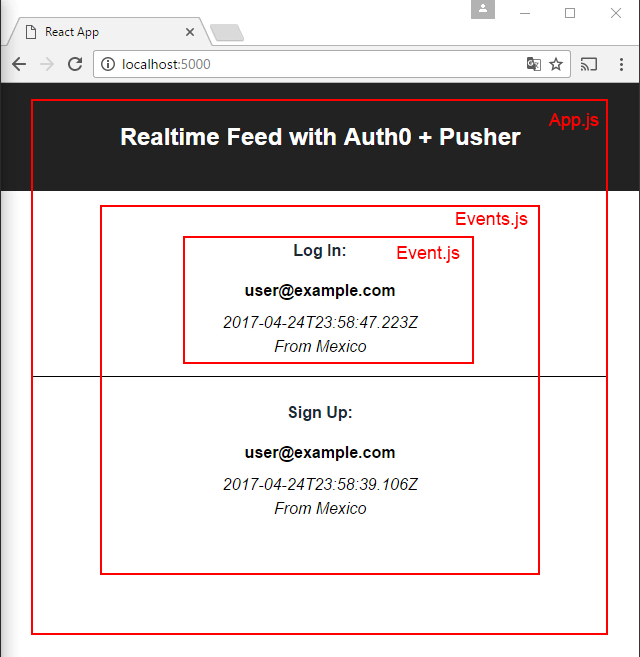
In this tutorial, we'll set up a Auth0 rule that will send login/signup events to Pusher so they can be shown in a feed in realtime. This is what we'll be building:
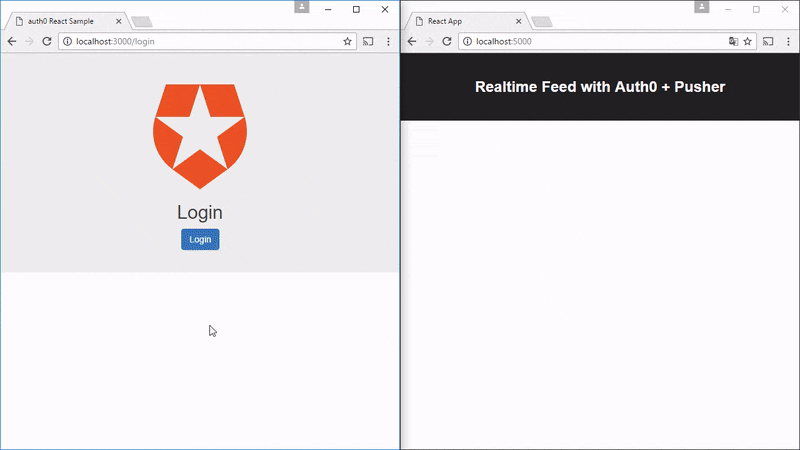
First, there's a login app that sends log in/signup requests to Auth0. If the user authenticates successfully, a rule is executed. This rule is a JavaScript function that sends the user information to a Pusher channel so another app can show it in a feed in realtime. We'll use Create React App to create this feed application.
For reference, you can find the source code of the Auth0 rule in this gist and the source code of the feed in this GitHub repo.
Let's get started.
Setting up your Pusher application
Create a free account at https://pusher.com/signup.
When you create an app, you'll be asked to enter some configuration options:
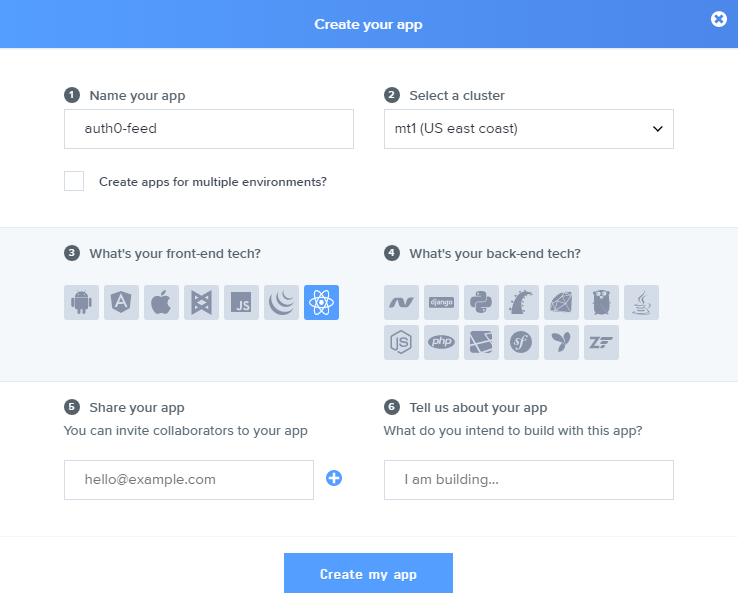
Enter a name for your app and choose React as your front-end tech. There's no need to choose a back-end tech for now. This will give you some sample code to get you started:
But don't worry, this won't lock you into this specific set of technologies as you can always change them. With Pusher, you can use any combination of libraries.
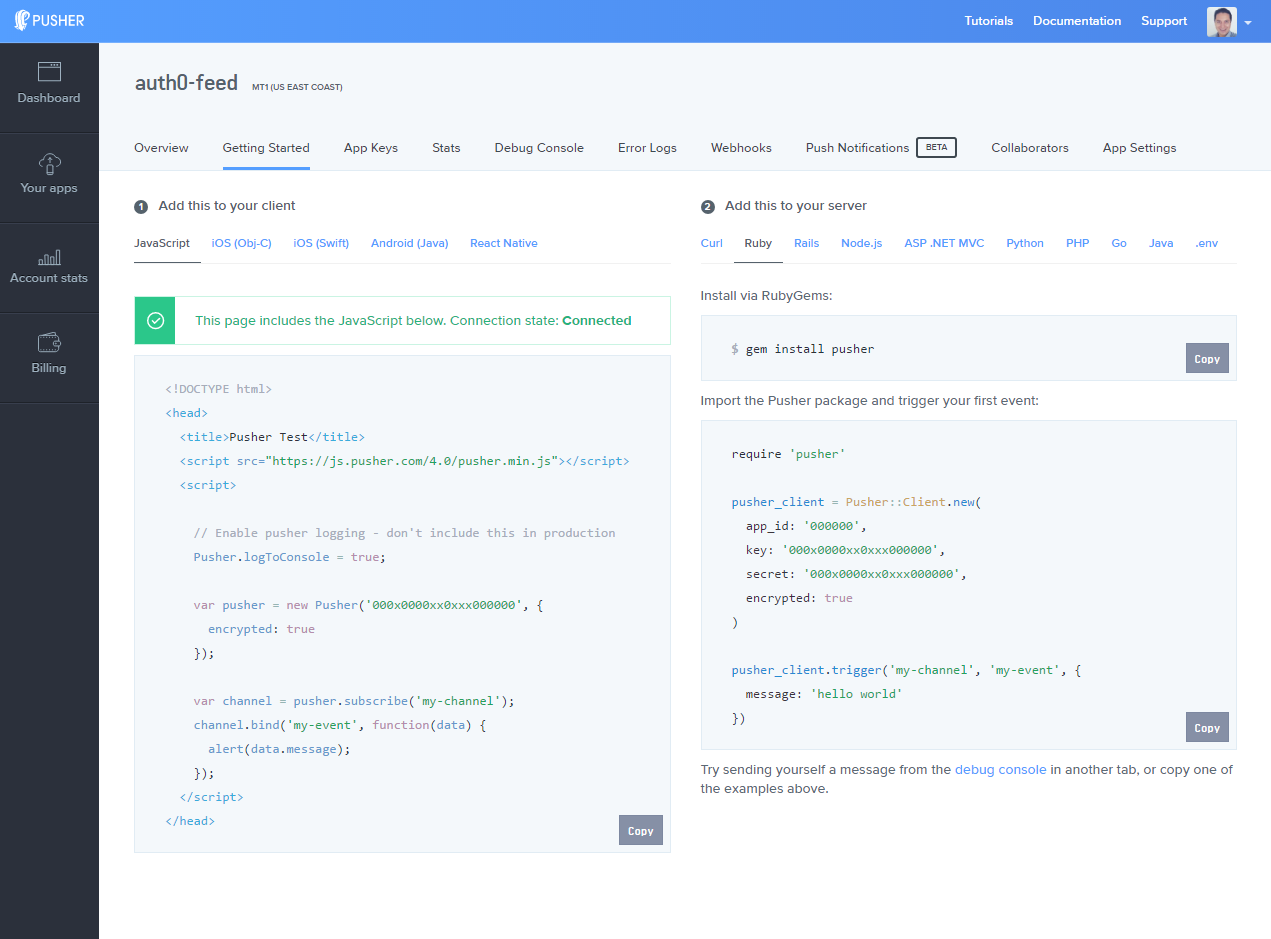
Next, copy your cluster ID (next to the app title, in this example mt1), App ID, Key, and Secret information as we'll need them later. You can also find them in the App Keys tab.
Setting up an Auth0 rule
Create a free account at https://auth0.com/signup.
Auth0 offers a generous free tier to get started with modern authentication.
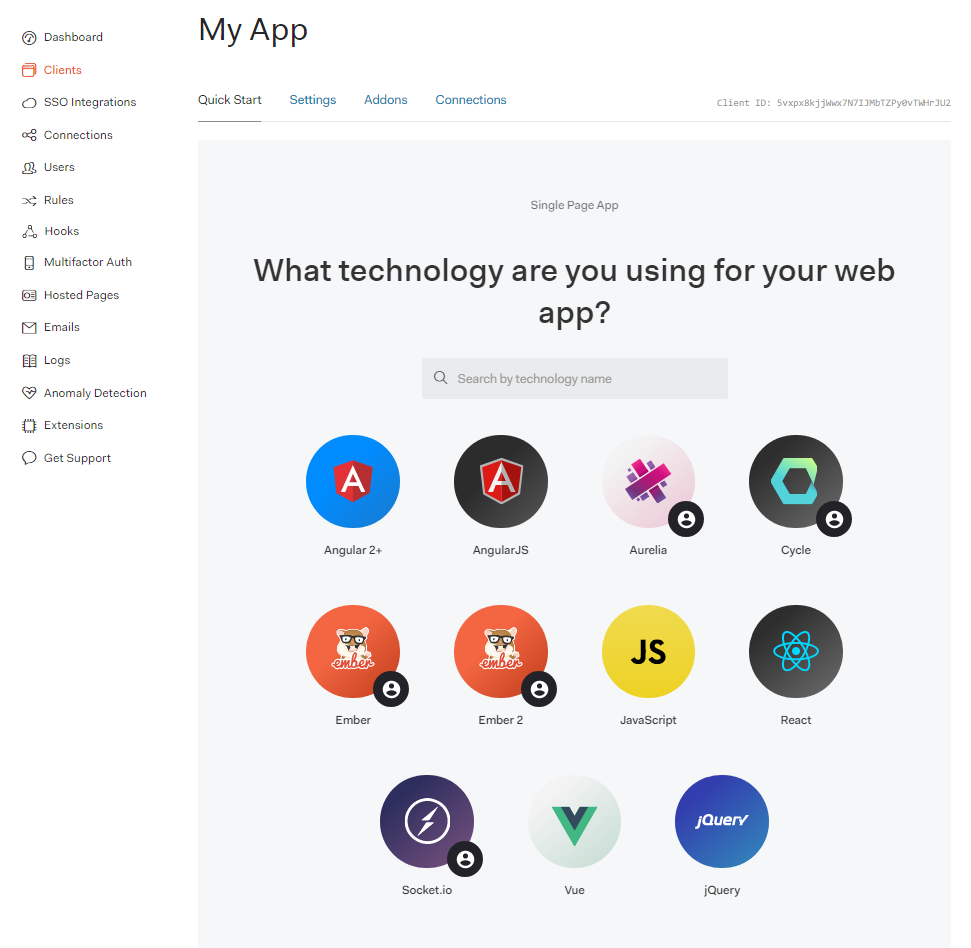
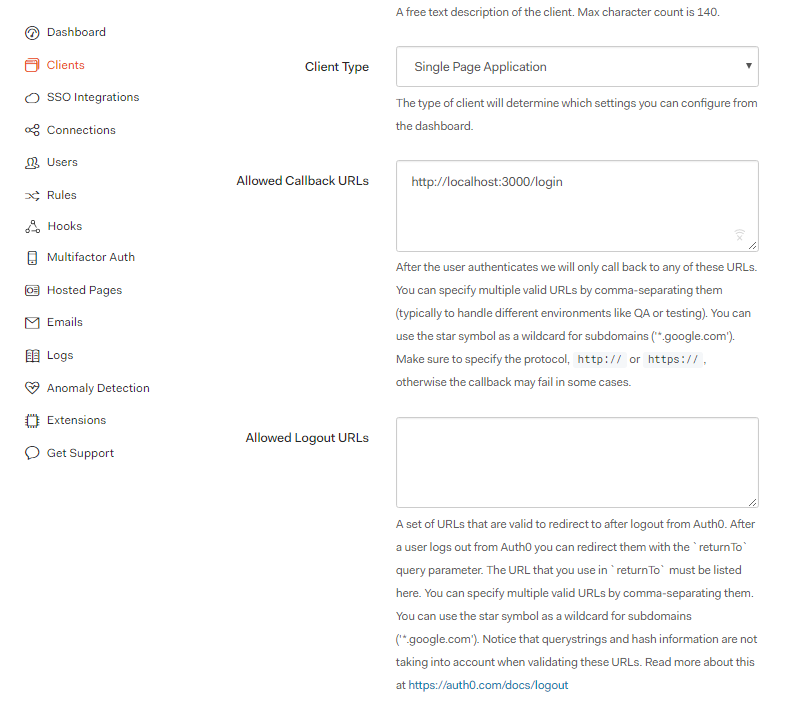
Next, create a client. Give it a name and choose the Single Page Web Application type.

For the tech, choose React.
This will give a sample project and some instructions to get you started. Download the project.

Next, go to the Settings tab and in the Allowed Callback URLs text field, enter http://localhost:3000/login (or whatever host and port you're planning to use to host your login app). This is required so Auth0 can authenticate users in your app and send a callback with the success or error.
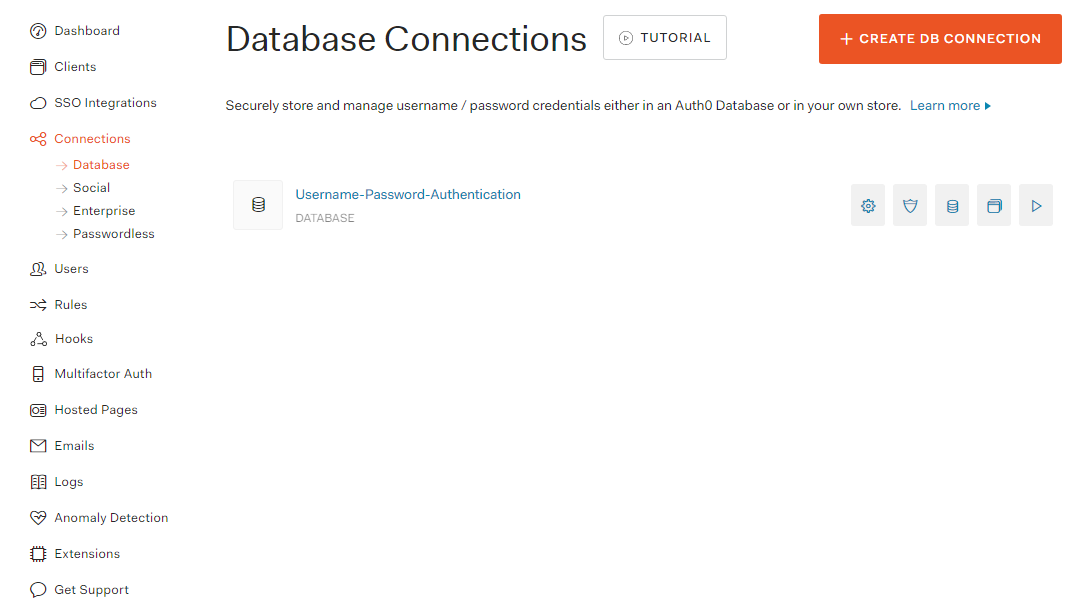
A database to store your users is enabled by default. You see it in the Connections->Database section.
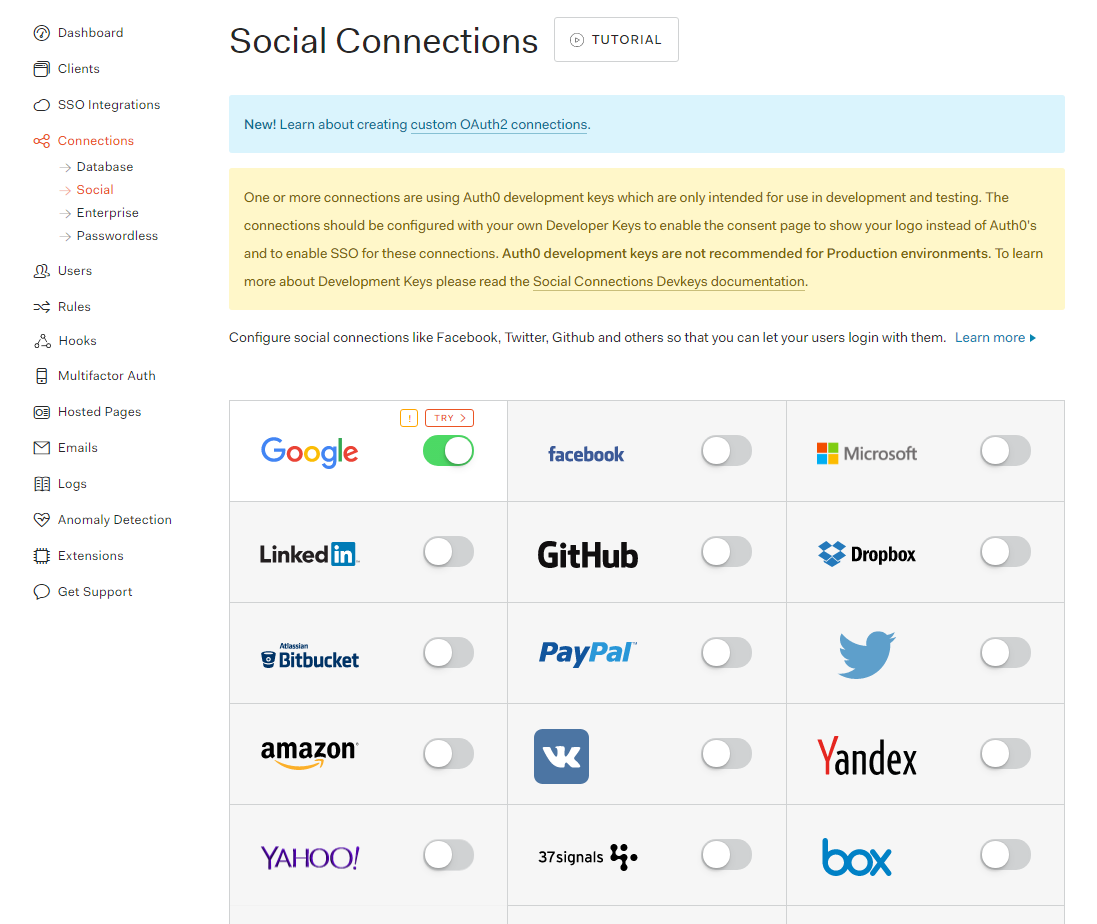
Also, for social logins, only Google is enabled by default with some sample development keys. You can see it in the Connections->Social section.
Now go to the Rules section.
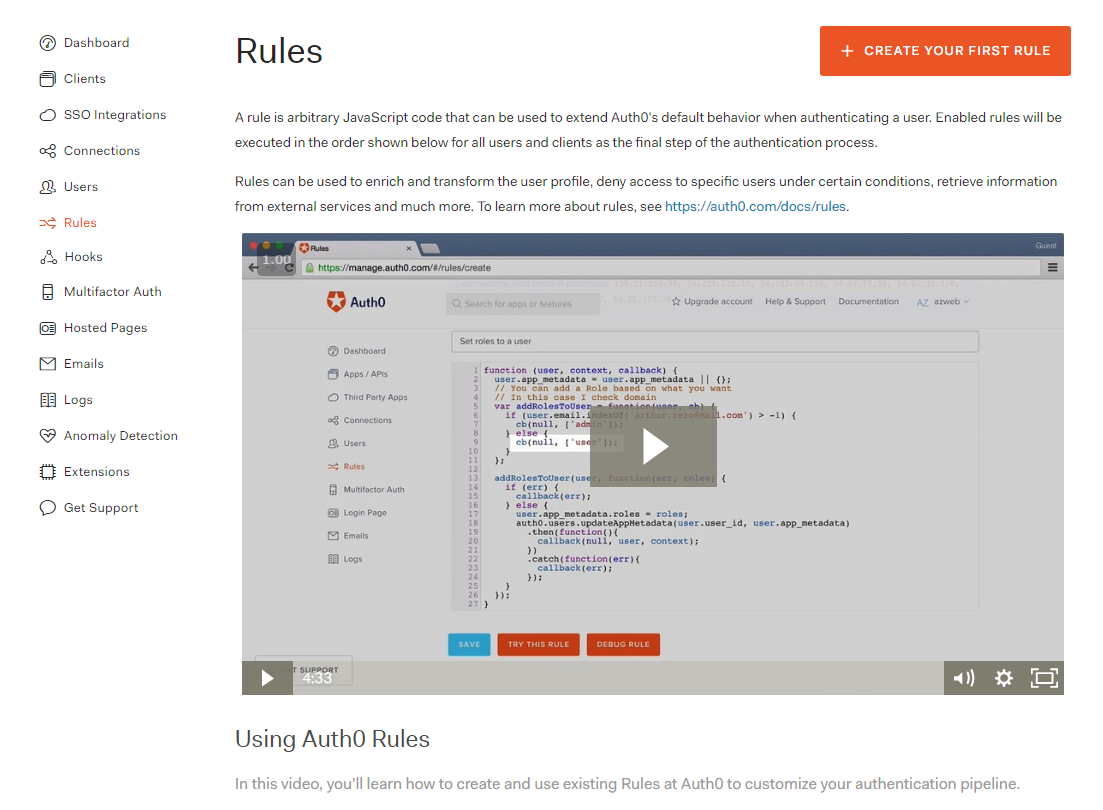
Rules are JavaScript functions that are executed in Auth0 every time a user authenticates to your application to extend Auth0's capabilities. You can learn more about them in the intro of this section or in the rules documentation.
When creating a rule, you can choose one of many pre-defined templates depending on what you want to do.
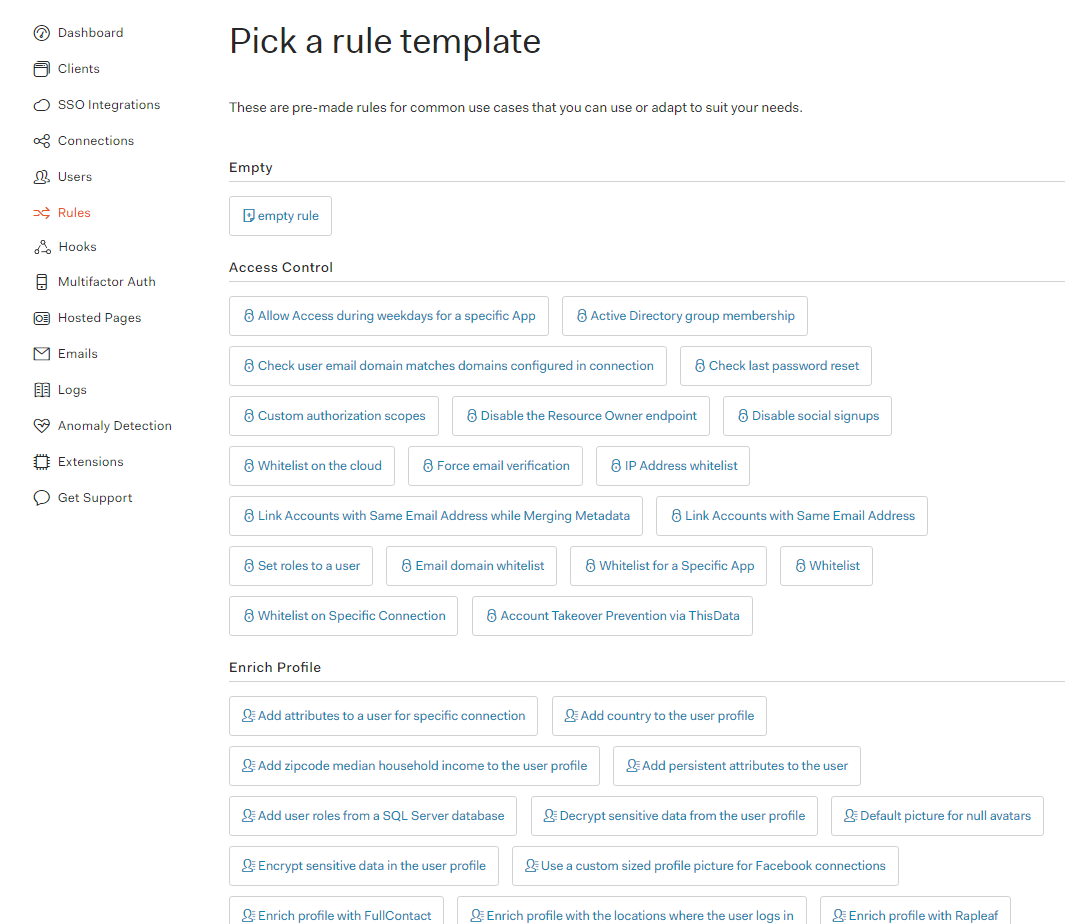
You can click on as many templates as you like to see their code; the rule won't be saved until you explicitly save it. For our purposes, we're going to choose the empty rule template.
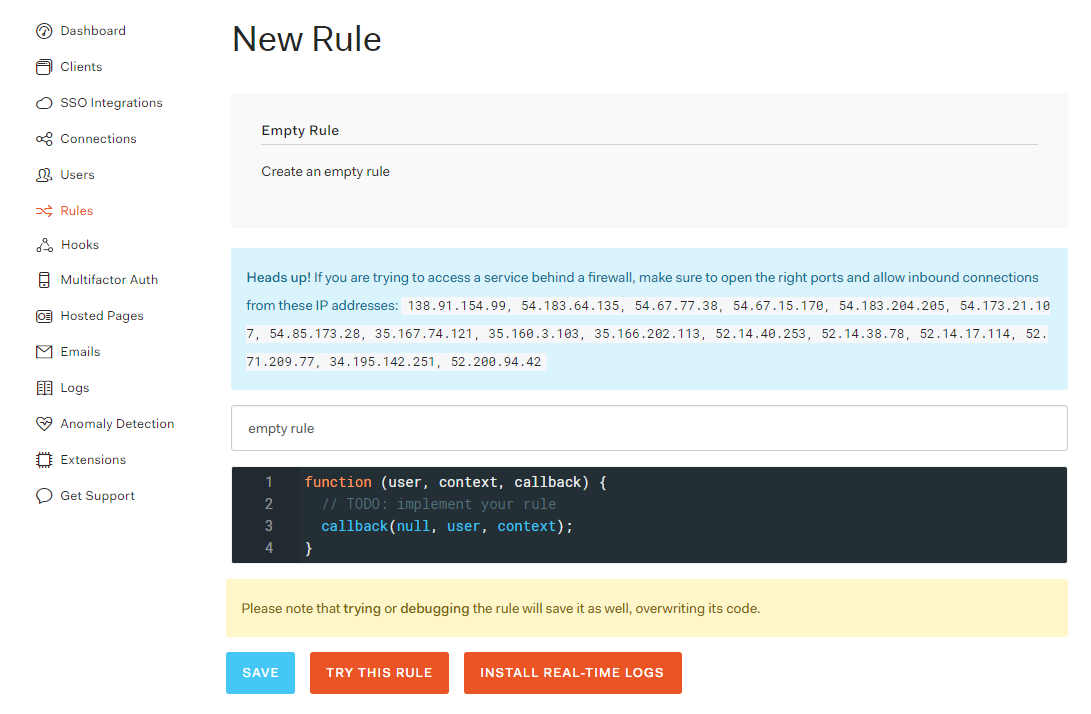
The function has the following arguments:
user. The object with the user information. This will vary depending on the identity provider the user used to authenticate, but you can see the general structure of this object here.context: An object containing information of the authentication. You can find a complete list of context properties here.callback. A function to send the result of the function and the (potentially modified) user and context objects back to the login app. It's important to always call this function, or else the script will timeout.
So let's start by requiring the Pusher module:
function (user, context, callback) {
  var Pusher = require('pusher@1.2.1');

  callback(null, user, context);
}
The code of this function runs in a JavaScript sandbox on webtask.io where you can use ECMAScript 5 and some supported sandbox modules (see the modules supported here). Luckily, Pusher is of them.
Now, remember your Pusher app info? We'll need it here to create the Pusher instance:
function (user, context, callback) {
  ...

  var pusher = new Pusher({
    appId: '<INSERT_YOUR_PUSHER_APP_ID>',
    key: '<INSERT_YOUR_PUSHER_APP_KEY>',
    secret: '<INSERT_YOUR_PUSHER_APP_SECRET>',
    cluster: '<INSERT_YOUR_PUSHER_APP_CLUSTER>',
    encrypted: true
  });

  callback(null, user, context);
}
The next line introduces the concept of user metadata:
function (user, context, callback) {
  ...

  user.app_metadata = user.app_metadata || {};

  callback(null, user, context);
}
If we want to store additional information about a user, Auth0 recommends to do it in a property of the user object called app_metadata.
We'll want to make a distinction between a sign up and a log in, however, since Auth0 doesn't have a way to tell us this. We'll have to set a flag manually, so this line creates an empty object if app_metadata is empty (which will be the case at sign up).
Moving on, let's define the channel where we will be publishing and the default event (when the user signs up). Events are the primary method of packaging messages in Pusher. Learn more about them here.
function (user, context, callback) {
  ...

  var channel = 'auth0';
  var event = 'user-signedUp';

  callback(null, user, context);
}
We're going to send the user object to Pusher, so let's create a deep copy of this object (so neither this or the original object can be affected by later modifications) and add the name of the country where the user is logging in from the context object:
function (user, context, callback) {
  ...

  var userClonedObj = JSON.parse(JSON.stringify(user));
  userClonedObj.country = context.request.geoip.country_name;

  callback(null, user, context);
}
Next, we check if there's a signedUp flag because this would mean that the event is a log in and we'd have to change the event name. If it doesn't exist, the event is a sign up so we set it and update the user object with the function auth0.users.updateAppMetadata.
function (user, context, callback) {
  ...

  if (user.app_metadata.signedUp) {
    event = 'user-loggedIn';
  } else {
    user.app_metadata.signedUp = true;
    auth0.users.updateAppMetadata(user.user_id, user.app_metadata);
  }

  callback(null, user, context);
}
Finally, we send the object to Pusher.
function (user, context, callback) {
  ...

  pusher.trigger(channel, event, userClonedObj);

  callback(null, user, context);
}
You can check the full code of the function in this gist.
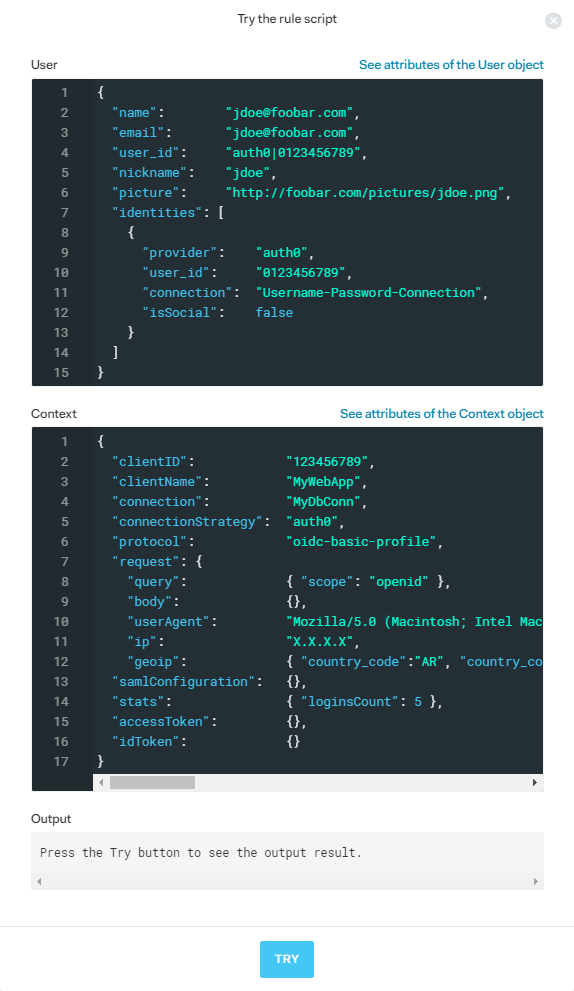
Now, let's test the integration with Pusher. Open the debug console of your app on the Pusher dashboard in another window/tab. Then, back to your rule, click the Try this rule button with some dummy data.
In the Pusher dashboard, you'll see the event when it's sent to Pusher:

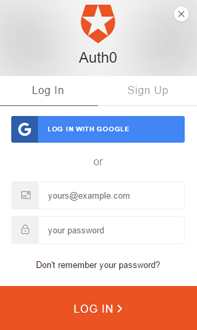
Now let's set up a sample login page with Auth0.
Setting up a login page with Auth0
For this tutorial, we're just going to use the demo project you downloaded when the Auth0 client was created (if you don't have it, return to the Clients section and go to the Quick start tab).
Unzip it, cd into it, and execute npm install to download the dependencies. Then, execute npm start and open in a browser http://localhost:3000. Something like this should be shown:
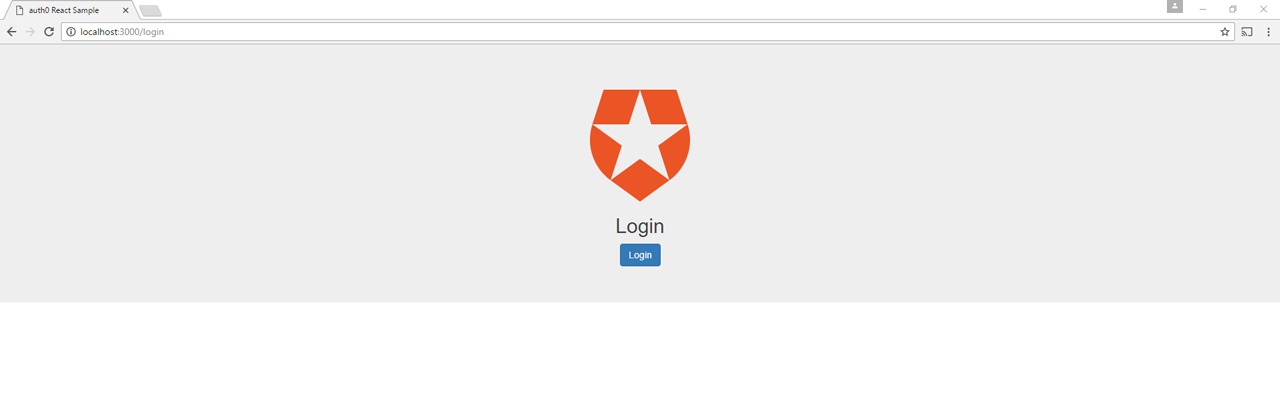
Leave it open, we'll return to it in a few moments.
Creating a realtime feed with Pusher and React
We'll use Create React App to create this feed application. You can install (or update) it with:
npm install -g create-react-app
And create the project with:
create-react-app auth0-pusher-feed
Next, cd into your app's directory and install the Pusher module with either NPM or Yarn:
yarn add pusher-js
or
npm install --save pusher-js
Let's modify the file src/App.css to give a custom style to our application:
.App {
  text-align: center;
}

.App-header {
  background-color: #222;
  padding: 20px;
  color: white;
}

.evts {
  list-style: none;
  max-width: 600px;
  margin: 0 auto;
  padding: 1.5em 2em;
}

.evts .evt {
  margin-bottom: 1.1em;
  padding-top: 1.5em;
  line-height: 1.5em;
}

.evts .evt + .evt {
  border-top: 1px solid #000;
}

.evts .evt-name {
  color: #172935;
  font-weight: bold;
  margin-bottom: 1em;
}

.evts .evt-email {
  font-weight: bold;
}

.evts .evt-date {
  margin-top: 0.5em;
  font-style: italic;
}

.evts .evt-from {
  font-style: italic;
}
Now go to src/App.js and change the render method to:
render() {
    return (
      <div className="App">
        <div className="App-header">
          <h2>Realtime Feed with Auth0 + Pusher</h2>
        </div>
        <Events events={this.state.events} />
      </div>
    );
}
Our React app will have an Events component that will be the container of Event components:
So let's import the modules we'll use:
...
import Events from './Events';
import Pusher from 'pusher-js';

class App extends Component {
  ...
}
In the component's constructor, define an array to hold the authentication events as the state and bind the function that will update this array:
class App extends Component {
  constructor(props) {
    super(props);
    this.state = {
      events: [],
    };
    this.updateEvents = this.updateEvents.bind(this);
  }
  ...
}
In componentDidMount(), let's set up Pusher, subscribe to the auth0 channel and bind the events user-signedUp and user-loggedIn (these identifiers were defined in the Auth0 rule):
class App extends Component {
  ...
  componentDidMount() {
    this.pusher = new Pusher('<INSERT_YOUR_PUSHER_APP_KEY>', {
      cluster: '<INSERT_YOUR_PUSHER_APP_CLUSTER>',
      encrypted: true,
    });

    this.channel = this.pusher.subscribe('auth0');
    this.channel.bind('user-signedUp', this.updateEvents);
    this.channel.bind('user-loggedIn', this.updateEvents);
  }
  ...
}
For this simple example, we're going to show the messages of the sign up and log in events in the same feed. This way, the updateEvents function just has to insert the object we're receiving at the beginning of the events array:
class App extends Component {
  ...
  updateEvents(data) {
    this.setState({
      events: [ data, ...this.state.events ],
    });
  }
  ...
}
The events are passed as a property of the Events component, which translates it toEvent components:
import React, { Component } from 'react';
import Event from './Event';

export default class Events extends Component {

  render() {
    const eventsMapped = this.props.events.map((result, index) => {
      const key = this.props.events.length - index;
      return <Event event={result} key={key} />
    });

    return <div className={'evts'}>
             {eventsMapped}
           </div>;
  }
}
Finally, this Event component just extracts the properties we want to show and renders them:
import React, { Component } from 'react';

export default class Event extends Component {

  render() {
    const {email, updated_at, country} = this.props.event;
    const event = this.props.event.app_metadata.signedUp ? 'Log In:' : 'Sign Up:';
    return (
        <li className={'evt'}>
          <div className={'evt-name'}>{event}</div>
          <div className={'evt-email'}>{email}</div>
          <div className={'evt-date'}>{updated_at}</div>
          <div className={'evt-from'}>From {country}</div>
        </li>
    );
  }
}
At this point, if we want to run it, we'll have a problem because the login app is already listening on the port 3000. We can solve this by creating a .env file to specify another port, let's say 5000:
PORT=5000
And that's it, let's test it.
Testing the application
Make sure the login and the feed apps are running by executing npm start on both.
Click on the Login button and sign up with either your Google account or by entering an email/password:
When you log in or sign up in one app, the event will be shown in the other one.
Auth0 provides the simplest and easiest to use user interface tools to help administrators manage user identities including password resets, creating and provisioning, blocking and deleting users. A generous free tier is offered so you can get started with modern authentication.
Conclusion
In this tutorial, we have seen how to integrate two services to implement complex functionality that would have been difficult to implement manually.
We learned how to implement a basic authorization mechanism with Auth0 and extend it with rules. We also learned how to create realtime applications with Pusher's publish/subscribe model.
Of course, you can extend these applications by adding more login options, publishing more information, chaining other rules, or by using charts, for example, to present the information in other ways.
Remember that you can find the code of the feed in this repo and you can learn more about Auth0 or Pusher in their documentation and by creating free accounts for both services.