


From startups to global enterprises, SAML is the foundational technology that makes secure, one-click access to multiple web applications possible. This article will break down what SAML is, how it works, and how you can configure a SAML Identity Provider using Auth0.
If you are a visual learner, you may prefer the following video instead of reading this article:
What Is SAML
Before jumping into the technical jargon, let's look at an example that demonstrates what SAML is and why it's beneficial.
You just started working at a new company, Wizova. They've given you a work email address and access to a dashboard. Once you sign in to this dashboard, you're presented with the icons of all of the external services the company uses: Salesforce, Expensify, Jira, AWS, and more. You click on the Salesforce icon, some magic happens in the background, and before you know it, you're signed into Salesforce without ever entering any credentials. As you might have guessed, the "magic" was actually SAML in action. So what's going on here?
SAML (Security Assertion Markup Language) is an XML-based open standard for transferring identity data between two parties:
- Identity Provider (IdP) — Performs authentication and passes the user's identity and authorization level to the service provider.
- Service Provider (SP) — Trusts the identity provider and authorizes the given user to access the requested resource.
In the scenario above, the identity provider would be the IdP that Wizova uses, for example, Auth0 and the service provider would be Salesforce, Expensify, or any other external services used by the company.
The Wizova employee signs in to the Wizova dashboard with Auth0. They click on the Salesforce icon, and Salesforce recognizes that the user wants to log in via SAML. Salesforce sends the employee back to Auth0 with a SAML Request that asks Auth0 to authenticate the user. Since the employee has already authenticated with Auth0, Auth0 verifies that the session is still valid and sends the user back to Salesforce with a SAML Response. Salesforce checks this response, and if it looks good, the employee is granted access.
This is a very high-level overview of how SAML authentication works, of course. But no worries! We will go more in depth in a minute.
Benefits of SAML Authentication
Before analyzing the details of the protocol, let’s quickly see what benefits SAML authentication brings to the table:
Improved User Experience — Users only need to sign in once to access multiple service providers. This allows for a faster authentication process and removes the need for users to remember multiple login credentials for every application. In the example above, that user could have clicked on any of the other icons in their dashboard and been promptly logged in without ever having to enter more credentials. This feature is known as Single Sign-On (SSO). While SSO can be implemented with other protocols, such as OpenID Connect (OIDC), SAML is the most used protocol for SSO in the enterprise context.
Increased Security — SAML provides a single point of authentication, which happens at a secure identity provider. Then, the IdP transfers the user identity information to the Service Providers. This form of authentication ensures that user credentials are only sent to the IdP directly and not shared among applications.
Loose Coupling of Directories — SAML doesn't require user information to be maintained and synchronized between directories. You have one central repository for user identities.
Centralized Access Management — SAML doesn’t require synchronization between directories for each application. As a result, it isn’t necessary to notify each service provider to revoke or change access levels, meaning that access can be revoked quickly if necessary for a single service or across an enterprise. Similarly, auditing who has access to which services is easy with SAML because authentication logs are centralized.
Fewer Password Reset Requests — Users only need to remember one set of credentials, so IT can focus on supporting your workforce without having to respond to numerous password reset requests.
Scalability — Adding new users, applications, or services is straightforward, minimizing the overhead necessary for your organization to grow.
Reduced Costs for Service Providers — With SAML, you don't have to maintain account information across multiple services. The identity provider bears this burden.
For further information, we invite you to learn more about SSO with our free whitepaper.
Download the whitepaper
How Does SAML Authentication Work?
Now that you've seen the high-level overview of how SAML authentication works, let's look at some of the technical details to see how everything is accomplished.
Trust and authentication
SAML Single Sign-On (SSO) authentication typically involves a service provider and an identity provider. The process flow usually involves two stages:
- Trust Establishment- At this stage, a Service Provider and an Identity Provider configure their systems to establish mutual recognition and trust. This is achieved through the exchange of SAML metadata, which provides essential details such as entity IDs, authentication and logout endpoints, and digital certificates for validating the integrity and authenticity of SAML assertions.
- Authentication Flow-User authentication takes place at this stage. After the Service Provider and Identity Provider have established a trusted connection, the user can authenticate with the IdP and gain access to the SP.
Consider this example:
- Your Identity Provider is Auth0.
- Your Service Provider is Zendesk, a popular CRM platform.
Note: In this example, we consider Auth0 as the IdP, but in general the Identity Provider could be any identity management platform.
In the Trust Establishment stage, you configure Auth0 to recognize Zendesk as a trusted Service Provider. On the other side, you configure Zendesk to recognize Auth0 as a trusted Identity Provider.
During the Authentication Flow, the user attempts to access Zendesk, which redirects them to Auth0 for authentication before granting access.
The SAML authentication flow
Before delving into configuring Auth0 and Zendesk for SAML authentication, let’s take a look at what happens under the hood when a user attempts to access Zendesk.
Considering the following diagram, let's break down how the different components involved in the SAML authentication flow interact with each other:
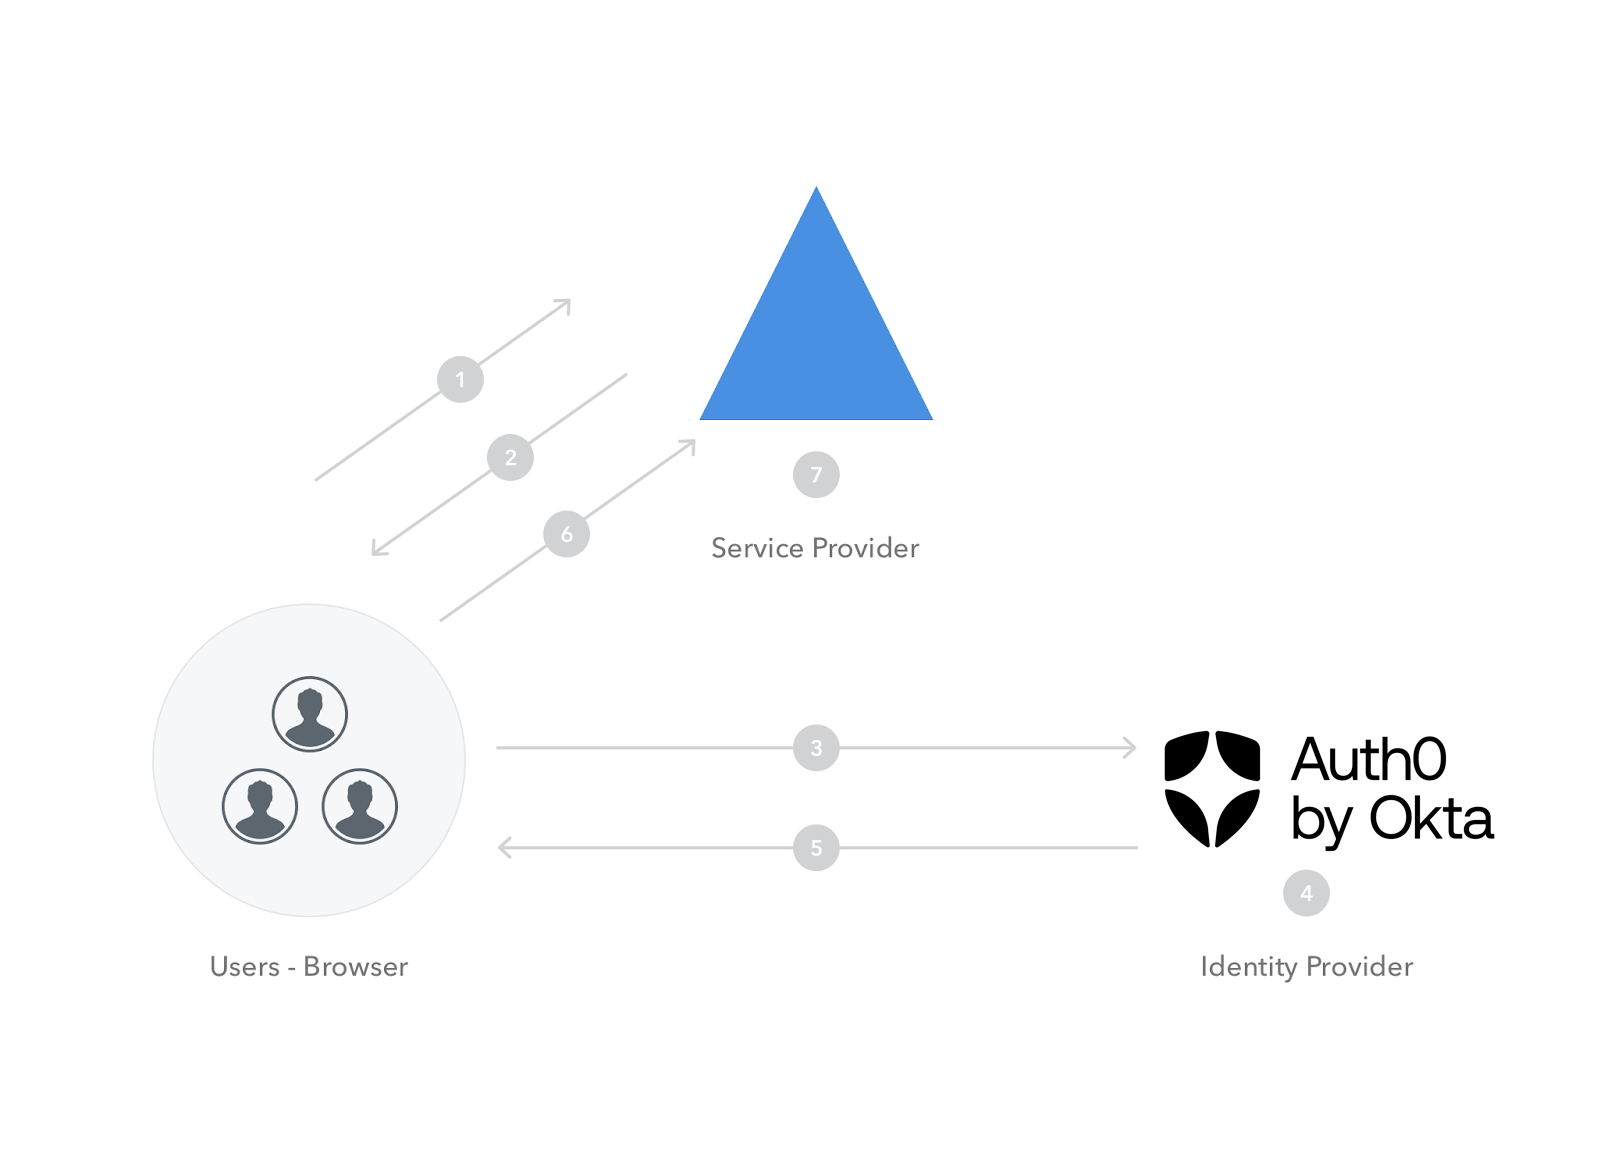
Here is a description of each numbered step in the diagram:
1. The user tries to log in to Zendesk from a browser.
2. Zendesk responds by generating a SAML request similar to the following:
<samlp:AuthnRequest
👉 ID="343854534394fed82ddfg6276"
   Version="2.0"
👉 IssueInstant="2025-09-09T09:50:51.133TZ"
   ProtocolBinding="urn:oasis:names:tc:SAML:2.0:bindings:HTTP-POST"
👉 AssertionConsumerServiceURL="https://zendesk.com/saml"
   xmlns:samlp="urn:oasis:names:tc:SAML:2.0:protocol">
     <saml:Issuer xmlns:saml="urn:oasis:names:tc:SAML:2.0:assertion">
👉     https://zendesk.com
     </saml:Issuer>
</samlp:AuthnRequest>
3. Zendesk instructs the browser to redirect the user to the Identity Provider—Auth0— with the SAML request.
4. Auth0 parses the SAML request and authenticates the user. The IdP can authenticate the user with username and password, social login, or other authentication factors. If the user is already authenticated on Auth0, this step will be skipped. Once the user is authenticated, Auth0 generates a SAML response like the following:
<samlp:Response
  ID="679933c5h87d24fdd3117a"
  Version="2.0"
  IssueInstant="2025-09-09T09:52:15.144Z"
👉InResponseTo="343854534394fed82ddfg6276"
  xmlns:samlp="urn:oasis:names:tc:SAML:2.0:protocol">
👉  <Issuer xmlns="urn:oasis:names:tc:SAML:2.0:assertion">
     https://your-tenant.auth0.com/saml
    </Issuer>
    <SignatureValue xmlns:ds="https://www.w3.org/2000/09/xmldsig#">
      ...
    </SignatureValue>
    <samlp:Status>
      <samlp:StatusCode Value="urn:oasis:names:tc:SAML:2.0:status:Success" />
    </samlp:Status>
 👉 <Assertion
      ID="_bf9c623d-cc20-407a-9a59-c2d0aee84d12"
      IssueInstant="2025-09-09T09:52:15.144Z"
      Version="2.0"
      xmlns="urn:oasis:names:tc:SAML:2.0:assertion">
        <Issuer>
          https://your-tenant.auth0.com/saml
        </Issuer>
        <SignatureValue xmlns:ds="https://www.w3.org/2000/09/xmldsig#">
          ...
        </SignatureValue>
        <Subject>
👉        <NameID>username@yourdomain.com</NameID>
          <SubjectConfirmation Method="urn:oasis:names:tc:SAML:2.0:cm:bearer">
            <SubjectConfirmationData
              InResponseTo="343854534394fed82ddfg6276"
              NotOnOrAfter="2025-09-09T09:52:15.144Z"
👉            Recipient="https://zendesk.com/saml" />
            </SubjectConfirmation>
          </Subject>
          <Conditions NotBefore="2025-09-09T09:52:15.144Z" NotOnOrAfter="2025-09-09T10:52:15.144Z">
          <AudienceRestriction>
            <Audience>https://zendesk.com</Audience>
          </AudienceRestriction>
        </Conditions>
        <AttributeStatement>
          <Attribute Name="http://schemas.xmlsoap.org/ws/2005/05/identity/claims/name">
            <AttributeValue>username@yourdomain.com</AttributeValue>
          </Attribute>
          <Attribute Name="http://schemas.microsoft.com/identity/claims/objectidentifier">
            <AttributeValue>3F2504E0-4F89-11D3-9A0C-0305E82C3301</AttributeValue>
          </Attribute>
          ...
        </AttributeStatement>
        <AuthnStatement AuthnInstant="2025-09-09T09:52:15.144Z" SessionIndex="2bf9c423d-cc20-407a-9b52-c2d03ee81d1a">
          <AuthnContext>
            <AuthnContextClassRef> urn:oasis:names:tc:SAML:2.0:ac:classes:Password</AuthnContextClassRef>
          </AuthnContext>
        </AuthnStatement>
    </Assertion>
</samlp:Response>
5. Auth0 returns the encoded SAML response to the browser.
6. The browser sends the SAML response to Zendesk for verification.
7. If the verification is successful, the user will be logged in to Zendesk and granted access to the resources that they are authorized to view/modify.
Note the attributes and elements that are highlighted with 👉 in the SAML request and response. Here's a quick overview of these parameters:
- ID: Newly generated string for request and response identification.
- IssueInstant: Timestamp to indicate the time it was generated.
- AssertionConsumerServiceURL: The URL of the Service Provider’s endpoint where the Identity Provider sends the SAML response.
- Assertion: The section of the SAML response containing confirmation of the user identity and some details about the user profile.
- Issuer: The unique identifier of the Identity Provider.
- InResponseTo: The ID of the SAML request that this response belongs to.
- Recipient: The unique identifier of the Service Provider.
SAML Authentication with Auth0
When it comes to implementing SAML, Auth0 is extremely extensible and able to handle several scenarios:
- Auth0 as the Identity Provider
- Auth0 as the Service Provider
- Auth0 as the Identity and Service Provider
For this example, you'll learn how to implement SAML authentication using Auth0 as the Identity Provider.
“When implementing SAML, Auth0 can serve as the identity provider, service provider, or both!”
Tweet This
Prerequisites
- An Auth0 account — If you don't already have one, you can sign up for a free account here.
- An account with a service provider that supports SAML — Generally, most service providers require you to have a business account or some paid plan to configure SAML.
Try out the most powerful authentication platform for free.
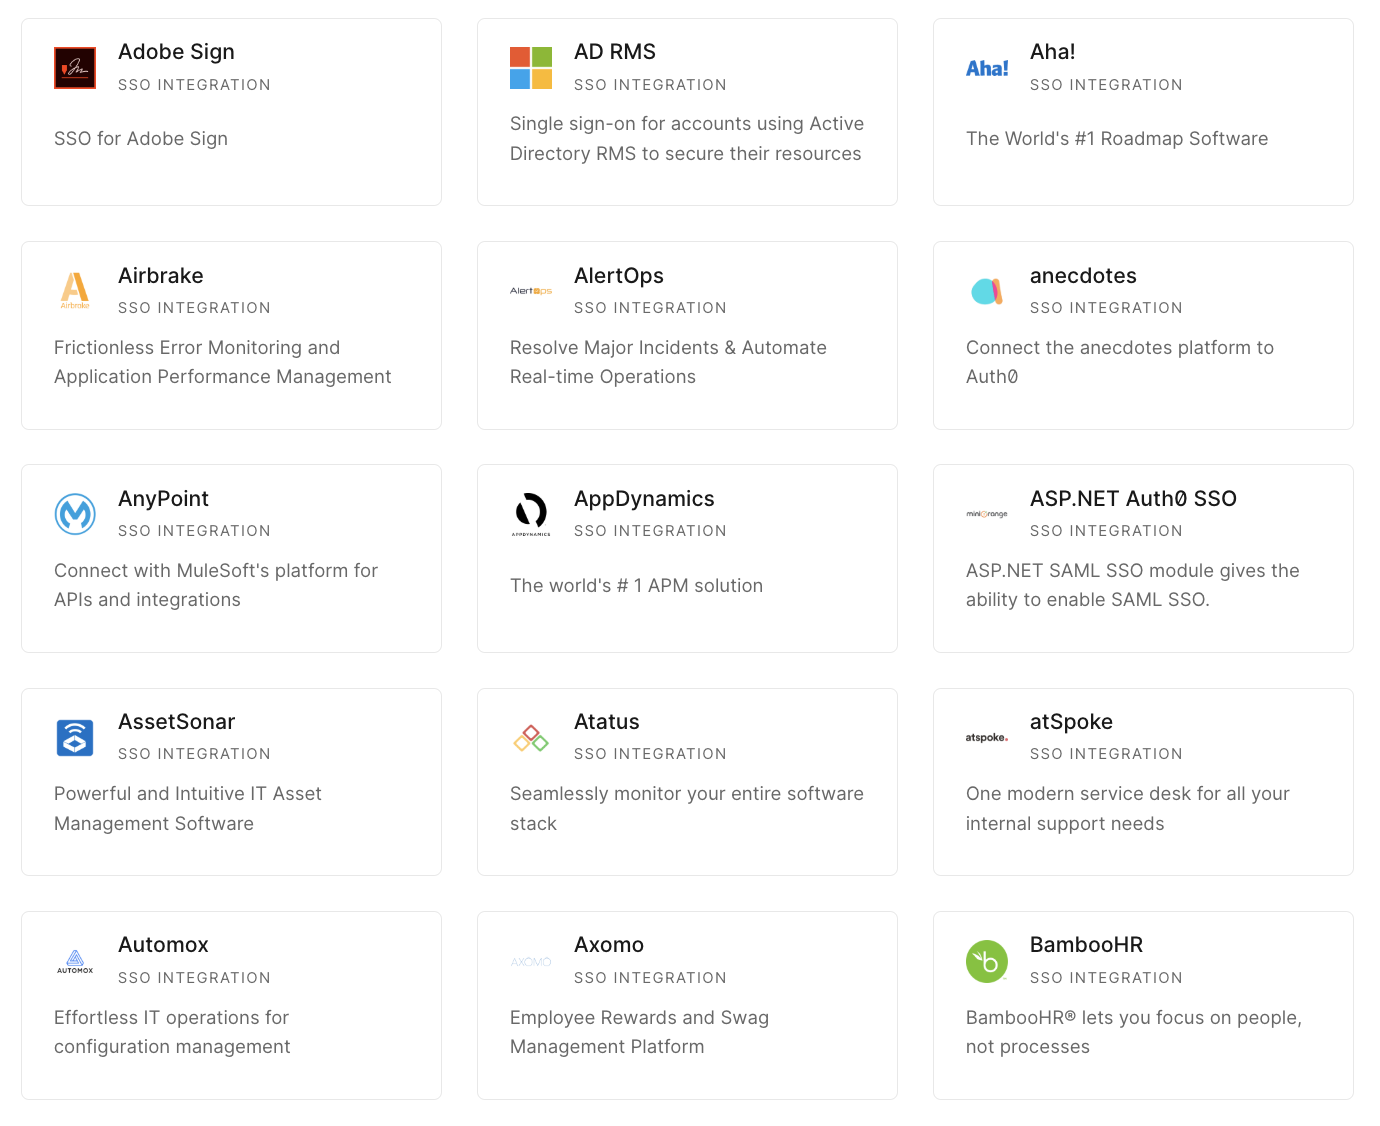
Get started →The following image shows a list of the SAML service providers Auth0 supports out-of-the-box, but you also have the option of configuring a custom service provider in the dashboard:
Configure the service provider in Auth0
This tutorial will use Zendesk as the service provider, but you can follow along with any SP of your choice.
To configure your chosen service provider, run through the following steps in your Auth0 dashboard:
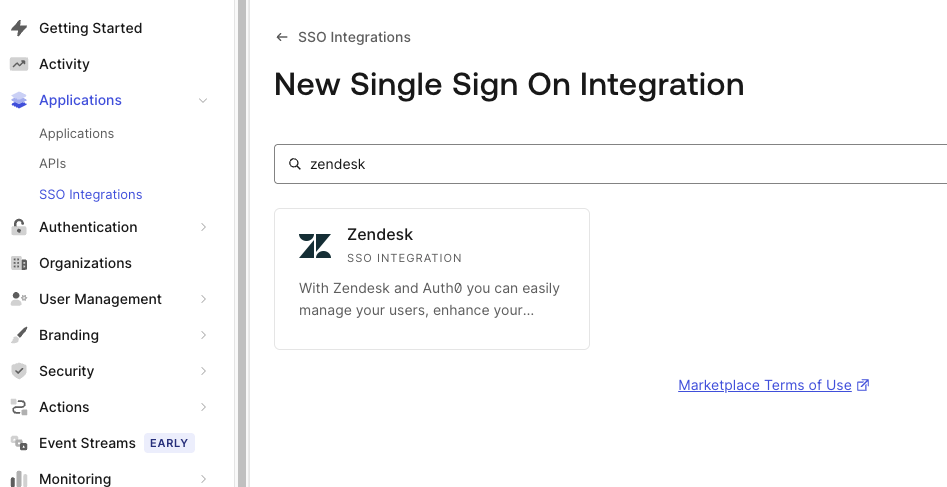
- Navigate to Applications > SSO Integrations.
- Click on the Create SSO Integration button.
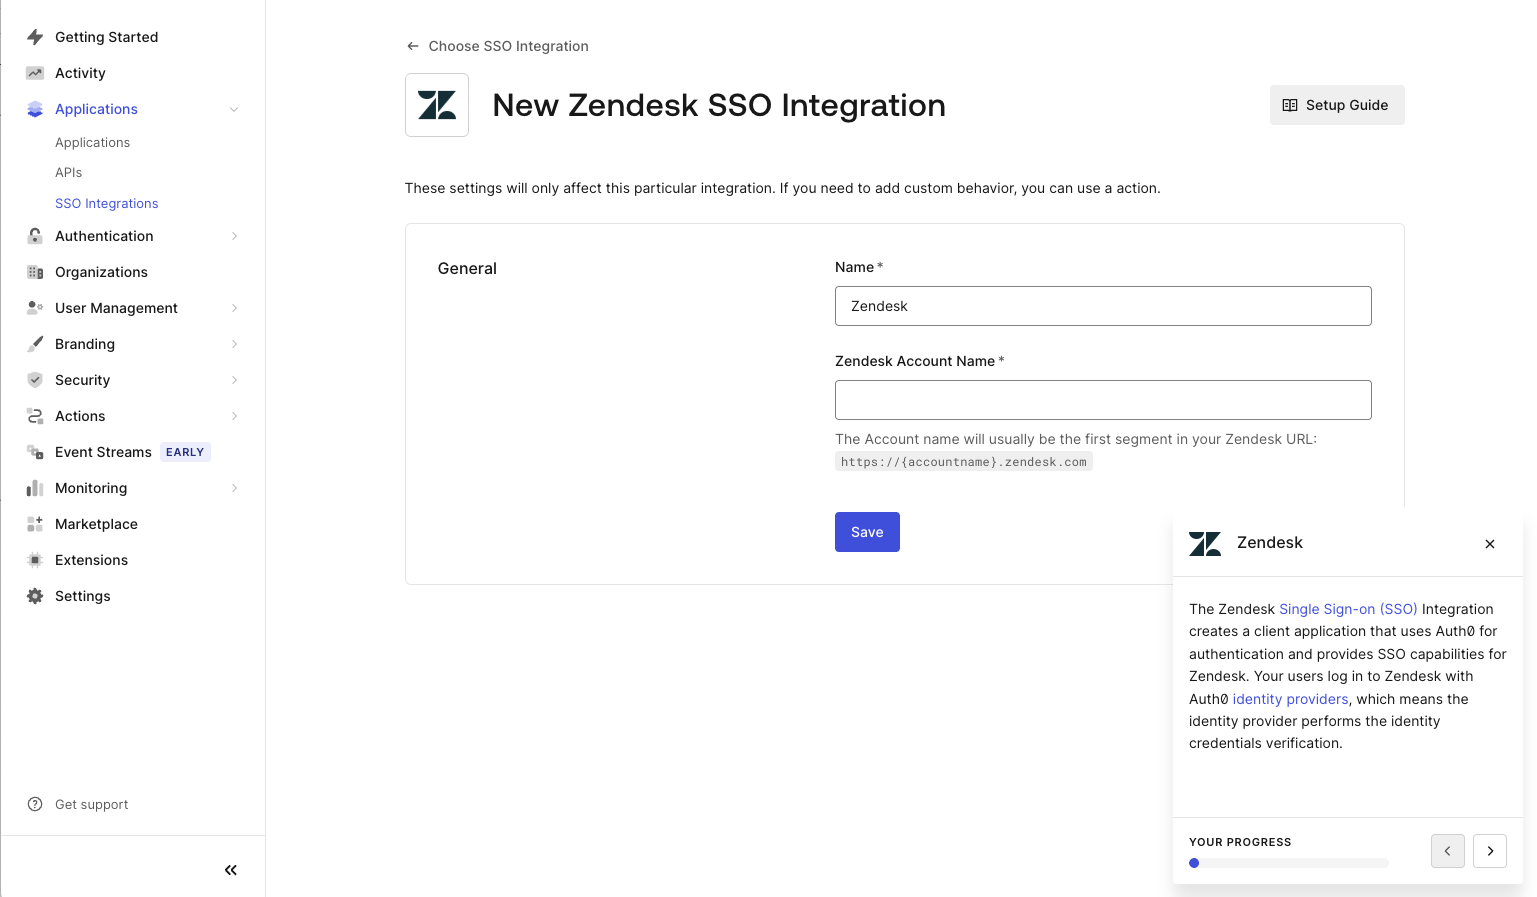
- Select Zendesk:
- Enter the name and/or any identifying information required and press Save:
- Follow the instructions under Tutorial for your specific Service Provider:
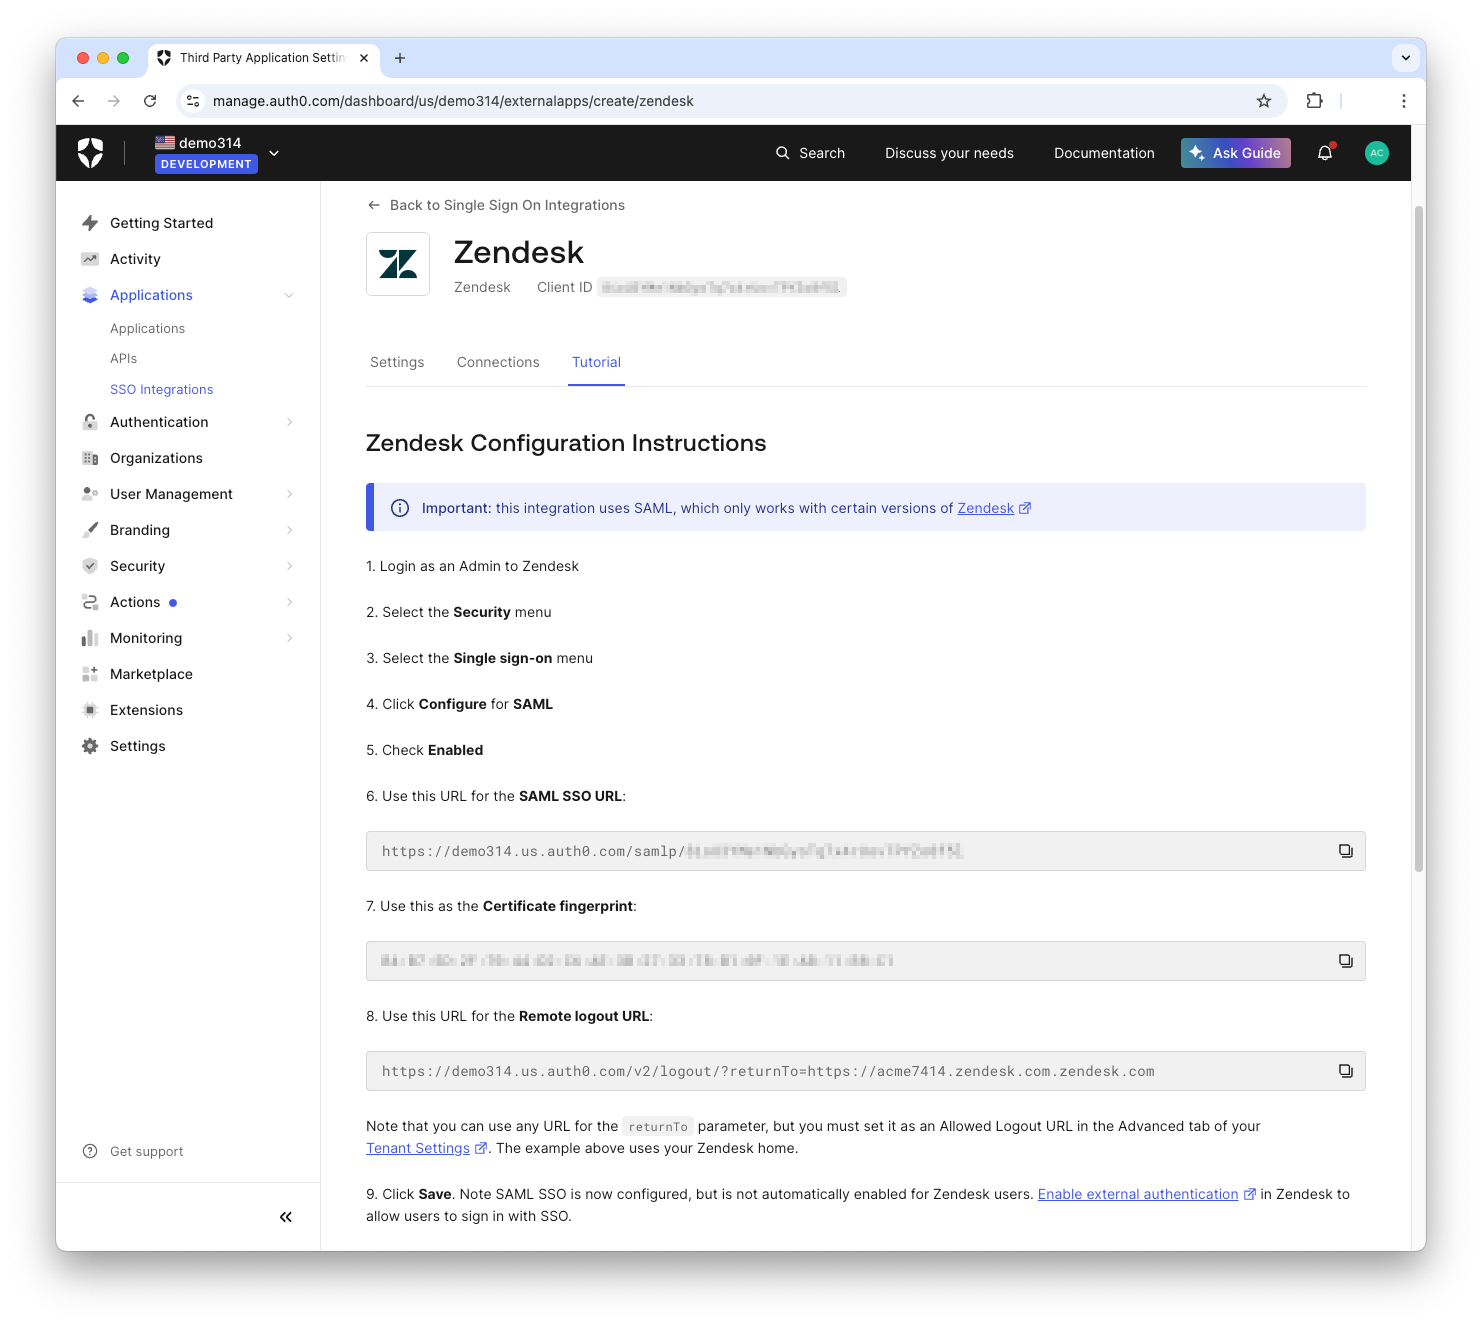
Note: This step will require you to input some values on the service provider's side.
Configure Auth0 on the Service Provider
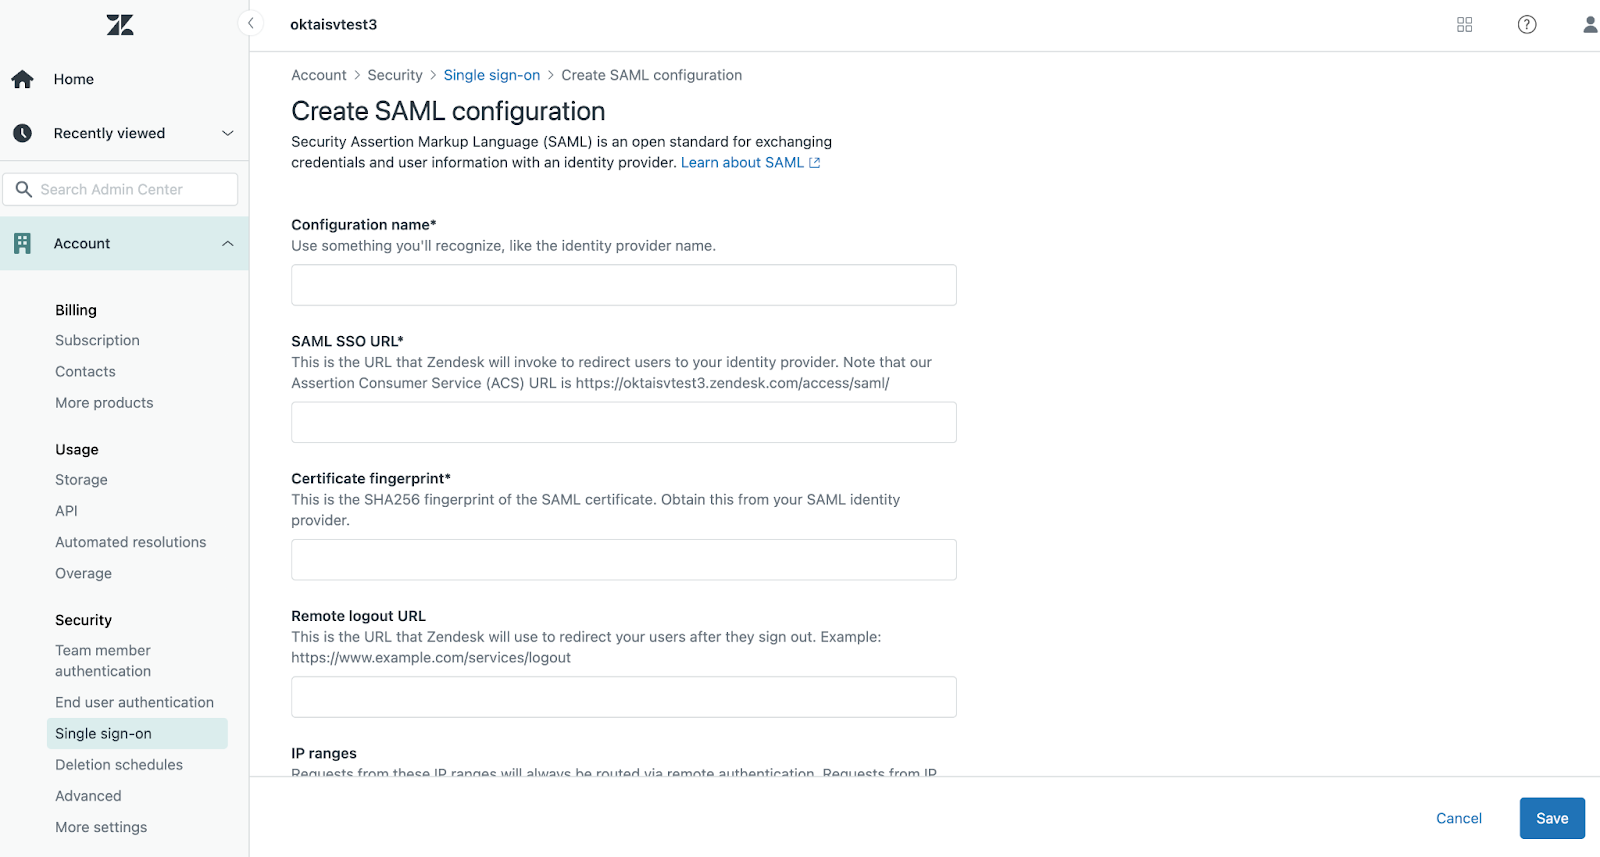
First, go into the Admin Center in the Zendesk dashboard and click on Security. Next, click on SSO, and you'll find the SAML configuration settings page. This is where you'll paste in those values from the Auth0 dashboard:
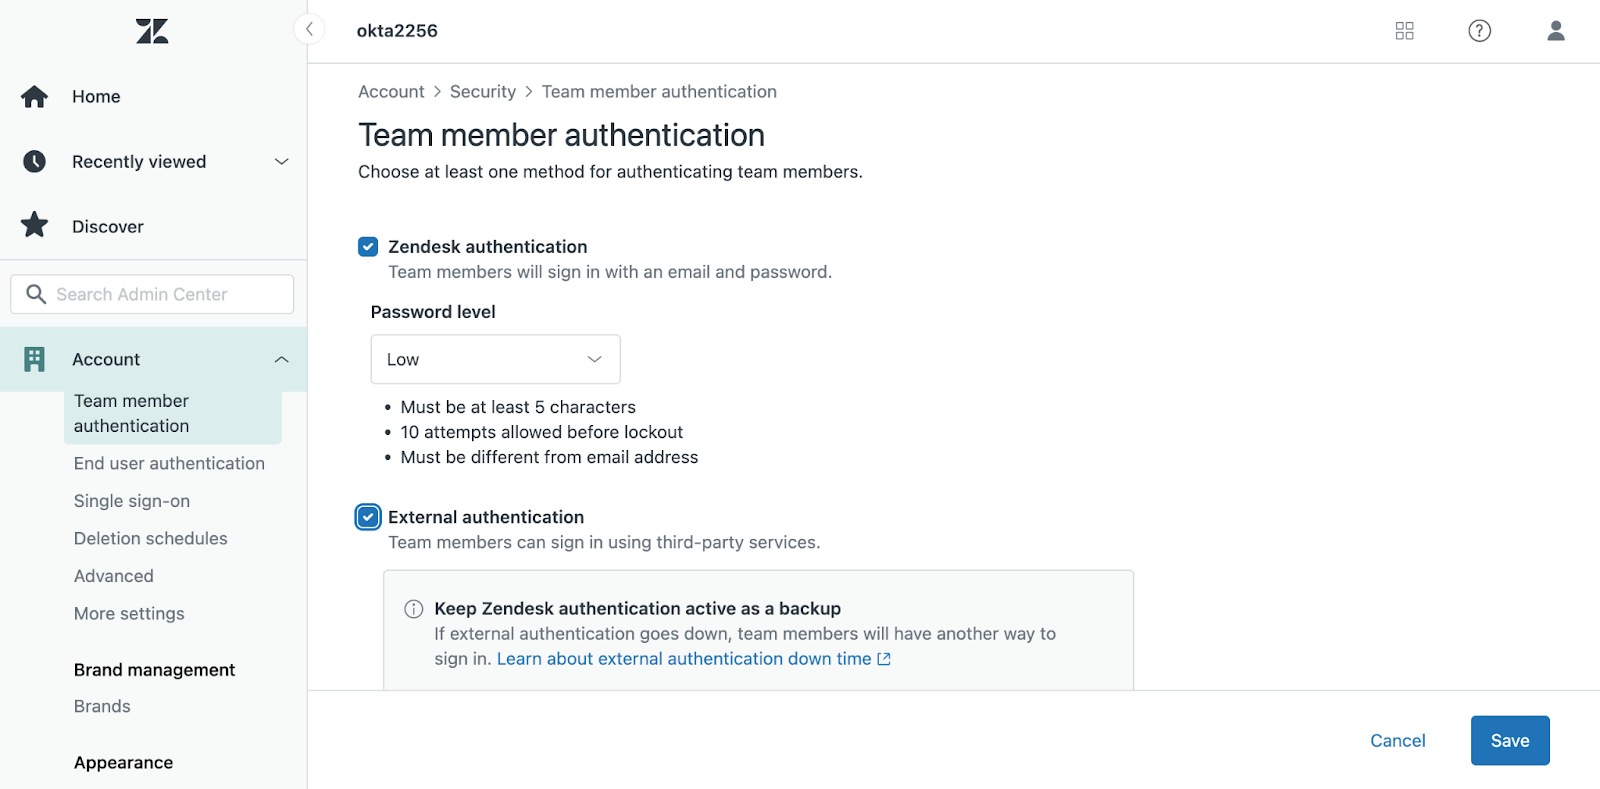
Once these values are copied over, the last step is to enable external authentication for the users who should be able to log in with SAML. Zendesk allows you to enable this for end-users, staff users, or both:
Test it out
Now that everything is set up on both ends, it's time to test it out! See the video below for a demonstration of what the final flow should look like:
As you can see, when you navigate to your Zendesk URL, you're redirected to Auth0 to sign in. Once authenticated, Auth0 sends a SAML response back to Zendesk. Zendesk verifies the response and, if it’s valid, grants you access to your dashboard.
Note: You may have noticed that in the video, the user signed in with Google SSO. This can be enabled in the Auth0 dashboard. You'll see how to implement this in the next section.
If you go back to your Auth0 dashboard, you'll now see a record of the user that just signed in:
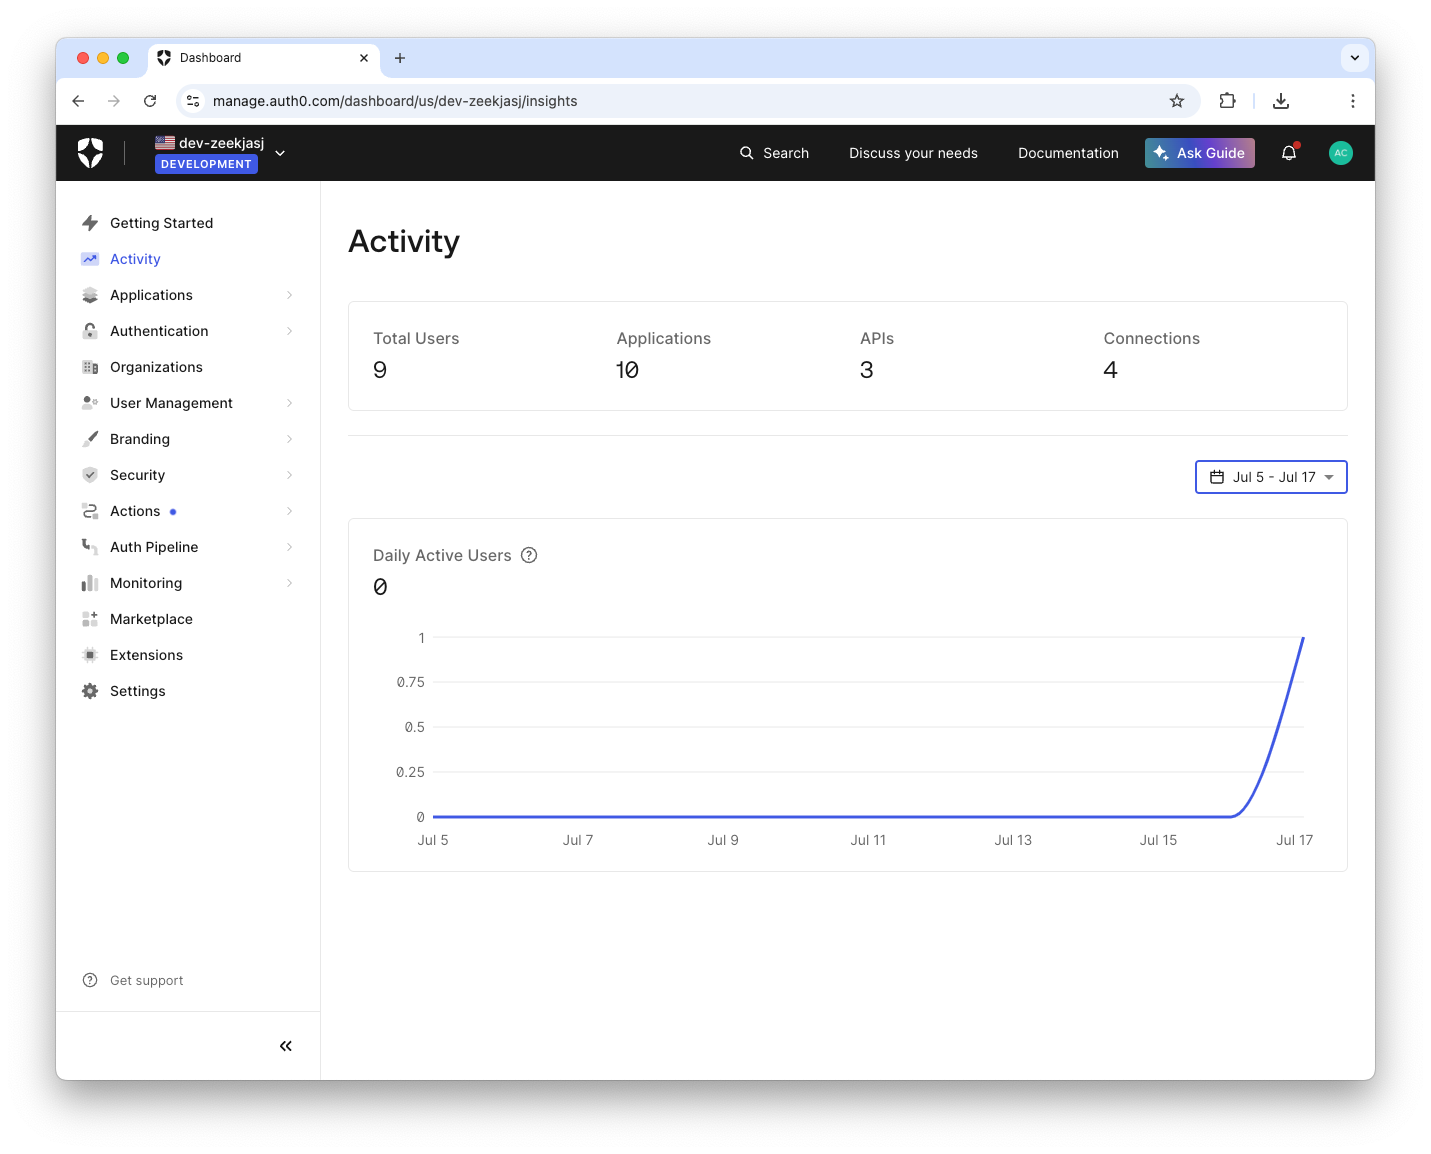
Note: If you'd like to debug a SAML response, check out the SAML tool powered by Auth0. This tool can decode a SAML response and serves as a useful debugging resource.
Enable Social Login SSO
Now that your Service Provider is set up with Auth0, your users can sign in using an email and password by default. A common use case is to have users sign in using Single Sign-On (SSO) with a social provider.
Auth0 supports several social identity providers that you can enable with the click of a button.
In your dashboard, click on Authentication > Social in the sidebar. Then, click Create Connection and select the provider you'd like to use:
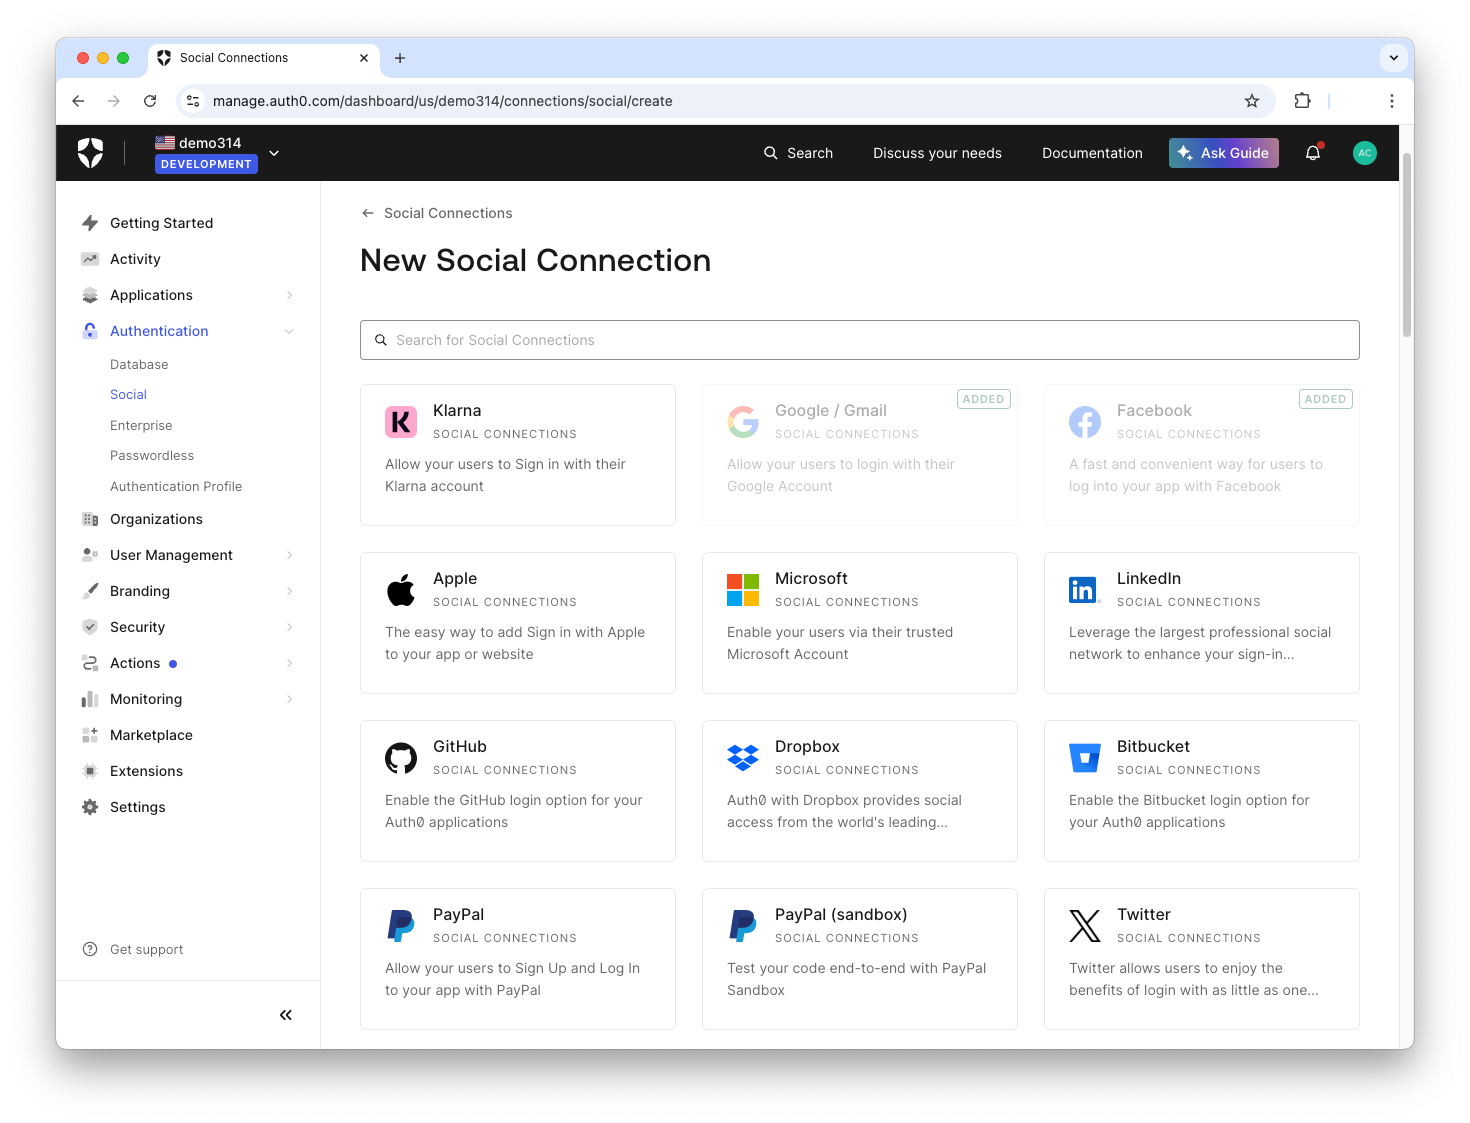
Finally, fill in the details required for that provider.
Note: Make sure you use your own keys for the selected provider. You may use the default Auth0 developer keys for testing, but they should not be used in production.
Once you've selected the social connections you want to use, go back to the Service Provider you configured under SSO Integrations. Select the Service Provider, and under Connections, you should see the social connection you just created. Click on the switch to enable it, and now your users are ready to sign in with any of the connections listed:
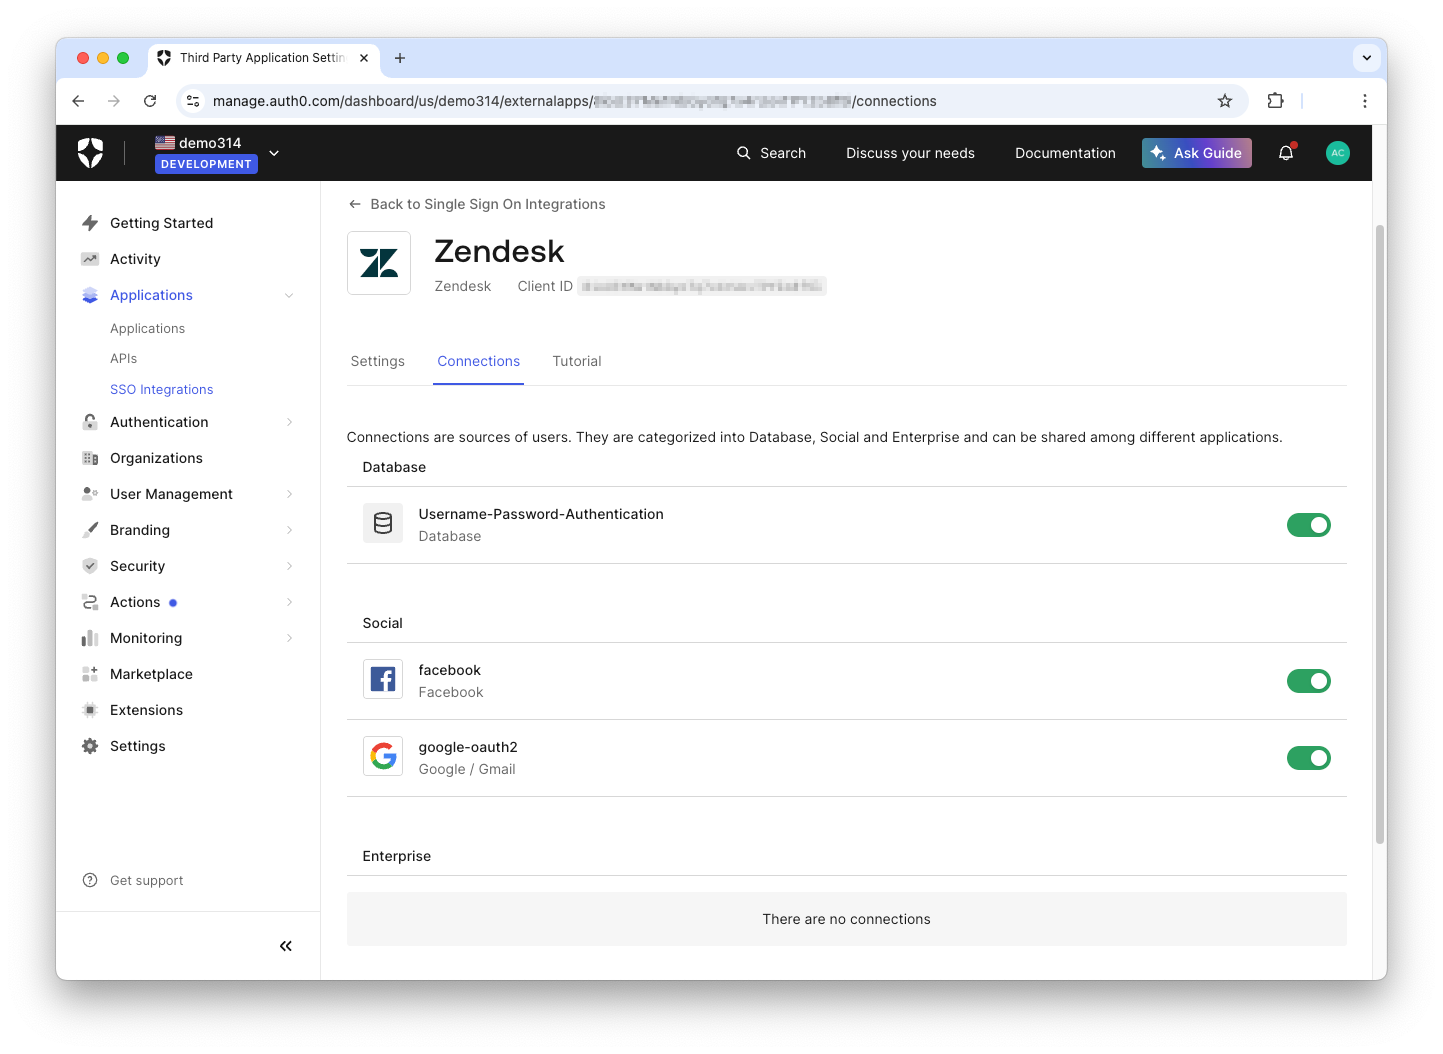
Note: Some SSO integrations are very easy, and simply require you to enable them as described above. However, a few integrations require additional steps that are specific to the social network. For example, Facebook requires you to create an app on its developers site, and supply details like an App ID. Some applications may require a review process. While a comprehensive guide to all of these processes is out of scope for this tutorial, each network typically publishes their own guide for configuring SSO.

Conclusion
You now have a solid understanding of the SAML authentication flow, from a user's initial request to the final, secure verification between a service provider and an identity provider like Auth0. By centralizing the authentication process, SAML is a powerful tool that accomplishes two critical goals: it dramatically simplifies the user experience with Single Sign-On (SSO) and significantly strengthens your organization's security posture.
Putting theory into practice is the best way to solidify your knowledge. Auth0 is designed to make implementing complex protocols like SAML straightforward and fast. Here’s how you can get started:
- Explore SAML in Action: Sign up for a free Auth0 account and create your first SSO integration in minutes using our interactive dashboard.
- Dive Deeper into Identity: Read our article comparing SAML vs. OpenID Connect to understand which protocol best fits your specific needs.
- Explore supporting IdP-initiated SAML sign-on: Read the Configure IdP-Initiated SAML Sign-on to OIDC Apps documentation.
- See More Configurations: Browse our extensive SSO documentation to see step-by-step guides for integrating dozens of popular enterprise applications.
- *Troubleshoot SAML Configurations: Understand how to troubleshoot SAML configuration issues
By leveraging a robust identity platform, you can offload the complexity of authentication and focus on building your core product.